중요합니다
이제 Cloud Services(클래식)는 2024년 9월 1일부터 모든 고객을 대상으로 더 이상 사용되지 않습니다. 기존 실행 중인 배포는 Microsoft에서 중지 및 종료되며 데이터는 2024년 10월부터 영구적으로 손실됩니다. 새 배포는 새 Azure Resource Manager 기반 배포 모델 Azure Cloud Services(추가 지원)를 사용해야 합니다.
이 문서에서는 Visual Studio용 Python 도구를 사용하여 Python 웹 및 작업자 역할을 사용하는 방법에 대한 개요를 제공합니다. Visual Studio를 사용하여 Python을 사용하는 기본 Cloud Service를 만들고 배포하는 방법을 알아봅니다.
필수 조건
- Visual Studio 2013, 2015 또는 2017
- Python Tools for Visual Studio (PTVS)
-
VS(Azure SDK Tools for Visual Studio) 2013 또는
VS 2015용 Azure SDK 도구 또는
VS 2017용 Azure SDK 도구 - Python 2.7 32비트 또는 Python 3.8 32비트
비고
이 자습서를 완료하려면 Azure 계정이 필요합니다. Visual Studio 구독자 혜택을 활성화하거나 평가판에 등록할 수 있습니다.
Python 웹 및 작업자 역할 정의
Azure는 애플리케이션을 실행하기 위한 세 가지 컴퓨팅 모델인 Azure App Service, Azure Virtual Machines 및 Azure Cloud Services의 Web Apps 기능을 제공합니다. 이 세 모델은 모두 Python을 지원합니다. 웹 및 작업자 역할을 포함하는 Cloud Services는 PaaS(Platform as a Service)를 제공합니다. Cloud Services 안에서 웹 역할은 프런트 엔드 웹 애플리케이션을 호스팅할 전용 IIS(인터넷 정보 서비스) 웹 서버를 제공합니다. 작업자 역할은 비동기, 장기 실행 또는 영구 작업을 사용자 조작 또는 입력과 독립적으로 실행할 수 있습니다.
자세한 내용은 클라우드 서비스란?을 참조하세요.
비고
간단한 웹 사이트를 빌드하려는 경우
시나리오에 간단한 웹 사이트 프런트 엔드만 포함된 경우 Azure App Service에서 간단한 Web Apps를 사용하도록 고려합니다. 그러면 웹 사이트가 커지고 요구 사항이 변경될 때 클라우드 서비스로 쉽게 업그레이드할 수 있습니다. Azure App Service에서 Web Apps 기능 개발을 다루는 문서는 Python 개발자 센터를 참조하세요.
프로젝트 만들기
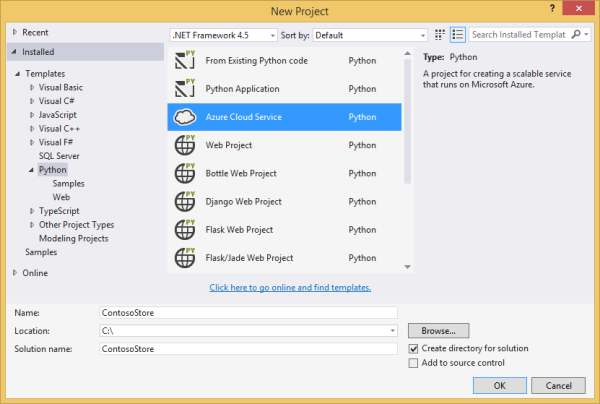
Visual Studio에서 Python 아래의 새 프로젝트 대화 상자에서 Azure Cloud Service를 선택할 수 있습니다.
Azure 클라우드 서비스 마법사에서 새 웹 및 작업자 역할 만들기를 선택할 수 있습니다.

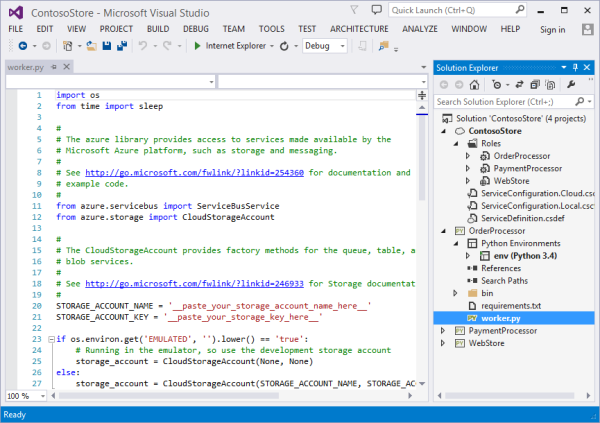
작업자 역할 템플릿에는 Azure Storage 계정 또는 Azure Service Bus에 연결하기 위한 상용구 코드가 제공됩니다.
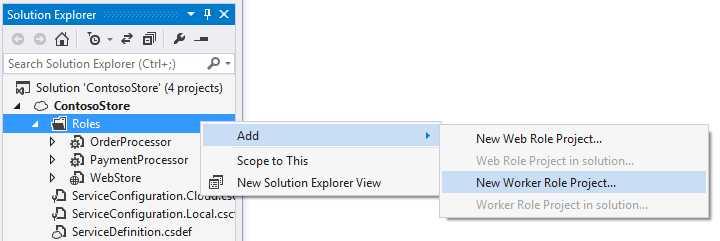
언제든지 기존 클라우드 서비스에 웹 또는 작업자 역할을 추가할 수 있습니다. 솔루션에 기존 프로젝트를 추가하거나 새 프로젝트를 만들도록 선택할 수 있습니다.
클라우드 서비스는 여러 언어로 구현된 역할을 포함할 수 있습니다. 예를 들어 Django로 구현된 Python 웹 역할과 Python 또는 C# 작업자 역할이 포함될 수 있습니다. Service Bus 큐 또는 스토리지 큐를 사용하면 역할 간에 쉽게 통신할 수 있습니다.
클라우드 서비스에 Python 설치
경고
(이 문서를 마지막으로 업데이트한 시간에)Visual Studio를 사용하여 설치된 설치 스크립트가 작동하지 않습니다. 이 섹션에서는 해결 방법을 설명합니다.
설치 스크립트의 가장 큰 문제는 Python을 설치하지 않았다는 점입니다. 먼저 ServiceDefinition.csdef 파일에서 두 개의 시작 작업을 정의합니다. 첫 번째 작업(PrepPython.ps1)은 Python 런타임을 다운로드하고 설치합니다. 두 번째 작업(PipInstaller.ps1)은 pip를 실행하여 있을 수 있는 모든 종속성을 설치합니다.
다음 스크립트는 Python 3.8을 대상으로 작성되었습니다. python 버전 2.x를 사용하려면 두 시작 작업 및 런타임 태스크<Variable name="PYTHON2" value="<mark>on</mark>" />에 대해 PYTHON2 변수 파일을 설정합니다.
<Startup>

  <Task executionContext="elevated" taskType="simple" commandLine="bin\ps.cmd PrepPython.ps1">
    <Environment>
      <Variable name="EMULATED">
        <RoleInstanceValue xpath="/RoleEnvironment/Deployment/@emulated" />
      </Variable>
      <Variable name="PYTHON2" value="off" />
    </Environment>
  </Task>

  <Task executionContext="elevated" taskType="simple" commandLine="bin\ps.cmd PipInstaller.ps1">
    <Environment>
      <Variable name="EMULATED">
        <RoleInstanceValue xpath="/RoleEnvironment/Deployment/@emulated" />
      </Variable>
      <Variable name="PYTHON2" value="off" />
    </Environment>

  </Task>

</Startup>
PYTHON2 및 PYPATH 변수를 작업자 시작 작업에 추가해야 합니다. PYPATH 변수는 PYTHON2 변수가 설정된 경우에만 사용됩니다.
<Runtime>
  <Environment>
    <Variable name="EMULATED">
      <RoleInstanceValue xpath="/RoleEnvironment/Deployment/@emulated" />
    </Variable>
    <Variable name="PYTHON2" value="off" />
    <Variable name="PYPATH" value="%SystemDrive%\Python27" />
  </Environment>
  <EntryPoint>
    <ProgramEntryPoint commandLine="bin\ps.cmd LaunchWorker.ps1" setReadyOnProcessStart="true" />
  </EntryPoint>
</Runtime>
샘플 ServiceDefinition.csdef
<?xml version="1.0" encoding="utf-8"?>
<ServiceDefinition name="AzureCloudServicePython" xmlns="http://schemas.microsoft.com/ServiceHosting/2008/10/ServiceDefinition" schemaVersion="2015-04.2.6">
  <WorkerRole name="WorkerRole1" vmsize="Small">
    <ConfigurationSettings>
      <Setting name="Microsoft.WindowsAzure.Plugins.Diagnostics.ConnectionString" />
      <Setting name="Python2" />
    </ConfigurationSettings>
    <Startup>
      <Task executionContext="elevated" taskType="simple" commandLine="bin\ps.cmd PrepPython.ps1">
        <Environment>
          <Variable name="EMULATED">
            <RoleInstanceValue xpath="/RoleEnvironment/Deployment/@emulated" />
          </Variable>
          <Variable name="PYTHON2" value="off" />
        </Environment>
      </Task>
      <Task executionContext="elevated" taskType="simple" commandLine="bin\ps.cmd PipInstaller.ps1">
        <Environment>
          <Variable name="EMULATED">
            <RoleInstanceValue xpath="/RoleEnvironment/Deployment/@emulated" />
          </Variable>
          <Variable name="PYTHON2" value="off" />
        </Environment>
      </Task>
    </Startup>
    <Runtime>
      <Environment>
        <Variable name="EMULATED">
          <RoleInstanceValue xpath="/RoleEnvironment/Deployment/@emulated" />
        </Variable>
        <Variable name="PYTHON2" value="off" />
        <Variable name="PYPATH" value="%SystemDrive%\Python27" />
      </Environment>
      <EntryPoint>
        <ProgramEntryPoint commandLine="bin\ps.cmd LaunchWorker.ps1" setReadyOnProcessStart="true" />
      </EntryPoint>
    </Runtime>
    <Imports>
      <Import moduleName="RemoteAccess" />
      <Import moduleName="RemoteForwarder" />
    </Imports>
  </WorkerRole>
</ServiceDefinition>
다음으로 ./bin 폴더 안의 귀하의 역할에 대해 PrepPython.ps1 및 PipInstaller.ps1 파일을 만드십시오.
PrepPython.ps1
이 스크립트는 Python을 설치합니다. PYTHON2 환경 변수가 켜지면 Python 2.7이 설치되고, 그렇지 않으면 Python 3.8이 설치됩니다.
[Net.ServicePointManager]::SecurityProtocol = "tls12, tls11, tls"
$is_emulated = $env:EMULATED -eq "true"
$is_python2 = $env:PYTHON2 -eq "on"
$nl = [Environment]::NewLine

if (-not $is_emulated){
    Write-Output "Checking if Python is installed...$nl"
    if ($is_python2) {
        & "${env:SystemDrive}\Python27\python.exe"  -V | Out-Null
    }
    else {
        py -V | Out-Null
    }

    if (-not $?) {

        $url = "https://www.python.org/ftp/python/3.8.8/python-3.8.8-amd64.exe"
        $outFile = "${env:TEMP}\python-3.8.8-amd64.exe"

        if ($is_python2) {
            $url = "https://www.python.org/ftp/python/2.7.18/python-2.7.18.amd64.msi"
            $outFile = "${env:TEMP}\python-2.7.18.amd64.msi"
        }

        Write-Output "Not found, downloading $url to $outFile$nl"
        Invoke-WebRequest $url -OutFile $outFile
        Write-Output "Installing$nl"

        if ($is_python2) {
            Start-Process msiexec.exe -ArgumentList "/q", "/i", "$outFile", "ALLUSERS=1" -Wait
        }
        else {
            Start-Process "$outFile" -ArgumentList "/quiet", "InstallAllUsers=1" -Wait
        }

        Write-Output "Done$nl"
    }
    else {
        Write-Output "Already installed"
    }
}
PipInstaller.ps1
이 스크립트는 pip를 호출하고 requirements.txt 파일에 모든 종속성을 설치합니다. PYTHON2 환경 변수를 설정하면 Python 2.7이 사용되고, 그렇지 않으면 Python 3.8이 사용됩니다.
$is_emulated = $env:EMULATED -eq "true"
$is_python2 = $env:PYTHON2 -eq "on"
$nl = [Environment]::NewLine

if (-not $is_emulated){
    Write-Output "Checking if requirements.txt exists$nl"
    if (Test-Path ..\requirements.txt) {
        Write-Output "Found. Processing pip$nl"

        if ($is_python2) {
            & "${env:SystemDrive}\Python27\python.exe" -m pip install -r ..\requirements.txt
        }
        else {
            py -m pip install -r ..\requirements.txt
        }

        Write-Output "Done$nl"
    }
    else {
        Write-Output "Not found$nl"
    }
}
LaunchWorker.ps1 수정
비고
작업자 역할 프로젝트의 경우 시작 파일을 실행하려면 LauncherWorker.ps1 파일이 필요합니다. 웹 역할 프로젝트에서 시작 파일은 프로젝트 속성에 정의됩니다.
bin\LaunchWorker.ps1 원래 많은 준비 작업을 수행하도록 만들어졌지만 실제로는 작동하지 않습니다. 해당 파일의 내용을 다음 스크립트로 바꿉니다.
이 스크립트는 Python 프로젝트에서 worker.py 파일을 호출합니다. PYTHON2 환경 변수를 설정하면 Python 2.7이 사용되고, 그렇지 않으면 Python 3.8이 사용됩니다.
$is_emulated = $env:EMULATED -eq "true"
$is_python2 = $env:PYTHON2 -eq "on"
$nl = [Environment]::NewLine

if (-not $is_emulated)
{
    Write-Output "Running worker.py$nl"

    if ($is_python2) {
        cd..
        iex "$env:PYPATH\python.exe worker.py"
    }
    else {
        cd..
        iex "py worker.py"
    }
}
else
{
    Write-Output "Running (EMULATED) worker.py$nl"

    # Customize to your local dev environment

    if ($is_python2) {
        cd..
        iex "$env:PYPATH\python.exe worker.py"
    }
    else {
        cd..
        iex "py worker.py"
    }
}
ps.cmd
Visual Studio 템플릿은 ./bin 폴더에 ps.cmd 파일을 만들었을 것입니다. 이 셸 스크립트는 이전 PowerShell 래퍼 스크립트를 호출하고 호출된 PowerShell 래퍼의 이름을 기반으로 하는 로깅을 제공합니다. 이 파일이 만들어지지 않았다면 다음 스크립트가 해당 파일에 포함됩니다.
@echo off

cd /D %~dp0

if not exist "%DiagnosticStore%\LogFiles" mkdir "%DiagnosticStore%\LogFiles"
%SystemRoot%\System32\WindowsPowerShell\v1.0\powershell.exe -ExecutionPolicy Unrestricted -File %* >> "%DiagnosticStore%\LogFiles\%~n1.txt" 2>> "%DiagnosticStore%\LogFiles\%~n1.err.txt"
로컬 실행
Cloud Service 프로젝트를 시작 프로젝트로 설정하고 F5 키를 누르면 해당 Cloud Service가 로컬 Azure 에뮬레이터에서 실행됩니다.
PTVS를 에뮬레이터에서 시작할 수는 있지만 중단점 등의 디버깅 기능은 작동하지 않습니다.
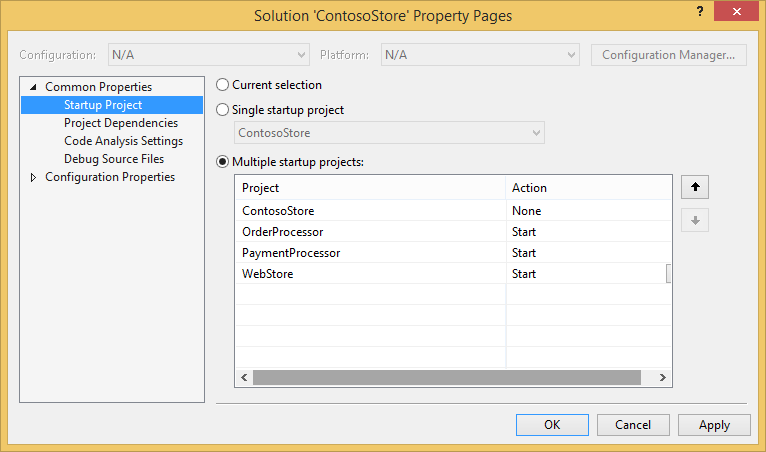
웹 및 작업자 역할을 디버그하려는 경우 역할 프로젝트를 시작 프로젝트로 설정하고 해당 프로젝트를 대신 디버그하면 됩니다. 여러 시작 프로젝트를 설정할 수도 있습니다. 솔루션을 마우스 오른쪽 단추로 클릭한 다음 시작 프로젝트 설정을 선택합니다.
Azure에 게시
게시하려면 솔루션에서 클라우드 서비스 프로젝트를 마우스 오른쪽 단추로 클릭한 다음 게시를 선택합니다.
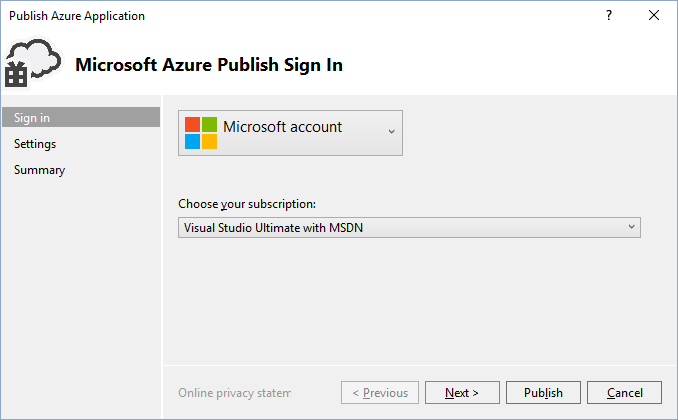
마법사를 따릅니다. 필요한 경우 원격 데스크톱을 사용합니다. 원격 데스크톱은 무언가를 디버깅해야 할 때 유용합니다.
설정 구성을 마치면 게시를 선택합니다.
출력 창에 진행률이 어느 정도 표시된 다음 Microsoft Azure 활동 로그 창이 표시됩니다.
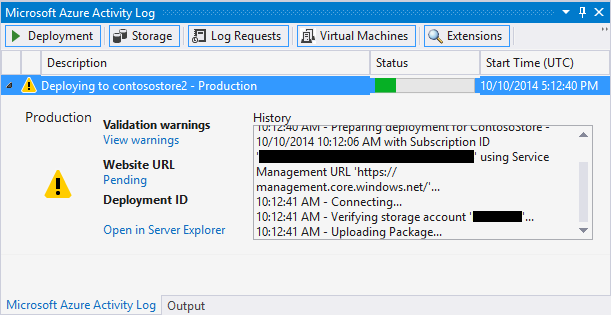
몇 분 후에 배포가 완료되고 웹 및/또는 작업자 역할이 Azure에서 실행됩니다.
로그를 조사하다
클라우드 서비스 가상 머신이 시작되고 Python을 설치한 후에 로그를 보고 오류 메시지를 찾을 수 있습니다. 이러한 로그는 C:\Resources\Directory\{role}\LogFiles 폴더에 있습니다. PrepPython.err.txt 스크립트가 Python이 설치되어 있는지 감지하려고 할 때 오류가 하나 이상 있으며 PipInstaller.err.txt 오래된 버전의 pip에 대해 불평할 수 있습니다.
다음 단계
Python Tools for Visual Studio에서 웹 및 작업자 역할을 사용하는 방법에 대한 자세한 내용은 PTVS 설명서를 참조하세요.
Azure Storage 또는 Service Bus를 사용하는 등 웹 및 작업자 역할에서 Azure 서비스를 사용하는 방법에 대한 자세한 내용은 다음 문서를 참조하세요.