이 연습에서는 터치 입력에 대한 응답으로 코어 그래픽을 사용하여 경로를 그립니다. 그런 다음 경로를 따라 애니메이션 효과를 줄 이미지 포함을 추가 CALayer 합니다.
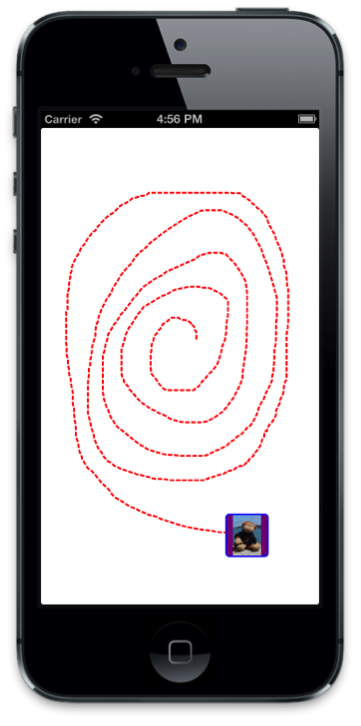
다음 스크린샷에 완성된 애플리케이션이 나와 있습니다.
경로 그리기
클래스
DemoView에 변수를CGPath추가하고 생성자에서 인스턴스화합니다. 또한 두CGPoint개의 변수를initialPoint선언하고latestPoint경로를 생성하는 터치 포인트를 캡처하는 데 사용합니다.public class DemoView : UIView { CGPath path; CGPoint initialPoint; CGPoint latestPoint; public DemoView () { BackgroundColor = UIColor.White; path = new CGPath (); } }다음 using 지시문을 추가합니다.
using CoreGraphics;
using CoreAnimation;
using Foundation;
다음으로, 초기 터치 포인트와
TouchesMoved,각 후속 터치 지점을 각각 캡처하기 위해 다음 구현을 재정TouchesBegan의하고 추가합니다.public override void TouchesBegan (NSSet touches, UIEvent evt){ base.TouchesBegan (touches, evt); UITouch touch = touches.AnyObject as UITouch; if (touch != null) { initialPoint = touch.LocationInView (this); } } public override void TouchesMoved (NSSet touches, UIEvent evt){ base.TouchesMoved (touches, evt); UITouch touch = touches.AnyObject as UITouch; if (touch != null) { latestPoint = touch.LocationInView (this); SetNeedsDisplay (); } }SetNeedsDisplay는 다음 실행 루프 패스에서 호출하기 위해Draw터치가 이동할 때마다 호출됩니다.메서드의 경로에
Draw선을 추가하고 빨간색 파선으로 그릴 것입니다. 아래 표시된 코드를 사용하여 구현Draw합니다.public override void Draw (CGRect rect){ base.Draw (rect); if (!initialPoint.IsEmpty) { //get graphics context using(CGContext g = UIGraphics.GetCurrentContext ()){ //set up drawing attributes g.SetLineWidth (2); UIColor.Red.SetStroke (); //add lines to the touch points if (path.IsEmpty) { path.AddLines (new CGPoint[]{initialPoint, latestPoint}); } else { path.AddLineToPoint (latestPoint); } //use a dashed line g.SetLineDash (0, new nfloat[] { 5, 2 * (nfloat)Math.PI }); //add geometry to graphics context and draw it g.AddPath (path); g.DrawPath (CGPathDrawingMode.Stroke); } } }
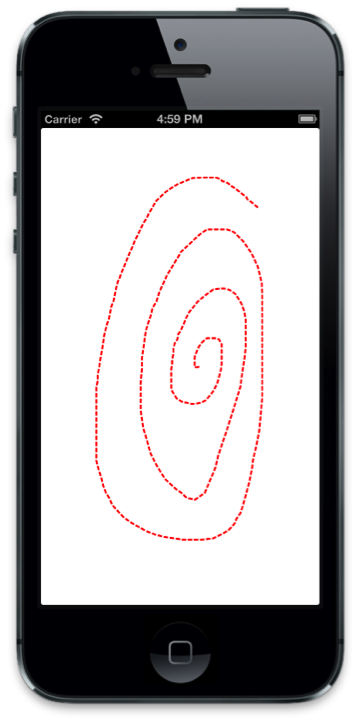
지금 애플리케이션을 실행하는 경우 다음 스크린샷과 같이 터치하여 화면에 그릴 수 있습니다.
경로를 따라 애니메이션
이제 사용자가 경로를 그릴 수 있도록 코드를 구현했으므로 그리기 경로를 따라 레이어에 애니메이션 효과를 주는 코드를 추가해 보겠습니다.
먼저 클래스에
CALayer변수를 추가하고 생성자에서 만듭니다.public class DemoView : UIView { … CALayer layer; public DemoView (){ … //create layer layer = new CALayer (); layer.Bounds = new CGRect (0, 0, 50, 50); layer.Position = new CGPoint (50, 50); layer.Contents = UIImage.FromFile ("monkey.png").CGImage; layer.ContentsGravity = CALayer.GravityResizeAspect; layer.BorderWidth = 1.5f; layer.CornerRadius = 5; layer.BorderColor = UIColor.Blue.CGColor; layer.BackgroundColor = UIColor.Purple.CGColor; }다음으로, 사용자가 화면에서 손가락을 들어 올릴 때 레이어를 보기 계층의 하위 계층으로 추가합니다. 그런 다음, 경로를 사용하여 키 프레임 애니메이션을 만들어 레이어
Position에 애니메이션 효과를 냅니다.이렇게 하려면 다음 코드를 재정의
TouchesEnded하고 추가해야 합니다.public override void TouchesEnded (NSSet touches, UIEvent evt) { base.TouchesEnded (touches, evt); //add layer with image and animate along path if (layer.SuperLayer == null) Layer.AddSublayer (layer); // create a keyframe animation for the position using the path layer.Position = latestPoint; CAKeyFrameAnimation animPosition = (CAKeyFrameAnimation)CAKeyFrameAnimation.FromKeyPath ("position"); animPosition.Path = path; animPosition.Duration = 3; layer.AddAnimation (animPosition, "position"); }지금 그리고 그리기 후에 애플리케이션을 실행하면 이미지가 있는 레이어가 추가되고 그려진 경로를 따라 이동합니다.
요약
이 문서에서는 그래픽과 애니메이션 개념을 함께 연결하는 예제를 단계별 설명했습니다. 먼저 핵심 그래픽을 사용하여 사용자 터치에 대한 응답으로 경로를 그리는 UIView 방법을 보여 줍니다. 그런 다음 핵심 애니메이션을 사용하여 해당 경로를 따라 이미지를 이동하는 방법을 보여 줬습니다.