연습 - 파이프라인에 Bicep 배포 작업 추가
기본 파이프라인을 만들었으며 Azure 및 Azure Pipelines 환경을 연결하도록 구성했습니다. 이제 웹 사이트의 Bicep 파일을 파이프라인에서 Azure에 배포할 준비가 되었습니다.
이 연습에서는 다음을 수행합니다.
- 리포지토리에 Bicep 파일을 추가합니다.
- 파이프라인 단계를 추가하여 Bicep 파일을 배포합니다.
- 파이프라인을 다시 실행하고 웹 사이트가 성공적으로 배포되었는지 확인합니다.
Git 리포지토리에 웹 사이트의 Bicep 파일 추가
웹 사이트의 Bicep 파일은 이미 준비했습니다. 환경 및 구성에 따라 웹 사이트 리소스의 다양한 구성을 배포하는 데 이 Bicep 파일을 사용할 수 있습니다. 여기에서 리포지토리에 Bicep 파일을 추가합니다.
Visual Studio Code 탐색기를 엽니다.
배포 폴더에서 main.bicep이라는 이름으로 새 파일을 만듭니다. 리포지토리의 루트가 아닌 deploy 폴더 내에 파일을 만들어야 합니다.
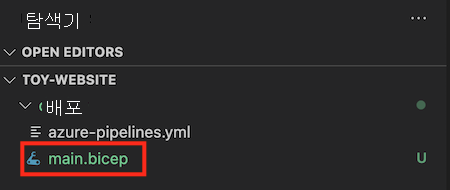
다음 코드를 main.bicep 파일에 복사합니다.
@description('The Azure region into which the resources should be deployed.')
param location string = resourceGroup().location

@description('The type of environment. This must be nonprod or prod.')
@allowed([
  'nonprod'
  'prod'
])
param environmentType string

@description('Indicates whether to deploy the storage account for toy manuals.')
param deployToyManualsStorageAccount bool

@description('A unique suffix to add to resource names that need to be globally unique.')
@maxLength(13)
param resourceNameSuffix string = uniqueString(resourceGroup().id)

var appServiceAppName = 'toy-website-${resourceNameSuffix}'
var appServicePlanName = 'toy-website-plan'
var toyManualsStorageAccountName = 'toyweb${resourceNameSuffix}'

// Define the SKUs for each component based on the environment type.
var environmentConfigurationMap = {
  nonprod: {
    appServicePlan: {
      sku: {
        name: 'F1'
        capacity: 1
      }
    }
    toyManualsStorageAccount: {
      sku: {
        name: 'Standard_LRS'
      }
    }
  }
  prod: {
    appServicePlan: {
      sku: {
        name: 'S1'
        capacity: 2
      }
    }
    toyManualsStorageAccount: {
      sku: {
        name: 'Standard_ZRS'
      }
    }
  }
}

var toyManualsStorageAccountConnectionString = deployToyManualsStorageAccount ? 'DefaultEndpointsProtocol=https;AccountName=${toyManualsStorageAccount.name};EndpointSuffix=${environment().suffixes.storage};AccountKey=${toyManualsStorageAccount.listKeys().keys[0].value}' : ''

resource appServicePlan 'Microsoft.Web/serverfarms@2022-03-01' = {
  name: appServicePlanName
  location: location
  sku: environmentConfigurationMap[environmentType].appServicePlan.sku
}

resource appServiceApp 'Microsoft.Web/sites@2022-03-01' = {
  name: appServiceAppName
  location: location
  properties: {
    serverFarmId: appServicePlan.id
    httpsOnly: true
    siteConfig: {
      appSettings: [
        {
          name: 'ToyManualsStorageAccountConnectionString'
          value: toyManualsStorageAccountConnectionString
        }
      ]
    }
  }
}

resource toyManualsStorageAccount 'Microsoft.Storage/storageAccounts@2022-09-01' = if (deployToyManualsStorageAccount) {
  name: toyManualsStorageAccountName
  location: location
  kind: 'StorageV2'
  sku: environmentConfigurationMap[environmentType].toyManualsStorageAccount.sku
}
파일의 변경 내용을 저장합니다.
Visual Studio Code 터미널에서 다음 코드를 실행하여 변경 내용을 스테이징하고, 변경 내용을 커밋하고, 변경 내용을 리포지토리로 푸시합니다.
git add deploy/main.bicep
git commit -m 'Add Bicep file'
git push
파이프라인 단계 바꾸기
다음으로 서비스 연결을 사용하여 Bicep 파일을 Azure에 배포하도록 파이프라인 정의를 업데이트합니다.
Visual Studio Code에서 deploy/azure-pipelines.yml 파일을 엽니다.
jobs:줄 앞에variables:를 추가하여deploymentDefaultLocation이라는 변수를 정의합니다.trigger: none pool: vmImage: ubuntu-latest variables: - name: deploymentDefaultLocation value: westus3 jobs:파이프라인 정의에서
script단계를 제거하려면 파일의 아래쪽 두 줄을 삭제합니다.팁
Visual Studio Code에서 작업하고 Azure Pipelines 확장을 설치한 경우 Ctrl + Space 키 조합을 사용해 보세요. 현재 커서 위치에서 추가할 제안 요소가 있는 상황에 맞는 메뉴를 보여 줍니다.
파일 하단에
AzureResourceManagerTemplateDeployment작업을 사용하여 Bicep 파일을 배포하는 작업을 추가합니다.jobs: - job: steps: - task: AzureResourceManagerTemplateDeployment@3 inputs: connectedServiceName: $(ServiceConnectionName) deploymentName: $(Build.BuildNumber) location: $(deploymentDefaultLocation) resourceGroupName: $(ResourceGroupName) csmFile: deploy/main.bicep overrideParameters: > -environmentType $(EnvironmentType) -deployToyManualsStorageAccount $(DeployToyManualsStorageAccount)참고
이 코드를 이 모듈에서 복사하여 붙여넣는 것보다 직접 입력하는 것이 좋습니다. 파일의 들여쓰기를 주의해야 합니다. 들여쓰기가 올바르지 않은 경우 YAML 파일이 유효하지 않습니다. Visual Studio Code는 물결 모양의 선을 표시하여 오류를 나타냅니다.
이 단계에서는 시스템 변수
$(Build.BuildNumber)를 사용하여 배포 이름을 지정합니다. 이 변수는 배포를 실행하는 파이프라인을 쉽게 확인하는 데 도움이 될 수 있습니다.location작업 속성은AzureResourceManagerTemplateDeployment작업에 필요합니다. 리소스 그룹을 만들어야 하는 Azure 지역을 지정합니다. 이 연습에서는 이미 리소스 그룹을 만들었으므로 여기서 지정한 위치는 중요하지 않습니다. 그러나 어쨌든 값을 제공해야 합니다. 여기서는 이전 단계에서 설정한deploymentDefaultLocation변수 값으로 설정합니다.파일의 변경 내용을 저장합니다. 파일은 다음 예제와 비슷합니다.
trigger: none pool: vmImage: ubuntu-latest variables: - name: deploymentDefaultLocation value: westus3 jobs: - job: steps: - task: AzureResourceManagerTemplateDeployment@3 inputs: connectedServiceName: $(ServiceConnectionName) deploymentName: $(Build.BuildNumber) location: $(deploymentDefaultLocation) resourceGroupName: $(ResourceGroupName) csmFile: deploy/main.bicep overrideParameters: > -environmentType $(EnvironmentType) -deployToyManualsStorageAccount $(DeployToyManualsStorageAccount)Visual Studio Code 터미널에서 변경 내용을 스테이징하고 리포지토리에 커밋한 후 Azure Repos에 푸시합니다.
git add deploy/azure-pipelines.yml
git commit -m 'Add deployment task to pipeline'
git push
파이프라인 변수 추가
브라우저에서 Pipelines를 선택합니다.
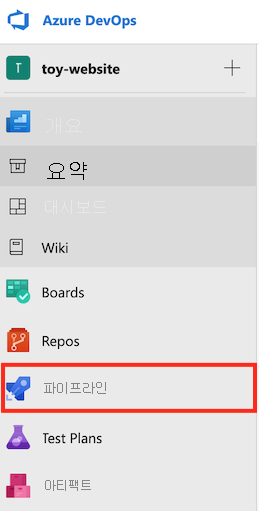
파이프라인을 선택합니다.

편집을 선택합니다.

변수를 선택합니다.

New variable을 선택합니다.
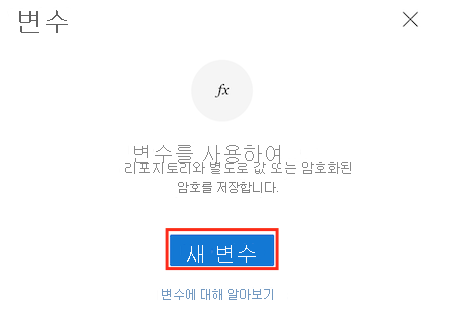
이름에 ServiceConnectionName를 입력합니다. 값에 ToyWebsite를 입력합니다.
확인란이 선택 취소된 상태에서 확인을 선택합니다.
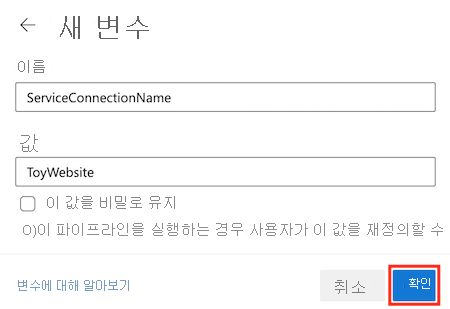
더 많은 변수를 만들려면 +를 선택합니다.

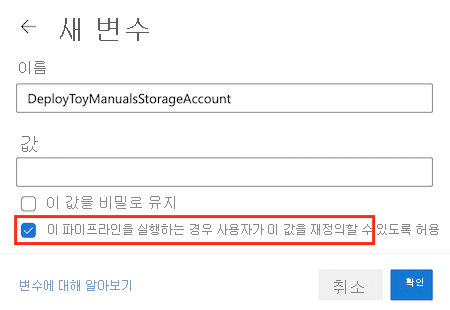
ServiceConnectionName 변수를 만든 것과 동일한 방법으로 다음 변수를 만듭니다.
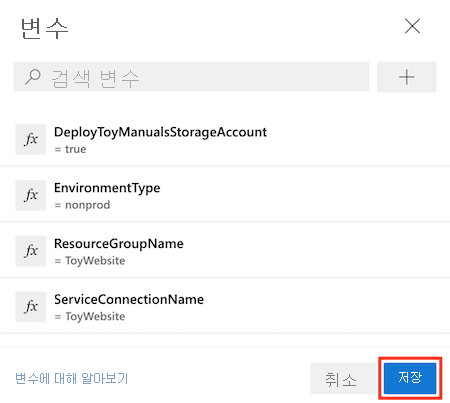
변수 이름 값 ResourceGroupName ToyWebsite EnvironmentType nonprod 단계를 한번 더 완료하여 이름이 DeployToyManualsStorageAccount이고 값이 true인 변수를 만듭니다. 이 변수에 대해 이 파이프라인을 실행할 때 사용자가 이 값을 재정의할 수 있도록 허용 확인란을 선택합니다.
네 개의 변수를 모두 만들었으면 저장을 선택합니다.
파이프라인을 실행하세요.
이제 파이프라인을 실행할 준비가 되었습니다.
템플릿에는 웹 사이트 팀이 장난감 사용 설명서를 저장하는 데 사용하는 스토리지 계정이 포함되어 있습니다. 아직 환경을 테스트하는 중이기 때문에 웹 사이트를 배포할 때마다 스토리지 계정을 배포할 필요가 없습니다. 따라서 스토리지 계정의 배포 여부를 컨트롤하는 Bicep 매개 변수를 만들었습니다. 여기서는 파이프라인을 실행하고 배포를 재정의하여 이번에는 스토리지 계정을 배포 지 않도록 합니다.
실행을 선택합니다.

파이프라인 실행 창이 나타납니다. 이 창에서 이 특정 파이프라인 실행에 대한 설정을 구성할 수 있습니다.
변수를 선택합니다.
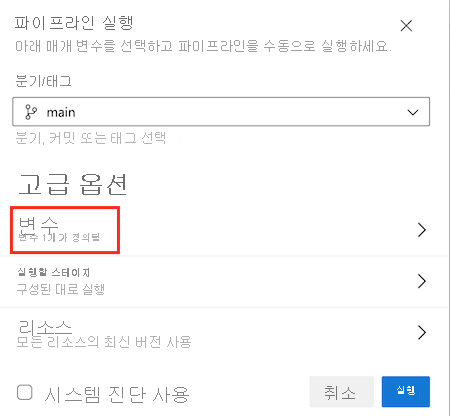
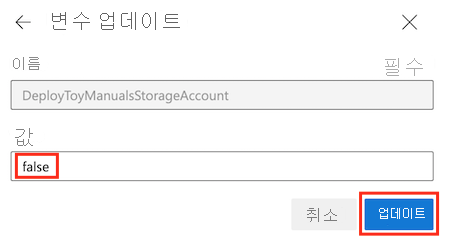
DeployToyManualsStorageAccount 변수를 선택하고 해당 값을 false로 변경합니다. 그런 다음 업데이트를 선택합니다.
뒤로 화살표를 선택합니다.
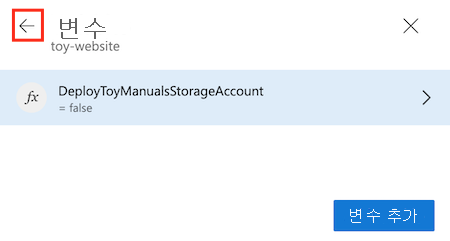
새 파이프라인 실행을 시작하려면 실행을 선택합니다. 파이프라인이 시작하는 데 몇 분 정도 걸릴 수 있습니다. 파이프라인이 시작한 후 배포가 완료되는 데 몇 분 정도 걸릴 수 있습니다.
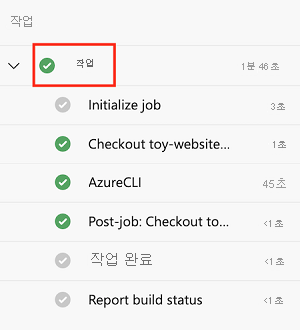
작업을 열려면 작업 섹션에서 작업을 선택합니다. 작업이 실행될 때 작업을 모니터링하거나 작업이 완료될 때까지 기다렸다가 해당 기록을 검토할 수 있습니다.
작업이 완료될 때까지 기다립니다.
작업을 선택하세요.
1 큐 시간 변수 사용됨을 선택하세요.
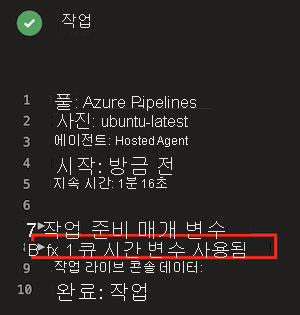
이 파이프라인 실행에 대해 재정의된 값이 표시됩니다. 원래 값을 재정의했기 때문에
DeployToyManualsStorageAccount변수의 값은 false입니다.나머지 파이프라인 출력을 검사합니다.
파이프라인은 성공적인 배포를 표시합니다.
배포 확인
Azure Portal로 이동합니다.
왼쪽 메뉴에서 리소스 그룹을 선택합니다.
ToyWebsite를 선택합니다.
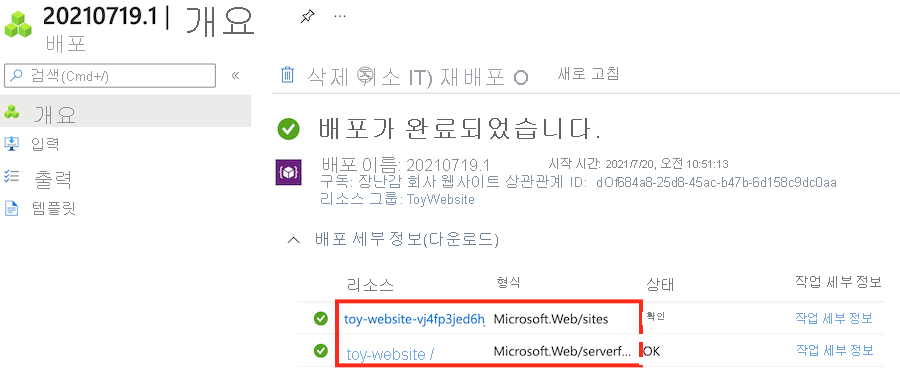
개요에서 배포 상태를 확인합니다. 성공한 배포 하나가 표시될 것입니다.
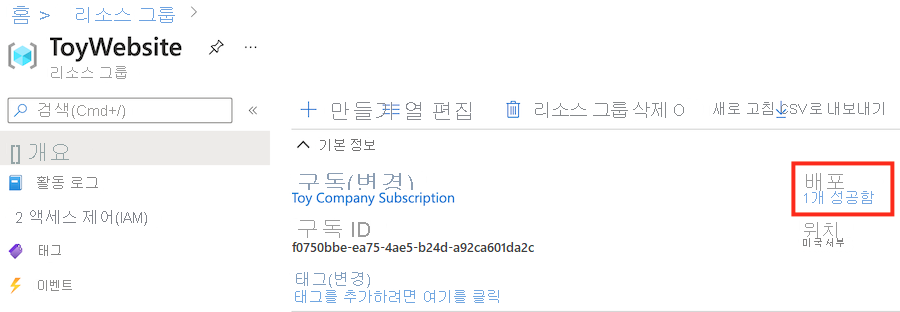
‘1 성공’을 선택하여 배포 세부 정보를 확인합니다.
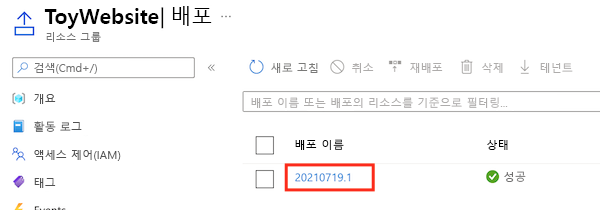
배포 이름은 파이프라인 실행 이름과 동일합니다.
배포된 리소스를 확인하려면 배포를 선택합니다. 배포를 확장하여 자세한 정보를 보려면 배포 세부 정보를 선택합니다. 이 경우에는 Azure App Service 요금제 및 앱이 있습니다.
