연습 - Azure Service Bus에 메시지 보내기
이 단원에서는 Azure Service Bus 큐에 메시지를 보내는 Spring Boot 애플리케이션을 만듭니다. 다음 단계를 로컬로 완료합니다.
Spring Boot 프로젝트 만들기
Spring Boot 프로젝트를 만들려면 다음 명령줄과 함께 Spring Initializr를 사용합니다.
curl https://start.spring.io/starter.tgz -d type=maven-project -d dependencies=web -d baseDir=spring-sender-application -d bootVersion=2.4.1.RELEASE -d javaVersion=1.8 | tar -xzvf -
Service Bus 큐에 메시지 보내기
이제 Service Bus 큐에 일부 메시지를 보내겠습니다.
Service Bus Spring Boot 스타터에 대한 maven 종속성 추가
pom.xml 파일의 spring-sender-application에서 종속성 아래에 다음 명령을 추가합니다.
            <dependency>
                <groupId>com.microsoft.azure</groupId>
                <artifactId>azure-servicebus-jms-spring-boot-starter</artifactId>
                <version>2.3.3</version>
            </dependency>
구성 매개 변수 추가
spring-sender-application\src\main\resources폴더에서application.properties파일을 편집하고 다음 매개 변수를 추가합니다.spring.jms.servicebus.connection-string=<xxxxx> spring.jms.servicebus.idle-timeout=20000spring.jms.servicebus.connection-string속성을 이전에 저장한 Service Bus 네임스페이스에 대한 연결 문자열로 설정합니다.
Service Bus로 메시지를 보내는 코드 추가
다음으로, Service Bus 큐에 메시지를 보내는 비즈니스 논리를 추가합니다.
src/main/java/com/example/demo 디렉터리에서 다음 콘텐츠가 있는 SendController.java 파일을 만듭니다.
package com.example.demo;

import org.springframework.beans.factory.annotation.Autowired;
import org.springframework.jms.core.JmsTemplate;
import org.springframework.web.bind.annotation.GetMapping;
import org.springframework.web.bind.annotation.RequestParam;
import org.springframework.web.bind.annotation.RestController;

@RestController
public class SendController {

    private static final String queue = "test-queue-jms";

    @Autowired
    private JmsTemplate jmsTemplate;

    @GetMapping("/messages")
    public String postMessage(@RequestParam String message) {
        jmsTemplate.send(queue, s -> s.createTextMessage(message));
        return message;
    }
}
애플리케이션을 로컬로 실행
pom.xml파일이 있는 샘플spring-sender-application폴더의 루트로 다시 전환하고 다음 명령을 실행하여 Spring Boot 애플리케이션을 시작합니다. 이 단계에서는 Windows 컴퓨터에mvn을 설치했으며PATH에 있다고 가정합니다.mvn spring-boot:run애플리케이션 시작이 완료된 후 다음 링크를 선택하여 Service Bus 큐에 메시지를 보낼 수 있습니다.
http://localhost:8080/messages?message=Hellohttp://localhost:8080/messages?message=HelloAgainhttp://localhost:8080/messages?message=HelloOnceAgain메시지 쿼리 매개 변수에서 문자열 값을 변경하고 Service Bus 큐에 텍스트를 보낼 수 있습니다.
브라우저는 메시지 쿼리 문자열 매개 변수로 전달되는 모든 것을 표시합니다. 이는 Service Bus가 메시지를 수락하고 있음을 의미합니다.
Service Bus 큐의 메시지 보기
참고
메시지를 보면 메시지의 송신 측을 이해하는 데 도움이 되지만, 이 단계는 선택 사항입니다.
이 메시지는 이 자습서의 다음 단계에서 받게 됩니다.
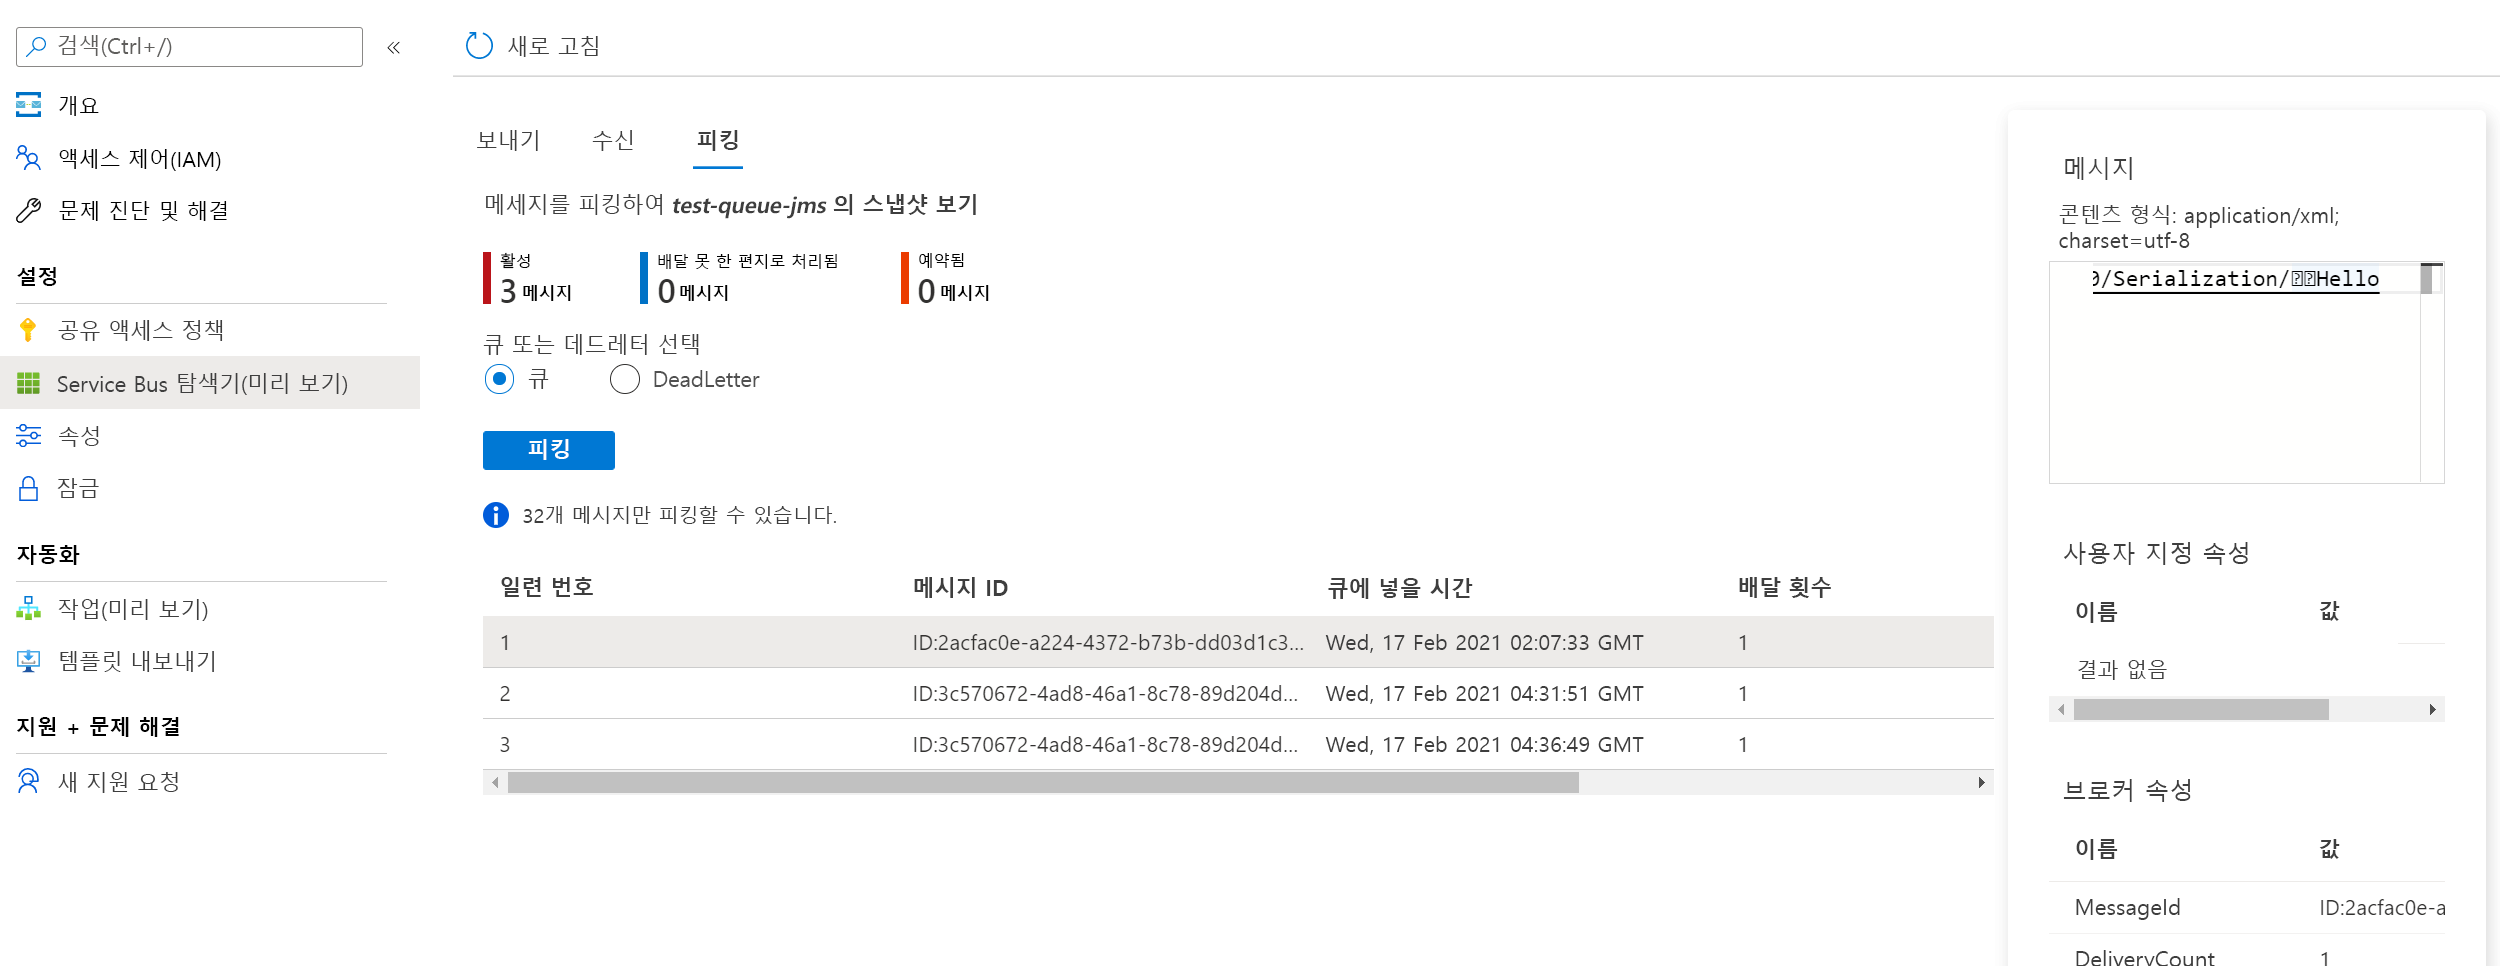
계속 진행하여 Azure Portal의 Service Bus Explorer에서 메시지를 볼 수 있습니다.
Azure Portal로 다시 돌아가서 엔터티 아래의 왼쪽 메뉴에서 큐를 선택합니다.
적절한 큐를 선택합니다. 예를 들어 이 데모의 큐는 test-queue-jms입니다.
왼쪽 창에서 Service Bus 탐색기를 선택합니다.
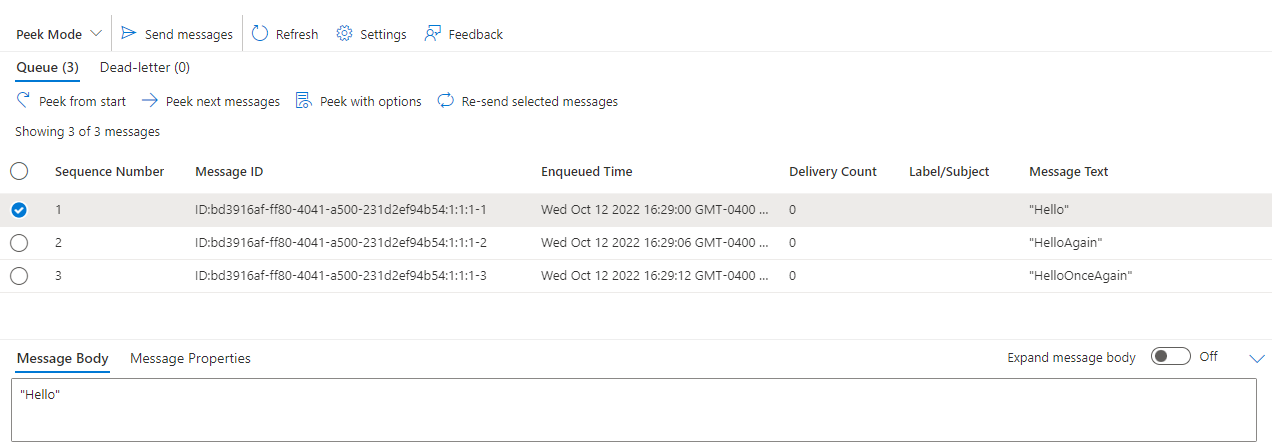
처음부터 피킹을 선택합니다. HTTP 명령을 사용하여 보낸 세 개의 메시지가 모두 표시됩니다.
메시지를 선택하여 아래쪽 창에서 메시지 본문을 확인합니다.