연습 - 파이프라인에 결과 게시
여기서 파이프라인을 통해 Space Game 웹 프로젝트를 빌드할 수 있습니다.
하지만 빌드 결과는 어디로 이동해야 하나요? 현재 빌드 출력은 임시 빌드 서버에 남아 있습니다. Mara는 Amita가 테스트를 시작할 수 있도록 이 빌드를 Amita에게 전달할 방법이 필요합니다.
빌드를 완료한 후 팀의 다른 사용자가 사용할 수 있도록 Azure Pipelines에 빌드 아티팩트(여기서 수행할 작업)를 저장할 수 있습니다. 또한 변수를 사용하여 구성을 더 쉽게 읽고 최신 상태로 유지하기 위해 빌드 구성을 리팩터링할 것입니다.
참고
Azure Pipelines를 사용하면 클라우드 또는 데이터 센터에서 실행되는 테스트 또는 프로덕션 환경에 빌드된 앱을 자동으로 배포할 수 있습니다. 지금 Mara의 목표는 기존 프로세스를 사용하여 QA에 전달할 수 있는 빌드를 생성하는 것입니다.
파이프라인에 빌드 게시
.NET에서는 앱을 .zip 파일로 패키지할 수 있습니다. 그런 다음 기본 제공 PublishBuildArtifacts@1 작업을 사용하여 Azure Pipelines에 .zip 파일을 게시할 수 있습니다.
Visual Studio Code에서 azure-pipelines.yml을 다음과 같이 변경합니다.
trigger:
- '*'

pool:
  name: 'Default' #replace if needed with name of your agent pool

steps:
- task: UseDotNet@2
  displayName: 'Use .NET SDK 6.x'
  inputs:
    version: '6.x'

- task: Npm@1
  displayName: 'Run npm install'
  inputs:
    verbose: false

- script: './node_modules/.bin/node-sass Tailspin.SpaceGame.Web/wwwroot --output Tailspin.SpaceGame.Web/wwwroot'
  displayName: 'Compile Sass assets'

- task: gulp@1
  displayName: 'Run gulp tasks'

- script: 'echo "$(Build.DefinitionName), $(Build.BuildId), $(Build.BuildNumber)" > buildinfo.txt'
  displayName: 'Write build info'
  workingDirectory: Tailspin.SpaceGame.Web/wwwroot

- task: DotNetCoreCLI@2
  displayName: 'Restore project dependencies'
  inputs:
    command: 'restore'
    projects: '**/*.csproj'

- task: DotNetCoreCLI@2
  displayName: 'Build the project - Release'
  inputs:
    command: 'build'
    arguments: '--no-restore --configuration Release'
    projects: '**/*.csproj'

- task: DotNetCoreCLI@2
  displayName: 'Publish the project - Release'
  inputs:
    command: 'publish'
    projects: '**/*.csproj'
    publishWebProjects: false
    arguments: '--no-build --configuration Release --output $(Build.ArtifactStagingDirectory)/Release'
    zipAfterPublish: true

- task: PublishBuildArtifacts@1
  displayName: 'Publish Artifact: drop'
  condition: succeeded()
trigger: - '*' pool: vmImage: ubuntu-latest steps: - task: UseDotNet@2 displayName: 'Use .NET SDK 6.x' inputs: version: '6.x' - task: Npm@1 displayName: 'Run npm install' inputs: verbose: false - script: './node_modules/.bin/node-sass Tailspin.SpaceGame.Web/wwwroot --output Tailspin.SpaceGame.Web/wwwroot' displayName: 'Compile Sass assets' - task: gulp@1 displayName: 'Run gulp tasks' - script: 'echo "$(Build.DefinitionName), $(Build.BuildId), $(Build.BuildNumber)" > buildinfo.txt' displayName: 'Write build info' workingDirectory: Tailspin.SpaceGame.Web/wwwroot - task: DotNetCoreCLI@2 displayName: 'Restore project dependencies' inputs: command: 'restore' projects: '**/*.csproj' - task: DotNetCoreCLI@2 displayName: 'Build the project - Release' inputs: command: 'build' arguments: '--no-restore --configuration Release' projects: '**/*.csproj' - task: DotNetCoreCLI@2 displayName: 'Publish the project - Release' inputs: command: 'publish' projects: '**/*.csproj' publishWebProjects: false arguments: '--no-build --configuration Release --output $(Build.ArtifactStagingDirectory)/Release' zipAfterPublish: true - task: PublishBuildArtifacts@1 displayName: 'Publish Artifact: drop' condition: succeeded()이 버전의 azure-pipelines.yml은 이전 버전과 유사하지만 작업을 두 개 더 추가합니다.
첫 번째 작업은
DotNetCoreCLI@2작업을 사용하여 앱의 빌드 결과(종속성 포함)를 폴더에 게시하거나 패키지합니다.zipAfterPublish인수는 빌드 결과를 .zip 파일에 추가하도록 지정합니다.두 번째 작업은
PublishBuildArtifacts@1작업을 사용하여 Azure Pipelines에 .zip 파일을 게시합니다.condition인수는 이전 태스크가 성공하는 경우에만 작업을 실행하도록 지정합니다.succeeded()은(는) 기본 조건이므로 지정할 필요는 없지만 여기에 표시하여 해당 사용을 보여 드립니다.통합 터미널에서 azure-pipelines.yml을 인덱스에 추가하고 변경 사항을 커밋한 다음 이를 GitHub에 푸시합니다.
팁
다음 Git 명령을 실행하려면 azure-pipelines.yml을 저장해야 합니다.
git add azure-pipelines.yml
git commit -m "Add publish tasks"
git push origin build-pipeline
앞에서 한 것처럼 Azure Pipelines에서 각 단계를 진행하는 동안 빌드를 추적합니다.
파이프라인이 완료되면 빌드 요약으로 돌아갑니다.
관련 항목 아래에 1개 게시됨이 있습니다.
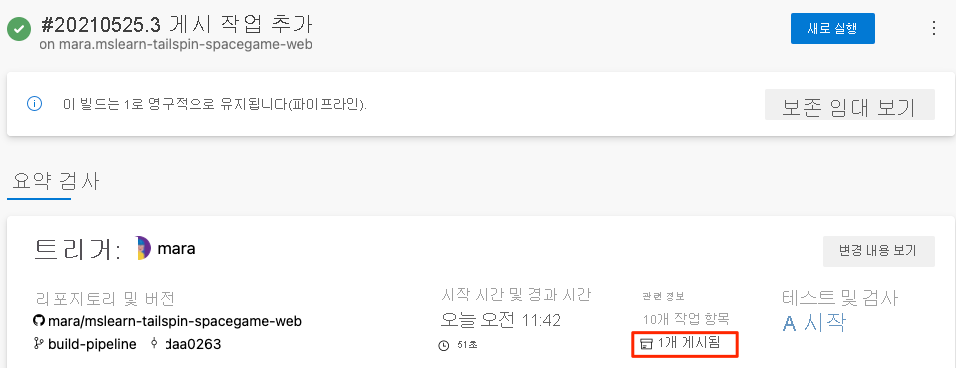
아티팩트를 선택합니다.
저장 폴더를 확장합니다.
빌드된 앱과 해당 종속성을 포함하는 .zip 파일이 표시됩니다.
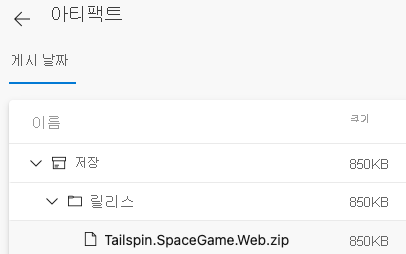
선택적 연습을 시도하려는 경우 이 .zip 파일을 컴퓨터에 다운로드하고 해당 콘텐츠를 살펴볼 수 있습니다.
가독성 개선을 위해 변수 정의
Mara는 한 걸음 물러나 자신의 작업을 살펴봅니다. 빌드 구성이 필요한 작업을 수행하지만 Andy와 다른 팀원이 해당 구성을 쉽게 최신 상태로 유지하고 확장하도록 만들고 싶습니다.
변수를 사용하면 값을 한 번 정의해 파이프라인 전체에서 해당 값을 참조할 수 있습니다. Azure Pipelines는 파이프라인 실행 시 각 변수를 해당 변수의 최신 값으로 바꿉니다.
다른 프로그래밍 언어와 마찬가지로 변수를 사용하면 다음과 같은 작업을 수행할 수 있습니다.
- 파이프라인 실행 간에 변경될 수 있는 값을 정의합니다.
- 파이프라인 전체에서 반복되는 정보(예: 버전 번호 또는 파일 경로)를 한 곳에 저장합니다. 이렇게 하면 요구 사항이 변경될 때 모든 항목을 업데이트할 필요가 없습니다.
Azure Pipelines는 많은 기본 제공 변수를 제공합니다. 이와 같은 변수는 빌드 식별자, 소프트웨어가 빌드되어 스테이징된 디렉터리 이름과 같은 빌드 프로세스의 여러 측면을 설명합니다.
사용자 자체 변수를 정의할 수도 있습니다. 다음은 릴리스 빌드 구성을 정의하는 buildConfiguration이라는 변수를 보여 주는 예제입니다.
variables:
  buildConfiguration: 'Release'
동일한 값을 여러 번 반복하거나 종속성 버전과 같은 값을 변경할 수 있는 경우 변수를 사용합니다.
빌드 구성의 모든 부분에 대해 변수를 만들 필요는 없습니다. 실제로 너무 많은 변수를 사용하면 다른 사용자가 파이프라인 코드를 읽고 이해할 수 없습니다.
잠시 시간을 내 azure-pipelines.yml을 살펴보겠습니다. 다음 값이 반복됩니다.
- 빌드 구성:
Release - wwwroot 디렉터리의 위치:
Tailspin.SpaceGame.Web/wwwroot - .NET SDK 버전:
6.x
이제 변수를 사용하여 이와 같은 값을 한 번 정의합니다. 그런 다음 파이프라인 전체에서 변수를 참조합니다.
Visual Studio Code에서 azure-pipelines.yml을 다음과 같이 변경합니다.
trigger:
- '*'

pool:
  name: 'Default' #replace if needed with name of your agent pool

variables:
  buildConfiguration: 'Release'
  wwwrootDir: 'Tailspin.SpaceGame.Web/wwwroot'
  dotnetSdkVersion: '6.x'

steps:
- task: UseDotNet@2
  displayName: 'Use .NET SDK $(dotnetSdkVersion)'
  inputs:
    version: '$(dotnetSdkVersion)'

- task: Npm@1
  displayName: 'Run npm install'
  inputs:
    verbose: false

- script: './node_modules/.bin/node-sass $(wwwrootDir) --output $(wwwrootDir)'
  displayName: 'Compile Sass assets'

- task: gulp@1
  displayName: 'Run gulp tasks'

- script: 'echo "$(Build.DefinitionName), $(Build.BuildId), $(Build.BuildNumber)" > buildinfo.txt'
  displayName: 'Write build info'
  workingDirectory: $(wwwrootDir)

- task: DotNetCoreCLI@2
  displayName: 'Restore project dependencies'
  inputs:
    command: 'restore'
    projects: '**/*.csproj'

- task: DotNetCoreCLI@2
  displayName: 'Build the project - $(buildConfiguration)'
  inputs:
    command: 'build'
    arguments: '--no-restore --configuration $(buildConfiguration)'
    projects: '**/*.csproj'

- task: DotNetCoreCLI@2
  displayName: 'Publish the project - $(buildConfiguration)'
  inputs:
    command: 'publish'
    projects: '**/*.csproj'
    publishWebProjects: false
    arguments: '--no-build --configuration $(buildConfiguration) --output $(Build.ArtifactStagingDirectory)/$(buildConfiguration)'
    zipAfterPublish: true

- task: PublishBuildArtifacts@1
  displayName: 'Publish Artifact: drop'
  condition: succeeded()
trigger: - '*' pool: vmImage: ubuntu-latest variables: buildConfiguration: 'Release' wwwrootDir: 'Tailspin.SpaceGame.Web/wwwroot' dotnetSdkVersion: '6.x' steps: - task: UseDotNet@2 displayName: 'Use .NET SDK $(dotnetSdkVersion)' inputs: version: '$(dotnetSdkVersion)' - task: Npm@1 displayName: 'Run npm install' inputs: verbose: false - script: './node_modules/.bin/node-sass $(wwwrootDir) --output $(wwwrootDir)' displayName: 'Compile Sass assets' - task: gulp@1 displayName: 'Run gulp tasks' - script: 'echo "$(Build.DefinitionName), $(Build.BuildId), $(Build.BuildNumber)" > buildinfo.txt' displayName: 'Write build info' workingDirectory: $(wwwrootDir) - task: DotNetCoreCLI@2 displayName: 'Restore project dependencies' inputs: command: 'restore' projects: '**/*.csproj' - task: DotNetCoreCLI@2 displayName: 'Build the project - $(buildConfiguration)' inputs: command: 'build' arguments: '--no-restore --configuration $(buildConfiguration)' projects: '**/*.csproj' - task: DotNetCoreCLI@2 displayName: 'Publish the project - $(buildConfiguration)' inputs: command: 'publish' projects: '**/*.csproj' publishWebProjects: false arguments: '--no-build --configuration $(buildConfiguration) --output $(Build.ArtifactStagingDirectory)/$(buildConfiguration)' zipAfterPublish: true - task: PublishBuildArtifacts@1 displayName: 'Publish Artifact: drop' condition: succeeded()variables섹션에서는 다음 값을 정의합니다.buildConfiguration: 빌드 구성을 지정합니다.wwwrootDir: wwwroot 디렉터리에 대한 경로를 지정합니다.dotnetSdkVersion: 사용할 .NET SDK 버전을 지정합니다.
해당 변수를 참조하려면 기본 제공 변수를 사용했던 것처럼
$()구문을 사용합니다. 다음은 node-Sass를 실행하여 Sass 파일을 CSS로 변환하는 단계입니다. wwwroot 디렉터리에 대한 경로를 얻기 위해wwwrootDir변수를 참조합니다.- script: './node_modules/.bin/node-sass $(wwwrootDir) --output $(wwwrootDir)' displayName: 'Compile Sass assets'스크립트 명령은 해당 변수를 사용하여 Sass 파일에 대한 소스 디렉터리와 CSS 파일을 쓰는 디렉터리를 모두 정의합니다. 또한 변수를 사용하여 사용자 인터페이스에 표시되는 작업 이름을 정의합니다.
통합 터미널에서 azure-pipelines.yml을 인덱스에 추가하고 변경 사항을 커밋한 다음 이를 GitHub에 푸시합니다.
git add azure-pipelines.yml
git commit -m "Refactor common variables"
git push origin build-pipeline
Azure Pipelines에서 각 단계를 통해 빌드를 추적합니다.
빌드가 실행될 때 변수가 변수의 해당 값으로 바뀌는 것을 볼 수 있습니다. 예를 들어 다음은 사용할 .NET SDK 버전을 설정하는
UseDotNet@2작업입니다.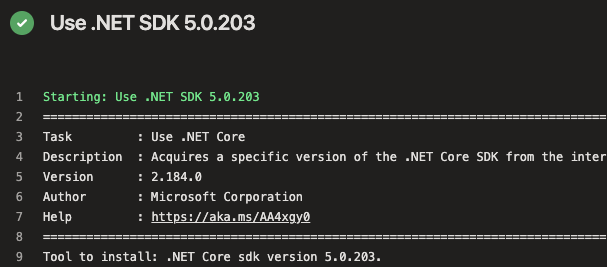
이전처럼 빌드가 완료될 때 아티팩트를 보려면 빌드 요약으로 이동할 수 있습니다.
축하합니다! Azure Pipelines를 성공적으로 사용하고 첫 번째 빌드 아티팩트를 만들었습니다.