연습 - 컴퓨팅 노드에서 애플리케이션 관리 및 배포
Azure Batch 클라이언트 API를 사용하면 Azure Batch 계정의 모든 구성 요소를 프로그래밍 방식으로 제어할 수 있습니다.
회사의 콘솔 앱을 계속 향상시키면 이제 마지막 연습에서 업로드한 비디오를 변환하는 데 필요한 모든 구성 요소를 추가합니다.
중요합니다
이 연습을 완료하려면 사용자 고유의 Azure 구독이 필요하며 요금이 발생할 수 있습니다. Azure 구독이 아직 없는 경우 시작하기 전에 체험 계정을 만듭니다.
이 연습이 끝나면 MP4 비디오를 애니메이션 GIF로 변환할 수 있는 Batch 프로세스가 작동하게 됩니다. 앱은 기존 풀에 작업을 추가하고 비디오 변환 작업을 추가하고 시작합니다.
일괄 처리 클라이언트를 사용하여 코드 향상
다음과 같이 Cloud Shell에서 편집기를 사용하여
Program.cs파일을 편집합니다.code Program.csBatch 작업에서 사용할 JobId의 Program.cs 상수를 추가합니다.
private const string JobId = "WinFFmpegJob";Main 메서드에서 다음 줄을 바꿉다.
var batchClient = BatchClient.Open(sharedKeyCredentials); // Create the Batch pool, which contains the compute nodes that execute tasks. await CreateBatchPoolAsync(batchClient, PoolId);batchClient의 using 블록으로 바꿉니다.using (BatchClient batchClient = BatchClient.Open(sharedKeyCredentials)) { // Create the Batch pool, which contains the compute nodes that execute the tasks. await CreateBatchPoolAsync(batchClient, PoolId); // Create the job that runs the tasks. await CreateJobAsync(batchClient, JobId, PoolId); // Create a collection of tasks and add them to the Batch job. await AddTasksAsync(batchClient, JobId, inputFiles, outputContainerSasUrl); }
작업 생성
이 새 메서드를
CreateJobAsync()추가하여 Program.cs 작업을 만들고 풀에 추가합니다.private static async Task CreateJobAsync(BatchClient batchClient, string jobId, string poolId) { Console.WriteLine("Creating job [{0}]...", jobId); CloudJob job = batchClient.JobOperations.CreateJob(); job.Id = jobId; job.PoolInformation = new PoolInformation { PoolId = poolId }; await job.CommitAsync(); }위의 코드는 일괄 처리 클라이언트를 사용하여 작업을 만듭니다. 이 메서드는 지정된 작업 ID와 풀에 대한 정보를 할당합니다.
작업 추가
작업을 만든 후 마지막 단계는 작업에 작업을 추가하는 것입니다. 다음 메서드인
AddTaskAsync()를 Program.cs에 추가하십시오.private static async Task<List<CloudTask>> AddTasksAsync(BatchClient batchClient, string jobId, List<ResourceFile> inputFiles, string outputContainerSasUrl) { Console.WriteLine("Adding {0} tasks to job [{1}]...", inputFiles.Count, jobId); // Create a collection to hold the tasks added to the job List<CloudTask> tasks = new List<CloudTask>(); for (int i = 0; i < inputFiles.Count; i++) { // Assign a task ID for each iteration string taskId = String.Format("Task{0}", i); // Define task command line to convert the video format from MP4 to animated GIF using ffmpeg. // Note that ffmpeg syntax specifies the format as the file extension of the input file // and the output file respectively. In this case inputs are MP4. string appPath = String.Format("%AZ_BATCH_APP_PACKAGE_{0}#{1}%", appPackageId, appPackageVersion); string inputMediaFile = inputFiles[i].FilePath; string outputMediaFile = String.Format("{0}{1}", System.IO.Path.GetFileNameWithoutExtension(inputMediaFile), ".gif"); // This is the dos command built by using the ffmpeg application package, the paths from the input container string taskCommandLine = String.Format("cmd /c {0}\\ffmpeg-3.4-win64-static\\bin\\ffmpeg.exe -i {1} {2}", appPath, inputMediaFile, outputMediaFile); // Create a cloud task (with the task ID and command line) and add it to the task list CloudTask task = new CloudTask(taskId, taskCommandLine); task.ResourceFiles = new List<ResourceFile> { inputFiles[i] }; // Task output file will be uploaded to the output container in Storage. List<OutputFile> outputFileList = new List<OutputFile>(); OutputFileBlobContainerDestination outputContainer = new OutputFileBlobContainerDestination(outputContainerSasUrl); OutputFile outputFile = new OutputFile(outputMediaFile, new OutputFileDestination(outputContainer), new OutputFileUploadOptions(OutputFileUploadCondition.TaskSuccess)); outputFileList.Add(outputFile); task.OutputFiles = outputFileList; tasks.Add(task); } // Call BatchClient.JobOperations.AddTask() to add the tasks as a collection rather than making a // separate call for each. Bulk task submission helps to ensure efficient underlying API // calls to the Batch service. await batchClient.JobOperations.AddTaskAsync(jobId, tasks); return tasks; }이 최종 메서드는 앱의 모든 복잡한 작업을 수행합니다. 파일이 업로드될 때마다 작업이 추가됩니다. 이 작업은 셸 명령의 형태를 취합니다. 애플리케이션 패키지를 사용했기 때문에 앱(
ffmpeg)이 특정 위치의 각 노드에 설치되었습니다. Batch 서비스는 다음을 통해 액세스할 수 있도록 노드의 환경 변수에 해당 위치를 저장합니다.%AZ_BATCH_APP_PACKAGE_ffmpeg#3.4%이 방법을 사용하면 최신 버전의 앱을 쉽게 업로드하고 증분할 수
ffmpeg있습니다. 이 명령은 zip 폴더를 살펴보고 다음을 실행합니다.ffmpeg.exe -i input-filename output-filename최상의 성능을 위해 태스크가
batchClient.JobOperations.AddTaskAsync에 목록으로 추가됩니다. 이는 각 파일에 대해 별도의 호출을 하는 것보다 더 효율적입니다.
콘솔 앱 테스트
코드 편집기에서 마우스 오른쪽 단추를 클릭하고 저장을 선택한 다음 마우스 오른쪽 단추를 클릭하고 종료를 선택합니다.
클라우드 셸에서 앱을 빌드하고 실행합니다.
dotnet run다음 메시지는 터미널에 기록됩니다.
Creating container [input].
Creating container [output].
Uploading file ~\cutifypets\InputFiles\3.mp4 to container [input]...
Uploading file ~\cutifypets\InputFiles\2.mp4 to container [input]...
Uploading file ~\cutifypets\InputFiles\4.mp4 to container [input]...
Uploading file ~\cutifypets\InputFiles\1.mp4 to container [input]...
Uploading file ~\cutifypets\InputFiles\5.mp4 to container [input]...
Uploading file ~\cutifypets\InputFiles\6.mp4 to container [input]...
Creating pool [WinFFmpegPool]...
Creating job [WinFFmpegJob]...
Adding 6 tasks to job [WinFFmpegJob]...
콘솔 앱이 작업을 추가하는 즉시 닫힙니다. Azure에서는 풀, 노드, 작업 및 태스크가 만들어집니다. 앱이 종료될 때 앱 내에서 발생하는 일을 모니터링하는 것은 없습니다. 변환의 현재 상태를 확인하고 결과를 확인하려면 Azure Portal로 돌아갑니다.
Azure Portal에서
cutify에서 시작하는 Batch 계정을 선택합니다.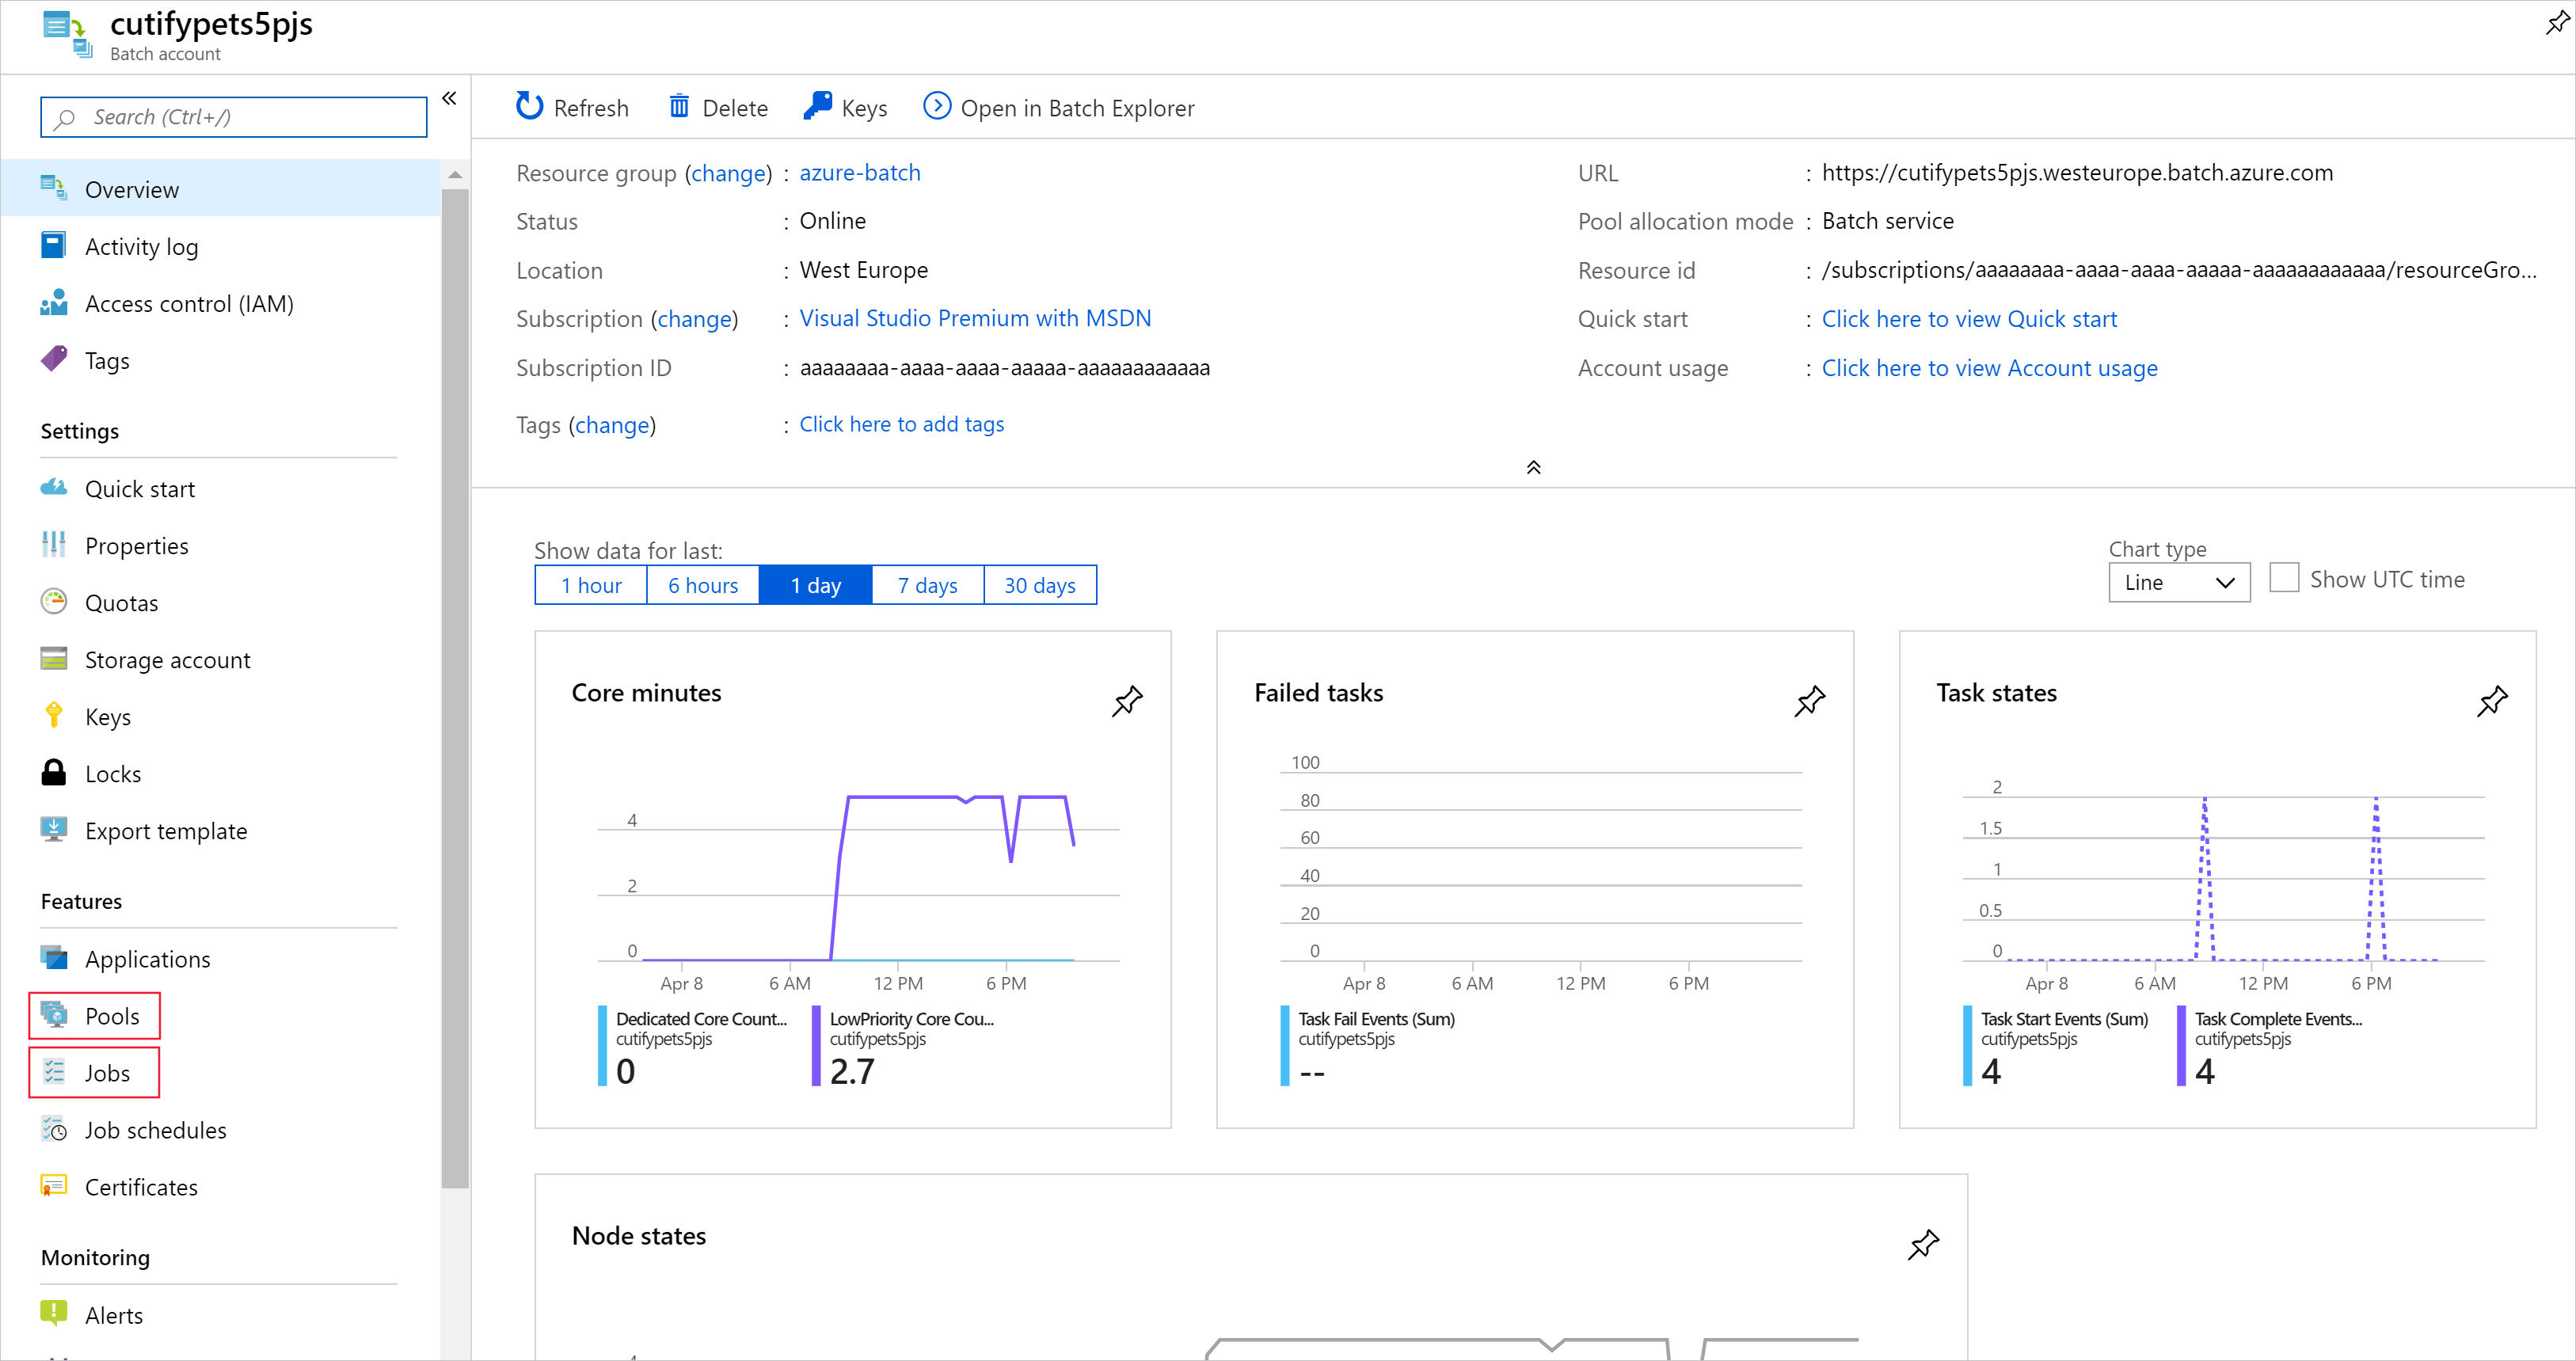
상태 대시보드는 개요 페이지에 표시됩니다. 여기에서 현재 실행 중인 작업의 상태와 노드 풀을 확인할 수 있습니다.
왼쪽 메뉴에서 Features 아래의 Jobs를 선택한 다음 WinFFmpegJob을 선택합니다. 이 페이지에는 작업의 현재 상태가 표시됩니다.
작업이 완료되면 첫 번째 연습에서 만든 스토리지 계정으로 돌아갑니다.
왼쪽 메뉴에서 데이터 스토리지 아래의 컨테이너를 선택한 다음 출력 폴더를 선택합니다.
이 폴더에는 변환된 애니메이션 GIF 파일이 포함되어 있습니다. 파일을 다운로드하여 가장 귀여운 애완 동물 비디오를 확인합니다.