연습 - 스토리지 계정 및 데이터베이스 시드
Bicep 파일에 정의된 Azure App Service 앱에 웹 사이트의 애플리케이션을 빌드하고 배포하도록 파이프라인을 업데이트했습니다. 그러나 데이터베이스가 아직 작동하지 않아 스모크 테스트 스테이지가 실패합니다. 이 단원에서는 새로운 Azure SQL 논리 서버 및 데이터베이스를 배포하고, 데이터베이스의 스키마를 빌드 및 배포하도록 파이프라인을 구성합니다. 또한 팀이 웹 사이트를 사용해 볼 수 있도록 테스트 환경에 대한 몇 가지 샘플 제품 데이터를 추가하도록 파이프라인을 업데이트합니다.
이 과정에서 다음 작업을 수행합니다.
- Azure 스토리지 계정에 BLOB 컨테이너 추가
- Azure SQL 논리 서버 및 데이터베이스를 추가합니다.
- 데이터베이스 프로젝트를 DACPAC 파일로 빌드하기 위해 빌드 스테이지를 업데이트합니다.
- Azure SQL 논리 서버 및 데이터베이스의 변수 그룹에 새 변수를 추가합니다.
- 새 변수를 매개 변수 값으로 사용하도록 배포 스테이지를 업데이트합니다.
- 새 파이프라인 단계를 추가하여 DACPAC 파일을 배포합니다.
- 파이프라인을 실행하고 웹 사이트를 확인합니다.
스토리지 컨테이너 추가
Bicep 파일은 이미 스토리지 계정을 정의하지만 BLOB 컨테이너는 정의하지 않습니다. 여기서 BLOB 컨테이너를 Bicep 파일에 추가합니다. 또한 구성 설정을 사용하여 스토리지 계정 및 BLOB 컨테이너의 이름을 애플리케이션에 제공합니다. 이런 방식으로 앱은 액세스할 스토리지 계정을 파악합니다.
Visual Studio Code의 deploy 폴더에서 main.bicep 파일을 엽니다.
리소스 이름을 정의하는 변수 아래에(27행 근처) Blob 스토리지 컨테이너 이름에 대한 새 변수 정의를 추가합니다.
var storageAccountImagesBlobContainerName = 'toyimages'storageAccount리소스를 업데이트하여 BLOB 컨테이너를 정의합니다.resource storageAccount 'Microsoft.Storage/storageAccounts@2022-09-01' = { name: storageAccountName location: location kind: 'StorageV2' sku: environmentConfigurationMap[environmentType].storageAccount.sku resource blobService 'blobServices' = { name: 'default' resource storageAccountImagesBlobContainer 'containers' = { name: storageAccountImagesBlobContainerName properties: { publicAccess: 'Blob' } } } }앱의
appSettings속성을 업데이트하여 스토리지 계정 이름, Blob 엔드포인트, Blob 컨테이너 이름에 대해 세 개의 새 애플리케이션 설정을 추가합니다.resource appServiceApp 'Microsoft.Web/sites@2022-03-01' = { name: appServiceAppName location: location properties: { serverFarmId: appServicePlan.id httpsOnly: true siteConfig: { appSettings: [ { name: 'APPINSIGHTS_INSTRUMENTATIONKEY' value: applicationInsights.properties.InstrumentationKey } { name: 'APPLICATIONINSIGHTS_CONNECTION_STRING' value: applicationInsights.properties.ConnectionString } { name: 'ReviewApiUrl' value: reviewApiUrl } { name: 'ReviewApiKey' value: reviewApiKey } { name: 'StorageAccountName' value: storageAccount.name } { name: 'StorageAccountBlobEndpoint' value: storageAccount.properties.primaryEndpoints.blob } { name: 'StorageAccountImagesContainerName' value: storageAccount::blobService::storageAccountImagesBlobContainer.name } ] } } }파일 끝부분에 스토리지 계정 및 Blob 컨테이너의 이름을 표시하는 새 출력을 추가합니다.
output storageAccountName string = storageAccount.name
output storageAccountImagesBlobContainerName string = storageAccount::blobService::storageAccountImagesBlobContainer.name
파일의 변경 내용을 저장합니다.
Git 리포지토리에 대한 변경 내용을 커밋하지만 아직 푸시하지는 않습니다. Visual Studio Code 터미널에서 다음 명령을 실행합니다.
git add .
git commit -m "Add storage container"
Azure SQL 논리 서버 및 데이터베이스 추가
Bicep 파일은 현재 Azure SQL 논리 서버 또는 데이터베이스를 배포하지 않습니다. 본 섹션에서는 이러한 리소스를 Bicep 파일에 추가합니다.
main.bicep 파일에서
reviewApiKey매개 변수 아래에 두 개의 새로운 매개 변수를 추가합니다.@description('The administrator login username for the SQL server.') param sqlServerAdministratorLogin string @secure() @description('The administrator login password for the SQL server.') param sqlServerAdministratorLoginPassword string리소스 이름을 정의하는 변수 아래에 새 변수를 추가하여 Azure SQL 논리 서버 및 데이터베이스의 이름을 정의합니다.
var sqlServerName = 'toy-website-${resourceNameSuffix}'
var sqlDatabaseName = 'Toys'
방금 추가한 변수 아래에 애플리케이션이 데이터베이스에 액세스하기 위한 연결 문자열을 만드는 새 변수를 정의합니다.
// Define the connection string to access Azure SQL.
var sqlDatabaseConnectionString = 'Server=tcp:${sqlServer.properties.fullyQualifiedDomainName},1433;Initial Catalog=${sqlDatabase.name};Persist Security Info=False;User ID=${sqlServerAdministratorLogin};Password=${sqlServerAdministratorLoginPassword};MultipleActiveResultSets=False;Encrypt=True;TrustServerCertificate=False;Connection Timeout=30;'
참고
편의를 위해 애플리케이션은 관리자 로그인 및 암호를 사용하여 데이터베이스에 액세스합니다. 그러나 이 방법은 프로덕션 솔루션에는 적합하지 않습니다. App Service 관리 ID를 사용하여 데이터베이스에 액세스하고 관리 ID에 애플리케이션에 필요한 최소 권한을 부여하는 것이 좋습니다. 요약 페이지에서 자세한 정보에 대한 링크를 제공합니다.
파일의 끝 부분에 있는 출력 위에 Azure SQL 논리 서버 및 데이터베이스 리소스를 추가합니다.
resource sqlServer 'Microsoft.Sql/servers@2022-05-01-preview' = {
  name: sqlServerName
  location: location
  properties: {
    administratorLogin: sqlServerAdministratorLogin
    administratorLoginPassword: sqlServerAdministratorLoginPassword
  }
}

resource sqlServerFirewallRule 'Microsoft.Sql/servers/firewallRules@2022-05-01-preview' = {
  parent: sqlServer
  name: 'AllowAllWindowsAzureIps'
  properties: {
    endIpAddress: '0.0.0.0'
    startIpAddress: '0.0.0.0'
  }
}

resource sqlDatabase 'Microsoft.Sql/servers/databases@2022-05-01-preview' = {
  parent: sqlServer
  name: sqlDatabaseName
  location: location
  sku: environmentConfigurationMap[environmentType].sqlDatabase.sku
}
각 환경의 데이터베이스에 사용할
sku값을 정의하려면environmentConfigurationMap변수를 업데이트합니다.var environmentConfigurationMap = { Production: { appServicePlan: { sku: { name: 'S1' capacity: 1 } } storageAccount: { sku: { name: 'Standard_LRS' } } sqlDatabase: { sku: { name: 'Standard' tier: 'Standard' } } } Test: { appServicePlan: { sku: { name: 'F1' } } storageAccount: { sku: { name: 'Standard_GRS' } } sqlDatabase: { sku: { name: 'Standard' tier: 'Standard' } } } }데이터베이스 연결 문자열에 대한 App Service 앱에 다른 앱 설정을 추가합니다.
resource appServiceApp 'Microsoft.Web/sites@2022-03-01' = {
  name: appServiceAppName
  location: location
  properties: {
    serverFarmId: appServicePlan.id
    httpsOnly: true
    siteConfig: {
      appSettings: [
        {
          name: 'APPINSIGHTS_INSTRUMENTATIONKEY'
          value: applicationInsights.properties.InstrumentationKey
        }
        {
          name: 'APPLICATIONINSIGHTS_CONNECTION_STRING'
          value: applicationInsights.properties.ConnectionString
        }
        {
          name: 'ReviewApiUrl'
          value: reviewApiUrl
        }
        {
          name: 'ReviewApiKey'
          value: reviewApiKey
        }
        {
          name: 'StorageAccountName'
          value: storageAccount.name
        }
        {
          name: 'StorageAccountBlobEndpoint'
          value: storageAccount.properties.primaryEndpoints.blob
        }
        {
          name: 'StorageAccountImagesContainerName'
          value: storageAccount::blobService::storageAccountImagesBlobContainer.name
        }
        {
          name: 'SqlDatabaseConnectionString'
          value: sqlDatabaseConnectionString
        }
      ]
    }
  }
}
파일의 아래쪽에서 출력을 추가하여 Azure SQL 논리 서버의 호스트 이름과 데이터베이스 이름을 표시합니다.
output appServiceAppName string = appServiceApp.name
output appServiceAppHostName string = appServiceApp.properties.defaultHostName
output storageAccountName string = storageAccount.name
output storageAccountImagesBlobContainerName string = storageAccount::blobService::storageAccountImagesBlobContainer.name
output sqlServerFullyQualifiedDomainName string = sqlServer.properties.fullyQualifiedDomainName
output sqlDatabaseName string = sqlDatabase.name
파일의 변경 내용을 저장합니다.
데이터베이스 프로젝트에 대한 새 빌드 단계 추가
웹 사이트 개발자는 웹 사이트 데이터베이스 테이블을 배포하고 구성하는 Visual Studio 데이터베이스 프로젝트를 준비했습니다. 여기서는 파이프라인 ‘빌드’ 스테이지를 업데이트하여 데이터베이스 프로젝트를 DACPAC 파일에 빌드하고 파이프라인 아티팩트로 게시합니다.
‘deploy/pipeline-templates’ 폴더에서 ‘build.yml’ 파일을 엽니다.
Visual Studio 데이터베이스 프로젝트를 빌드하려면 생성된 DACPAC 파일을 준비 폴더에 복사하고, 파이프라인 아티팩트로 게시하고, 다음 단계를 추가합니다.
jobs:
- job: Build
  displayName: Build application and database
  pool:
    vmImage: windows-latest

  steps:

  # Build, copy, and publish the website.
  - task: DotNetCoreCLI@2
    displayName: Build publishable website
    inputs:
      command: 'publish'
      publishWebProjects: true

  - task: CopyFiles@2
    displayName: Copy publishable website
    inputs:
      sourceFolder: '$(Build.SourcesDirectory)/src/ToyCompany/ToyCompany.Website/bin'
      contents: '**/publish.zip'
      targetFolder: '$(Build.ArtifactStagingDirectory)/website'
      flattenFolders: true

  - task: PublishBuildArtifacts@1
    displayName: Publish website as pipeline artifact
    inputs:
      pathToPublish: '$(Build.ArtifactStagingDirectory)/website'
      artifactName: 'website'

  # Build, copy, and publish the DACPAC file.
  - task: VSBuild@1
    displayName: Build Visual Studio solution
    inputs:
      solution: '$(Build.SourcesDirectory)/src/ToyCompany/ToyCompany.Database/ToyCompany.Database.sqlproj'

  - task: CopyFiles@2
    displayName: Copy DACPAC
    inputs:
      sourceFolder: '$(Build.SourcesDirectory)/src/ToyCompany/ToyCompany.Database/bin'
      contents: '**/*.dacpac'
      targetFolder: '$(Build.ArtifactStagingDirectory)/database'
      flattenFolders: true

  - task: PublishBuildArtifacts@1
    displayName: Publish DACPAC as pipeline artifact
    inputs:
      pathToPublish: '$(Build.ArtifactStagingDirectory)/database'
      artifactName: 'database'
파일의 변경 내용을 저장합니다.
변수 그룹에 값 추가
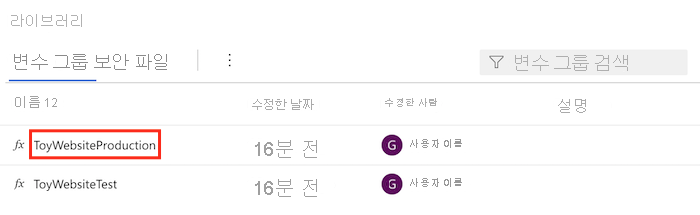
브라우저에서 Pipelines>라이브러리로 이동합니다.
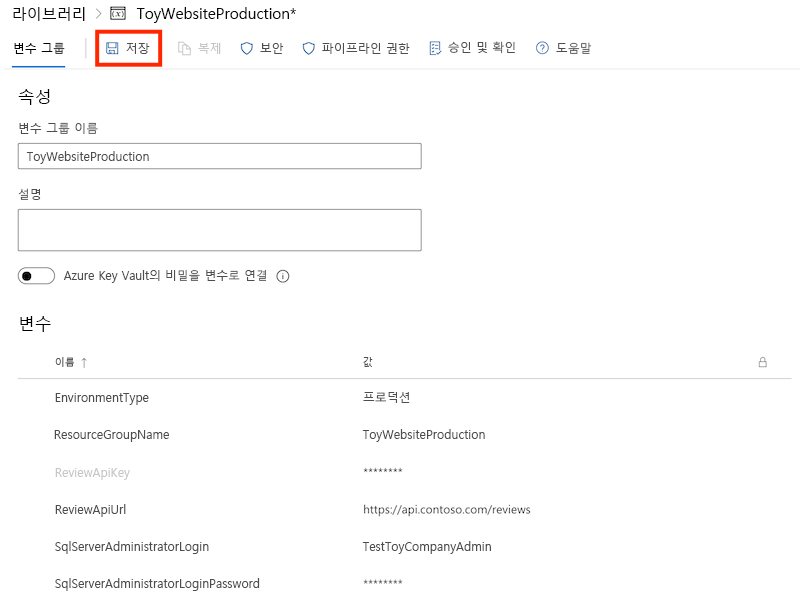
ToyWebsiteProduction 변수 그룹을 선택합니다.
변수 그룹에 다음 변수를 추가합니다.
이름 값 SqlServerAdministratorLogin ToyCompanyAdmin SqlServerAdministratorLoginPassword SecurePassword!111 SqlServerAdministratorLoginPassword 변수 옆에 있는 자물쇠 아이콘을 선택합니다. 이 기능은 Azure Pipelines로 하여금 변수의 값을 안전하게 처리하도록 지시합니다.

변수 그룹을 저장합니다.
프로세스를 반복하여 ToyWebsiteTest 변수 그룹에 다음 변수를 추가합니다.
이름 값 SqlServerAdministratorLogin TestToyCompanyAdmin SqlServerAdministratorLoginPassword SecurePassword!999 SqlServerAdministratorLoginPassword 변수 옆에 있는 자물쇠 아이콘을 선택하고 변수 그룹을 저장합니다.
유효성 검사 및 미리 보기 스테이지에 매개 변수 값 추가
이제 Bicep 파일에는 sqlServerAdministratorLogin 및 sqlServerAdministratorLoginPassword라는 두 개의 새로운 필수 매개 변수가 있습니다. 여기서는 ‘유효성 검사’ 및 ‘미리 보기’ 스테이지 모두에 대해 변수 그룹에서 이러한 매개 변수 값을 전파합니다.
Visual Studio Code에서 ‘deploy/pipeline-templates’ 폴더의 ‘deploy.yml’ 파일을 엽니다.
새 매개 변수를 추가하여 유효성 검증 스테이지의 RunPreflightValidation 단계를 업데이트합니다.
- task: AzureResourceManagerTemplateDeployment@3
  name: RunPreflightValidation
  displayName: Run preflight validation
  inputs:
    connectedServiceName: ToyWebsite${{parameters.environmentType}}
    location: ${{parameters.deploymentDefaultLocation}}
    deploymentMode: Validation
    resourceGroupName: $(ResourceGroupName)
    csmFile: deploy/main.bicep
    overrideParameters: >
      -environmentType $(EnvironmentType)
      -reviewApiUrl $(ReviewApiUrl)
      -reviewApiKey $(ReviewApiKey)
      -sqlServerAdministratorLogin $(SqlServerAdministratorLogin)
      -sqlServerAdministratorLoginPassword $(SqlServerAdministratorLoginPassword)
새 매개 변수를 추가하여 미리 보기 스테이지의 RunWhatIf 단계를 업데이트합니다.
inlineScript: |
  az deployment group what-if \
    --resource-group $(ResourceGroupName) \
    --template-file deploy/main.bicep \
    --parameters environmentType=$(EnvironmentType) \
                 reviewApiUrl=$(ReviewApiUrl) \
                 reviewApiKey=$(ReviewApiKey) \
                 sqlServerAdministratorLogin=$(SqlServerAdministratorLogin) \
                 sqlServerAdministratorLoginPassword=$(SqlServerAdministratorLoginPassword)
Important
reviewApiKey매개 변수 값을 설정하는 행의 끝부분과 다음 행에 백슬래시 문자(\)를 추가해야 합니다.\문자는 동일한 Azure CLI 명령에 추가적인 행이 있음을 나타냅니다.
배포 스테이지에 매개 변수 값 추가
새 매개 변수를 추가하여 배포 스테이지의 DeployBicepFile 단계를 업데이트합니다.
- task: AzureResourceManagerTemplateDeployment@3
  name: DeployBicepFile
  displayName: Deploy Bicep file
  inputs:
    connectedServiceName: ToyWebsite${{parameters.environmentType}}
    deploymentName: $(Build.BuildNumber)
    location: ${{parameters.deploymentDefaultLocation}}
    resourceGroupName: $(ResourceGroupName)
    csmFile: deploy/main.bicep
    overrideParameters: >
      -environmentType $(EnvironmentType)
      -reviewApiUrl $(ReviewApiUrl)
      -reviewApiKey $(ReviewApiKey)
      -sqlServerAdministratorLogin $(SqlServerAdministratorLogin)
      -sqlServerAdministratorLoginPassword $(SqlServerAdministratorLoginPassword)
    deploymentOutputs: deploymentOutputs
스토리지 계정 및 Azure SQL 리소스에 대해 최근에 추가한 Bicep 출력의 값을 포함하는 파이프라인 변수를 만듭니다.
- bash: |
    echo "##vso[task.setvariable variable=appServiceAppName]$(echo $DEPLOYMENT_OUTPUTS | jq -r '.appServiceAppName.value')"
    echo "##vso[task.setvariable variable=appServiceAppHostName;isOutput=true]$(echo $DEPLOYMENT_OUTPUTS | jq -r '.appServiceAppHostName.value')"
    echo "##vso[task.setvariable variable=storageAccountName]$(echo $DEPLOYMENT_OUTPUTS | jq -r '.storageAccountName.value')"
    echo "##vso[task.setvariable variable=storageAccountImagesBlobContainerName]$(echo $DEPLOYMENT_OUTPUTS | jq -r '.storageAccountImagesBlobContainerName.value')"
    echo "##vso[task.setvariable variable=sqlServerFullyQualifiedDomainName]$(echo $DEPLOYMENT_OUTPUTS | jq -r '.sqlServerFullyQualifiedDomainName.value')"
    echo "##vso[task.setvariable variable=sqlDatabaseName]$(echo $DEPLOYMENT_OUTPUTS | jq -r '.sqlDatabaseName.value')"
  name: SaveDeploymentOutputs
  displayName: Save deployment outputs into variables
  env:
    DEPLOYMENT_OUTPUTS: $(deploymentOutputs)
데이터베이스 배포 단계 추가
본 섹션에서는 웹 사이트의 데이터베이스 구성 요소를 배포하는 데 필요한 단계를 정의합니다. 먼저 파이프라인이 이전에 빌드한 DACPAC 파일을 배포하는 단계를 추가합니다. 그런 다음 데이터베이스 및 스토리지 계정에 샘플 데이터를 추가하지만, 이는 비프로덕션 환경에만 해당됩니다.
‘배포’ 스테이지의 ‘DeployWebsiteApp’ 단계 아래에 DACPAC 파일을 배포하는 새 단계를 추가합니다.
- task: SqlAzureDacpacDeployment@1
  name: DeploySqlDatabaseDacpac
  displayName: Deploy DACPAC to database
  inputs:
    ConnectedServiceNameARM: ToyWebsite${{parameters.environmentType}}
    authenticationType: 'server'
    serverName: $(sqlServerFullyQualifiedDomainName)
    databaseName: $(sqlDatabaseName)
    sqlUsername: $(SqlServerAdministratorLogin)
    sqlPassword: $(SqlServerAdministratorLoginPassword)
    deployType: 'DacpacTask'
    deploymentAction: 'Publish'
    dacpacFile: '$(Pipeline.Workspace)/database/ToyCompany.Database.dacpac'
방금 추가한 단계 아래에서 샘플 데이터를 통해 데이터베이스를 시드하는 단계를 정의합니다.
- ${{ if ne(parameters.environmentType, 'Production') }}:
  - task: SqlAzureDacpacDeployment@1
    name: AddTestDataToDatabase
    displayName: Add test data to database
    inputs:
      ConnectedServiceNameARM: ToyWebsite${{parameters.environmentType}}
      authenticationType: 'server'
      serverName: $(sqlServerFullyQualifiedDomainName)
      databaseName: $(sqlDatabaseName)
      sqlUsername: $(SqlServerAdministratorLogin)
      sqlPassword: $(SqlServerAdministratorLoginPassword)
      deployType: 'sqlTask'
      sqlFile: 'deploy/sample-data/Toys.sql'
이 단계에는 비프로덕션 환경에서만 실행되도록 조건이 적용되어 있습니다.
방금 추가한 단계 아래에 조건 범위 내에서 Azure CLI를 사용하여 샘플 완구 이미지를 Blob 컨테이너에 업로드하는 단계를 추가합니다.
- task: AzureCLI@2
  name: UploadSampleImages
  displayName: Upload sample images
  inputs:
    azureSubscription: ToyWebsite${{parameters.environmentType}}
    scriptType: 'bash'
    scriptLocation: 'inlineScript'
    inlineScript: |
      az storage blob upload-batch \
        --account-name $(storageAccountName) \
        --destination $(storageAccountImagesBlobContainerName) \
        --source 'deploy/sample-data/toyimages'
파일 확인 및 변경 내용 커밋
‘main.bicep’ 파일이 다음과 같이 표시되는지 확인합니다.
@description('The location into which your Azure resources should be deployed.')
param location string = resourceGroup().location

@description('Select the type of environment you want to provision. Allowed values are Production and Test.')
@allowed([
  'Production'
  'Test'
])
param environmentType string

@description('A unique suffix to add to resource names that need to be globally unique.')
@maxLength(13)
param resourceNameSuffix string = uniqueString(resourceGroup().id)

@description('The URL to the product review API.')
param reviewApiUrl string

@secure()
@description('The API key to use when accessing the product review API.')
param reviewApiKey string

@description('The administrator login username for the SQL server.')
param sqlServerAdministratorLogin string

@secure()
@description('The administrator login password for the SQL server.')
param sqlServerAdministratorLoginPassword string

// Define the names for resources.
var appServiceAppName = 'toy-website-${resourceNameSuffix}'
var appServicePlanName = 'toy-website'
var logAnalyticsWorkspaceName = 'workspace-${resourceNameSuffix}'
var applicationInsightsName = 'toywebsite'
var storageAccountName = 'mystorage${resourceNameSuffix}'
var storageAccountImagesBlobContainerName = 'toyimages'
var sqlServerName = 'toy-website-${resourceNameSuffix}'
var sqlDatabaseName = 'Toys'

// Define the connection string to access Azure SQL.
var sqlDatabaseConnectionString = 'Server=tcp:${sqlServer.properties.fullyQualifiedDomainName},1433;Initial Catalog=${sqlDatabase.name};Persist Security Info=False;User ID=${sqlServerAdministratorLogin};Password=${sqlServerAdministratorLoginPassword};MultipleActiveResultSets=False;Encrypt=True;TrustServerCertificate=False;Connection Timeout=30;'

// Define the SKUs for each component based on the environment type.
var environmentConfigurationMap = {
  Production: {
    appServicePlan: {
      sku: {
        name: 'S1'
        capacity: 1
      }
    }
    storageAccount: {
      sku: {
        name: 'Standard_LRS'
      }
    }
    sqlDatabase: {
      sku: {
        name: 'Standard'
        tier: 'Standard'
      }
    }
  }
  Test: {
    appServicePlan: {
      sku: {
        name: 'F1'
      }
    }
    storageAccount: {
      sku: {
        name: 'Standard_GRS'
      }
    }
    sqlDatabase: {
      sku: {
        name: 'Standard'
        tier: 'Standard'
      }
    }
  }
}

resource appServicePlan 'Microsoft.Web/serverfarms@2022-03-01' = {
  name: appServicePlanName
  location: location
  sku: environmentConfigurationMap[environmentType].appServicePlan.sku
}

resource appServiceApp 'Microsoft.Web/sites@2022-03-01' = {
  name: appServiceAppName
  location: location
  properties: {
    serverFarmId: appServicePlan.id
    httpsOnly: true
    siteConfig: {
      appSettings: [
        {
          name: 'APPINSIGHTS_INSTRUMENTATIONKEY'
          value: applicationInsights.properties.InstrumentationKey
        }
        {
          name: 'APPLICATIONINSIGHTS_CONNECTION_STRING'
          value: applicationInsights.properties.ConnectionString
        }
        {
          name: 'ReviewApiUrl'
          value: reviewApiUrl
        }
        {
          name: 'ReviewApiKey'
          value: reviewApiKey
        }
        {
          name: 'StorageAccountName'
          value: storageAccount.name
        }
        {
          name: 'StorageAccountBlobEndpoint'
          value: storageAccount.properties.primaryEndpoints.blob
        }
        {
          name: 'StorageAccountImagesContainerName'
          value: storageAccount::blobService::storageAccountImagesBlobContainer.name
        }
        {
          name: 'SqlDatabaseConnectionString'
          value: sqlDatabaseConnectionString
        }
      ]
    }
  }
}

resource logAnalyticsWorkspace 'Microsoft.OperationalInsights/workspaces@2022-10-01' = {
  name: logAnalyticsWorkspaceName
  location: location
}

resource applicationInsights 'Microsoft.Insights/components@2020-02-02' = {
  name: applicationInsightsName
  location: location
  kind: 'web'
  properties: {
    Application_Type: 'web'
    Request_Source: 'rest'
    Flow_Type: 'Bluefield'
    WorkspaceResourceId: logAnalyticsWorkspace.id
  }
}

resource storageAccount 'Microsoft.Storage/storageAccounts@2022-09-01' = {
  name: storageAccountName
  location: location
  kind: 'StorageV2'
  sku: environmentConfigurationMap[environmentType].storageAccount.sku

  resource blobService 'blobServices' = {
    name: 'default'

    resource storageAccountImagesBlobContainer 'containers' = {
      name: storageAccountImagesBlobContainerName

      properties: {
        publicAccess: 'Blob'
      }
    }
  }
}

resource sqlServer 'Microsoft.Sql/servers@2022-05-01-preview' = {
  name: sqlServerName
  location: location
  properties: {
    administratorLogin: sqlServerAdministratorLogin
    administratorLoginPassword: sqlServerAdministratorLoginPassword
  }
}

resource sqlServerFirewallRule 'Microsoft.Sql/servers/firewallRules@2022-05-01-preview' = {
  parent: sqlServer
  name: 'AllowAllWindowsAzureIps'
  properties: {
    endIpAddress: '0.0.0.0'
    startIpAddress: '0.0.0.0'
  }
}

resource sqlDatabase 'Microsoft.Sql/servers/databases@2022-05-01-preview' = {
  parent: sqlServer
  name: sqlDatabaseName
  location: location
  sku: environmentConfigurationMap[environmentType].sqlDatabase.sku
}

output appServiceAppName string = appServiceApp.name
output appServiceAppHostName string = appServiceApp.properties.defaultHostName
output storageAccountName string = storageAccount.name
output storageAccountImagesBlobContainerName string = storageAccount::blobService::storageAccountImagesBlobContainer.name
output sqlServerFullyQualifiedDomainName string = sqlServer.properties.fullyQualifiedDomainName
output sqlDatabaseName string = sqlDatabase.name
다음과 같이 표시되지 않는 경우에는 파일 내용과 일치하도록 업데이트합니다.
‘deploy.yml’ 파일이 다음과 같이 표시되는지 확인합니다.
parameters:
- name: environmentType
  type: string
- name: deploymentDefaultLocation
  type: string
  default: westus3

stages:

- ${{ if ne(parameters.environmentType, 'Production') }}:
  - stage: Validate_${{parameters.environmentType}}
    displayName: Validate (${{parameters.environmentType}} Environment)
    jobs:
    - job: ValidateBicepCode
      displayName: Validate Bicep code
      variables:
      - group: ToyWebsite${{parameters.environmentType}}
      steps:
        - task: AzureResourceManagerTemplateDeployment@3
          name: RunPreflightValidation
          displayName: Run preflight validation
          inputs:
            connectedServiceName: ToyWebsite${{parameters.environmentType}}
            location: ${{parameters.deploymentDefaultLocation}}
            deploymentMode: Validation
            resourceGroupName: $(ResourceGroupName)
            csmFile: deploy/main.bicep
            overrideParameters: >
              -environmentType $(EnvironmentType)
              -reviewApiUrl $(ReviewApiUrl)
              -reviewApiKey $(ReviewApiKey)
              -sqlServerAdministratorLogin $(SqlServerAdministratorLogin)
              -sqlServerAdministratorLoginPassword $(SqlServerAdministratorLoginPassword)

- ${{ if eq(parameters.environmentType, 'Production') }}:
  - stage: Preview_${{parameters.environmentType}}
    displayName: Preview (${{parameters.environmentType}} Environment)
    jobs:
    - job: PreviewAzureChanges
      displayName: Preview Azure changes
      variables:
      - group: ToyWebsite${{parameters.environmentType}}
      steps:
        - task: AzureCLI@2
          name: RunWhatIf
          displayName: Run what-if
          inputs:
            azureSubscription: ToyWebsite${{parameters.environmentType}}
            scriptType: 'bash'
            scriptLocation: 'inlineScript'
            inlineScript: |
              az deployment group what-if \
                --resource-group $(ResourceGroupName) \
                --template-file deploy/main.bicep \
                --parameters environmentType=$(EnvironmentType) \
                             reviewApiUrl=$(ReviewApiUrl) \
                             reviewApiKey=$(ReviewApiKey) \
                             sqlServerAdministratorLogin=$(SqlServerAdministratorLogin) \
                             sqlServerAdministratorLoginPassword=$(SqlServerAdministratorLoginPassword)

- stage: Deploy_${{parameters.environmentType}}
  displayName: Deploy (${{parameters.environmentType}} Environment)
  jobs:
  - deployment: DeployWebsite
    displayName: Deploy website
    pool:
      vmImage: windows-latest
    variables:
    - group: ToyWebsite${{parameters.environmentType}}
    environment: ${{parameters.environmentType}}
    strategy:
      runOnce:
        deploy:
          steps:
            - checkout: self

            - task: AzureResourceManagerTemplateDeployment@3
              name: DeployBicepFile
              displayName: Deploy Bicep file
              inputs:
                connectedServiceName: ToyWebsite${{parameters.environmentType}}
                deploymentName: $(Build.BuildNumber)
                location: ${{parameters.deploymentDefaultLocation}}
                resourceGroupName: $(ResourceGroupName)
                csmFile: deploy/main.bicep
                overrideParameters: >
                  -environmentType $(EnvironmentType)
                  -reviewApiUrl $(ReviewApiUrl)
                  -reviewApiKey $(ReviewApiKey)
                  -sqlServerAdministratorLogin $(SqlServerAdministratorLogin)
                  -sqlServerAdministratorLoginPassword $(SqlServerAdministratorLoginPassword)
                deploymentOutputs: deploymentOutputs

            - bash: |
                echo "##vso[task.setvariable variable=appServiceAppName]$(echo $DEPLOYMENT_OUTPUTS | jq -r '.appServiceAppName.value')"
                echo "##vso[task.setvariable variable=appServiceAppHostName;isOutput=true]$(echo $DEPLOYMENT_OUTPUTS | jq -r '.appServiceAppHostName.value')"
                echo "##vso[task.setvariable variable=storageAccountName]$(echo $DEPLOYMENT_OUTPUTS | jq -r '.storageAccountName.value')"
                echo "##vso[task.setvariable variable=storageAccountImagesBlobContainerName]$(echo $DEPLOYMENT_OUTPUTS | jq -r '.storageAccountImagesBlobContainerName.value')"
                echo "##vso[task.setvariable variable=sqlServerFullyQualifiedDomainName]$(echo $DEPLOYMENT_OUTPUTS | jq -r '.sqlServerFullyQualifiedDomainName.value')"
                echo "##vso[task.setvariable variable=sqlDatabaseName]$(echo $DEPLOYMENT_OUTPUTS | jq -r '.sqlDatabaseName.value')"
              name: SaveDeploymentOutputs
              displayName: Save deployment outputs into variables
              env:
                DEPLOYMENT_OUTPUTS: $(deploymentOutputs)

            - task: AzureRmWebAppDeployment@4
              name: DeployWebsiteApp
              displayName: Deploy website
              inputs:
                appType: webApp
                ConnectionType: AzureRM
                azureSubscription: ToyWebsite${{parameters.environmentType}}
                ResourceGroupName: $(ResourceGroupName)
                WebAppName: $(appServiceAppName)
                Package: '$(Pipeline.Workspace)/website/publish.zip'

            - task: SqlAzureDacpacDeployment@1
              name: DeploySqlDatabaseDacpac
              displayName: Deploy DACPAC to database
              inputs:
                ConnectedServiceNameARM: ToyWebsite${{parameters.environmentType}}
                authenticationType: 'server'
                serverName: $(sqlServerFullyQualifiedDomainName)
                databaseName: $(sqlDatabaseName)
                sqlUsername: $(SqlServerAdministratorLogin)
                sqlPassword: $(SqlServerAdministratorLoginPassword)
                deployType: 'DacpacTask'
                deploymentAction: 'Publish'
                dacpacFile: '$(Pipeline.Workspace)/database/ToyCompany.Database.dacpac'

            - ${{ if ne(parameters.environmentType, 'Production') }}:
              - task: SqlAzureDacpacDeployment@1
                name: AddTestDataToDatabase
                displayName: Add test data to database
                inputs:
                  ConnectedServiceNameARM: ToyWebsite${{parameters.environmentType}}
                  authenticationType: 'server'
                  serverName: $(sqlServerFullyQualifiedDomainName)
                  databaseName: $(sqlDatabaseName)
                  sqlUsername: $(SqlServerAdministratorLogin)
                  sqlPassword: $(SqlServerAdministratorLoginPassword)
                  deployType: 'sqlTask'
                  sqlFile: 'deploy/sample-data/Toys.sql'

              - task: AzureCLI@2
                name: UploadSampleImages
                displayName: Upload sample images
                inputs:
                  azureSubscription: ToyWebsite${{parameters.environmentType}}
                  scriptType: 'bash'
                  scriptLocation: 'inlineScript'
                  inlineScript: |
                    az storage blob upload-batch \
                      --account-name $(storageAccountName) \
                      --destination $(storageAccountImagesBlobContainerName) \
                      --source 'deploy/sample-data/toyimages'

- stage: SmokeTest_${{parameters.environmentType}}
  displayName: Smoke Test (${{parameters.environmentType}} Environment)
  jobs:
  - job: SmokeTest
    displayName: Smoke test
    variables:
      appServiceAppHostName: $[ stageDependencies.Deploy_${{parameters.environmentType}}.DeployWebsite.outputs['DeployWebsite.SaveDeploymentOutputs.appServiceAppHostName'] ]
    steps:
      - task: PowerShell@2
        name: RunSmokeTests
        displayName: Run smoke tests
        inputs:
          targetType: inline
          script: |
            $container = New-PesterContainer `
              -Path 'deploy/Website.Tests.ps1' `
              -Data @{ HostName = '$(appServiceAppHostName)' }
            Invoke-Pester `
              -Container $container `
              -CI

      - task: PublishTestResults@2
        name: PublishTestResults
        displayName: Publish test results
        condition: always()
        inputs:
          testResultsFormat: NUnit
          testResultsFiles: 'testResults.xml'
다음과 같이 표시되지 않는 경우에는 파일 내용과 일치하도록 업데이트합니다.
파일의 변경 내용을 저장합니다.
변경 내용을 커밋하고 Git 리포지토리에 푸시합니다. Visual Studio Code 터미널에서 다음 명령을 실행합니다.
git add .
git commit -m "Add SQL database"
git push
파이프라인 실행
브라우저에서 Pipelines로 이동합니다.
가장 최근에 실행한 파이프라인을 선택합니다.
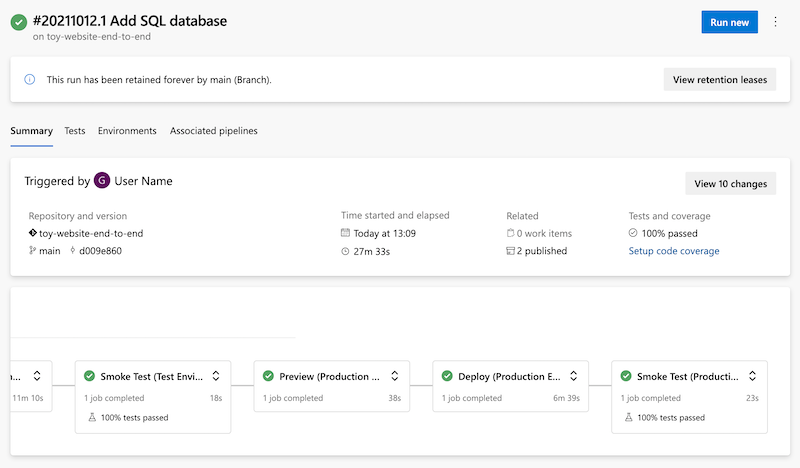
테스트 환경에 대한 모든 스테이지가 성공적으로 완료될 때까지 기다립니다. 이제 스모크 테스트도 성공합니다.

이번에는 다른 변수 그룹에 대한 권한이 필요하므로 ‘미리 보기(프로덕션 환경)’ 스테이지 전에 파이프라인이 다시 일시 중지되기를 기다립니다.
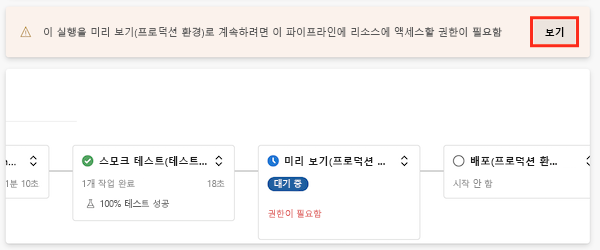
보기를 선택한 다음 허용>허용을 선택합니다.
‘미리 보기(프로덕션 환경)’ 스테이지가 성공적으로 완료됩니다.
파이프라인이 최종 단계를 완료할 때 모니터링합니다.
‘배포(프로덕션 환경)’ 스테이지가 성공적으로 완료되고 ‘스모크 테스트(프로덕션 환경)’ 스테이지도 성공적으로 완료됩니다.
웹 사이트 보기
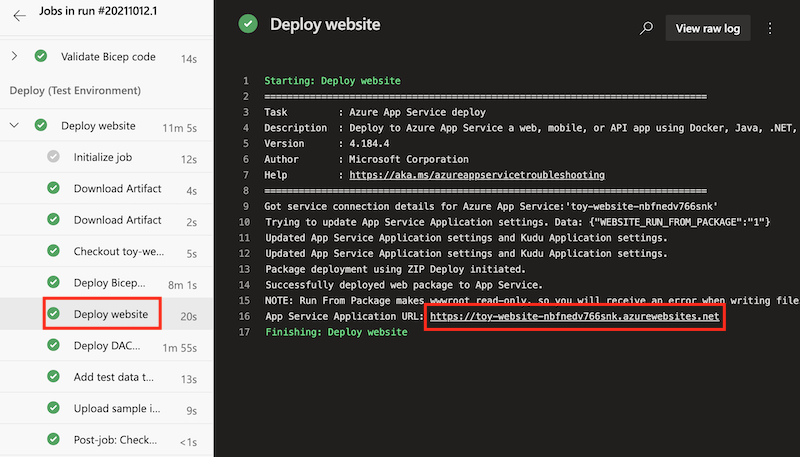
배포(테스트 환경) 스테이지를 선택하여 파이프라인 로그를 엽니다.
웹 사이트 배포 단계를 선택합니다.
Ctrl 키(macOS의 경우 ⌘)를 누른 채 App Service 앱의 URL을 선택하여 새 브라우저 탭에서 엽니다.
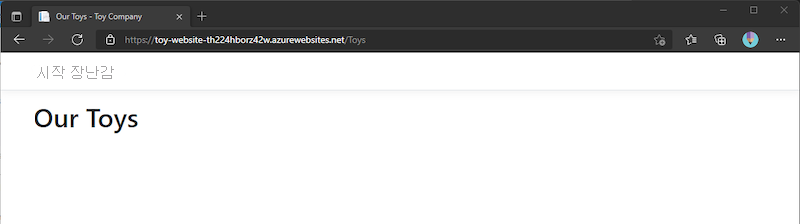
Toys를 선택합니다.

샘플 데이터가 테스트 환경에 표시됩니다.

배포(프로덕션 환경) 스테이지의 앱에 대해 이전 프로세스를 반복합니다.
프로덕션 환경에는 샘플 데이터가 표시되지 않습니다.
리소스 정리
이제 연습이 완료되었으므로 비용이 청구되지 않도록 리소스를 제거해야 합니다.
Visual Studio Code 터미널에서 다음 명령을 실행합니다.
az group delete --resource-group ToyWebsiteTest --yes --no-wait
az group delete --resource-group ToyWebsiteProduction --yes --no-wait
리소스 그룹은 백그라운드에서 삭제됩니다.
Remove-AzResourceGroup -Name ToyWebsiteTest -Force
Remove-AzResourceGroup -Name ToyWebsiteProduction -Force