연습 - 파이프라인에 린팅 및 유효성 검사 스테이지 추가
여러분은 팀원들에게 말하고 파이프라인을 사용하여 배포를 추가로 자동화하기로 결정했습니다. 여러분은 배포하려는 대상에 대한 신뢰도를 높이고 싶습니다.
이 연습에서는 파이프라인에 유효성 검사 스테이지를 추가합니다. 그런 다음, 각 배포 전에 Linter 및 실행 전 유효성 검사를 실행합니다.
프로세스 중에 다음을 수행합니다.
- 기존 파이프라인을 업데이트하여 Bicep 코드를 린팅하고 유효성을 검사하는 새로운 두 가지 스테이지를 추가합니다.
- 파이프라인을 실행합니다.
- 파이프라인에서 감지하는 문제를 해결합니다.
스테이지를 준비하도록 파이프라인 업데이트
먼저 파이프라인 파일을 업데이트하여 스테이지를 정의해야 합니다. Azure Pipelines는 자동으로 단일 스테이지를 만들지만, 곧 더 많은 스테이지를 추가할 예정이므로 파이프라인을 업데이트하여 명시적으로 스테이지를 정의해야 합니다.
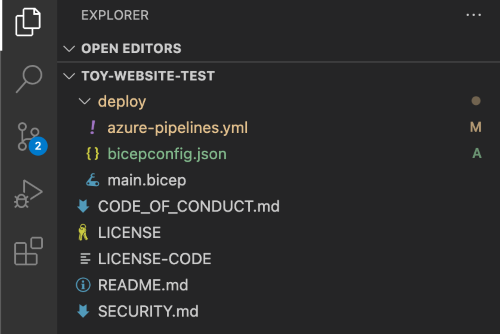
Visual Studio Code의 deploy 폴더에서 azure-pipelines.yml 파일을 엽니다.
파일의 14번째 줄부터 마지막 줄까지 제거합니다.
jobs:줄도 제거해야 합니다.파일의 맨 아래에 다음 코드를 추가합니다.
stages:

- stage: Deploy
  jobs:
  - job: Deploy
    steps:
      - task: AzureResourceManagerTemplateDeployment@3
        name: Deploy
        displayName: Deploy to Azure
        inputs:
          connectedServiceName: $(ServiceConnectionName)
          deploymentName: $(Build.BuildNumber)
          location: $(DeploymentDefaultLocation)
          resourceGroupName: $(ResourceGroupName)
          csmFile: deploy/main.bicep
          overrideParameters: >
            -environmentType $(EnvironmentType)
팁
YAML 파일은 들여쓰기를 구분합니다. 이 코드를 입력하든 아니면 붙여넣든, 들여쓰기가 정확해야 합니다. 다음 섹션에서는 파일이 일치하는지 확인할 수 있도록 전체 YAML 파이프라인 정의를 확인하겠습니다.
파이프라인에 린팅 및 유효성 검사 스테이지 추가
다음과 같이
stages:줄 아래에 린팅 스테이지를 추가합니다.- stage: Lint jobs: - job: LintCode displayName: Lint code steps: - script: | az bicep build --file deploy/main.bicep name: LintBicepCode displayName: Run Bicep linter이 스테이지에서는
az bicep build명령을 실행하여 Bicep 파일을 린팅하는 단일 단계를 정의합니다.방금 추가한 줄 아래에 유효성 검사 스테이지를 추가합니다.
- stage: Validate
  jobs:
  - job: ValidateBicepCode
    displayName: Validate Bicep code
    steps:
      - task: AzureResourceManagerTemplateDeployment@3
        name: RunPreflightValidation
        displayName: Run preflight validation
        inputs:
          connectedServiceName: $(ServiceConnectionName)
          location: $(deploymentDefaultLocation)
          deploymentMode: Validation
          resourceGroupName: $(ResourceGroupName)
          csmFile: deploy/main.bicep
          overrideParameters: >
            -environmentType $(EnvironmentType)
이 스테이지에서는 실행 전 유효성 검사를 실행하는 단일 단계를 정의합니다. 이 단계에는 서비스 연결에 대한 참조가 포함됩니다. 실행 전 유효성 검사 프로세스에서는 Azure와 통신해야 하기 때문입니다.
이제 파이프라인 정의에 3개의 스테이지가 있습니다. 첫 번째 작업은 Bicep 파일에 대한 Linter를 실행하고, 두 번째 작업은 실행 전 유효성 검사를 수행하고, 세 번째 작업은 Azure에 배포합니다.
파일을 저장합니다.
Linter 구성
기본적으로 Bicep Linter는 파일에서 문제를 발견하면 경고를 보냅니다. Azure Pipelines는 Linter 경고를 파이프라인을 중지해야 하는 문제로 처리하지 않습니다. 이 동작을 사용자 지정하려면 Linter를 다시 구성하는 bicepconfig.json 파일을 만들면 됩니다.
deploy 폴더에 새 파일을 추가하고 이름을 bicepconfig.json으로 지정합니다.
다음 코드를 파일에 복사합니다.
{
  "analyzers": {
    "core": {
      "enabled": true,
      "verbose": true,
      "rules": {
        "adminusername-should-not-be-literal": {
          "level": "error"
        },
        "max-outputs": {
          "level": "error"
        },
        "max-params": {
          "level": "error"
        },
        "max-resources": {
          "level": "error"
        },
        "max-variables": {
          "level": "error"
        },
        "no-hardcoded-env-urls": {
          "level": "error"
        },
        "no-unnecessary-dependson": {
          "level": "error"
        },
        "no-unused-params": {
          "level": "error"
        },
        "no-unused-vars": {
          "level": "error"
        },
        "outputs-should-not-contain-secrets": {
          "level": "error"
        },
        "prefer-interpolation": {
          "level": "error"
        },
        "secure-parameter-default": {
          "level": "error"
        },
        "simplify-interpolation": {
          "level": "error"
        },
        "protect-commandtoexecute-secrets": {
          "level": "error"
        },
        "use-stable-vm-image": {
          "level": "error"
        }
      }
    }
  }
}
파일을 저장합니다.
파이프라인 정의 확인 및 커밋
azure-pipelines.yml 파일이 다음 코드와 같은지 확인하세요.
trigger:
  batch: true
  branches:
    include:
    - main

pool:
  vmImage: ubuntu-latest

variables:
  - name: deploymentDefaultLocation
    value: westus3

stages:

- stage: Lint
  jobs:
  - job: LintCode
    displayName: Lint code
    steps:
      - script: |
          az bicep build --file deploy/main.bicep
        name: LintBicepCode
        displayName: Run Bicep linter

- stage: Validate
  jobs:
  - job: ValidateBicepCode
    displayName: Validate Bicep code
    steps:
      - task: AzureResourceManagerTemplateDeployment@3
        name: RunPreflightValidation
        displayName: Run preflight validation
        inputs:
          connectedServiceName: $(ServiceConnectionName)
          location: $(deploymentDefaultLocation)
          deploymentMode: Validation
          resourceGroupName: $(ResourceGroupName)
          csmFile: deploy/main.bicep
          overrideParameters: >
            -environmentType $(EnvironmentType)

- stage: Deploy
  jobs:
  - job: Deploy
    steps:
      - task: AzureResourceManagerTemplateDeployment@3
        name: Deploy
        displayName: Deploy to Azure
        inputs:
          connectedServiceName: $(ServiceConnectionName)
          deploymentName: $(Build.BuildNumber)
          location: $(DeploymentDefaultLocation)
          resourceGroupName: $(ResourceGroupName)
          csmFile: deploy/main.bicep
          overrideParameters: >
            -environmentType $(EnvironmentType)
같지 않으면 다음 예제와 일치하도록 업데이트한 후 저장합니다.
Visual Studio Code 터미널에서 다음 명령을 실행하여 변경 내용을 커밋하고 Git 리포지토리에 푸시합니다.
git add .
git commit -m "Add lint and validation stages"
git push
푸시하는 즉시 Azure Pipelines가 새 파이프라인 실행을 시작합니다.
파이프라인 실행 보기
브라우저에서 Pipelines로 이동합니다.
가장 최근에 실행한 파이프라인을 선택합니다.

파이프라인이 여전히 실행 중이면 완료될 때까지 기다립니다. Azure Pipelines는 자동으로 페이지를 최신 상태로 업데이트하지만 가끔 페이지를 새로 고치는 것이 좋습니다.
이제 YAML 파일에서 정의한 세 가지 스테이지가 파이프라인 실행에 표시됩니다. 또한 린팅 스테이지가 실패한 것을 볼 수 있습니다.
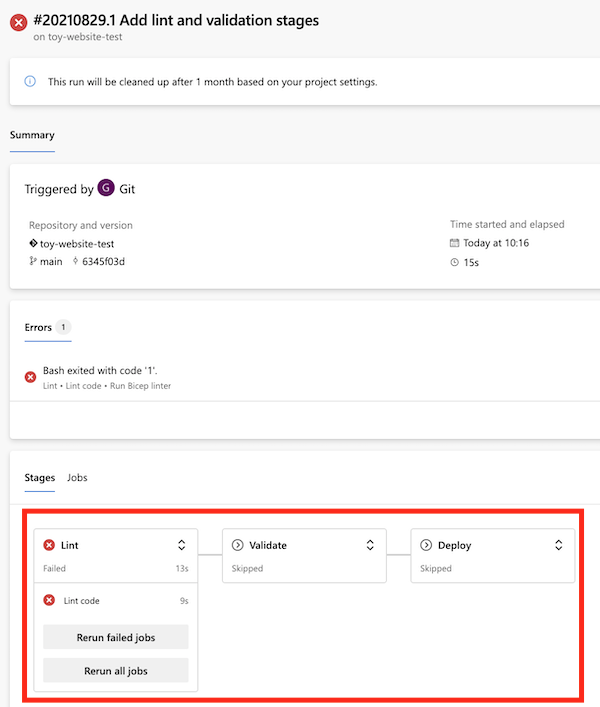
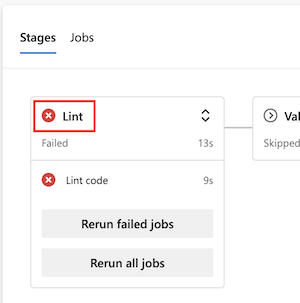
린팅 스테이지를 선택하여 세부 정보를 표시합니다.
Bicep Linter 실행 단계를 선택하여 파이프라인 로그를 봅니다.
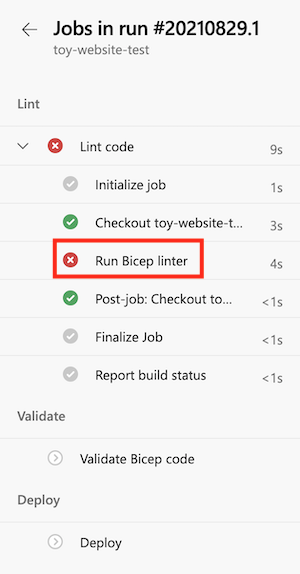
표시된 오류가 다음과 비슷한지 확인합니다.
no-unused-params 오류: "storageAccountNameParam" 매개 변수가 선언되었지만 한 번도 사용되지 않았습니다.
이 오류는 Linter가 Bicep 파일에서 규칙 위반을 발견했다는 뜻입니다.
Linter 오류 수정
문제를 확인했으므로 Bicep 파일에서 문제를 수정할 수 있습니다.
Visual Studio Code의 deploy 폴더에서 main.bicep 파일을 엽니다.
Bicep Linter는
storageAccountNameParam매개 변수가 사용되지 않은 것도 발견했습니다. Visual Studio Code는 사용되지 않는 매개 변수를 꼬불꼬불한 선으로 표시합니다. 일반적으로 경고 표시줄은 노란색입니다. 그러나 bicepconfig.json 파일을 사용자 지정했으므로 Linter는 코드를 오류로 취급하고 해당 줄을 빨간색으로 표시합니다.param storageAccountNameParam string = uniqueString(resourceGroup().id)storageAccountNameParam매개 변수를 삭제합니다.파일을 저장합니다.
Visual Studio Code 터미널에서 다음 명령을 실행하여 변경 내용을 커밋하고 Git 리포지토리에 푸시합니다.
git add .
git commit -m "Remove unused parameter"
git push
마찬가지로 Azure Pipelines가 새 파이프라인 실행을 자동으로 트리거합니다.
파이프라인 실행 다시 보기
브라우저에서 Pipelines로 이동합니다.
가장 최근 실행을 선택합니다.
파이프라인 실행이 완료될 때까지 기다립니다. Azure Pipelines는 자동으로 페이지를 최신 상태로 업데이트하지만 가끔 페이지를 새로 고치는 것이 좋습니다.
린팅 스테이지가 성공적으로 완료되었지만 이제 유효성 검사 스테이지가 실패했습니다.
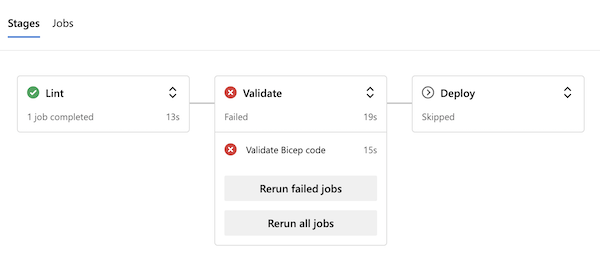
유효성 검사 스테이지를 선택하여 세부 정보를 표시합니다.
실행 전 유효성 검사 실행 단계를 선택하여 파이프라인 로그를 봅니다.
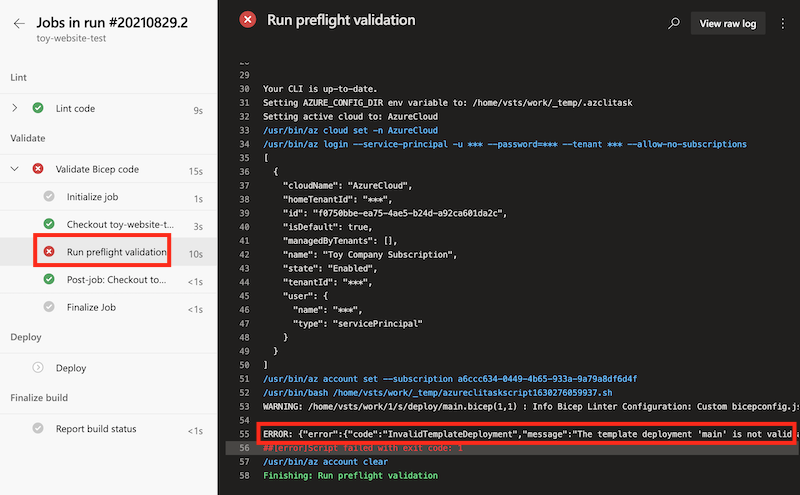
로그에 표시되는 오류에는 다음 메시지가 포함되어 있습니다.
mystorageresourceNameSuffix는 유효한 스토리지 계정 이름이 아닙니다. 스토리지 계정 이름은 3자에서 24자 사이여야 하며 숫자와 소문자만 사용해야 합니다.
이 오류는 스토리지 계정 이름이 유효하지 않다는 것을 나타냅니다.
유효성 검사 오류 수정
Bicep 파일에서 또 다른 문제를 발견했습니다. 여기서 문제를 해결해보세요.
Visual Studio Code의 deploy 폴더에서 main.bicep 파일을 엽니다.
다음과 같은
storageAccountName변수의 정의를 살펴봅니다.var appServiceAppName = 'toy-website-${resourceNameSuffix}' var appServicePlanName = 'toy-website' var applicationInsightsName = 'toywebsite' var logAnalyticsWorkspaceName = 'workspace-${resourceNameSuffix}' var storageAccountName = 'mystorageresourceNameSuffix'오타가 있고 문자열 보간이 올바르게 구성되지 않은 것 같습니다.
문자열 보간을 올바르게 사용하도록
storageAccountName변수를 업데이트합니다.var storageAccountName = 'mystorage${resourceNameSuffix}'파일을 저장합니다.
Visual Studio Code 터미널에서 다음 명령을 실행하여 변경 내용을 커밋하고 Git 리포지토리에 푸시합니다.
git add .
git commit -m "Fix string interpolation"
git push
성공한 파이프라인 실행 보기
브라우저에서 Pipelines로 이동합니다.
가장 최근 실행을 선택합니다.
파이프라인 실행이 완료될 때까지 기다립니다. Azure Pipelines는 자동으로 페이지를 최신 상태로 업데이트하지만 가끔 페이지를 새로 고치는 것이 좋습니다.
파이프라인의 3개 스테이지가 모두 성공적으로 완료되었습니다.
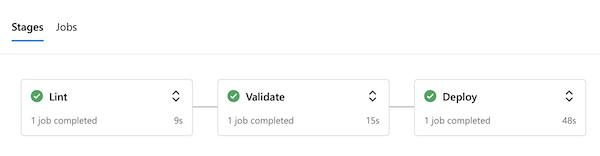
이제 배포 프로세스 초기에 Bicep 코드의 오류를 성공적으로 감지한 다음, 오류가 없으면 Azure에 배포하는 파이프라인이 완성되었습니다.