연습 - 파이프라인에 미리 보기 스테이지 추가
Azure 환경이 어떻게 변경되는지 확인할 수 있도록 파이프라인에 스테이지를 추가하려고 합니다.
프로세스 중에 다음을 수행합니다.
- 파이프라인 YAML 파일을 업데이트하여 새 미리 보기 스테이지를 추가합니다.
- Azure Pipelines에 환경을 추가합니다.
- 승인이 필요하도록 환경을 구성합니다.
- 배포 스테이지에 환경을 사용하도록 파이프라인 YAML 파일을 업데이트합니다.
- 가상 결과를 보고 파이프라인 실행을 승인합니다.
파이프라인 정의를 업데이트하여 미리 보기 스테이지 추가
여기서는 가상 작업을 실행하는 새 스테이지를 파이프라인에 추가합니다.
Visual Studio Code의 deploy 폴더에서 azure-pipelines.yml 파일을 엽니다.
유효성 검사 스테이지와 배포 스테이지 사이에 미리 보기 스테이지에 대한 다음 정의를 추가합니다.
- stage: Preview
  jobs:
  - job: PreviewAzureChanges
    displayName: Preview Azure changes
    steps:
      - task: AzureCLI@2
        name: RunWhatIf
        displayName: Run what-if
        inputs:
          azureSubscription: $(ServiceConnectionName)
          scriptType: 'bash'
          scriptLocation: 'inlineScript'
          inlineScript: |
            az deployment group what-if \
              --resource-group $(ResourceGroupName) \
              --template-file deploy/main.bicep \
              --parameters environmentType=$(EnvironmentType)
파일의 변경 내용을 저장합니다.
환경 추가
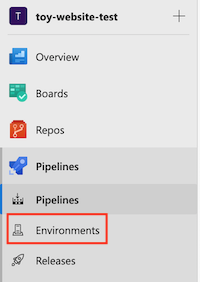
브라우저에서 Pipelines>환경으로 이동합니다.
환경 만들기를 선택합니다.
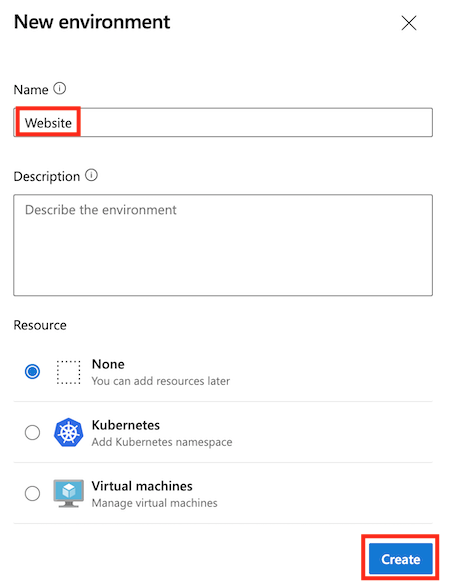
환경 이름으로 Website를 입력합니다.
설명은 비워 둡니다. 리소스에서 없음을 선택합니다.
참고
Azure Pipelines에서는 다양한 배포 기능을 활성화하는 데 여러 환경이 사용됩니다. 이러한 기능 중 일부는 Kubernetes 또는 가상 머신에 배포하는 경우에만 적용됩니다. 이 모듈에서는 이러한 기능을 사용하지 않으므로 무시해도 됩니다.
만들기를 실행합니다.
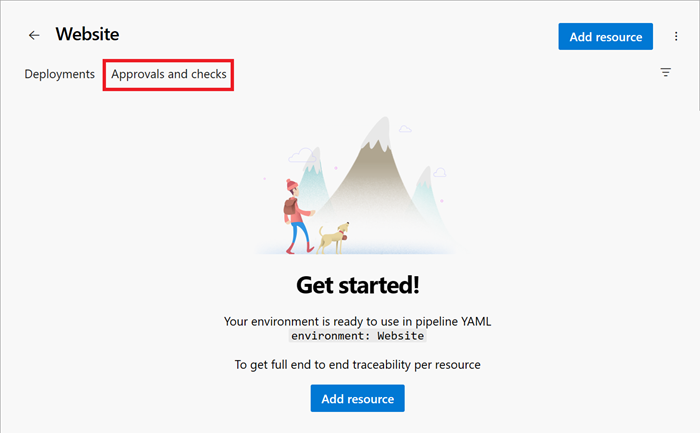
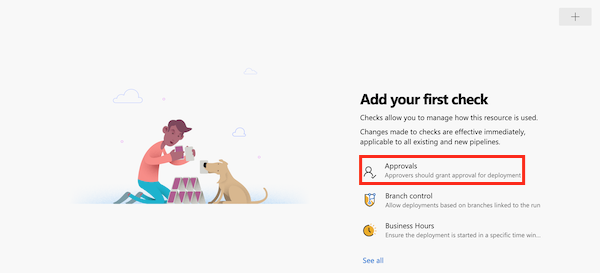
환경에 승인 검사 추가
화면의 왼쪽 위에서 승인 및 확인 탭을 선택합니다.
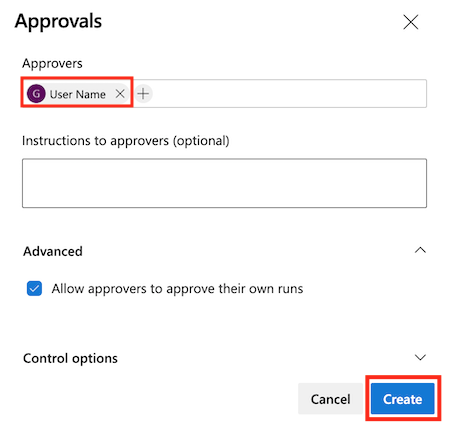
승인을 선택합니다.
승인자 텍스트 상자에 여러분의 고유한 이름을 입력하고 여러분을 선택합니다.
고급 옆에 있는 화살표 단추를 선택합니다.
기본적으로 승인자는 자신이 트리거한 실행을 승인할 수 있습니다. 여러분은 이 파이프라인을 작업할 유일한 사람이므로 이 확인란을 선택한 상태로 둡니다.
만들기를 실행합니다.
환경 및 승인이 필요하도록 파이프라인 정의 업데이트
여기서는 이전에 만든 Website 환경에 대해 실행되도록 배포 스테이지를 구성합니다. 표준 작업 대신 배포 작업을 실행하도록 배포 스테이지를 변환하고, 환경에 배포하도록 구성합니다.
Visual Studio Code의 azure-pipelines.yml 파일에서 Deploy 스테이지 정의를 다음 코드로 바꿉니다.
- stage: Deploy
  jobs:
  - deployment: DeployWebsite
    displayName: Deploy website
    environment: Website
    strategy:
      runOnce:
        deploy:
          steps:
            - checkout: self

            - task: AzureResourceManagerTemplateDeployment@3
              name: DeployBicepFile
              displayName: Deploy Bicep file
              inputs:
                connectedServiceName: $(ServiceConnectionName)
                deploymentName: $(Build.BuildNumber)
                location: $(deploymentDefaultLocation)
                resourceGroupName: $(ResourceGroupName)
                csmFile: deploy/main.bicep
                overrideParameters: >
                  -environmentType $(EnvironmentType)
그러면 새
checkout단계가 정의됩니다. 일반 작업과 달리 배포 작업은 Git 리포지토리에서 파일을 체크 아웃(다운로드)하도록 구성해야 합니다. 이 단계를 수행하지 않으면 배포 작업에서 Bicep 파일을 읽을 수 없습니다. 파이프라인 아티팩트를 사용하여 파이프라인 스테이지 간에 파일을 보내는 방법을 고려해 볼 수도 있습니다. 아티팩트에 대한 자세한 내용은 요약 단원에서 링크를 통해 제공됩니다.파일을 저장합니다.
파이프라인 정의 확인 및 커밋
azure-pipelines.yml 파일이 다음 코드와 같은지 확인합니다.
trigger:
  batch: true
  branches:
    include:
    - main

pool:
  vmImage: ubuntu-latest

variables:
  - name: deploymentDefaultLocation
    value: westus3

stages:

- stage: Lint
  jobs:
  - job: LintCode
    displayName: Lint code
    steps:
      - script: |
          az bicep build --file deploy/main.bicep
        name: LintBicepCode
        displayName: Run Bicep linter

- stage: Validate
  jobs:
  - job: ValidateBicepCode
    displayName: Validate Bicep code
    steps:
      - task: AzureResourceManagerTemplateDeployment@3
        name: RunPreflightValidation
        displayName: Run preflight validation
        inputs:
          connectedServiceName: $(ServiceConnectionName)
          location: $(deploymentDefaultLocation)
          deploymentMode: Validation
          resourceGroupName: $(ResourceGroupName)
          csmFile: deploy/main.bicep
          overrideParameters: >
            -environmentType $(EnvironmentType)

- stage: Preview
  jobs:
  - job: PreviewAzureChanges
    displayName: Preview Azure changes
    steps:
      - task: AzureCLI@2
        name: RunWhatIf
        displayName: Run what-if
        inputs:
          azureSubscription: $(ServiceConnectionName)
          scriptType: 'bash'
          scriptLocation: 'inlineScript'
          inlineScript: |
            az deployment group what-if \
              --resource-group $(ResourceGroupName) \
              --template-file deploy/main.bicep \
              --parameters environmentType=$(EnvironmentType)

- stage: Deploy
  jobs:
  - deployment: DeployWebsite
    displayName: Deploy website
    environment: Website
    strategy:
      runOnce:
        deploy:
          steps:
            - checkout: self

            - task: AzureResourceManagerTemplateDeployment@3
              name: DeployBicepFile
              displayName: Deploy Bicep file
              inputs:
                connectedServiceName: $(ServiceConnectionName)
                deploymentName: $(Build.BuildNumber)
                location: $(deploymentDefaultLocation)
                resourceGroupName: $(ResourceGroupName)
                csmFile: deploy/main.bicep
                overrideParameters: >
                  -environmentType $(EnvironmentType)
같지 않으면 다음 예제와 일치하도록 업데이트하고 저장합니다.
Visual Studio Code 터미널에서 다음 명령을 실행하여 변경 내용을 커밋하고 Git 리포지토리에 푸시합니다.
git add .
git commit -m "Add preview stage"
git push
파이프라인을 실행하고 가상 출력 검토
브라우저에서 Pipelines로 이동합니다.
가장 최근에 실행한 파이프라인을 선택합니다.
파이프라인이 린팅, 유효성 검사 및 미리 보기 스테이지를 완료할 때까지 기다립니다. Azure Pipelines는 자동으로 페이지를 최신 상태로 업데이트하지만 가끔 페이지를 새로 고치는 것이 좋습니다.
리소스에 액세스할 수 있는 권한을 부여하라는 메시지가 표시되면 보기를 선택하고 허용을 선택합니다.
Azure Pipelines가 사용자의 승인을 요청합니다. 파이프라인에서 사용자의 승인이 필요하다는 이메일도 받게 됩니다.
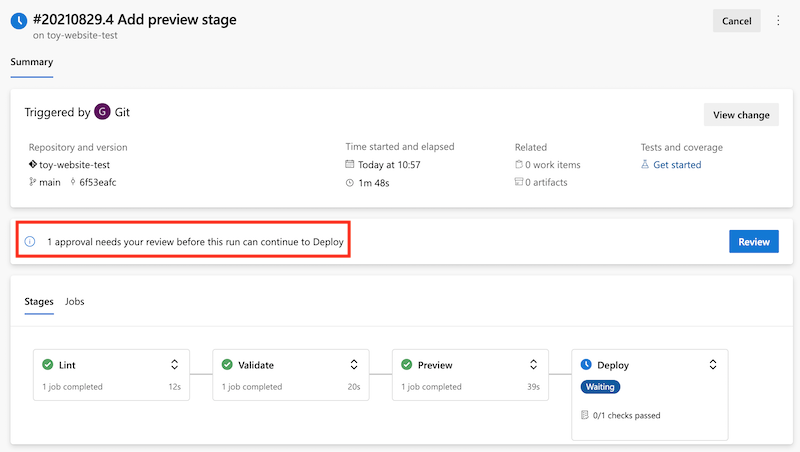
파이프라인을 계속하도록 승인하기 전에, what-if 결과를 검토하여 예상과 일치하는지 확인합니다.
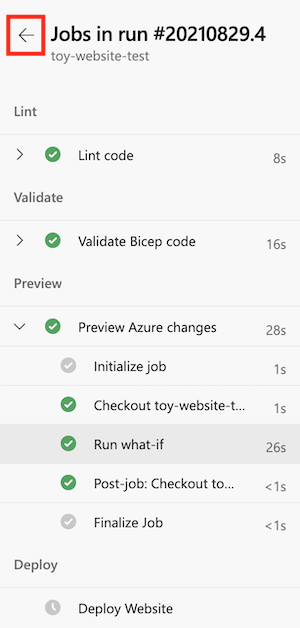
미리 보기 스테이지를 선택합니다.
가상 실행 단계를 선택하여 가상 명령이 보고하는 변경 내용을 검사합니다.
파이프라인 로그는 다음 코드와 비슷한 what-if 결과를 제공합니다.
Resource and property changes are indicated with these symbols:
  + Create
  ~ Modify
  = Nochange

The deployment will update the following scope:

Scope: /subscriptions/f0750bbe-ea75-4ae5-b24d-a92ca601da2c/resourceGroups/ToyWebsiteTest

  ~ Microsoft.Web/sites/toy-website-nbfnedv766snk [2021-01-15]
    + properties.siteConfig.localMySqlEnabled:   false
    + properties.siteConfig.netFrameworkVersion: "v4.6"

  = Microsoft.Insights/components/toywebsite [2020-02-02]
  = Microsoft.Storage/storageAccounts/mystoragenbfnedv766snk [2021-04-01]
  = Microsoft.Web/serverfarms/toy-website [2021-01-15]

Resource changes: 1 to modify, 3 no change.
가상 작업에서 웹 사이트 리소스에 대한 변경 내용을 발견했습니다. 그러나 감지된 변경 내용은 노이즈입니다. 노이즈는 리소스를 실제로 변경하지 않습니다. Azure 팀에서 노이즈를 줄이기 위해 노력하고 있습니다. 그 동안에는 이러한 두 가지 속성과 관련하여 발견된 변경 내용을 무시해도 됩니다.
리소스 종류
microsoft.alertsmanagement/smartDetectorAlertRules/Failure Anomalies - toywebsite에 대한 가상 출력에 항목이 표시될 수도 있습니다. Application Insights는 이 리소스를 자동으로 만듭니다. 가상 명령은 리소스에 대한 변경 내용이 없는 것을 확인합니다.
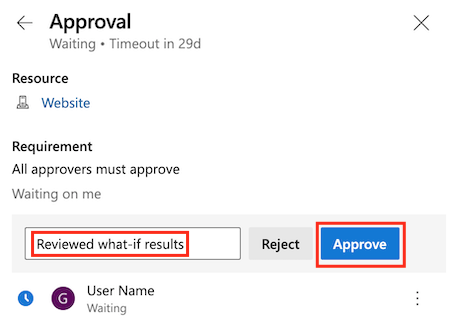
파이프라인 실행 승인
왼쪽 화살표를 선택하여 파이프라인 실행 세부 정보로 돌아갑니다.
승인 패널에서 검토 단추를 선택합니다.
주석 상자에 Reviewed what-if results를 입력합니다.
승인을 선택합니다.
성공한 배포 관찰
파이프라인 실행을 승인한 후에는 배포 스테이지가 실행됩니다.
스테이지가 완료될 때까지 기다립니다.
파이프라인 실행이 성공적으로 완료됩니다.