사용자 역할을 하는 또 다른 Web API를 호출하는 Web API를 빌드하는 방법을 알아봅니다.
이 문서를 읽기 전에 AD FS 개념 및 On-Behalf_Of 흐름을 숙지해야 합니다.
Overview
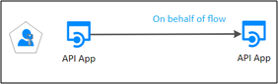
아래 다이어그램에 표시되지 않은 클라이언트(웹 앱)는 보호된 웹 API를 호출하고 "권한 부여" Http 헤더에 JWT 전달자 토큰을 제공합니다.
보호된 Web API는 토큰의 유효성을 검사하고 MSAL AcquireTokenOnBehalfOf 메서드를 사용하여 AD FS에서 다른 토큰을 요청하여 사용자를 대신하여 두 번째 웹 API(다운스트림 웹 API라는 이름)를 호출할 수 있게 합니다.
보호된 웹 API는 이 토큰으로 다운스트림 API를 호출합니다. AcquireTokenSilentlater를 호출하여 다른 다운스트림 API에 대한 토큰을 요청할 수도 있습니다(그러나 여전히 동일한 사용자를 대신함). AcquireTokenSilent는 필요할 때 토큰을 새로 고칩니다.
AD FS에서 인증 시나리오를 대신하여 구성하는 방법을 더 잘 이해하려면 여기에서 사용할 수 있는 샘플을 사용하고 앱 등록 및 코드 구성 단계를 연습해 보겠습니다.
Pre-requisites
- GitHub 클라이언트 도구
- AD FS 2019 이상 구성 및 실행
- Visual Studio 2013 이상
AD FS에 앱 등록
이 섹션는 네이티브 앱을 공용 클라이언트로 등록하고 Web API를 AD FS에서 RP(신뢰 당사자)로 등록하는 방법을 설명합니다.
AD FS 관리에서 애플리케이션 그룹을 마우스 오른쪽 단추로 클릭하고 애플리케이션 그룹 추가를 선택합니다.
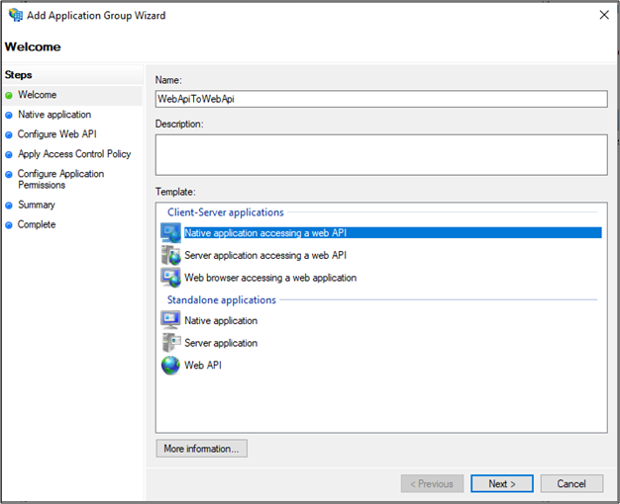
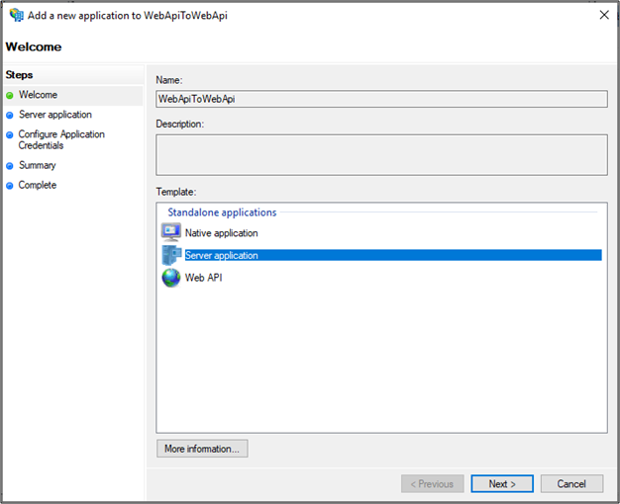
애플리케이션 그룹 마법사에서 이름 에 WebApiToWebApi 를 입력하고 Client-Server 애플리케이션 에서 Web API 템플릿에 액세스하는 네이티브 애플리케이션을 선택합니다. 다음을 클릭합니다.
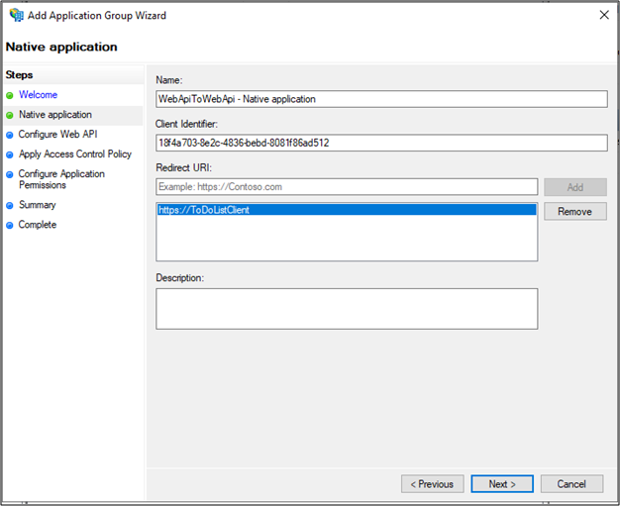
복사는 클라이언트 식별자 값입니다. 이것은 나중에 애플리케이션의 App.config 파일에서 ClientId의 값으로 사용됩니다. 리디렉션 URI:에 다음을 입력합니다 - https://ToDoListClient. 추가를 클릭합니다. 다음을 클릭합니다.
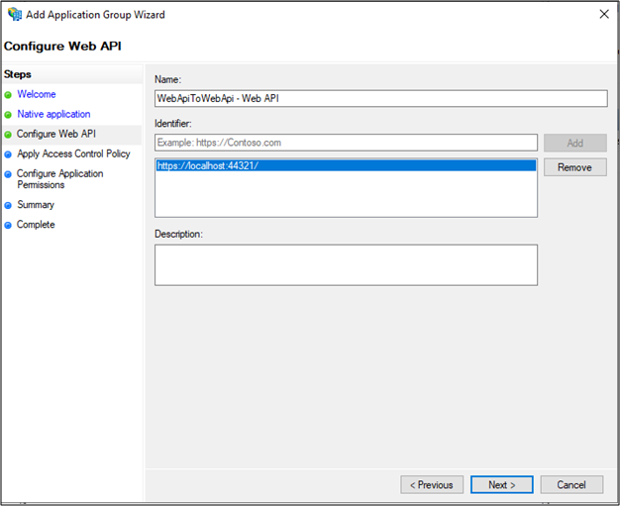
웹 API 구성 화면에서 식별자:https://localhost:44321/.를 입력 추가를 클릭합니다. 다음을 클릭합니다. 이 값은 나중에 애플리케이션의 App.config 및 Web.Config 파일에서 사용됩니다.
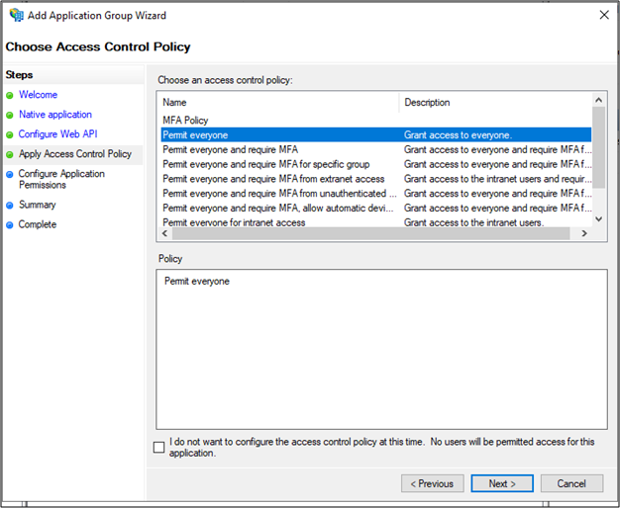
액세스 제어 정책 적용 화면에서 모든 사람 허용을 선택하고 다음을 클릭합니다.
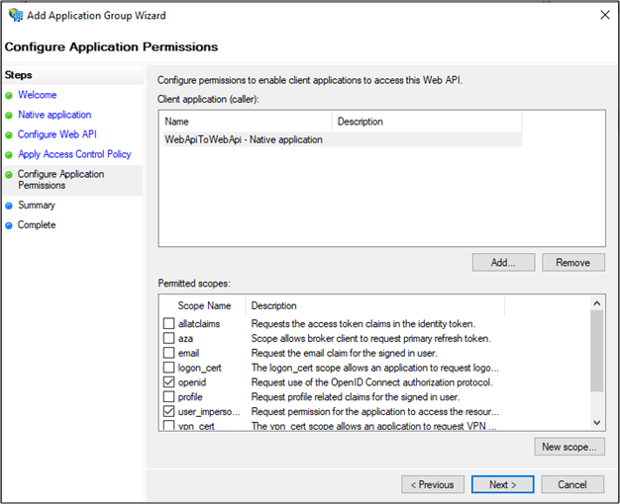
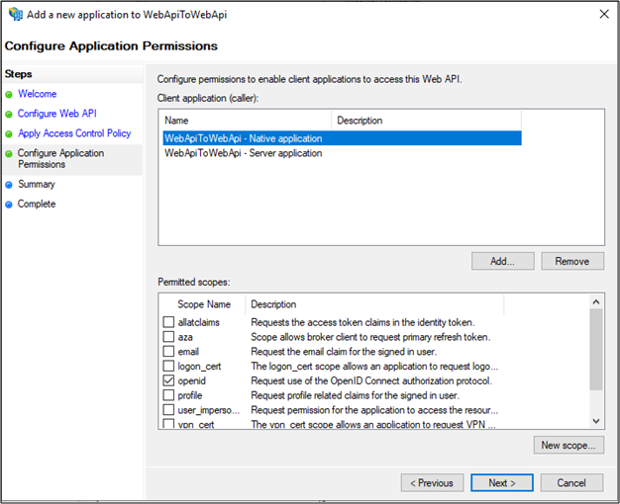
애플리케이션 사용 권한 구성 화면에서 openid 를 선택하고 user_impersonation. 다음을 클릭합니다.
요약 화면에서 다음을 클릭합니다.
완료 화면에서 닫기를 클릭합니다.
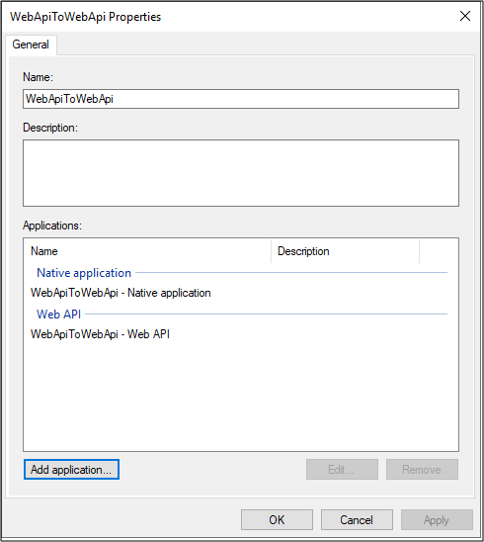
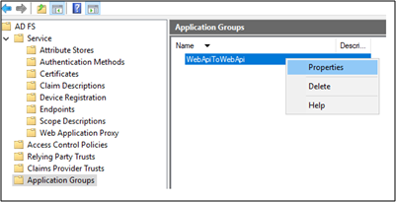
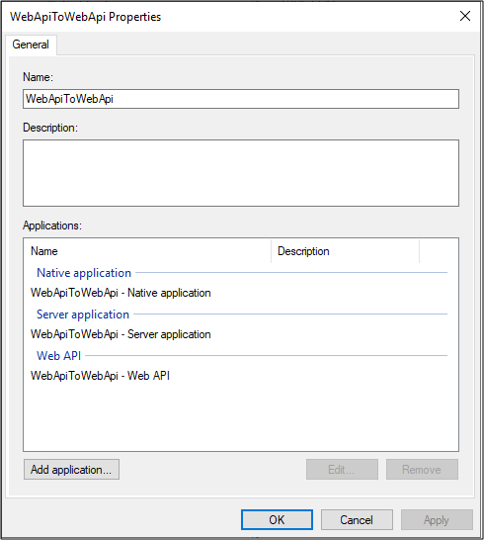
AD FS 관리에서 애플리케이션 그룹을 클릭하고 WebApiToWebApi 애플리케이션 그룹을 선택합니다. 마우스 오른쪽 단추를 클릭하고 속성을 선택합니다.

WebApiToWebApi 속성 화면에서 애플리케이션 추가...를 클릭합니다.
독립 실행형 애플리케이션에서 서버 애플리케이션을 선택합니다.
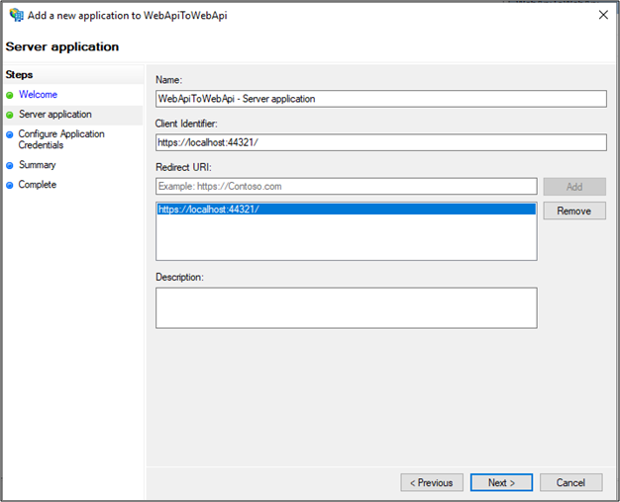
서버 애플리케이션 화면에서 클라이언트 식별자 및 리디렉션 URI로 추가 https://localhost:44321/ 합니다.
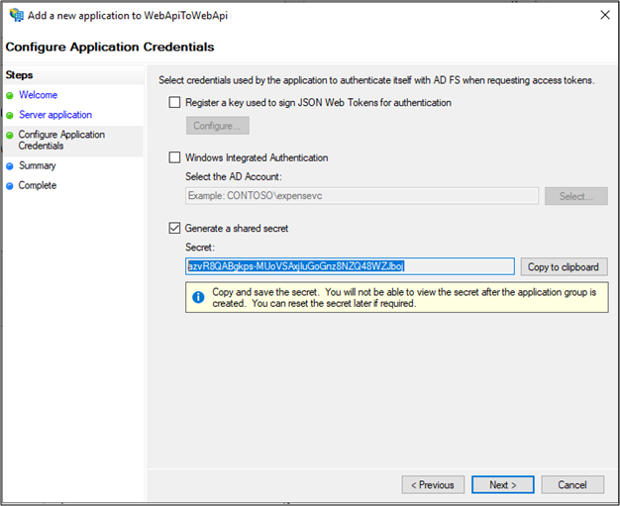
애플리케이션 자격 증명 구성 화면에서 공유 비밀 생성을 선택합니다. 나중에 사용할 비밀을 복사합니다.
요약 화면에서 다음을 클릭합니다.
완료 화면에서 닫기를 클릭합니다.
AD FS 관리에서 애플리케이션 그룹을 클릭하고 WebApiToWebApi 애플리케이션 그룹을 선택합니다. 마우스 오른쪽 단추를 클릭하고 속성을 선택합니다.
WebApiToWebApi 속성 화면에서 애플리케이션 추가...를 클릭합니다.
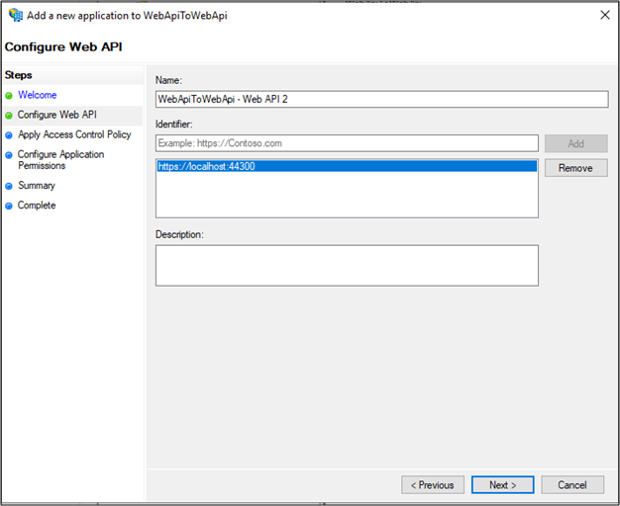
독립 실행형 애플리케이션에서 Web API를 선택합니다.

Web API 구성에서 식별자로 추가 https://localhost:44300 합니다.
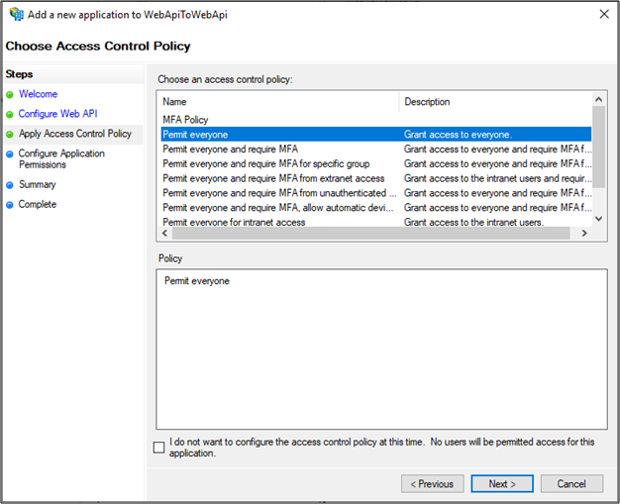
액세스 제어 정책 적용 화면에서 모든 사람 허용을 선택하고 다음을 클릭합니다.
애플리케이션 사용 권한 구성 화면에서 다음을 클릭합니다.
요약 화면에서 다음을 클릭합니다.
완료 화면에서 닫기를 클릭합니다.
WebApiToWebApi – Web API 2 속성 화면에서 확인 클릭
WebApiToWebApi 속성 화면에서 WebApiToWebApi – Web API를 선택하고 편집…을 클릭합니다.
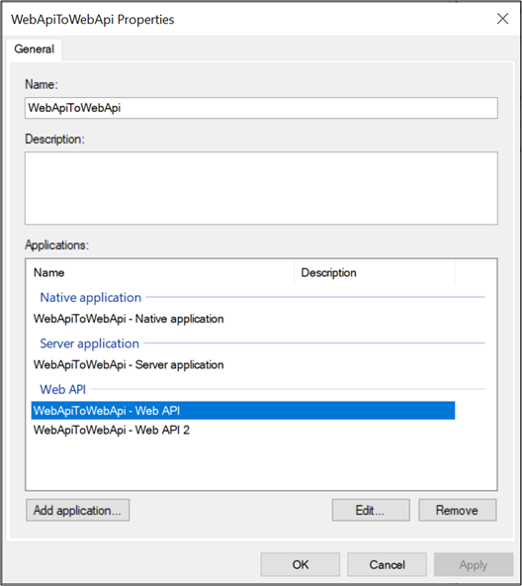
WebApiToWebApi – Web API 속성 화면에서 발급 변환 규칙 탭을 선택하고 규칙 추가…를 클릭합니다.
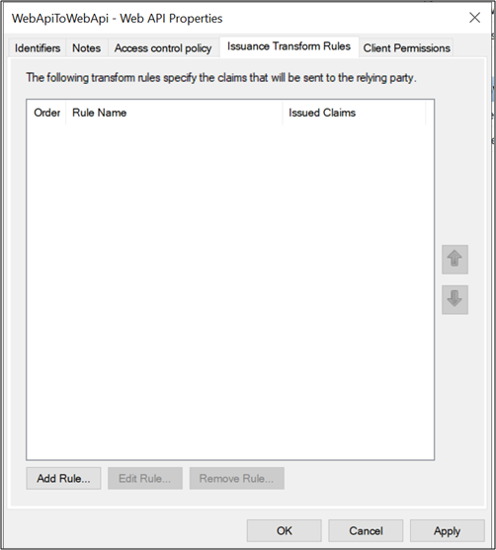
추가 변환 클레임 규칙 마법사의 드롭다운에서 사용자 지정 규칙으로 클레임 전송을 선택하고 다음을 클릭합니다.

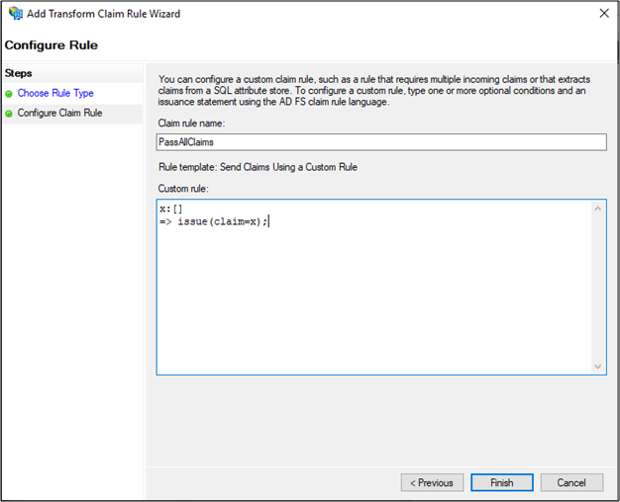
클레임 규칙 이름에PassAllClaims를 입력합니다. field 및 x:[] => issue(claim=x); 사용자 지정 규칙: 필드에 클레임 규칙을 입력하고 마침을 클릭합니다.
WebApiToWebApi – Web API 속성 화면에서 확인 클릭
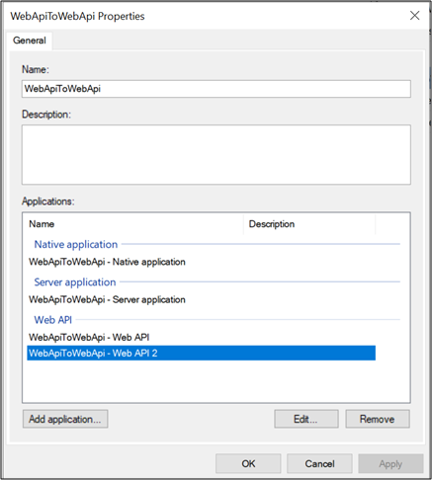
WebApiToWebApi 속성 화면에서 WebApiToWebApi – Web API 2를 선택하고 편집… 클릭
WebApiToWebApi – Web API 2 속성 화면에서 발급 변환 규칙 탭을 선택하고 규칙 추가…를 클릭합니다.
변환 클레임 규칙 마법사의 화면에서 드롭다운 메뉴에서 사용자 지정 규칙을 사용하여 클레임 보내기를 선택하고 다음을 클릭하십시오.

PassAllClaims를 Claim rule name: 필드에 입력하고, 그리고 x:[] => issue(claim=x); claim rule를 Custom rule: 필드에 입력한 다음 마침을 클릭합니다.

WebApiToWebApi – Web API 2 속성 화면과 WebApiToWebApi 속성 화면에서 확인을 각각 클릭합니다.
코드 구성
이 섹션는 다른 Web API를 호출하도록 Web API를 구성하는 방법을 설명합니다.
여기에서 샘플 다운로드
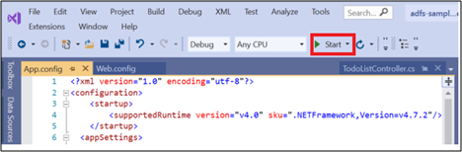
Visual Studio를 사용하여 샘플 열기
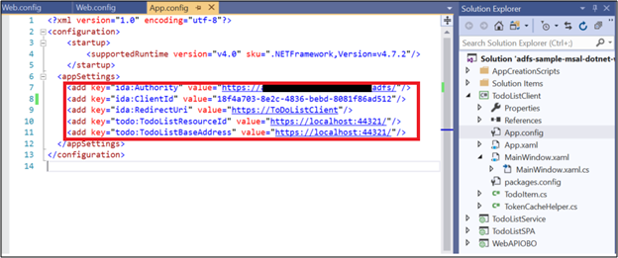
App.config 파일을 엽니다. 다음을 수정합니다.
ida:Authority - https://[당신의 AD FS 호스트 이름]/adfs/ 를 입력하세요.
ida:ClientId - 위의 AD FS 섹션에서 앱 등록의 #3 값을 입력합니다.
ida:RedirectUri - 위의 AD FS 섹션에서 앱 등록의 #3 값을 입력합니다.
todo:TodoListResourceId – 위의 AD FS 섹션에서 앱 등록에서 #4의 식별자 값 입력
ida: todo:TodoListBaseAddress - 위의 AD FS 섹션에서 앱 등록에서 #4의 식별자 값을 입력합니다.
ToDoListService 아래의 Web.config 파일을 엽니다. 다음을 수정합니다.
ida:Audience - 위의 AD FS 섹션에서 앱 등록에서 #12의 클라이언트 식별자 값을 입력합니다.
ida:ClientId - 위의 AD FS 섹션에서 앱 등록에서 #12의 클라이언트 식별자 값을 입력합니다.
Ida: ClientSecret - 위의 AD FS 섹션에서 앱 등록에서 #13에서 복사한 공유 비밀을 입력합니다.
ida:RedirectUri - 위의 AD FS 섹션에서 앱 등록의 #12에서 RedirectUri 값을 입력합니다.
ida: AdfsMetadataEndpoint - https://[AD FS 호스트 이름]/federationmetadata/2007-06/federationmetadata.xml에 접속합니다.
ida:OBOWebAPIBase - 위의 AD FS 섹션에서 앱 등록에서 #19의 식별자 값을 입력합니다.
ida:Authority - 입력 https://[your AD FS hostname]/adfs

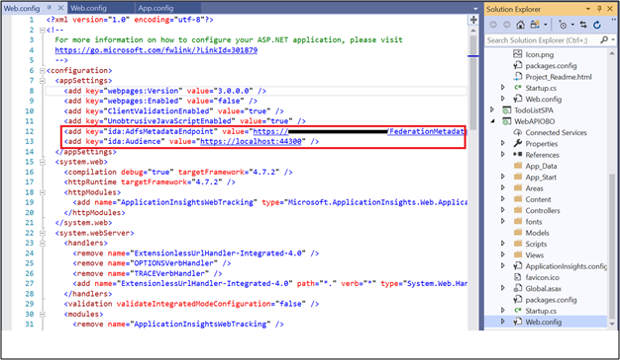
WebAPIOBO 아래의 Web.config 파일을 엽니다. 다음을 수정합니다.
ida: AdfsMetadataEndpoint - https://[AD FS 호스트 이름]/federationmetadata/2007-06/federationmetadata.xml에 접속합니다.
ida:Audience - 위의 AD FS 섹션에서 앱 등록에서 #12의 클라이언트 식별자 값을 입력합니다.
샘플 테스트
이 섹션은 위에서 구성한 샘플을 테스트하는 방법을 보여줍니다.
코드가 변경되면 솔루션을 다시 빌드
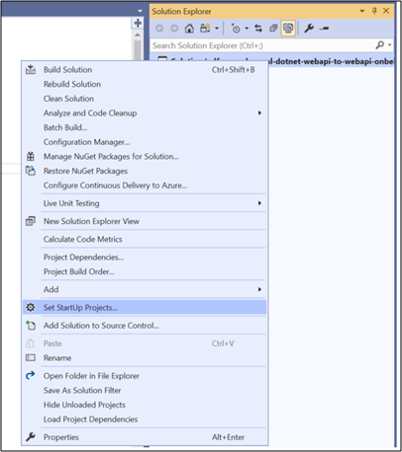
Visual Studio에서 솔루션을 마우스 오른쪽 단추로 클릭하고 시작 프로젝트 설정... 선택
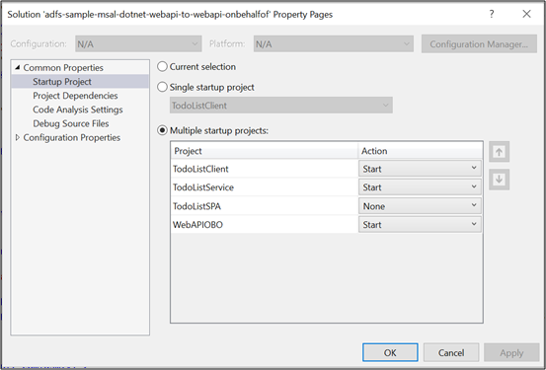
속성 페이지에서 TodoListSPA를 제외한 각 프로젝트에 대해 작업이시작 으로 설정되어 있는지 확인합니다.
Visual Studio 맨 위에서 녹색 화살표를 클릭합니다.
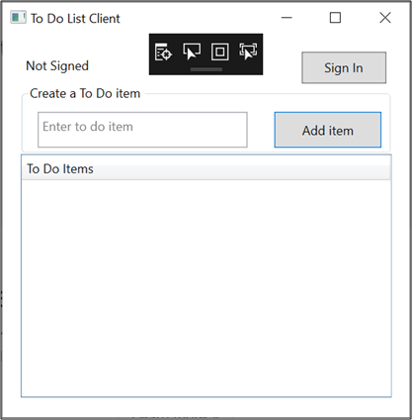
네이티브 앱의 기본 화면에서 로그인을 클릭합니다.
네이티브 앱 화면이 표시되지 않으면 시스템에 프로젝트 리포지토리가 저장된 폴더에서 *msalcache.bin 파일을 검색하여 제거합니다.
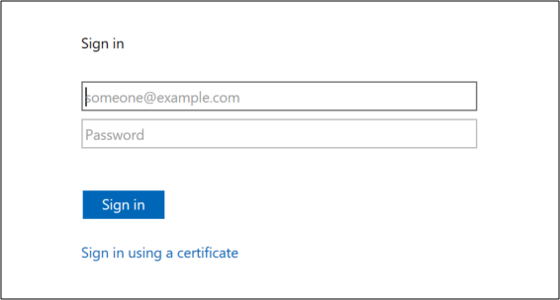
AD FS 로그인 페이지로 리디렉션될 수 있습니다. 로그인하세요.
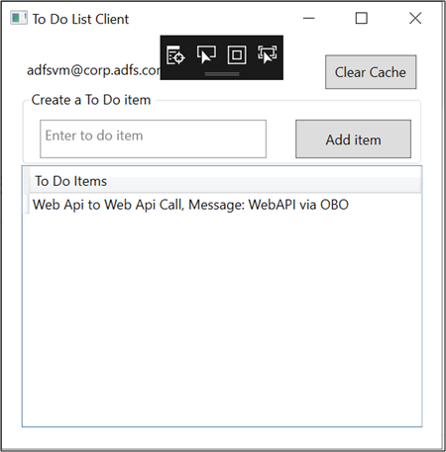
로그인한 후에 할 일 만들기 항목에서 Web Api 호출에 대한 텍스트 Web Api를 입력합니다. 항목 추가를 클릭합니다. 그러면 Web API(To Do List Service)를 호출한 다음 Web API 2(WebAPIOBO)를 호출하여 캐시에 항목을 추가합니다.