이제 도우미에게 페이지를 만들도록 요청합니다. 다른 UI 프레임워크의 컨트롤을 대체하지 않도록 원하는 WinUI 컨트롤의 이름을 지정합니다.
XAML 요청하기
다음 프롬프트를 사용합니다.
Create MainPage.xaml for TaskTally.

- Use a TextBox with a visible Header and an Add task Button.
- Use ListView for the task collection. Don't wrap it in ScrollViewer.
- In each row, use a CheckBox, task title, and delete Button.
- Use InfoBar for save and error status.
- Use x:Bind and specify Mode for every binding that changes.
- For TextBox.Text, use Mode=TwoWay and
  UpdateSourceTrigger=PropertyChanged.
- Add accessible names and tooltips for icon-only commands.
- Add an empty state.
- At widths below 640 effective pixels, move the Add task button
  below the TextBox and stretch it.
- Use theme resources instead of hard-coded colors.
- Build and fix all XAML compiler and analyzer warnings.
생성된 XAML에서 이러한 세부 정보를 검사합니다.
데이터 입력
<TextBox
    x:Name="NewTaskTextBox"
    Header="New task"
    PlaceholderText="For example, review the generated XAML"
    Text="{x:Bind ViewModel.NewTaskTitle, Mode=TwoWay,
                  UpdateSourceTrigger=PropertyChanged}" />
<Button
    x:Name="AddTaskButton"
    Grid.Column="1"
    VerticalAlignment="Bottom"
    AutomationProperties.Name="Add task"
    Command="{x:Bind ViewModel.AddTaskCommand}"
    Content="Add task" />
표시 Header 됨은 입력이 자리 표시자 텍스트를 유일한 레이블로 사용하지 않음을 의미합니다.
UpdateSourceTrigger=PropertyChanged는 사용자가 입력하는 동안 뷰 모델을 업데이트하므로 명령이 즉시 활성화될 수 있습니다.
작업 모음
형식화된 데이터 템플릿을 정의합니다.
<DataTemplate x:Key="TaskTemplate" x:DataType="models:TaskItem">
<Grid Padding="8" ColumnSpacing="12">
<Grid.ColumnDefinitions>
<ColumnDefinition Width="Auto" />
<ColumnDefinition Width="*" />
<ColumnDefinition Width="Auto" />
</Grid.ColumnDefinitions>
<CheckBox
VerticalAlignment="Center"
AutomationProperties.Name="{x:Bind Title}"
Click="TaskCheckBox_Click"
IsChecked="{x:Bind IsComplete, Mode=TwoWay}" />
<TextBlock
Grid.Column="1"
VerticalAlignment="Center"
Text="{x:Bind Title}" />
<Button
Grid.Column="2"
VerticalAlignment="Center"
AutomationProperties.Name="{x:Bind local:MainPage.DeleteTaskName(Title),
Mode=OneWay}"
Click="DeleteButton_Click"
DataContext="{x:Bind}"
ToolTipService.ToolTip="Delete task">
<FontIcon Glyph="" />
</Button>
</Grid>
</DataTemplate>
정적 함수를 사용하여 삭제 단추의 자동화 이름에 작업 제목을 포함하면 화면 읽기 프로그램에서 행을 구분할 수 있습니다.
public static string DeleteTaskName(string title) => $"Delete {title}";
그런 다음 컬렉션을 바인딩합니다.
<ListView
    AutomationProperties.Name="Tasks"
    ItemTemplate="{StaticResource TaskTemplate}"
    ItemsSource="{x:Bind ViewModel.Tasks, Mode=OneWay}"
    SelectionMode="None" />
ListView 는 스크롤 및 UI 가상화를 제공합니다. 이를 ScrollViewer로 감싸면 둘 다를 방해합니다.
자세한 정보: XAML을 사용한 ListView 및 GridView 및 데이터 바인딩.
상태 및 빈 상태
차단 해제 상태 메시지에 사용합니다 InfoBar .
<InfoBar
    IsClosable="True"
    IsOpen="{x:Bind ViewModel.IsStatusOpen, Mode=TwoWay}"
    Message="{x:Bind ViewModel.StatusMessage, Mode=OneWay}"
    Severity="{x:Bind local:MainPage.StatusSeverity(ViewModel.HasError),
                      Mode=OneWay}" />
정적 함수를 사용하여 변환기 클래스를 추가하지 않고 빈 상태 Boolean 값을 Visibility로 변환합니다:
public static Visibility BoolToVisibility(bool value) =>
    value ? Visibility.Visible : Visibility.Collapsed;

public static InfoBarSeverity StatusSeverity(bool hasError) =>
    hasError ? InfoBarSeverity.Error : InfoBarSeverity.Success;
<TextBlock
    HorizontalAlignment="Center"
    VerticalAlignment="Center"
    Text="Add a task to get started."
    Visibility="{x:Bind local:MainPage.BoolToVisibility(ViewModel.HasNoTasks),
                        Mode=OneWay}" />
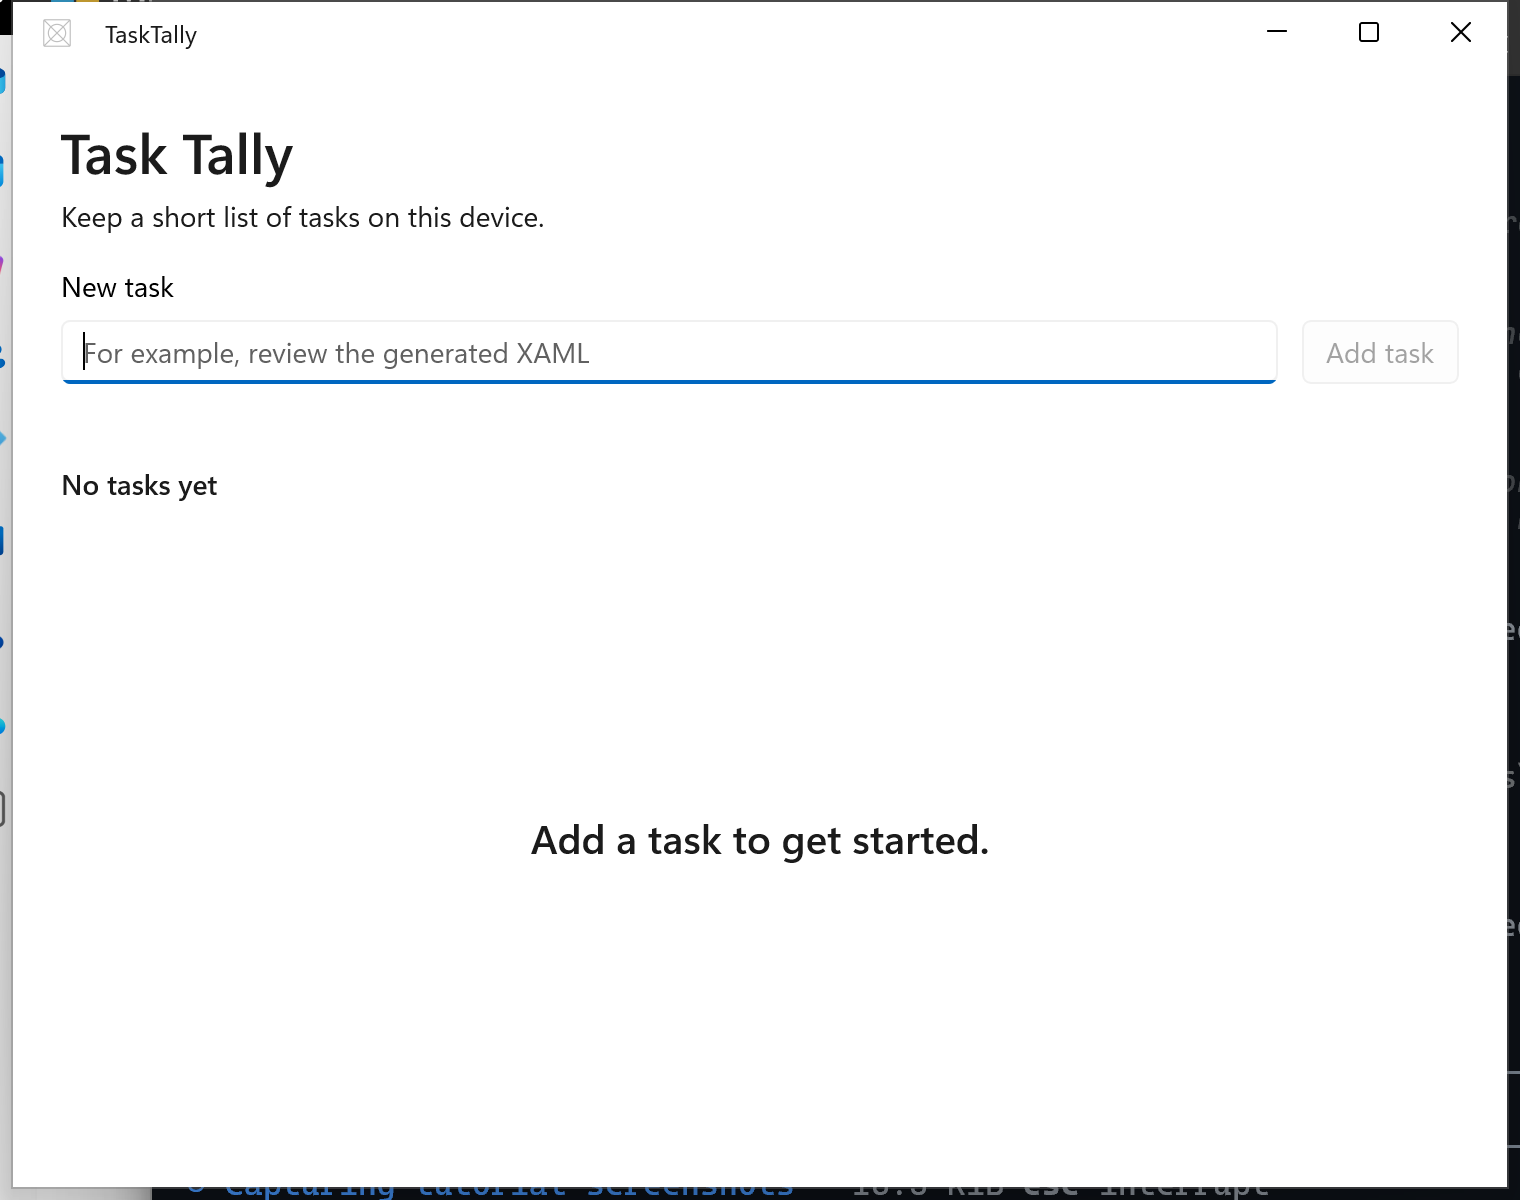
데이터를 추가하기 전에 앱을 실행하고 빈 상태가 명확하고 작업 추가 단추가 비활성화되어 있는지 확인합니다.
적응형 레이아웃
시각적 상태를 사용하여 입력 아래의 단추를 이동합니다.
<VisualStateManager.VisualStateGroups>
    <VisualStateGroup>
        <VisualState x:Name="Narrow">
            <VisualState.StateTriggers>
                <AdaptiveTrigger MinWindowWidth="0" />
            </VisualState.StateTriggers>
            <VisualState.Setters>
                <Setter Target="AddTaskButton.(Grid.Row)" Value="1" />
                <Setter Target="AddTaskButton.(Grid.Column)" Value="0" />
                <Setter Target="AddTaskButton.HorizontalAlignment" Value="Stretch" />
            </VisualState.Setters>
        </VisualState>
        <VisualState x:Name="Standard">
            <VisualState.StateTriggers>
                <AdaptiveTrigger MinWindowWidth="640" />
            </VisualState.StateTriggers>
        </VisualState>
    </VisualStateGroup>
</VisualStateManager.VisualStateGroups>
중단점에서 실행 중인 앱의 크기를 조정합니다. 프롬프트의 반응형 클레임은 레이아웃이 작동한다는 증거가 아닙니다.
자세한 정보: XAML을 사용한 반응형 레이아웃.
보기별 이벤트 연결
페이지는 지속형 데이터를 한 번 로드하고 뷰 모델에 태스크 변경 내용을 위임합니다.
public sealed partial class MainPage : Page
{
    public MainPageViewModel ViewModel { get; } = new();

    public MainPage()
    {
        InitializeComponent();
        Loaded += MainPage_Loaded;
    }

    private async void MainPage_Loaded(object sender, RoutedEventArgs e)
    {
        Loaded -= MainPage_Loaded;
        await ViewModel.InitializeAsync();
        NewTaskTextBox.Focus(FocusState.Programmatic);
    }

    private async void TaskCheckBox_Click(object sender, RoutedEventArgs e)
    {
        await ViewModel.TaskCompletionChangedAsync();
    }

    private async void DeleteButton_Click(object sender, RoutedEventArgs e)
    {
        if (sender is Button { DataContext: TaskItem task })
        {
            await ViewModel.DeleteTaskCommand.ExecuteAsync(task);
        }
    }
}
반환 형식의 async void 이벤트 처리기는 XAML 이벤트가 필요하기 때문에 여기에 적합합니다 void. 앱의 다른 비동기 메서드는 Task를 반환합니다.
빌드 및 실행
앱을 빌드하고, 패키지를 통해 시작하고, 이제 구현된 모든 수락 조건을 테스트합니다.
- 마우스를 사용하여 작업을 추가합니다.
- 키보드만 사용하여 작업을 추가합니다.
- 작업을 완료하고 삭제합니다.
- 앱을 닫고 다시 시작하여 지속성을 확인합니다.
- 창 크기를 640 유효 픽셀보다 작게 또는 크게 조정하세요.
- 라이트, 다크 및 대비 테마 간에 전환합니다.
GitHub에서 Microsoft와 공동 작업
이 콘텐츠의 원본은 GitHub에서 찾을 수 있으며, 여기서 문제와 끌어오기 요청을 만들고 검토할 수도 있습니다. 자세한 내용은 참여자 가이드를 참조하세요.

Windows developer