참고 항목
이 항목은 UWP(유니버설 Windows 플랫폼) 게임 및 앱과 Windows.UI.Xaml.Xxx 네임스페이스의 형식(Microsoft.UI.Xaml.Xxx 아님)에 적용됩니다.
UWP(유니버설 Windows 플랫폼) 게임 또는 앱에서 Microsoft DirectX와 함께 XAML(Extensible Application Markup Language)을 사용할 수 있습니다. XAML과 DirectX를 함께 사용하면 DirectX로 렌더링된 콘텐츠와 상호 운용되는 유연한 사용자 인터페이스 프레임워크를 빌드할 수 있으며 이 방법은 그래픽을 많이 사용하는 앱에 특히 유용합니다. 이 항목에서는 DirectX를 사용하는 UWP 앱의 구조를 설명하고, DirectX와 함께 작동하도록 UWP 앱을 빌드할 때 사용할 중요 유형을 식별합니다.
앱이 주로 2D 렌더링에 중점을 두는 경우 Win2D Windows 런타임 라이브러리를 사용하려고 할 수 있습니다. 이 라이브러리는 Microsoft에서 유지 관리하며, 핵심 Direct2D 기술을 기반으로 합니다. Win2D는 2D 그래픽을 구현하는 사용 패턴을 크게 간소화하며 이 문서에 설명된 기법 중 일부에 대한 유용한 추상화를 포함하고 있습니다. 자세한 내용은 프로젝트 페이지를 참조하세요. 이 문서에서는 Win2D를 사용하지 않도록 선택한 앱 개발자를 위한 지침을 설명합니다.
참고 항목
DirectX API는 Windows 런타임 유형으로 정의되지 않지만 C++/WinRT를 사용하여 DirectX와 상호 운용되는 XAML UWP 앱을 개발할 수 있습니다. DirectX를 호출하는 코드를 자체 C++/WinRT WRC(Windows 런타임 구성 요소)에 포함하면 XAML과 DirectX를 결합하는 UWP 앱(C# 앱 포함)에서 해당 WRC를 사용할 수 있습니다.
XAML 및 DirectX
DirectX는 2D 및 3D 그래픽을 위한 두 가지 강력한 라이브러리인 Direct2D 및 Direct3D를 각각 제공합니다. XAML은 기본 2D 기본 요소 및 효과에 대한 지원을 제공하지만 많은 모델링 및 게임 앱에는 더 복잡한 그래픽 지원이 필요합니다. 이를 위해 Direct2D 및 Direct3D를 사용하여 더 복잡한 그래픽을 렌더링하고 XAML을 사용하여 보다 전통적인 UI(사용자 인터페이스) 요소를 사용할 수 있습니다.
사용자 지정 XAML 및 DirectX 상호 운용성을 구현하는 경우 이 두 개념을 알아야 합니다.
- 공유 표면은 XAML로 정의된 크기 조정되는 표시 영역입니다. 즉, DirectX를 사용하여 Windows::UI::Xaml::Media::ImageSource유형으로 간접적으로 그릴 수 있는 영역입니다. 공유 표면의 경우 새 콘텐츠가 화면에 표시되는 정확한 타이밍을 제어할 수 없습니다. 오히려 공유 표면에 대한 업데이트는 XAML 프레임워크의 업데이트와 동기화됩니다.
- 스왑 체인은 최소 대기 시간으로 그래픽을 표시하는 데 사용되는 버퍼 모음을 나타냅니다. 일반적으로 스왑 체인은 UI 스레드와 별도로 초당 60프레임으로 업데이트됩니다. 그러나 스왑 체인은 빠른 업데이트를 지원하기 위해 더 많은 메모리와 CPU 리소스를 사용하고 여러 스레드를 관리해야 하므로 사용하기가 상대적으로 어렵습니다.
DirectX를 사용하는 용도를 고려합니다. 디스플레이 창의 크기에 맞는 단일 컨트롤을 합성하거나 애니메이션하는 데 사용하려고 하나요? 게임처럼 실시간으로 렌더링 및 제어해야 하는 출력이 포함되나요? 그런 경우 스왑 체인을 구현해야 할 수 있습니다. 그렇지 않으면 공유 표면을 사용하는 것이 좋습니다.
DirectX를 사용할 방법을 결정했으면 다음 Windows 런타임 유형 중 하나를 사용하여 DirectX 렌더링을 UWP 앱에 통합합니다.
- 정적 이미지를 작성하거나 이벤트 구동 간격으로 복잡한 이미지를 그리려는 경우 Windows::UI::Xaml::Media::Imaging::SurfaceImageSource를 사용하여 공유 표면에 그립니다. 이 유형은 크기가 조정된 DirectX 그리기 화면을 처리합니다. 일반적으로 이미지 또는 텍스처를 문서 또는 UI 요소에 표시할 비트맵으로 작성할 때 이 형식을 사용합니다. 고성능 게임과 같은 실시간 대화형 작업에서는 작동하지 않습니다. SurfaceImageSource 개체에 대한 업데이트는 XAML 사용자 인터페이스 업데이트와 동기화되므로 가변 프레임 속도 또는 실시간 입력에 대한 응답 사용자에게 제공하는 시각적 피드백에 대기 시간이 발생할 수 있기 때문입니다. 그렇지만 동적 컨트롤이나 데이터 시뮬레이션을 하는 데는 무리 없는 정도로 빠른 업데이트 속도를 제공합니다.
- 이미지가 제공된 화면 크기보다 크고 사용자가 이를 회전하거나 확대/축소할 수 있는 경우 Windows::UI::Xaml::Media::Imaging::VirtualSurfaceImageSource를 사용합니다. 이 유형은 화면보다 큰 크기의 DirectX 그리기 표면을 처리합니다. SurfaceImageSource와 마찬가지로 복잡한 이미지를 작성하거나 동적으로 컨트롤을 작성할 때 사용합니다. 또한 SurfaceImageSource와 마찬가지로 고성능 게임에서는 잘 작동하지 않습니다. VirtualSurfaceImageSource를 사용할 수 있는 XAML 요소의 몇 가지 예는 지도 컨트롤 또는 이미지 밀도가 높은 큰 문서 뷰어입니다.
- 정기적인 짧은 대기 시간 간격으로 업데이트가 수행되어야 하는 상황에서, 또는 업데이트된 그래픽을 실시간으로 나타내는 데 DirectX를 사용하는 경우 XAML 프레임워크 새로 고침 타이머와 동기화하지 않고 그래픽을 새로 고칠 수 있도록 SwapChainPanel 클래스를 사용하세요. SwapChainPanel을 사용하면 그래픽 디바이스의 스왑 체인(IDXGISwapChain1)에 직접 액세스하고 렌더링 대상 위에 XAML을 레이어링할 수 있습니다. SwapChainPanel은 XAML 기반 사용자 인터페이스가 필요한 게임 및 전체 화면 DirectX 앱에 적합합니다. 이 방법을 사용하려면 Microsoft DXGI(DirectX Graphics Infrastructure), Direct2D 및 Direct3D 기술을 포함하여 DirectX에 대해 잘 알고 있어야 합니다. 자세한 내용은 Direct3D 11 프로그래밍 가이드를 참조하세요.
SurfaceImageSource
SurfaceImageSource는 그릴 DirectX 공유 표면을 제공하고 비트를 앱 콘텐츠로 작성합니다.
팁
줄 간격(DirectWrite) 및 다운로드 가능한 글꼴(DirectWrite) 샘플 애플리케이션은 SurfaceImageSource를 보여 줍니다.
매우 높은 수준에서 SurfaceImageSource를 만들고 업데이트하는 프로세스는 다음과 같습니다.
- Direct 3D 디바이스, Direct 2D 디바이스 및 Direct 2D 디바이스 컨텍스트를 만듭니다.
- SurfaceImageSource를 만들고 여기에 Direct 2D(또는 Direct 3D) 디바이스를 설정합니다.
- DXGI 표면을 가져오기 위해 SurfaceImageSource에서 그리기를 시작합니다.
- Direct2D(또는 Direct3D)를 사용하여 DXGI 표면에 그립니다.
- 완료되면 SurfaceImageSource에서 그리기를 종료합니다.
- XAML UI에 표시하려면 XAML 이미지 또는 ImageBrush에서 SurfaceImageSource를 설정합니다.
소스 코드 예제와 함께 이러한 단계에 대해 자세히 알아봅니다.
Microsoft Visual Studio에서 새 프로젝트를 만들어 아래에 표시되고 설명된 코드를 따를 수 있습니다. 빈 앱(C++/WinRT) 프로젝트를 만듭니다. 일반적으로 사용 가능한 최신(미리 보기 아님) 버전의 Windows SDK를 대상으로 합니다.
pch.h를 열고 이미 있는 항목 아래에 다음을 추가합니다.// pch.h ... #include <d3d11_4.h> #include <d2d1_1.h> #include <windows.ui.xaml.media.dxinterop.h> #include <winrt/Windows.UI.Xaml.Media.Imaging.h>아래에 표시된
using지시문을 이미 있는 항목 아래에 있는MainPage.cpp의 상단에 추가합니다. 또한MainPage.cpp에서 MainPage::ClickHandler의 기존 구현을 아래 표시된 목록으로 바꿉니다. 이 코드는 Direct 3D 디바이스, Direct 2D 디바이스 및 Direct 2D 디바이스 컨텍스트를 만듭니다. 이를 위해 D3D11CreateDevice, D2D1CreateDevice 및 ID2D1Device::CreateDeviceContext를 호출합니다.// MainPage.cpp | paste this below the existing using directives using namespace Windows::UI::Xaml::Media::Imaging;// MainPage.cpp | paste this to replace the existing MainPage::ClickHandler void MainPage::ClickHandler(IInspectable const&, RoutedEventArgs const&) { myButton().Content(box_value(L"Clicked")); uint32_t creationFlags = D3D11_CREATE_DEVICE_BGRA_SUPPORT; D3D_FEATURE_LEVEL featureLevels[] = { D3D_FEATURE_LEVEL_11_1, D3D_FEATURE_LEVEL_11_0, D3D_FEATURE_LEVEL_10_1, D3D_FEATURE_LEVEL_10_0, D3D_FEATURE_LEVEL_9_3, D3D_FEATURE_LEVEL_9_2, D3D_FEATURE_LEVEL_9_1 }; // Create the Direct3D device. winrt::com_ptr<::ID3D11Device> d3dDevice; D3D_FEATURE_LEVEL supportedFeatureLevel; winrt::check_hresult(::D3D11CreateDevice( nullptr, D3D_DRIVER_TYPE_HARDWARE, 0, creationFlags, featureLevels, ARRAYSIZE(featureLevels), D3D11_SDK_VERSION, d3dDevice.put(), &supportedFeatureLevel, nullptr) ); // Get the DXGI device. winrt::com_ptr<::IDXGIDevice> dxgiDevice{ d3dDevice.as<::IDXGIDevice>() }; // Create the Direct2D device and a corresponding context. winrt::com_ptr<::ID2D1Device> d2dDevice; ::D2D1CreateDevice(dxgiDevice.get(), nullptr, d2dDevice.put()); winrt::com_ptr<::ID2D1DeviceContext> d2dDeviceContext; winrt::check_hresult( d2dDevice->CreateDeviceContext( D2D1_DEVICE_CONTEXT_OPTIONS_NONE, d2dDeviceContext.put() ) ); }다음으로 SurfaceImageSource를 만드는 코드를 추가하고 ISurfaceImageSourceNativeWithD2D::SetDevice를 호출하여 Direct 2D(또는 Direct 3D) 디바이스를 설정합니다.
참고 항목
백그라운드 스레드에서 SurfaceImageSource로 그리는 경우 DXGI 디바이스에 다중 스레드 액세스가 사용하도록 설정되어 있는지도 확인해야 합니다(아래 코드 참조). 성능상의 이유로 백그라운드 스레드에서 그리는 경우에만 이 작업을 수행해야 합니다.
SurfaceImageSource 생성자에 높이와 너비를 전달하여 공유 표면의 크기를 정의합니다. 표면에 알파(불투명도) 지원이 필요한지 여부를 나타낼 수도 있습니다.
디바이스를 설정하고 그리기 작업을 실행하려면 ISurfaceImageSourceNativeWithD2D에 대한 포인터가 필요합니다. 하나를 가져오려면 기본 ISurfaceImageSourceNativeWithD2D 인터페이스에 대해 SurfaceImageSource 개체를 쿼리합니다.
// MainPage.cpp | paste this at the end of MainPage::ClickHandler SurfaceImageSource surfaceImageSource(500, 500); winrt::com_ptr<::ISurfaceImageSourceNativeWithD2D> sisNativeWithD2D{ surfaceImageSource.as<::ISurfaceImageSourceNativeWithD2D>() }; // Associate the Direct2D device with the SurfaceImageSource. sisNativeWithD2D->SetDevice(d2dDevice.get()); // To enable multi-threaded access (optional) winrt::com_ptr<::ID3D11Multithread> d3dMultiThread{ d3dDevice.as<::ID3D11Multithread>() }; d3dMultiThread->SetMultithreadProtected(true);ISurfaceImageSourceNativeWithD2D::BeginDraw를 호출하여 DXGI 표면(IDXGISurface 인터페이스)을 검색합니다. 다중 스레드 액세스를 사용하도록 설정한 경우 배경 스레드에서 ISurfaceImageSourceNativeWithD2D::BeginDraw(및 이후 그리기 명령)를 호출할 수 있습니다. 이 단계에서는 DXGI 표면에서 비트맵을 만들고 이를 Direct 2D 디바이스 컨텍스트로 설정합니다.
offset 매개 변수에서 ISurfaceImageSourceNativeWithD2D::BeginDraw는 업데이트된 대상 직사각형의 점 오프셋(x,y 값)을 반환합니다. 이 오프셋을 사용하여 ID2D1DeviceContext로 업데이트된 콘텐츠를 그릴 위치를 결정할 수 있습니다.
// MainPage.cpp | paste this at the end of MainPage::ClickHandler
winrt::com_ptr<::IDXGISurface> dxgiSurface;

RECT updateRect{ 0, 0, 500, 500 };
POINT offset{ 0, 0 };
HRESULT beginDrawHR = sisNativeWithD2D->BeginDraw(
    updateRect,
    __uuidof(::IDXGISurface),
    dxgiSurface.put_void(),
    &offset);

// Create render target.
winrt::com_ptr<::ID2D1Bitmap1> bitmap;
winrt::check_hresult(
    d2dDeviceContext->CreateBitmapFromDxgiSurface(
        dxgiSurface.get(),
        nullptr,
        bitmap.put()
    )
);

// Set context's render target.
d2dDeviceContext->SetTarget(bitmap.get());
Direct 2D 디바이스 컨텍스트를 사용하여 SurfaceImageSource의 콘텐츠를 그립니다. updateRect 매개 변수의 이전 단계에서 업데이트를 위해 지정된 영역만 그려집니다.
// MainPage.cpp | paste this at the end of MainPage::ClickHandler if (beginDrawHR == DXGI_ERROR_DEVICE_REMOVED || beginDrawHR == DXGI_ERROR_DEVICE_RESET || beginDrawHR == D2DERR_RECREATE_TARGET) { // The Direct3D and Direct2D devices were lost and need to be re-created. // Recovery steps are: // 1) Re-create the Direct3D and Direct2D devices // 2) Call ISurfaceImageSourceNativeWithD2D::SetDevice with the new Direct2D // device // 3) Redraw the contents of the SurfaceImageSource } else if (beginDrawHR == E_SURFACE_CONTENTS_LOST) { // The devices were not lost but the entire contents of the surface // were. Recovery steps are: // 1) Call ISurfaceImageSourceNativeWithD2D::SetDevice with the Direct2D // device again // 2) Redraw the entire contents of the SurfaceImageSource } else { // Draw using Direct2D context. d2dDeviceContext->BeginDraw(); d2dDeviceContext->Clear(D2D1::ColorF(D2D1::ColorF::Orange)); winrt::com_ptr<::ID2D1SolidColorBrush> brush; winrt::check_hresult(d2dDeviceContext->CreateSolidColorBrush( D2D1::ColorF(D2D1::ColorF::Chocolate), D2D1::BrushProperties(0.8f), brush.put())); D2D1_SIZE_F const size{ 500, 500 }; D2D1_RECT_F const rect{ 100.0f, 100.0f, size.width - 100.0f, size.height - 100.0f }; d2dDeviceContext->DrawRectangle(rect, brush.get(), 100.0f); d2dDeviceContext->EndDraw(); }ISurfaceImageSourceNativeWithD2D::EndDraw를 호출하여 비트맵을 완성합니다(UI 스레드에서만 ISurfaceImageSourceNativeWithD2D::EndDraw를 호출해야 함). 그런 다음 XAML UI에 표시하기 위해 XAML Image(또는 ImageBrush)에서 SurfaceImageSource를 설정합니다.
// MainPage.cpp | paste this at the end of MainPage::ClickHandler
sisNativeWithD2D->EndDraw();

// The SurfaceImageSource object's underlying
// ISurfaceImageSourceNativeWithD2D object will contain the completed bitmap.

theImage().Source(surfaceImageSource);
참고 항목
현재 SurfaceImageSource::SetSource(IBitmapSource::SetSource에서 상속됨)를 호출하면 예외가 발생합니다. SurfaceImageSource 개체에서 호출하지 마세요.
참고 항목
창이 숨겨져 있거나 비활성화되어 있는 동안 SurfaceImageSource에 그리는 것을 피합니다. 그렇지 않으면 ISurfaceImageSourceNativeWithD2D API가 실패합니다. 이를 달성하기 위해 창 가시성 및 애플리케이션 일시 중단과 관련된 이벤트를 처리합니다.
마지막으로
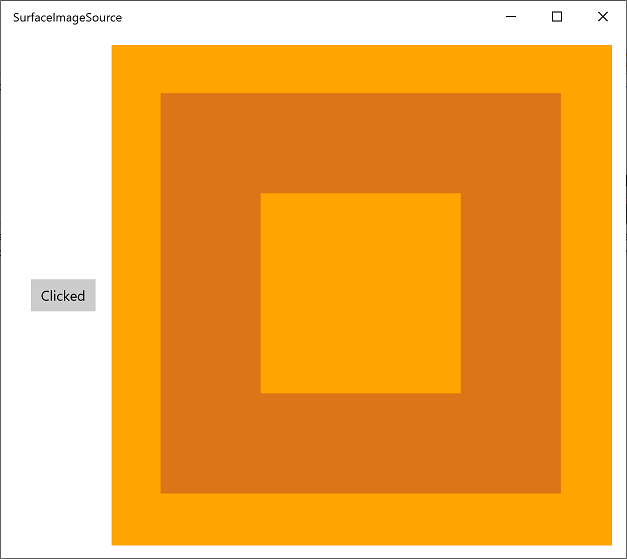
MainPage.xaml의 기존 XAML 표시 내에 다음 Image 요소를 추가합니다.<!-- MainPage.xaml --> ... <Image x:Name="theImage" Width="500" Height="500" /> ...이제 앱을 빌드 및 실행할 수 있습니다. 단추를 클릭하면 Image에 표시된 SurfaceImageSource의 내용을 볼 수 있습니다.
VirtualSurfaceImageSource
VirtualSurfaceImageSource는 SurfaceImageSource를 확장하며, 콘텐츠가 한 번에 화면에 모두 담기에는 너무 커서(및/또는 비디오 메모리에 단일 텍스처로 담기에는 너무 큼) 최적의 렌더링을 위해 콘텐츠를 가상화해야 하는 시나리오를 위한 것입니다. 예를 들어 매핑 앱 또는 대용량 문서 캔버스가 있습니다.
팁
복잡한 수동 입력 샘플 애플리케이션은 VirtualSurfaceImageSource를 보여 줍니다.
VirtualSurfaceImageSource는 표면의 영역이 화면에 보이게 되면 이를 업데이트하도록 구현하는 콜백 IVirtualSurfaceImageSourceCallbacksNative::UpdatesNeeded을 사용한다는 점에서 SurfaceImageSource와 다릅니다. XAML 프레임워크가 알아서 처리하기 때문에 숨겨진 영역을 지울 필요가 없습니다.
VirtualSurfaceImageSource를 다루기 전에 SurfaceImageSource(위의 SurfaceImageSource 섹션 참조)에 익숙해지는 것이 좋습니다. 그러나 매우 높은 수준에서 VirtualSurfaceImageSource를 만들고 업데이트하는 프로세스는 다음과 같습니다.
- IVirtualSurfaceImageSourceCallbackNative 인터페이스를 구현합니다.
- Direct 3D 디바이스, Direct 2D 디바이스 및 Direct 2D 디바이스 컨텍스트를 만듭니다.
- VirtualSurfaceImageSource를 만들고 여기에 Direct 2D(또는 Direct 3D) 디바이스를 설정합니다.
- VirtualSurfaceImageSource에서 RegisterForUpdatesNeeded를 호출합니다.
- UpdatesNeeded 콜백에서 GetUpdateRectCount 및 GetUpdateRects를 호출합니다.
- 업데이트 사각형을 렌더링합니다(SurfaceImageSource와 마찬가지로 BeginDraw/EndDraw 사용).
- XAML UI에 표시하려면 XAML 이미지 또는 ImageBrush에서 SurfaceImageSource를 설정합니다.
소스 코드 예제와 함께 이러한 단계에 대해 자세히 알아봅니다.
Microsoft Visual Studio에서 새 프로젝트를 만들어 아래에 표시되고 설명된 코드를 따를 수 있습니다. 빈 앱(C++/WinRT) 프로젝트를 만들고 이름을 VSISDemo로 지정합니다(아래에 제공된 코드 목록에서 복사하여 붙여넣을 경우 프로젝트에 이 이름을 지정하는 것이 중요합니다.). 일반적으로 사용 가능한 최신(미리 보기 아님) 버전의 Windows SDK를 대상으로 합니다.
pch.h를 열고 이미 있는 항목 아래에 다음을 추가합니다.// pch.h ... #include <d3d11_4.h> #include <d2d1_1.h> #include <windows.ui.xaml.media.dxinterop.h> #include <winrt/Windows.UI.Xaml.Media.Imaging.h>이 단계에서는 IVirtualSurfaceUpdatesCallbackNative 인터페이스의 구현을 제공합니다. 프로젝트에 새 헤더 파일(.h) 항목을 추가하고 이름을 CallbackImplementation.h로 지정합니다. 해당 파일의 내용을 아래 목록으로 바꿉니다. 코드는 목록 뒤에 설명되어 있습니다.
#include "pch.h"

namespace winrt::VSISDemo::implementation
{
    struct CallbackImplementation : winrt::implements<CallbackImplementation, ::IVirtualSurfaceUpdatesCallbackNative>
    {
        CallbackImplementation(
            winrt::com_ptr<::ISurfaceImageSourceNativeWithD2D> sisNativeWithD2D,
            winrt::com_ptr<::IVirtualSurfaceImageSourceNative> const& vsisNative,
            winrt::com_ptr<::ID2D1DeviceContext> const& d2dDeviceContext) :
            m_sisNativeWithD2D(sisNativeWithD2D),
            m_vsisNative(vsisNative),
            m_d2dDeviceContext(d2dDeviceContext)
        {}

        IFACEMETHOD(UpdatesNeeded)()
        {
            HRESULT hr = S_OK;

            ULONG drawingBoundsCount = 0;
            m_vsisNative->GetUpdateRectCount(&drawingBoundsCount);

            std::unique_ptr<RECT[]> drawingBounds(
                new RECT[drawingBoundsCount]);

            m_vsisNative->GetUpdateRects(
                drawingBounds.get(),
                drawingBoundsCount);

            for (ULONG i = 0; i < drawingBoundsCount; ++i)
            {
                winrt::com_ptr<::IDXGISurface> dxgiSurface;

                POINT offset{ 0, 0 };
                HRESULT beginDrawHR = m_sisNativeWithD2D->BeginDraw(
                    drawingBounds[i],
                    __uuidof(::IDXGISurface),
                    dxgiSurface.put_void(),
                    &offset);

                // Create render target.
                winrt::com_ptr<::ID2D1Bitmap1> bitmap;
                winrt::check_hresult(
                    m_d2dDeviceContext->CreateBitmapFromDxgiSurface(
                        dxgiSurface.get(),
                        nullptr,
                        bitmap.put()
                    )
                );

                // Set context's render target.
                m_d2dDeviceContext->SetTarget(bitmap.get());

                if (beginDrawHR == DXGI_ERROR_DEVICE_REMOVED ||
                    beginDrawHR == DXGI_ERROR_DEVICE_RESET ||
                    beginDrawHR == D2DERR_RECREATE_TARGET)
                {
                    // The Direct3D and Direct2D devices were lost and need to be re-created.
                    // Recovery steps are:
                    // 1) Re-create the Direct3D and Direct2D devices
                    // 2) Call ISurfaceImageSourceNativeWithD2D::SetDevice with the new Direct2D
                    //    device
                    // 3) Redraw the contents of the SurfaceImageSource
                }
                else if (beginDrawHR == E_SURFACE_CONTENTS_LOST)
                {
                    // The devices were not lost but the entire contents of the surface
                    // were. Recovery steps are:
                    // 1) Call ISurfaceImageSourceNativeWithD2D::SetDevice with the Direct2D
                    //    device again
                    // 2) Redraw the entire contents of the SurfaceImageSource
                }
                else
                {
                    // Draw using Direct2D context.
                    m_d2dDeviceContext->BeginDraw();

                    m_d2dDeviceContext->Clear(D2D1::ColorF(D2D1::ColorF::Orange));

                    winrt::com_ptr<::ID2D1SolidColorBrush> brush;
                    winrt::check_hresult(m_d2dDeviceContext->CreateSolidColorBrush(
                        D2D1::ColorF(D2D1::ColorF::Chocolate),
                        D2D1::BrushProperties(0.8f),
                        brush.put()));

                    D2D1_SIZE_F const size{ drawingBounds[i].right - drawingBounds[i].left, drawingBounds[i].bottom - drawingBounds[i].top };
                    D2D1_RECT_F const rect{ 100.0f, 100.0f, size.width - 100.0f, size.height - 100.0f };
                    m_d2dDeviceContext->DrawRectangle(rect, brush.get(), 100.0f);

                    m_d2dDeviceContext->EndDraw();
                }

                m_sisNativeWithD2D->EndDraw();
            }

            return hr;
        }

    private:
        winrt::com_ptr<::ISurfaceImageSourceNativeWithD2D> m_sisNativeWithD2D{ nullptr };
        winrt::com_ptr<::IVirtualSurfaceImageSourceNative> m_vsisNative{ nullptr };
        winrt::com_ptr<::ID2D1DeviceContext> m_d2dDeviceContext{ nullptr };
    };
}
VirtualSurfaceImageSource 영역을 업데이트해야 할 때마다 프레임워크는 IVirtualSurfaceUpdatesCallbackNative::UpdatesNeeded(위에 표시됨) 구현을 호출합니다.
이는 프레임워크가 영역을 그려야 할 필요가 있는지 결정하는 경우(예: 사용자가 표면의 보기를 회전하거나 확대/축소하는 경우) 또는 앱이 해당 영역에서 IVirtualSurfaceImageSourceNative::Invalidate를 호출한 후에 발생할 수 있습니다.
IVirtualSurfaceImageSourceNative::UpdatesNeeded 구현에서 IVirtualSurfaceImageSourceNative::GetUpdateRectCount 및 IVirtualSurfaceImageSourceNative::GetUpdateRects를 사용합니다. 표면의 어떤 영역을 그려야 하는지 결정하는 메서드입니다.
업데이트해야 하는 각 영역에 대해 특정 콘텐츠를 해당 영역에 그리지만 더 나은 성능을 위해 경계 영역으로 그리기를 제한합니다. ISurfaceImageSourceNativeWithD2D 메서드를 호출하는 방법은 SurfaceImageSource와 동일합니다(위의 SurfaceImageSource 섹션 참조).
참고 항목
창이 숨겨져 있거나 비활성화되어 있는 동안 VirtualSurfaceImageSource에 그리는 것을 피합니다. 그렇지 않으면 ISurfaceImageSourceNativeWithD2D API가 실패합니다. 이를 달성하기 위해 창 가시성 및 애플리케이션 일시 중단과 관련된 이벤트를 처리합니다.
MainPage 클래스에서 CallbackImplementation 유형의 멤버를 추가합니다. 또한 Direct 3D 디바이스, Direct 2D 디바이스 및 Direct 2D 디바이스 컨텍스트를 만듭니다. 이를 위해 D3D11CreateDevice, D2D1CreateDevice 및 ID2D1Device::CreateDeviceContext를 호출하겠습니다.
MainPage.idl,MainPage.h및MainPage.cpp의 내용을 아래 목록의 내용으로 바꿉니다.// MainPage.idl namespace VSISDemo { [default_interface] runtimeclass MainPage : Windows.UI.Xaml.Controls.Page { MainPage(); } }// MainPage.h #pragma once #include "MainPage.g.h" #include "CallbackImplementation.h" namespace winrt::VSISDemo::implementation { struct MainPage : MainPageT<MainPage> { MainPage(); void ClickHandler(Windows::Foundation::IInspectable const& sender, Windows::UI::Xaml::RoutedEventArgs const& args); private: winrt::com_ptr<::IVirtualSurfaceUpdatesCallbackNative> m_cbi{ nullptr }; }; } namespace winrt::VSISDemo::factory_implementation { struct MainPage : MainPageT<MainPage, implementation::MainPage> { }; }// MainPage.cpp #include "pch.h" #include "MainPage.h" #include "MainPage.g.cpp" using namespace winrt; using namespace Windows::UI::Xaml; using namespace Windows::UI::Xaml::Media::Imaging; namespace winrt::VSISDemo::implementation { MainPage::MainPage() { InitializeComponent(); } void MainPage::ClickHandler(IInspectable const&, RoutedEventArgs const&) { myButton().Content(box_value(L"Clicked")); uint32_t creationFlags = D3D11_CREATE_DEVICE_BGRA_SUPPORT; D3D_FEATURE_LEVEL featureLevels[] = { D3D_FEATURE_LEVEL_11_1, D3D_FEATURE_LEVEL_11_0, D3D_FEATURE_LEVEL_10_1, D3D_FEATURE_LEVEL_10_0, D3D_FEATURE_LEVEL_9_3, D3D_FEATURE_LEVEL_9_2, D3D_FEATURE_LEVEL_9_1 }; // Create the Direct3D device. winrt::com_ptr<::ID3D11Device> d3dDevice; D3D_FEATURE_LEVEL supportedFeatureLevel; winrt::check_hresult(::D3D11CreateDevice( nullptr, D3D_DRIVER_TYPE_HARDWARE, 0, creationFlags, featureLevels, ARRAYSIZE(featureLevels), D3D11_SDK_VERSION, d3dDevice.put(), &supportedFeatureLevel, nullptr) ); // Get the Direct3D device. winrt::com_ptr<::IDXGIDevice> dxgiDevice{ d3dDevice.as<::IDXGIDevice>() }; // Create the Direct2D device and a corresponding context. winrt::com_ptr<::ID2D1Device> d2dDevice; ::D2D1CreateDevice(dxgiDevice.get(), nullptr, d2dDevice.put()); winrt::com_ptr<::ID2D1DeviceContext> d2dDeviceContext; winrt::check_hresult( d2dDevice->CreateDeviceContext( D2D1_DEVICE_CONTEXT_OPTIONS_NONE, d2dDeviceContext.put() ) ); } }그런 다음 원하는 크기로 VirtualSurfaceImageSource를 만들고 ISurfaceImageSourceNativeWithD2D::SetDevice를 호출하여 Direct 2D(또는 Direct 3D) 디바이스를 설정하는 코드를 추가합니다.
참고 항목
백그라운드 스레드에서 VirtualSurfaceImageSource로 그리는 경우 DXGI 디바이스에 다중 스레드 액세스가 사용하도록 설정되어 있는지도 확인해야 합니다(아래 코드 참조). 성능상의 이유로 백그라운드 스레드에서 그리는 경우에만 이 작업을 수행해야 합니다.
디바이스를 설정하고 그리기 작업을 실행하려면 ISurfaceImageSourceNativeWithD2D에 대한 포인터가 필요합니다. 하나를 가져오려면 기본 ISurfaceImageSourceNativeWithD2D 인터페이스에 대해 VirtualSurfaceImageSource 개체를 쿼리합니다.
또한 IVirtualSurfaceImageSourceNative를 쿼리하고 IVirtualSurfaceImageSourceNative::RegisterForUpdatesNeeded를 호출하여 IVirtualSurfaceUpdatesCallbackNative 구현을 제공합니다. .
그런 다음 XAML UI에 표시하기 위해 XAML Image(또는 ImageBrush)에서 SurfaceImageSource를 설정합니다.
// MainPage.cpp | paste this at the end of MainPage::ClickHandler
VirtualSurfaceImageSource virtualSurfaceImageSource(2000, 2000);

winrt::com_ptr<::ISurfaceImageSourceNativeWithD2D> sisNativeWithD2D{
    virtualSurfaceImageSource.as<::ISurfaceImageSourceNativeWithD2D>() };

// Associate the Direct2D device with the SurfaceImageSource.
sisNativeWithD2D->SetDevice(d2dDevice.get());

// To enable multi-threaded access (optional)
winrt::com_ptr<::ID3D11Multithread> d3dMultiThread{
    d3dDevice.as<::ID3D11Multithread>() };
d3dMultiThread->SetMultithreadProtected(true);

winrt::com_ptr<::IVirtualSurfaceImageSourceNative> vsisNative{
    virtualSurfaceImageSource.as<::IVirtualSurfaceImageSourceNative>() };

m_cbi = winrt::make<CallbackImplementation>(sisNativeWithD2D, vsisNative, d2dDeviceContext);
vsisNative->RegisterForUpdatesNeeded(m_cbi.as<::IVirtualSurfaceUpdatesCallbackNative>().get());

// The SurfaceImageSource object's underlying
// ISurfaceImageSourceNativeWithD2D object will contain the completed bitmap.

theImage().Source(virtualSurfaceImageSource);
마지막으로
MainPage.xaml의 기존 XAML 표시 내에 다음 Image 요소를 추가합니다.<!-- MainPage.xaml --> ... <Image x:Name="theImage" Width="500" Height="500" /> ...이제 앱을 빌드 및 실행할 수 있습니다. 단추를 클릭하면 Image에 표시된 VirtualSurfaceImageSource의 내용을 볼 수 있습니다.
SwapChainPanel 및 게임
SwapChainPanel은 개발자가 스왑 체인을 직접 관리할 수 있는 경우 고성능 그래픽 및 게임을 지원하기 위해 디자인된 Windows 런타임 유형입니다. 이 경우 고유한 DirectX 스왑 체인을 만들고 렌더링된 콘텐츠의 프레젠테이션을 관리합니다. SwapChainPanel의 또 다른 기능은 그 앞에 다른 XAML 요소를 오버레이할 수 있다는 것입니다.
팁
다음 샘플 애플리케이션은 SurfaceImageSource를 보여 줍니다. Direct2D 고급 컬러 이미지 렌더링, Direct2D 사진 조정, Direct2D SVG 이미지 렌더링, 낮음 대기 시간 입력, DirectX 및 XAML 게임, XAML SwapChainPanel DirectX interop(Windows 8.1).
성능을 보장하기 위해, SwapChainPanel 유형에는 특정 제한이 있습니다.
- 앱당 SwapChainPanel 인스턴스가 4개를 넘지 않아야 합니다.
- DirectX 스왑 체인의 높이 및 너비를 (DXGI_SWAP_CHAIN_DESC1에서) 스왑 체인 요소의 현재 크기로 설정해야 합니다. 그렇지 않으면 표시 콘텐츠가 그에 맞게 조정됩니다(DXGI_SCALING_STRETCH 사용).
- DirectX 스왑 체인의 크기 조정 모드를 (DXGI_SWAP_CHAIN_DESC1에서) DXGI_SCALING_STRETCH로 설정해야 합니다.
- IDXGIFactory2::CreateSwapChainForComposition을 호출하여 DirectX 스왑 체인을 만들어야 합니다.
앱의 필요에 따라 SwapChainPanel을 업데이트하며 XAML 프레임워크의 업데이트와 동기화되지 않습니다. SwapChainPanel의 업데이트를 XAML 프레임워크의 업데이트와 동기화해야 하는 경우 Windows::UI::Xaml::Media::CompositionTarget::Rendering 이벤트에 등록합니다. 그렇지 않으면 SwapChainPanel을 업데이트하는 스레드와 다른 스레드에서 XAML 요소를 업데이트하려는 경우 스레드 간 문제를 고려해야 합니다.
SwapChainPanel에 짧은 대기 시간의 포인터 입력을 수신해야 하는 경우 SwapChainPanel::CreateCoreIndependentInputSource를 사용합니다. 이 메서드는 백그라운드 스레드에서 최소 대기 시간에 입력 이벤트를 수신하는 데 사용할 수 있는 CoreIndependentInputSource 개체를 반환합니다. 이 메서드가 호출되면 SwapChainPanel에 대해 일반 XAML 포인터 입력 이벤트가 발생되지 않습니다. 모든 입력이 백그라운드 스레드로 리디렉션되기 때문입니다.
다음은 SwapChainPanel 개체를 만들고 업데이트하는 프로세스입니다.
Microsoft Visual Studio에서 새 프로젝트를 만들어 아래에 표시되고 설명된 코드를 따를 수 있습니다. 빈 앱(C++/WinRT) 프로젝트를 만들고 이름을 SCPDemo로 지정합니다(아래에 제공된 코드 목록에서 복사하여 붙여넣을 경우 프로젝트에 이 이름을 지정하는 것이 중요합니다.). 일반적으로 사용 가능한 최신(미리 보기 아님) 버전의 Windows SDK를 대상으로 합니다.
pch.h를 열고 이미 있는 항목 아래에 다음을 추가합니다.// pch.h ... #include <d3d11_4.h> #include <d2d1_1.h> #include <windows.ui.xaml.media.dxinterop.h>MainPage 클래스에서 먼저 Direct 3D 디바이스, Direct 2D 디바이스 및 Direct 2D 디바이스 컨텍스트를 만듭니다. 이를 위해 D3D11CreateDevice, D2D1CreateDevice 및 ID2D1Device::CreateDeviceContext를 호출하겠습니다.
MainPage.idl,MainPage.h및MainPage.cpp의 내용을 아래 목록의 내용으로 바꿉니다.// MainPage.idl namespace SCPDemo { [default_interface] runtimeclass MainPage : Windows.UI.Xaml.Controls.Page { MainPage(); } }// MainPage.h #pragma once #include "MainPage.g.h" namespace winrt::SCPDemo::implementation { struct MainPage : MainPageT<MainPage> { MainPage(); void ClickHandler(Windows::Foundation::IInspectable const& sender, Windows::UI::Xaml::RoutedEventArgs const& args); }; } namespace winrt::SCPDemo::factory_implementation { struct MainPage : MainPageT<MainPage, implementation::MainPage> { }; }// MainPage.cpp #include "pch.h" #include "MainPage.h" #include "MainPage.g.cpp" using namespace winrt; using namespace Windows::UI::Xaml; namespace winrt::SCPDemo::implementation { MainPage::MainPage() { InitializeComponent(); } void MainPage::ClickHandler(IInspectable const&, RoutedEventArgs const&) { myButton().Content(box_value(L"Clicked")); uint32_t creationFlags = D3D11_CREATE_DEVICE_BGRA_SUPPORT; D3D_FEATURE_LEVEL featureLevels[] = { D3D_FEATURE_LEVEL_11_1, D3D_FEATURE_LEVEL_11_0, D3D_FEATURE_LEVEL_10_1, D3D_FEATURE_LEVEL_10_0, D3D_FEATURE_LEVEL_9_3, D3D_FEATURE_LEVEL_9_2, D3D_FEATURE_LEVEL_9_1 }; // Create the Direct3D device. winrt::com_ptr<::ID3D11Device> d3dDevice; D3D_FEATURE_LEVEL supportedFeatureLevel; winrt::check_hresult(::D3D11CreateDevice( nullptr, D3D_DRIVER_TYPE_HARDWARE, 0, creationFlags, featureLevels, ARRAYSIZE(featureLevels), D3D11_SDK_VERSION, d3dDevice.put(), &supportedFeatureLevel, nullptr) ); // Get the Direct3D device. winrt::com_ptr<::IDXGIDevice> dxgiDevice{ d3dDevice.as<::IDXGIDevice>() }; // Create the Direct2D device and a corresponding context. winrt::com_ptr<::ID2D1Device> d2dDevice; ::D2D1CreateDevice(dxgiDevice.get(), nullptr, d2dDevice.put()); winrt::com_ptr<::ID2D1DeviceContext> d2dDeviceContext; winrt::check_hresult( d2dDevice->CreateDeviceContext( D2D1_DEVICE_CONTEXT_OPTIONS_NONE, d2dDeviceContext.put() ) ); } }SwapChainPanel 요소에서 XAML 표시를
x:Name으로 래핑합니다. 래핑된 XAML 요소는 SwapChainPanel 앞에서 렌더링됩니다.<!-- MainPage.xaml --> <SwapChainPanel x:Name="swapChainPanel"> <StackPanel Orientation="Horizontal" HorizontalAlignment="Center" VerticalAlignment="Center"> <Button x:Name="myButton" Click="ClickHandler">Click Me</Button> </StackPanel> </SwapChainPanel>그런 다음 나중에 보게 될 동일한 이름의 접근자 함수를 통해 SwapChainPanel 개체에 액세스할 수 있습니다.
그런 다음 IDXGIFactory2::CreateSwapChainForComposition을 호출하여 스왑 체인을 만듭니다.
// MainPage.cpp | paste this at the end of MainPage::ClickHandler // Get the DXGI adapter. winrt::com_ptr< ::IDXGIAdapter > dxgiAdapter; dxgiDevice->GetAdapter(dxgiAdapter.put()); // Get the DXGI factory. winrt::com_ptr< ::IDXGIFactory2 > dxgiFactory; dxgiFactory.capture(dxgiAdapter, &IDXGIAdapter::GetParent); DXGI_SWAP_CHAIN_DESC1 swapChainDesc { 0 }; swapChainDesc.Width = 500; swapChainDesc.Height = 500; swapChainDesc.Format = DXGI_FORMAT_B8G8R8A8_UNORM; // This is the most common swapchain format. swapChainDesc.Stereo = false; swapChainDesc.SampleDesc.Count = 1; // Don't use multi-sampling. swapChainDesc.SampleDesc.Quality = 0; swapChainDesc.BufferUsage = DXGI_USAGE_RENDER_TARGET_OUTPUT; swapChainDesc.BufferCount = 2; swapChainDesc.Scaling = DXGI_SCALING_STRETCH; swapChainDesc.SwapEffect = DXGI_SWAP_EFFECT_FLIP_SEQUENTIAL; // We recommend using this swap effect for all applications. swapChainDesc.Flags = 0; // Create a swap chain by calling IDXGIFactory2::CreateSwapChainForComposition. winrt::com_ptr< ::IDXGISwapChain1 > swapChain; dxgiFactory->CreateSwapChainForComposition( d3dDevice.get(), &swapChainDesc, nullptr, swapChain.put());swapChainPanel이라는 이름을 지정한 SwapChainPanel에서 ISwapChainPanelNative를 가져옵니다. ISwapChainPanelNative::SetSwapChain을 호출하여 SwapChainPanel에서 스왑 체인을 설정합니다.
// MainPage.cpp | paste this at the end of MainPage::ClickHandler
// Get native interface for SwapChainPanel
auto panelNative{ swapChainPanel().as<ISwapChainPanelNative>() };

winrt::check_hresult(
    panelNative->SetSwapChain(swapChain.get())
);
마지막으로 DirectX 스왑 체인을 그린 다음 콘텐츠를 표시하도록 제시합니다.
// Create a Direct2D target bitmap associated with the
// swap chain back buffer, and set it as the current target.
D2D1_BITMAP_PROPERTIES1 bitmapProperties =
    D2D1::BitmapProperties1(
        D2D1_BITMAP_OPTIONS_TARGET | D2D1_BITMAP_OPTIONS_CANNOT_DRAW,
        D2D1::PixelFormat(DXGI_FORMAT_B8G8R8A8_UNORM, D2D1_ALPHA_MODE_PREMULTIPLIED),
        96.f,
        96.f
    );

winrt::com_ptr<::IDXGISurface> dxgiBackBuffer;
swapChain->GetBuffer(0, __uuidof(dxgiBackBuffer), dxgiBackBuffer.put_void());

winrt::com_ptr< ::ID2D1Bitmap1 > targetBitmap;
winrt::check_hresult(
    d2dDeviceContext->CreateBitmapFromDxgiSurface(
        dxgiBackBuffer.get(),
        &bitmapProperties,
        targetBitmap.put()
    )
);

d2dDeviceContext->SetTarget(targetBitmap.get());

// Draw using Direct2D context.
d2dDeviceContext->BeginDraw();

d2dDeviceContext->Clear(D2D1::ColorF(D2D1::ColorF::Orange));

winrt::com_ptr<::ID2D1SolidColorBrush> brush;
winrt::check_hresult(d2dDeviceContext->CreateSolidColorBrush(
    D2D1::ColorF(D2D1::ColorF::Chocolate),
    D2D1::BrushProperties(0.8f),
    brush.put()));

D2D1_SIZE_F const size{ 500, 500 };
D2D1_RECT_F const rect{ 100.0f, 100.0f, size.width - 100.0f, size.height - 100.0f };
d2dDeviceContext->DrawRectangle(rect, brush.get(), 100.0f);

d2dDeviceContext->EndDraw();

swapChain->Present(1, 0);
XAML 요소는 Windows 런타임 레이아웃/렌더링 논리가 업데이트 신호를 보낼 때 새로 고쳐집니다.
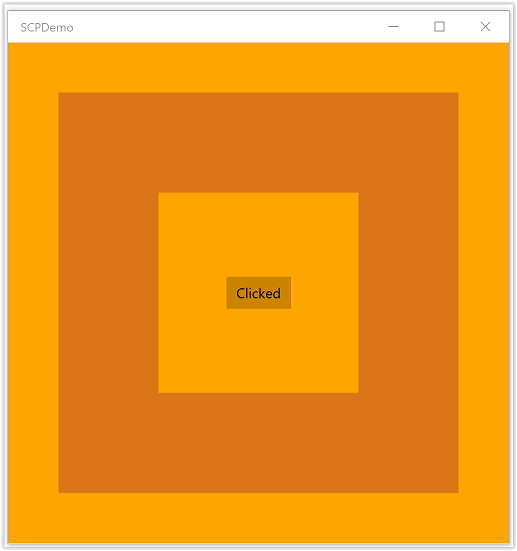
이제 앱을 빌드 및 실행할 수 있습니다. 단추를 클릭하면 다른 XAML 요소 뒤에 표시되는 SwapChainPanel의 내용을 볼 수 있습니다.
참고 항목
일반적으로 DirectX 앱은 디스플레이 창 크기(대부분의 Microsoft Store 게임에서 기본 화면 해상도)와 동일한 가로 방향으로 스왑 체인을 만들어야 합니다. 이렇게 하면 앱에 보이는 XAML 오버레이가 없을 때 앱이 최적의 스왑 체인 구현을 사용합니다. 앱이 세로 모드로 회전되는 경우 앱은 기존 스왑 체인에서 IDXGISwapChain1::SetRotation을 호출하고 필요한 경우 콘텐츠에 변형을 적용한 다음 동일한 스왑 체인에서 SetSwapChain을 다시 호출해야 합니다. 마찬가지로 앱은 IDXGISwapChain::ResizeBuffers를 호출하여 스왑 체인의 크기를 조정할 때마다 동일한 스왑 체인에서 SetSwapChain을 다시 호출해야 합니다.