Windows Hello 로그인 서비스 만들기
이제 Windows 10 및 Windows 11 UWP(Universal Windows platform) 앱에서 기존 사용자 이름 및 암호 인증 시스템의 대안으로 Windows Hello를 사용하는 방법을 안내해드리는 전체 과정의 2부를 시작하겠습니다. 이 문서는 1부 Windows Hello 로그인 앱의 마지막 내용을 이어 받아, 기능을 확장하여 Windows Hello를 기존 애플리케이션에 통합하는 방법을 알려드립니다.
이 프로젝트를 만들려면 C#과 XAML에 대한 약간의 경험이 필요합니다. 또한 Windows 10 또는 Windows 11 컴퓨터에서 Visual Studio 2015(Community Edition 이상)를 사용해야 합니다.
연습 1: 서버 쪽 논리
이 연습에서 첫 번째 랩에 빌드된 Windows Hello 애플리케이션을 시작하고 로컬 모의 서버와 데이터베이스를 만듭니다. 이 실습 교육의 목적은 Windows Hello를 기존 시스템에 통합하는 방법을 알려드리는 것입니다. 모의 서버 및 모의 데이터베이스를 사용하면 관련 없는 설정이 많이 제거됩니다. 사용자 고유의 애플리케이션에서 모의 개체를 실제 서비스 및 데이터베이스로 바꿔야 합니다.
시작하려면 첫 번째 Passport Hands On Lab에서 PassportLogin 솔루션을 엽니다.
먼저 모의 서버 및 모의 데이터베이스를 구현합니다. "AuthService"라는 새 폴더를 만듭니다. 솔루션 탐색기에서 "PassportLogin(Universal Windows)" 솔루션을 마우스 우클릭하고 추가 > 새 폴더를 선택합니다.
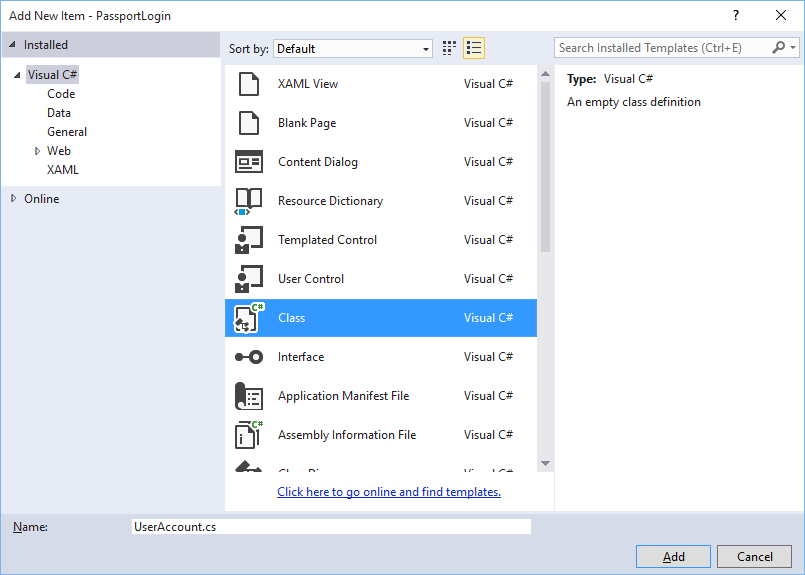
모의 데이터베이스에 저장할 데이터의 모델 역할을 하는 UserAccount 및 PassportDevices 클래스를 만듭니다. UserAccount는 기존 인증 서버에서 구현된 사용자 모델과 유사합니다. AuthService 폴더를 마우스 우클릭하고 "UserAccount.cs"라는 새 클래스를 추가합니다.

클래스 정의를 공용으로 변경한 다음, 다음의 공용 속성을 추가합니다. 다음의 참조가 필요합니다.
using System.ComponentModel.DataAnnotations;

namespace PassportLogin.AuthService
{
    public class UserAccount
    {
        [Key, Required]
        public Guid UserId { get; set; }
        [Required]
        public string Username { get; set; }
        public string Password { get; set; }
        // public List<PassportDevice> PassportDevices = new List<PassportDevice>();
    }
}
PassportDevices의 주석 처리된 목록을 발견했을 수 있습니다. 현재 구현에서 기존 사용자 모델을 수정해야 합니다. PassportDevices 목록은 deviceID, Windows Hello에서 만든 공개 키 및 KeyCredentialAttestationResult를 포함합니다. 이 실습 교육의 경우, TPM(신뢰할 수 있는 플랫폼 모듈) 칩이 있는 장치에서 Windows Hello만 이것들을 제공하므로 keyAttestationResult를 구현해야 합니다. KeyCredentialAttestationResult는 여러 속성의 조합이며 데이터베이스를 저장하고 로드하려면 분할해야 합니다.
AuthService 폴더에 "PassportDevice.cs"라는 새 클래스를 만듭니다. 위에서 설명한 것처럼 이는 Windows Hello 장치용 모델입니다. 클래스 정의를 공용으로 변경하고 다음의 속성을 추가합니다.
namespace PassportLogin.AuthService
{
    public class PassportDevice
    {
        // These are the new variables that will need to be added to the existing UserAccount in the Database
        // The DeviceName is used to support multiple devices for the one user.
        // This way the correct public key is easier to find as a new public key is made for each device.
        // The KeyAttestationResult is only used if the User device has a TPM (Trusted Platform Module) chip,
        // in most cases it will not. So will be left out for this hands on lab.
        public Guid DeviceId { get; set; }
        public byte[] PublicKey { get; set; }
        // public KeyCredentialAttestationResult KeyAttestationResult { get; set; }
    }
}
UserAccount.cs에서 되돌아가 Windows Hello 장치 목록의 주석 처리를 제거합니다.
using System.Collections.Generic;

namespace PassportLogin.AuthService
{
    public class UserAccount
    {
        [Key, Required]
        public Guid UserId { get; set; }
        [Required]
        public string Username { get; set; }
        public string Password { get; set; }
        public List<PassportDevice> PassportDevices = new List<PassportDevice>();
    }
}
UserAccount 및 PassportDevice에 대한 모델을 만든 경우, AuthService에 모의 데이터베이스 역할을 할 다른 새 클래스를 만들어야 합니다. 이는 사용자 계정 목록을 로컬로 저장하고 로드할 모의 데이터베이스입니다. 실제 환경에서는 데이터베이스 구현이 됩니다. AuthService에서 "MockStore.cs"라는 새 클래스를 만듭니다. 클래스 정의를 공용으로 변경합니다.
모의 저장소가 사용자 계정 목록을 로컬로 저장하고 로드할 때, XmlSerializer를 사용하여 해당 목록을 저장하고 로드하는 논리를 구현할 수 있습니다. 또한 파일 이름을 기억하고 위치를 저장해야 합니다. MockStore.cs에서 다음을 구현합니다.
    using System.IO;
    using System.Linq;
    using System.Xml.Serialization;
    using Windows.Storage;

    namespace PassportLogin.AuthService
    {
        public class MockStore
        {
            private const string USER_ACCOUNT_LIST_FILE_NAME = "userAccountsList.txt";
            // This cannot be a const because the LocalFolder is accessed at runtime
            private string _userAccountListPath = Path.Combine(
                ApplicationData.Current.LocalFolder.Path, USER_ACCOUNT_LIST_FILE_NAME);
            private List<UserAccount> _mockDatabaseUserAccountsList;

    #region Save and Load Helpers
            /// <summary>
            /// Create and save a useraccount list file. (Replacing the old one)
            /// </summary>
            private async void SaveAccountListAsync()
            {
                string accountsXml = SerializeAccountListToXml();

                if (File.Exists(_userAccountListPath))
                {
                    StorageFile accountsFile = await StorageFile.GetFileFromPathAsync(_userAccountListPath);
                    await FileIO.WriteTextAsync(accountsFile, accountsXml);
                }
                else
                {
                    StorageFile accountsFile = await ApplicationData.Current.LocalFolder.CreateFileAsync(USER_ACCOUNT_LIST_FILE_NAME);
                    await FileIO.WriteTextAsync(accountsFile, accountsXml);
                }
            }

            /// <summary>
            /// Gets the useraccount list file and deserializes it from XML to a list of useraccount objects.
            /// </summary>
            /// <returns>List of useraccount objects</returns>
            private async void LoadAccountListAsync()
            {
                if (File.Exists(_userAccountListPath))
                {
                    StorageFile accountsFile = await StorageFile.GetFileFromPathAsync(_userAccountListPath);

                    string accountsXml = await FileIO.ReadTextAsync(accountsFile);
                    DeserializeXmlToAccountList(accountsXml);
                }

                // If the UserAccountList does not contain the sampleUser Initialize the sample users
                // This is only needed as it in a Hand on Lab to demonstrate a user migrating
                // In the real world user accounts would just be in a database
                if (!_mockDatabaseUserAccountsList.Any(f => f.Username.Equals("sampleUsername")))
                {
                    //If the list is empty InitializeSampleAccounts and return the list
                    //InitializeSampleUserAccounts();
                }
            }

            /// <summary>
            /// Uses the local list of accounts and returns an XML formatted string representing the list
            /// </summary>
            /// <returns>XML formatted list of accounts</returns>
            private string SerializeAccountListToXml()
            {
                XmlSerializer xmlizer = new XmlSerializer(typeof(List<UserAccount>));
                StringWriter writer = new StringWriter();
                xmlizer.Serialize(writer, _mockDatabaseUserAccountsList);
                return writer.ToString();
            }

            /// <summary>
            /// Takes an XML formatted string representing a list of accounts and returns a list object of accounts
            /// </summary>
            /// <param name="listAsXml">XML formatted list of accounts</param>
            /// <returns>List object of accounts</returns>
            private List<UserAccount> DeserializeXmlToAccountList(string listAsXml)
            {
                XmlSerializer xmlizer = new XmlSerializer(typeof(List<UserAccount>));
                TextReader textreader = new StreamReader(new MemoryStream(Encoding.UTF8.GetBytes(listAsXml)));
                return _mockDatabaseUserAccountsList = (xmlizer.Deserialize(textreader)) as List<UserAccount>;
            }
    #endregion
        }
    }
Load 메서드에서 InitializeSampleUserAccounts 메서드가 주석으로 처리된 것을 알 수 있습니다. 이 메서드를 MockStore.cs에서 만들어야 합니다. 이 메서드는 로그인이 수행될 수 있도록 사용자 계정 목록을 채웁니다. 실제 환경에서는 사용자 데이터베이스가 이미 채워져 있습니다. 이 단계에서 사용자 목록을 초기화하고 로드를 호출하는 생성자도 만듭니다.
namespace PassportLogin.AuthService
{
    public class MockStore
    {
        private const string USER_ACCOUNT_LIST_FILE_NAME = "userAccountsList.txt";
        // This cannot be a const because the LocalFolder is accessed at runtime
        private string _userAccountListPath = Path.Combine(
            ApplicationData.Current.LocalFolder.Path, USER_ACCOUNT_LIST_FILE_NAME);
        private List<UserAccount> _mockDatabaseUserAccountsList;

        public MockStore()
        {
            _mockDatabaseUserAccountsList = new List& lt; UserAccount & gt; ();
            LoadAccountListAsync();
        }

        private void InitializeSampleUserAccounts()
        {
            // Create a sample Traditional User Account that only has a Username and Password
            // This will be used initially to demonstrate how to migrate to use Windows Hello

            UserAccount sampleUserAccount = new UserAccount()
            {
                UserId = Guid.NewGuid(),
                Username = "sampleUsername",
                Password = "samplePassword",
            };

            // Add the sampleUserAccount to the _mockDatabase
            _mockDatabaseUserAccountsList.Add(sampleUserAccount);
            SaveAccountListAsync();
        }
    }
}
이제 InitalizeSampleUserAccounts 메서드가 LoadAccountListAsync 메서드에서 메서드 호출의 주석 처리를 제거합니다.
private async void LoadAccountListAsync()
{
    if (File.Exists(_userAccountListPath))
    {
        StorageFile accountsFile = await StorageFile.GetFileFromPathAsync(_userAccountListPath);

        string accountsXml = await FileIO.ReadTextAsync(accountsFile);
        DeserializeXmlToAccountList(accountsXml);
    }

    // If the UserAccountList does not contain the sampleUser Initialize the sample users
    // This is only needed as it in a Hand on Lab to demonstrate a user migrating
    // In the real world user accounts would just be in a database
    if (!_mockDatabaseUserAccountsList.Any(f = > f.Username.Equals("sampleUsername")))
            {
        //If the list is empty InitializeSampleAccounts and return the list
        InitializeSampleUserAccounts();
    }
}
이제 모의 저장소에서 사용자 계정 목록을 저장하고 로드할 수 있습니다. 애플리케이션의 다른 부분에서 이 목록에 액세스할 수 있어야 하므로, 이 데이터를 검색하는 몇 가지 방법이 있어야 합니다. InitializeSampleUserAccounts 메서드 아래에 다음의 get 메서드를 추가합니다. 그러면 사용자 ID, 단일 사용자, 특정 Windows Hello 디바이스 사용자 목록을 가져올 수 있으며, 특정 장치에서 사용자의 공개 키를 가져올 수도 있습니다.
public Guid GetUserId(string username)
{
    if (_mockDatabaseUserAccountsList.Any())
    {
        UserAccount account = _mockDatabaseUserAccountsList.FirstOrDefault(f => f.Username.Equals(username));
        if (account != null)
        {
            return account.UserId;
        }
    }
    return Guid.Empty;
}

public UserAccount GetUserAccount(Guid userId)
{
    return _mockDatabaseUserAccountsList.FirstOrDefault(f => f.UserId.Equals(userId));
}

public List<UserAccount> GetUserAccountsForDevice(Guid deviceId)
{
    List<UserAccount> usersForDevice = new List<UserAccount>();

    foreach (UserAccount account in _mockDatabaseUserAccountsList)
    {
        if (account.PassportDevices.Any(f => f.DeviceId.Equals(deviceId)))
        {
            usersForDevice.Add(account);
        }
    }

    return usersForDevice;
}

public byte[] GetPublicKey(Guid userId, Guid deviceId)
{
    UserAccount account = _mockDatabaseUserAccountsList.FirstOrDefault(f => f.UserId.Equals(userId));
    if (account != null)
    {
        if (account.PassportDevices.Any())
        {
            return account.PassportDevices.FirstOrDefault(p => p.DeviceId.Equals(deviceId)).PublicKey;
        }
    }
    return null;
}
다음 구현 방법은 계정을 추가하고, 계정을 제거하고, 장치를 제거하는 간단한 작업을 처리합니다. Windows Hello는 장치별로 지정되므로 장치 제거가 필요합니다. Windows Hello는 로그인하는 각 장치에 대한 새 퍼블릭 키 및 프라이빗 키 쌍을 만듭니다. 이는 로그인하는 각 장치에 대해 다른 암호를 갖는 것과 같으며, 서버에서 수행하는 모든 암호를 기억할 필요가 없어지게 만드는 유일한 방법입니다. 다음의 메서드를 MockStore.cs에 추가합니다.
public UserAccount AddAccount(string username)
{
    UserAccount newAccount = null;
    try
    {
        newAccount = new UserAccount()
        {
            UserId = Guid.NewGuid(),
            Username = username,
        };

        _mockDatabaseUserAccountsList.Add(newAccount);
        SaveAccountListAsync();
    }
    catch (Exception)
    {
        throw;
    }
    return newAccount;
}

public bool RemoveAccount(Guid userId)
{
    UserAccount userAccount = GetUserAccount(userId);
    if (userAccount != null)
    {
        _mockDatabaseUserAccountsList.Remove(userAccount);
        SaveAccountListAsync();
        return true;
    }
    return false;
}

public bool RemoveDevice(Guid userId, Guid deviceId)
{
    UserAccount userAccount = GetUserAccount(userId);
    PassportDevice deviceToRemove = null;
    if (userAccount != null)
    {
        foreach (PassportDevice device in userAccount.PassportDevices)
        {
            if (device.DeviceId.Equals(deviceId))
            {
                deviceToRemove = device;
                break;
            }
        }
    }

    if (deviceToRemove != null)
    {
        //Remove the PassportDevice
        userAccount.PassportDevices.Remove(deviceToRemove);
        SaveAccountListAsync();
    }

    return true;
}
MockStore 클래스에서 기존 UserAccount에 Windows Hello 관련 정보를 추가할 메서드를 추가합니다. 이 메서드는 PassportUpdateDetails라고 하며, 사용자를 확인하는 매개 변수 및 Windows Hello 세부 정보를 사용합니다. KeyAttestationResult는 PassportDevice를 만들 때 주석 처리되었습니다. 실제 애플리케이션에서는 이 작업이 필요합니다.
using Windows.Security.Credentials;

public void PassportUpdateDetails(Guid userId, Guid deviceId, byte[] publicKey,
    KeyCredentialAttestationResult keyAttestationResult)
{
    UserAccount existingUserAccount = GetUserAccount(userId);
    if (existingUserAccount != null)
    {
        if (!existingUserAccount.PassportDevices.Any(f => f.DeviceId.Equals(deviceId)))
        {
            existingUserAccount.PassportDevices.Add(new PassportDevice()
            {
                DeviceId = deviceId,
                PublicKey = publicKey,
                // KeyAttestationResult = keyAttestationResult
            });
        }
    }
    SaveAccountListAsync();
}
이제 MockStore 클래스는 프라이빗으로 간주되어야 하는 데이터베이스를 나타내기 때문에 완료되었습니다. MockStore에 액세스하려면, 데이터베이스 데이터를 조작하기 위해 AuthService 클래스가 필요합니다. AuthService 폴더에서 "AuthService.cs"라는 새 클래스를 만듭니다. 클래스 정의를 공용으로 변경하고 단일 인스턴스 패턴을 추가하여 인스턴스가 하나만 만들어지도록 합니다.
namespace PassportLogin.AuthService
{
    public class AuthService
    {
        // Singleton instance of the AuthService
        // The AuthService is a mock of what a real world server and service implementation would be
        private static AuthService _instance;
        public static AuthService Instance
        {
            get
            {
                if (null == _instance)
                {
                    _instance = new AuthService();
                }
                return _instance;
            }
        }

        private AuthService()
        { }
    }
}
AuthService 클래스는 MockStore 클래스의 인스턴스를 만들고 MockStore 개체의 속성에 대한 액세스를 제공해야 합니다.
namespace PassportLogin.AuthService
{
    public class AuthService
    {
        //Singleton instance of the AuthService
        //The AuthService is a mock of what a real world server and database implementation would be
        private static AuthService _instance;
        public static AuthService Instance
        {
            get
            {
                if (null == _instance)
                {
                    _instance = new AuthService();
                }
                return _instance;
            }
        }

        private MockStore _mockStore = new MockStore();

        public Guid GetUserId(string username)
        {
            return _mockStore.GetUserId(username);
        }

        public UserAccount GetUserAccount(Guid userId)
        {
            return _mockStore.GetUserAccount(userId);
        }

        public List<UserAccount> GetUserAccountsForDevice(Guid deviceId)
        {
            return _mockStore.GetUserAccountsForDevice(deviceId);
        }
    }
}
MockStore 개체의 Passport 세부 정보 메서드 추가, 제거 및 업데이트에 액세스하려면 AuthService 클래스의 메서드가 필요합니다. 다음의 메서드를 AuthService 클래스 파일의 끝에 추가합니다.
using Windows.Security.Credentials;

public void Register(string username)
{
    _mockStore.AddAccount(username);
}

public bool PassportRemoveUser(Guid userId)
{
    return _mockStore.RemoveAccount(userId);
}

public bool PassportRemoveDevice(Guid userId, Guid deviceId)
{
    return _mockStore.RemoveDevice(userId, deviceId);
}

public void PassportUpdateDetails(Guid userId, Guid deviceId, byte[] publicKey,
    KeyCredentialAttestationResult keyAttestationResult)
{
    _mockStore.PassportUpdateDetails(userId, deviceId, publicKey, keyAttestationResult);
}
AuthService 클래스는 자격 증명의 유효성을 검사하는 메서드를 제공해야 합니다. 이 메서드는 사용자 이름과 암호를 사용하고 계정이 있으며 암호가 유효한지 확인합니다. 기존 시스템에는 사용자에게 권한이 있는지를 검사하는 이와 동일한 메서드가 있습니다. 다음의 ValidateCredentials를 AuthService.cs 파일에 추가합니다.
public bool ValidateCredentials(string username, string password)
{
    if (!string.IsNullOrEmpty(username) && !string.IsNullOrEmpty(password))
    {
        // This would be used for existing accounts migrating to use Passport
        Guid userId = GetUserId(username);
        if (userId != Guid.Empty)
        {
            UserAccount account = GetUserAccount(userId);
            if (account != null)
            {
                if (string.Equals(password, account.Password))
                {
                    return true;
                }
            }
        }
    }
    return false;
}
AuthService 클래스에는 사용자가 자신이 주장하는 사용자인지 확인하기 위해 클라이언트에 챌린지를 반환하는 요청 챌린지 메서드가 필요합니다. 그런 다음, 클라이언트에서 서명된 챌린지를 다시 받으려면 AuthService 클래스에 메서드가 필요합니다. 이 실습의 경우, 서명된 챌린지가 완료되었는지 확인하는 방법이 불완전하게 남아 있습니다. Windows Hello를 기존 인증 시스템에 구현할 때마다 약간씩 달라집니다. 서버에 저장된 공개 키는 클라이언트가 서버에 반환한 결과와 일치해야 합니다. 이러한 두 가지 메서드를 AuthService.cs에 추가합니다.
using Windows.Security.Cryptography;
using Windows.Storage.Streams;

public IBuffer PassportRequestChallenge()
{
    return CryptographicBuffer.ConvertStringToBinary("ServerChallenge", BinaryStringEncoding.Utf8);
}

public bool SendServerSignedChallenge(Guid userId, Guid deviceId, byte[] signedChallenge)
{
    // Depending on your company polices and procedures this step will be different
    // It is at this point you will need to validate the signedChallenge that is sent back from the client.
    // Validation is used to ensure the correct user is trying to access this account.
    // The validation process will use the signedChallenge and the stored PublicKey
    // for the username and the specific device signin is called from.
    // Based on the validation result you will return a bool value to allow access to continue or to block the account.

    // For this sample validation will not happen as a best practice solution does not apply and will need to
       // be configured for each company.
    // Simply just return true.

    // You could get the User's Public Key with something similar to the following:
    byte[] userPublicKey = _mockStore.GetPublicKey(userId, deviceId);
    return true;
}
연습 2: 클라이언트 쪽 논리
이 연습에서는 AuthService 클래스를 사용하도록 첫 번째 랩에서 클라이언트 쪽 보기 및 도우미 클래스를 변경합니다. 실제 환경에서는 AuthService가 인증 서버가 되며 Web API를 사용하여 서버에서 데이터를 보내고 받아야 합니다. 이 실습의 경우 랩 클라이언트와 서버는 모두 작업을 간단하게 유지하기 위해 로컬입니다. 목표는 Windows Hello API 사용법을 배우는 것입니다.
MainPage.xaml.cs AuthService 클래스가 계정 목록을 로드하는 MockStore의 인스턴스를 만들 때 로드된 메서드에서 AccountHelper.LoadAccountListAsync 메서드 호출을 제거할 수 있습니다. 로드된 메서드는 이제 아래와 비슷해집니다. 대기 중인 항목이 없기 때문에, 비동기 메서드 정의가 제거된다는 점을 기억해 두세요.
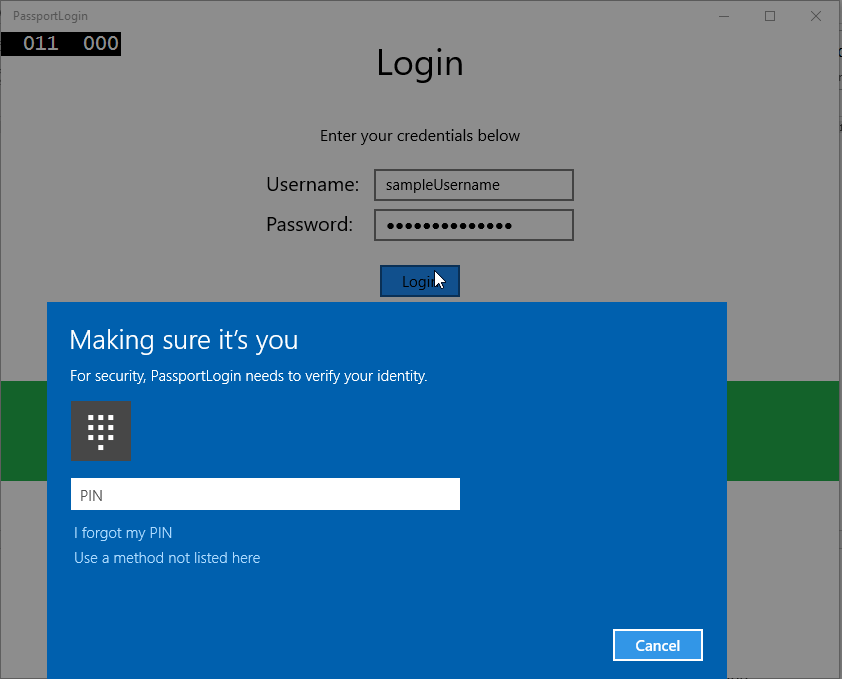
private void MainPage_Loaded(object sender, RoutedEventArgs e)
{
    Frame.Navigate(typeof(UserSelection));
}
여권을 입력하도록 로그인 페이지 인터페이스를 업데이트합니다. 이 실습 교육은 기존 시스템을 마이그레이션하여 Windows Hello를 사용하도록 하는 방법과 기존 계정이 사용자 이름 및 암호를 얻는 방법을 알려드립니다. 또한 XAML 아래쪽의 설명을 업데이트하여 기본 암호를 포함하도록 합니다. Login.xaml에서 다음의 XAML 업데이트하기
<Grid Background="{ThemeResource ApplicationPageBackgroundThemeBrush}">
  <StackPanel Orientation="Vertical">
    <TextBlock Text="Login" FontSize="36" Margin="4" TextAlignment="Center"/>

    <TextBlock x:Name="ErrorMessage" Text="" FontSize="20" Margin="4" Foreground="Red" TextAlignment="Center"/>

    <TextBlock Text="Enter your credentials below" Margin="0,0,0,20"
               TextWrapping="Wrap" Width="300"
               TextAlignment="Center" VerticalAlignment="Center" FontSize="16"/>

    <StackPanel Orientation="Horizontal" HorizontalAlignment="Center">
      <!-- Username Input -->
      <TextBlock x:Name="UserNameTextBlock" Text="Username: "
             FontSize="20" Margin="4" Width="100"/>
      <TextBox x:Name="UsernameTextBox" PlaceholderText="sampleUsername" Width="200" Margin="4"/>
    </StackPanel>

    <StackPanel Orientation="Horizontal" HorizontalAlignment="Center">
      <!-- Password Input -->
      <TextBlock x:Name="PasswordTextBlock" Text="Password: "
             FontSize="20" Margin="4" Width="100"/>
      <PasswordBox x:Name="PasswordBox" PlaceholderText="samplePassword" Width="200" Margin="4"/>
    </StackPanel>

    <Button x:Name="PassportSignInButton" Content="Login" Background="DodgerBlue" Foreground="White"
        Click="PassportSignInButton_Click" Width="80" HorizontalAlignment="Center" Margin="0,20"/>

    <TextBlock Text="Don't have an account?"
                TextAlignment="Center" VerticalAlignment="Center" FontSize="16"/>
    <TextBlock x:Name="RegisterButtonTextBlock" Text="Register now"
               PointerPressed="RegisterButtonTextBlock_OnPointerPressed"
               Foreground="DodgerBlue"
               TextAlignment="Center" VerticalAlignment="Center" FontSize="16"/>

    <Border x:Name="PassportStatus" Background="#22B14C"
               Margin="0,20" Height="100">
      <TextBlock x:Name="PassportStatusText" Text="Windows Hello is ready to use!"
             Margin="4" TextAlignment="Center" VerticalAlignment="Center" FontSize="20"/>
    </Border>

    <TextBlock x:Name="LoginExplaination" FontSize="24" TextAlignment="Center" TextWrapping="Wrap"
        Text="Please Note: To demonstrate a login, validation will only occur using the default username
        'sampleUsername' and default password 'samplePassword'"/>

  </StackPanel>
</Grid>
로그인 클래스 코드에서 클래스 맨 위에 있는 Account private 변수를 UserAccount로 변경해야 합니다. OnNavigateTo 이벤트를 변경하여 형식을 UserAccount로 캐스팅하도록 합니다. 다음의 참조가 필요합니다.
using PassportLogin.AuthService;

namespace PassportLogin.Views
{
    public sealed partial class Login : Page
    {
        private UserAccount _account;
        private bool _isExistingAccount;

        public Login()
        {
            this.InitializeComponent();
        }

        protected override async void OnNavigatedTo(NavigationEventArgs e)
        {
            //Check Windows Hello is setup and available on this machine
            if (await MicrosoftPassportHelper.MicrosoftPassportAvailableCheckAsync())
            {
                if (e.Parameter != null)
                {
                    _isExistingAccount = true;
                    //Set the account to the existing account being passed in
                    _account = (UserAccount)e.Parameter;
                    UsernameTextBox.Text = _account.Username;
                    SignInPassport();
                }
            }
        }
    }
}
로그인 페이지에서 이전 Account 개체 대신 UserAccount 개체를 사용하므로, 일부 메서드에 대한 매개 변수로 UserAccount를 사용하려면 MicrosoftPassportHelper.cs 업데이트해야 합니다. CreatePassportKeyAsync, RemovePassportAccountAsync 및 GetPassportAuthenticationMessageAsync 메서드에 대해 다음의 매개 변수를 변경해야 합니다. UserAccount 클래스에 UserId에 대한 Guid가 있으므로, 더 구체적인 위치에서 ID를 사용하기 시작합니다.
public static async Task<bool> CreatePassportKeyAsync(Guid userId, string username)
{
    KeyCredentialRetrievalResult keyCreationResult = await KeyCredentialManager.RequestCreateAsync(username, KeyCredentialCreationOption.ReplaceExisting);
}

public static async void RemovePassportAccountAsync(UserAccount account)
{

}
public static async Task<bool> GetPassportAuthenticationMessageAsync(UserAccount account)
{
    KeyCredentialRetrievalResult openKeyResult = await KeyCredentialManager.OpenAsync(account.Username);
    //Calling OpenAsync will allow the user access to what is available in the app and will not require user credentials again.
    //If you wanted to force the user to sign in again you can use the following:
    //var consentResult = await Windows.Security.Credentials.UI.UserConsentVerifier.RequestVerificationAsync(account.Username);
    //This will ask for the either the password of the currently signed in Microsoft Account or the PIN used for Windows Hello.

    if (openKeyResult.Status == KeyCredentialStatus.Success)
    {
        //If OpenAsync has succeeded, the next thing to think about is whether the client application requires access to backend services.
        //If it does here you would Request a challenge from the Server. The client would sign this challenge and the server
        //would check the signed challenge. If it is correct it would allow the user access to the backend.
        //You would likely make a new method called RequestSignAsync to handle all this
        //for example, RequestSignAsync(openKeyResult);
        //Refer to the second Windows Hello sample for information on how to do this.

        //For this sample there is not concept of a server implemented so just return true.
        return true;
    }
    else if (openKeyResult.Status == KeyCredentialStatus.NotFound)
    {
        //If the _account is not found at this stage. It could be one of two errors.
        //1. Windows Hello has been disabled
        //2. Windows Hello has been disabled and re-enabled cause the Windows Hello Key to change.
        //Calling CreatePassportKey and passing through the account will attempt to replace the existing Windows Hello Key for that account.
        //If the error really is that Windows Hello is disabled then the CreatePassportKey method will output that error.
        if (await CreatePassportKeyAsync(account.UserId, account.Username))
        {
            //If the Passport Key was again successfully created, Windows Hello has just been reset.
            //Now that the Passport Key has been reset for the _account retry sign in.
            return await GetPassportAuthenticationMessageAsync(account);
        }
    }

    // Can't use Passport right now, try again later
    return false;
}
AccountHelper 대신 AuthService를 사용하려면 Login.xaml.cs 파일의 SignInPassport 메서드를 업데이트해야 합니다. 자격 증명의 유효성 검사는 AuthService를 통해 수행됩니다. 이 실습 랩의 경우, 구성된 유일한 계정은 "sampleUsername"입니다. 이 계정은 MockStore.cs InitializeSampleUserAccounts 메서드에서 만들어집니다. Login.xaml.cs에서 SignInPassport 메서드를 업데이트하여 아래의 코드 조각을 반영하도록 합니다.
private async void SignInPassportAsync()
{
    if (_isExistingLocalAccount)
    {
        if (await MicrosoftPassportHelper.GetPassportAuthenticationMessageAsync(_account))
        {
            Frame.Navigate(typeof(Welcome), _account);
        }
    }
    else if (AuthService.AuthService.Instance.ValidateCredentials(UsernameTextBox.Text, PasswordBox.Password))
    {
        Guid userId = AuthService.AuthService.Instance.GetUserId(UsernameTextBox.Text);

        if (userId != Guid.Empty)
        {
            //Now that the account exists on server try and create the necessary passport details and add them to the account
            bool isSuccessful = await MicrosoftPassportHelper.CreatePassportKeyAsync(userId, UsernameTextBox.Text);
            if (isSuccessful)
            {
                Debug.WriteLine("Successfully signed in with Windows Hello!");
                //Navigate to the Welcome Screen.
                _account = AuthService.AuthService.Instance.GetUserAccount(userId);
                Frame.Navigate(typeof(Welcome), _account);
            }
            else
            {
                //The passport account creation failed.
                //Remove the account from the server as passport details were not configured
                AuthService.AuthService.Instance.PassportRemoveUser(userId);

                ErrorMessage.Text = "Account Creation Failed";
            }
        }
    }
    else
    {
        ErrorMessage.Text = "Invalid Credentials";
    }
}
Windows Hello는 각 장치의 계정마다 다른 퍼블릭 키 및 프라이빗 키 쌍을 만듬으로, 환영 페이지에서는 로그인된 계정에 대한 등록 장치 목록을 표시하고 각 장치를 무시할 수 있도록 허용해야 합니다. Welcome.xaml에서 ForgetButton 아래에 다음의 XAML을 추가합니다. 그러면 장치 잊기 버튼, 오류 텍스트 영역 및 모든 장치를 표시하는 목록이 구현됩니다.
<Grid Background="{ThemeResource ApplicationPageBackgroundThemeBrush}">
  <StackPanel Orientation="Vertical">
    <TextBlock x:Name="Title" Text="Welcome" FontSize="40" TextAlignment="Center"/>
    <TextBlock x:Name="UserNameText" FontSize="28" TextAlignment="Center" Foreground="Black"/>

    <Button x:Name="BackToUserListButton" Content="Back to User List" Click="Button_Restart_Click"
           HorizontalAlignment="Center" Margin="0,20" Foreground="White" Background="DodgerBlue"/>

    <Button x:Name="ForgetButton" Content="Forget Me" Click="Button_Forget_User_Click"
           Foreground="White"
           Background="Gray"
           HorizontalAlignment="Center"/>

    <Button x:Name="ForgetDeviceButton" Content="Forget Device" Click="Button_Forget_Device_Click"
           Foreground="White"
           Background="Gray"
           Margin="0,40,0,20"
           HorizontalAlignment="Center"/>

    <TextBlock x:Name="ForgetDeviceErrorTextBlock" Text="Select a device first"
              TextWrapping="Wrap" Width="300" Foreground="Red"
              TextAlignment="Center" VerticalAlignment="Center" FontSize="16" Visibility="Collapsed"/>

    <ListView x:Name="UserListView" MaxHeight="500" MinWidth="350" Width="350" HorizontalAlignment="Center">
      <ListView.ItemTemplate>
        <DataTemplate>
          <Grid Background="Gray" Height="50" Width="350" HorizontalAlignment="Center" VerticalAlignment="Stretch" >
            <TextBlock Text="{Binding DeviceId}" HorizontalAlignment="Center" TextAlignment="Center" VerticalAlignment="Center"
                      Foreground="White"/>
          </Grid>
        </DataTemplate>
      </ListView.ItemTemplate>
    </ListView>
  </StackPanel>
</Grid>
Welcome.xaml.cs 파일에서 클래스 맨 위에 있는 private Account 변수를 private UserAccount 변수로 변경해야 합니다. 그런 다음 AuthService를 사용하도록 OnNavigatedTo 메서드를 업데이트하고 현재 계정에 대한 정보를 검색합니다. 계정 정보가 있는 경우 목록의 항목 원본을 장치를 표시하도록 설정할 수 있습니다. AuthService 네임스페이스에 대한 참조를 추가해야 합니다.
using PassportLogin.AuthService;

namespace PassportLogin.Views
{
    public sealed partial class Welcome : Page
    {
        private UserAccount _activeAccount;

        public Welcome()
        {
            InitializeComponent();
        }

        protected override void OnNavigatedTo(NavigationEventArgs e)
        {
            _activeAccount = (UserAccount)e.Parameter;
            if (_activeAccount != null)
            {
                UserAccount account = AuthService.AuthService.Instance.GetUserAccount(_activeAccount.UserId);
                if (account != null)
                {
                    UserListView.ItemsSource = account.PassportDevices;
                    UserNameText.Text = account.Username;
                }
            }
        }
    }
}
계정을 제거할 때 AuthService를 사용하므로, Button_Forget_User_Click 메서드의 AccountHelper에 대한 참조를 제거할 수 있습니다. 이제 메서드가 아래와 같이 표시됩니다.
private void Button_Forget_User_Click(object sender, RoutedEventArgs e)
{
    //Remove it from Windows Hello
    MicrosoftPassportHelper.RemovePassportAccountAsync(_activeAccount);

    Debug.WriteLine("User " + _activeAccount.Username + " deleted.");

    //Navigate back to UserSelection page.
    Frame.Navigate(typeof(UserSelection));
}
MicrosoftPassportHelper 메서드는 AuthService를 사용하여 계정을 제거하지 않습니다. AuthService를 호출하고 userId를 전달해야 합니다.
public static async void RemovePassportAccountAsync(UserAccount account)
{
    //Open the account with Windows Hello
    KeyCredentialRetrievalResult keyOpenResult = await KeyCredentialManager.OpenAsync(account.Username);

    if (keyOpenResult.Status == KeyCredentialStatus.Success)
    {
        // In the real world you would send key information to server to unregister
        AuthService.AuthService.Instance.PassportRemoveUser(account.UserId);
    }

    //Then delete the account from the machines list of Passport Accounts
    await KeyCredentialManager.DeleteAsync(account.Username);
}
시작 페이지 클래스 구현을 완료하려면, MicrosoftPassportHelper.cs 장치를 제거할 수 있는 메서드를 만들어야 합니다. AuthService에서 PassportRemoveDevice를 호출하는 새로운 메서드를 만듭니다.
public static void RemovePassportDevice(UserAccount account, Guid deviceId)
{
    AuthService.AuthService.Instance.PassportRemoveDevice(account.UserId, deviceId);
}
Welcome.xaml.cs에서 Forget Device 클릭 이벤트를 구현합니다. 그러면 장치 목록에서 선택한 장치를 사용하고, 여권 도우미를 사용하여 제거 장치를 호출합니다.
private void Button_Forget_Device_Click(object sender, RoutedEventArgs e)
{
    PassportDevice selectedDevice = UserListView.SelectedItem as PassportDevice;
    if (selectedDevice != null)
    {
        //Remove it from Windows Hello
        MicrosoftPassportHelper.RemovePassportDevice(_activeAccount, selectedDevice.DeviceId);

        Debug.WriteLine("User " + _activeAccount.Username + " deleted.");

        if (!UserListView.Items.Any())
        {
            //Navigate back to UserSelection page.
            Frame.Navigate(typeof(UserSelection));
        }
    }
    else
    {
        ForgetDeviceErrorTextBlock.Visibility = Visibility.Visible;
    }
}
업데이트하려는 다음 페이지는 UserSelection 페이지입니다. UserSelection 페이지는 현재 장치에 대한 모든 사용자 계정을 AuthService를 사용하여 검색해야 합니다. 현재는 해당 장치에 대한 사용자 계정을 반환할 수 있도록 장치 ID를 AuthService에 전달할 방법이 없습니다. Utils 폴더에 "Helpers.cs"라는 새로운 클래스를 만듭니다. 클래스 정의를 public static(공용 정적)으로 변경한 다음, 현재 장치 ID를 검색할 수 있는 다음의 메서드를 추가합니다.
using Windows.Security.ExchangeActiveSyncProvisioning;

namespace PassportLogin.Utils
{
    public static class Helpers
    {
        public static Guid GetDeviceId()
        {
            //Get the Device ID to pass to the server
            EasClientDeviceInformation deviceInformation = new EasClientDeviceInformation();
            return deviceInformation.Id;
        }
    }
}
UserSelection 페이지 클래스에서 사용자 인터페이스가 아니라 뒤에 있는 코드만 변경해야 합니다. UserSelection.xaml.cs에서 로드된 메서드 및 사용자 선택 메서드를 업데이트하여 Account 클래스 대신 UserAccount 클래스를 사용합니다. 또한 이 장치에 대한 모든 사용자를 AuthService를 통해 가져와야 합니다.
using System.Linq;
using PassportLogin.AuthService;

namespace PassportLogin.Views
{
    public sealed partial class UserSelection : Page
    {
        public UserSelection()
        {
            InitializeComponent();
            Loaded += UserSelection_Loaded;
        }

        private void UserSelection_Loaded(object sender, RoutedEventArgs e)
        {
            List<UserAccount> accounts = AuthService.AuthService.Instance.GetUserAccountsForDevice(Helpers.GetDeviceId());

            if (accounts.Any())
            {
                UserListView.ItemsSource = accounts;
                UserListView.SelectionChanged += UserSelectionChanged;
            }
            else
            {
                //If there are no accounts navigate to the LoginPage
                Frame.Navigate(typeof(Login));
            }
        }

        /// <summary>
        /// Function called when an account is selected in the list of accounts
        /// Navigates to the Login page and passes the chosen account
        /// </summary>
        private void UserSelectionChanged(object sender, RoutedEventArgs e)
        {
            if (((ListView)sender).SelectedValue != null)
            {
                UserAccount account = (UserAccount)((ListView)sender).SelectedValue;
                if (account != null)
                {
                    Debug.WriteLine("Account " + account.Username + " selected!");
                }
                Frame.Navigate(typeof(Login), account);
            }
        }
    }
}
PassportRegister 페이지는 코드 숨김을 업데이트해야 하며, 사용자 인터페이스를 변경할 필요는 없습니다. PassportRegister.xaml.cs에서 private Account 변수는 더 이상 필요하지 않으므로, 클래스 맨 위에 있는 private Account 변수를 제거합니다. AuthService를 사용하도록 RegisterButton 클릭 이벤트를 업데이트합니다. 이 메서드는 새 UserAccount를 만든 다음, 여권 세부 정보를 시도하고 업데이트합니다. Passport에서 여권 키를 만들지 못하여 등록 프로세스가 실패하면 계정이 제거됩니다.
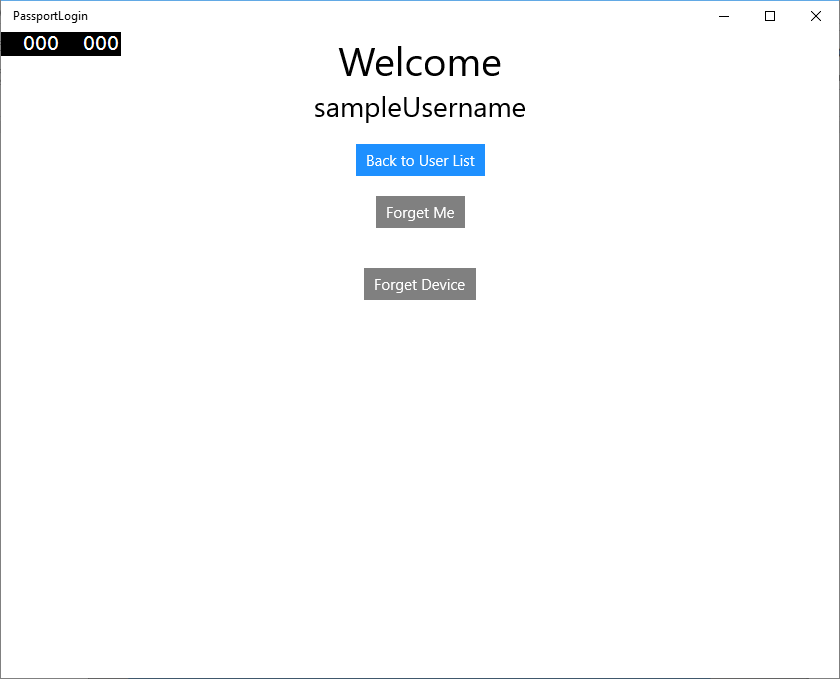
private async void RegisterButton_Click_Async(object sender, RoutedEventArgs e)
{
    ErrorMessage.Text = "";

    //Validate entered credentials are acceptable
    if (!string.IsNullOrEmpty(UsernameTextBox.Text))
    {
        //Register an Account on the AuthService so that we can get back a userId
        AuthService.AuthService.Instance.Register(UsernameTextBox.Text);
        Guid userId = AuthService.AuthService.Instance.GetUserId(UsernameTextBox.Text);

        if (userId != Guid.Empty)
        {
            //Now that the account exists on server try and create the necessary passport details and add them to the account
            bool isSuccessful = await MicrosoftPassportHelper.CreatePassportKeyAsync(userId, UsernameTextBox.Text);
            if (isSuccessful)
            {
                //Navigate to the Welcome Screen.
                Frame.Navigate(typeof(Welcome), AuthService.AuthService.Instance.GetUserAccount(userId));
            }
            else
            {
                //The passport account creation failed.
                //Remove the account from the server as passport details were not configured
                AuthService.AuthService.Instance.PassportRemoveUser(userId);

                ErrorMessage.Text = "Account Creation Failed";
            }
        }
    }
    else
    {
        ErrorMessage.Text = "Please enter a username";
    }
}
애플리케이션을 빌드하고 실행합니다(F5). "sampleUsername" 및 "samplePassword" 자격 증명으로 샘플 사용자 계정에 로그인합니다. 시작 화면에서 Forget Device 버튼이 표시되지만, 장치가 없음을 알 수 있습니다. 사용자를 만들거나 마이그레이션하여 Windows Hello로 작업하도록 하는 경우, 여권 정보는 AuthService로 푸시되지 않습니다.
여권 정보를 AuthService로 가져오려면, MicrosoftPassportHelper.cs를 업데이트해야 합니다. CreatePassportKeyAsync 메서드에서 성공한 경우 true만 반환하는 대신 KeyAttestation을 가져오는 새로운 메서드를 호출해야 합니다. 이 실습은 이 정보를 AuthService에서 기록하지 않지만, 이 정보를 클라이언트 쪽에서 가져오는 방법을 알아봅니다. CreatePassportKeyAsync 메서드를 업데이트합니다.
public static async Task<bool> CreatePassportKeyAsync(Guid userId, string username)
{
    KeyCredentialRetrievalResult keyCreationResult = await KeyCredentialManager.RequestCreateAsync(username, KeyCredentialCreationOption.ReplaceExisting);

    switch (keyCreationResult.Status)
    {
        case KeyCredentialStatus.Success:
            Debug.WriteLine("Successfully made key");
            await GetKeyAttestationAsync(userId, keyCreationResult);
            return true;
        case KeyCredentialStatus.UserCanceled:
            Debug.WriteLine("User cancelled sign-in process.");
            break;
        case KeyCredentialStatus.NotFound:
            // User needs to setup Windows Hello
            Debug.WriteLine("Windows Hello is not setup!\nPlease go to Windows Settings and set up a PIN to use it.");
            break;
        default:
            break;
    }

    return false;
}
MicrosoftPassportHelper.cs에서 GetKeyAttestationAsync 메서드를 만듭니다. 이 메서드는 특정 장치에서 각 계정에 대해 Windows Hello가 제공할 수 있는 필요 정보를 모두 가져오는 방법을 설명합니다.
using Windows.Storage.Streams;

private static async Task GetKeyAttestationAsync(Guid userId, KeyCredentialRetrievalResult keyCreationResult)
{
    KeyCredential userKey = keyCreationResult.Credential;
    IBuffer publicKey = userKey.RetrievePublicKey();
    KeyCredentialAttestationResult keyAttestationResult = await userKey.GetAttestationAsync();
    IBuffer keyAttestation = null;
    IBuffer certificateChain = null;
    bool keyAttestationIncluded = false;
    bool keyAttestationCanBeRetrievedLater = false;
    KeyCredentialAttestationStatus keyAttestationRetryType = 0;

    if (keyAttestationResult.Status == KeyCredentialAttestationStatus.Success)
    {
        keyAttestationIncluded = true;
        keyAttestation = keyAttestationResult.AttestationBuffer;
        certificateChain = keyAttestationResult.CertificateChainBuffer;
        Debug.WriteLine("Successfully made key and attestation");
    }
    else if (keyAttestationResult.Status == KeyCredentialAttestationStatus.TemporaryFailure)
    {
        keyAttestationRetryType = KeyCredentialAttestationStatus.TemporaryFailure;
        keyAttestationCanBeRetrievedLater = true;
        Debug.WriteLine("Successfully made key but not attestation");
    }
    else if (keyAttestationResult.Status == KeyCredentialAttestationStatus.NotSupported)
    {
        keyAttestationRetryType = KeyCredentialAttestationStatus.NotSupported;
        keyAttestationCanBeRetrievedLater = false;
        Debug.WriteLine("Key created, but key attestation not supported");
    }

    Guid deviceId = Helpers.GetDeviceId();
    //Update the Pasport details with the information we have just gotten above.
    //UpdatePassportDetails(userId, deviceId, publicKey.ToArray(), keyAttestationResult);
}
방금 추가한 GetKeyAttestationAsync 메서드에서 마지막 행이 주석 처리되었음을 알았을 수도 있습니다. 이 마지막 행은 만들어지는 새로운 메서드가 되며 모든 Windows Hello 정보를 AuthService로 보냅니다. 실제 환경에서는 Web API를 사용하여 실제 서버로 보내야 합니다.
using System.Runtime.InteropServices.WindowsRuntime;

public static bool UpdatePassportDetails(Guid userId, Guid deviceId, byte[] publicKey, KeyCredentialAttestationResult keyAttestationResult)
{
    //In the real world you would use an API to add Passport signing info to server for the signed in _account.
    //For this tutorial we do not implement a WebAPI for our server and simply mock the server locally
    //The CreatePassportKey method handles adding the Windows Hello account locally to the device using the KeyCredential Manager

    //Using the userId the existing account should be found and updated.
    AuthService.AuthService.Instance.PassportUpdateDetails(userId, deviceId, publicKey, keyAttestationResult);
    return true;
}
GetKeyAttestationAsync 메서드에서 마지막 줄의 주석 처리를 제거하여 Windows Hello 정보가 AuthService로 전송되도록 합니다.
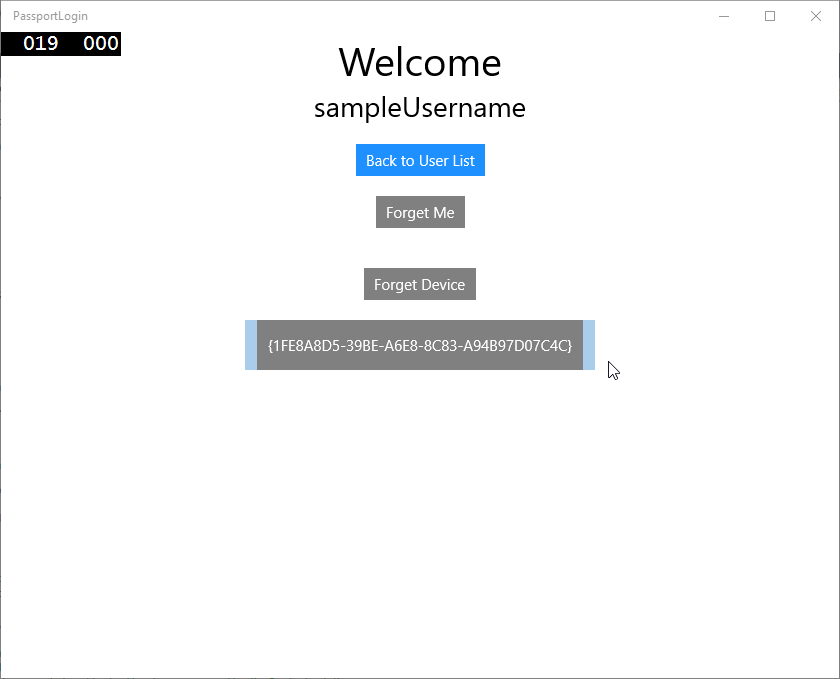
애플리케이션을 빌드 및 실행하고 이전과 같이 기본 자격 증명으로 로그인합니다. 이제 시작 화면에서 장치 ID가 표시되는 것을 볼 수 있습니다. 여기에 표시될 다른 장치에 로그인한 경우(클라우드 호스팅 인증 서비스가 있는 경우)입니다. 이 실습 랩의 경우, 실제 장치 ID가 표시됩니다. 실제 구현에서는 사용자가 이해하고 각 장치를 결정하는 데 사용할 수 있는 친숙한 이름을 표시하려고 합니다.
-
- 랩에서 이 실습을 완료하려면, 사용자 선택 페이지에서 선택하고 다시 로그인할 때 사용자에게 요청 및 챌린지가 필요합니다. AuthService에는 챌린지를 요청하기 위해 만든 두 가지 메서드가 있으며, 하나는 서명된 챌린지를 사용합니다. MicrosoftPassportHelper.cs에서 "RequestSignAsync"라는 새 메서드를 만들 때, AuthService에서 챌린지를 요청하고 Passport API를 사용하여 해당 챌린지에 로컬로 서명하고 서명된 챌린지를 AuthService에 보냅니다. 이 실습 랩에서 AuthService는 서명된 챌린지를 받고 true를 반환합니다. 실제 구현에서는 올바른 장치에서 올바른 사용자가 챌린지에 서명했는지 확인하기 위해 확인 메커니즘을 구현해야 합니다. 아래의 메서드를 MicrosoftPassportHelper.cs에 추가합니다.
private static async Task<bool> RequestSignAsync(Guid userId, KeyCredentialRetrievalResult openKeyResult) { // Calling userKey.RequestSignAsync() prompts the uses to enter the PIN or use Biometrics (Windows Hello). // The app would use the private key from the user account to sign the sign-in request (challenge) // The client would then send it back to the server and await the servers response. IBuffer challengeMessage = AuthService.AuthService.Instance.PassportRequestChallenge(); KeyCredential userKey = openKeyResult.Credential; KeyCredentialOperationResult signResult = await userKey.RequestSignAsync(challengeMessage); if (signResult.Status == KeyCredentialStatus.Success) { // If the challenge from the server is signed successfully // send the signed challenge back to the server and await the servers response return AuthService.AuthService.Instance.SendServerSignedChallenge( userId, Helpers.GetDeviceId(), signResult.Result.ToArray()); } else if (signResult.Status == KeyCredentialStatus.UserCanceled) { // User cancelled the Windows Hello PIN entry. } else if (signResult.Status == KeyCredentialStatus.NotFound) { // Must recreate Windows Hello key } else if (signResult.Status == KeyCredentialStatus.SecurityDeviceLocked) { // Can't use Windows Hello right now, remember that hardware failed and suggest restart } else if (signResult.Status == KeyCredentialStatus.UnknownError) { // Can't use Windows Hello right now, try again later } return false; } -
- MicrosoftPassportHelper 클래스에서, GetPassportAuthenticationMessageAsync 메서드로부터 RequestSignAsync 메서드를 호출합니다.
public static async Task<bool> GetPassportAuthenticationMessageAsync(UserAccount account)
{
    KeyCredentialRetrievalResult openKeyResult = await KeyCredentialManager.OpenAsync(account.Username);
    // Calling OpenAsync will allow the user access to what is available in the app and will not require user credentials again.
    // If you wanted to force the user to sign in again you can use the following:
    // var consentResult = await Windows.Security.Credentials.UI.UserConsentVerifier.RequestVerificationAsync(account.Username);
    // This will ask for the either the password of the currently signed in Microsoft Account or the PIN used for Windows Hello.

    if (openKeyResult.Status == KeyCredentialStatus.Success)
    {
        //If OpenAsync has succeeded, the next thing to think about is whether the client application requires access to backend services.
        //If it does here you would Request a challenge from the Server. The client would sign this challenge and the server
        //would check the signed challenge. If it is correct it would allow the user access to the backend.
        //You would likely make a new method called RequestSignAsync to handle all this
        //for example, RequestSignAsync(openKeyResult);
        //Refer to the second Windows Hello sample for information on how to do this.

        return await RequestSignAsync(account.UserId, openKeyResult);
    }
    else if (openKeyResult.Status == KeyCredentialStatus.NotFound)
    {
        //If the _account is not found at this stage. It could be one of two errors.
        //1. Windows Hello has been disabled
        //2. Windows Hello has been disabled and re-enabled cause the Windows Hello Key to change.
        //Calling CreatePassportKey and passing through the account will attempt to replace the existing Windows Hello Key for that account.
        //If the error really is that Windows Hello is disabled then the CreatePassportKey method will output that error.
        if (await CreatePassportKeyAsync(account.UserId, account.Username))
        {
            //If the Passport Key was again successfully created, Windows Hello has just been reset.
            //Now that the Passport Key has been reset for the _account retry sign in.
            return await GetPassportAuthenticationMessageAsync(account);
        }
    }

    // Can't use Windows Hello right now, try again later
    return false;
}
클라이언트 쪽 애플리케이션을 업데이트하여 이 연습 전체에서 AuthService를 사용하도록 했습니다. 이렇게 하면 Account 클래스 및 AccountHelper 클래스가 필요하지 않습니다. Account 클래스, Models 폴더 및 AccountHelper 클래스를 Utils 폴더에서 삭제합니다. 솔루션이 성공적으로 빌드되기 전에 애플리케이션 전체에서 Models 네임스페이스에 대한 모든 참조를 제거해야 합니다.
애플리케이션을 빌드 및 실행하고 모의 서비스 및 데이터베이스로 Windows Hello를 경험해 보세요.
이 실습 랩에서는 Windows 10 또는 Windows 11 컴퓨터에서 인증을 사용할 때 암호의 필요성을 대체하기 위해 Windows Hello API를 사용하는 방법을 알아보았습니다. 기존 시스템에서 암호를 유지 관리하고 분실한 암호를 지원하려면 얼마나 많은 작업을 수행해야 하는지를 감안할 때, 이 새로운 Windows Hello 인증 시스템으로 전환하면 이점이 있음을 알 수 있습니다.
서비스 및 서버 쪽에서 인증을 구현하는 방법에 대한 자세한 정보는 연습으로 남겨 드립니다. 대부분 Windows Hello로 작업을 시작하기 위해 마이그레이션해야 하는 기존 시스템이 있고 각 시스템의 세부 정보가 다를 것으로 예상됩니다.
관련 토픽
피드백
출시 예정: 2024년 내내 콘텐츠에 대한 피드백 메커니즘으로 GitHub 문제를 단계적으로 폐지하고 이를 새로운 피드백 시스템으로 바꿀 예정입니다. 자세한 내용은 다음을 참조하세요. https://aka.ms/ContentUserFeedback
다음에 대한 사용자 의견 제출 및 보기