Exercise - Create an approval request flow
The flow triggers when you add a new item to the Machine Order table in Microsoft Dataverse.
It uses the Approvals Service to send an approval request.
The approver receives an email with options to approve or reject and to add comments.
After the approver responds, the record in the Machine Order table will be updated with the appropriate approval status.
An email is sent to the requester informing them whether the machine was approved or rejected.
Note
Two ways to create a flow are from blank or from a template. In this lab, you'll create the approval flow starting with a blank flow.
Note
This module is designed for use with the App in a Day instructor-led course. For more information on attending this free, instructor-led course, see Microsoft Power Platform instructor-led training. On that page, you can Register for an event.
Note
To complete the exercises, you'll need to use a few files. Download the App in a Day files for use in this module. The file folders that are in this download include:
- Completed modules with instructions - Package files to import the completed exercise steps.
- Machine-Order-Data.xlsx - File used in the exercises.
Section 1: Sign in to the Power Apps website
Your first task is to sign in to the Microsoft Power Apps website.
Go to Make Power Apps and make sure that you're in the correct environment.

Select Solutions and then select to open the Contoso Coffee solution.

Section 2: Sign in to the Power Automate website
Go to Power Automate and make sure that you're in the correct environment where you have been building your apps for these labs.
Select Solutions and then select to open the Contoso Coffee solution.
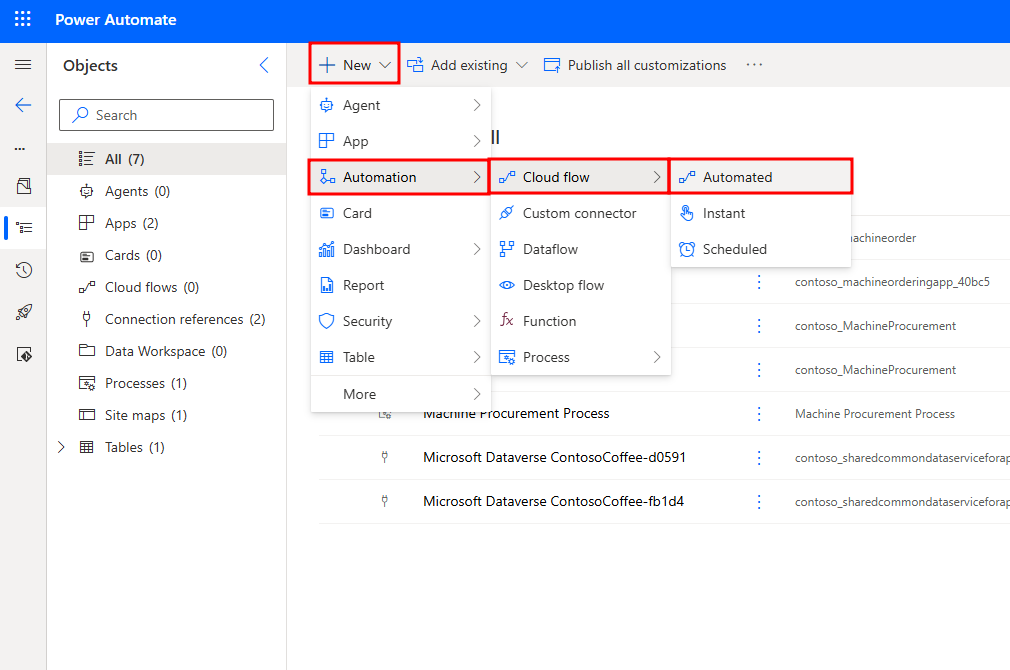
Select + New and then select Automation > Cloud flow > Automated.

Section 3: Set up the trigger
Next, you need to set up the trigger, that is, when the flow should run. You can trigger a flow in the following ways:
Manually, from a Power Apps application
Manually, from a flow button
On a fixed schedule
When an event occurs, such as a new item being added to a table, a new email arriving in a user's inbox, or a new tweet being posted on Twitter that meets certain conditions
In this scenario, you set the flow to trigger when a new item is added to the Machine Order table in Microsoft Dataverse.
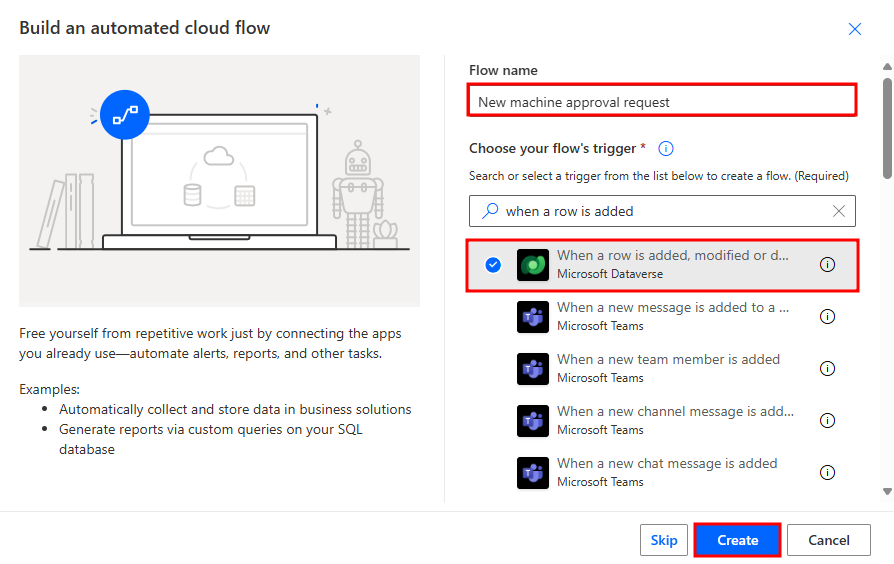
In the Flow name box, enter a name for your flow, such as
New machine approval request.In the Choose your flow's trigger box, search for
when a row is addedand then select When a row is added, modified, or deleted.Then, select Create.
If prompted, select Oauth for Authentication Type and sign in with your user account.
Note
If your connection request gets denied, try closing out of the flow, deleting any Dataverse connection references that were formed, and create the flow again.
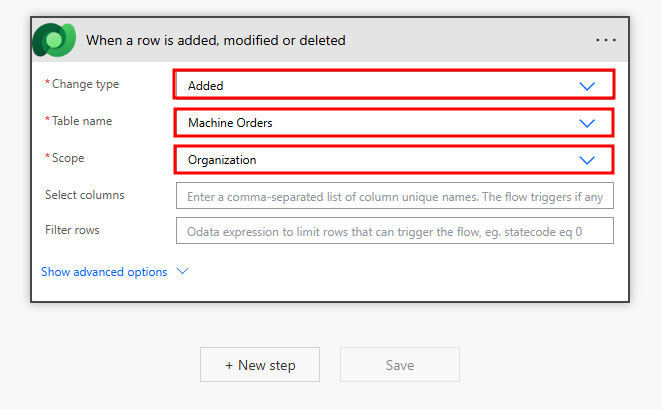
In the trigger, select Added from the Change type dropdown menu.
From the Table Name dropdown menu, select Machine Orders. You can type
machine ordersto search for it.From the Scope dropdown menu, select Organization. Scope allows you to limit when your flow runs. For example, if you choose User, the flow would only run for orders that you create. In this case, you're choosing Organization because you want this flow to run for records that are created by anyone in your entire organization.


Section 4: Add an action to send an approval request
In this next task, you'll add an action to send an approval request.
Select New step.

Search for
Approvalsand then select Start and wait for an approval.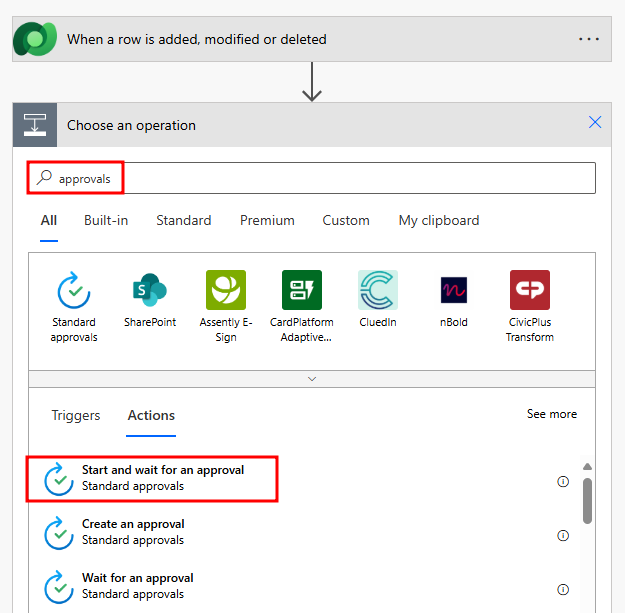
The system uses the approval service. For more information, see Get started with approvals.
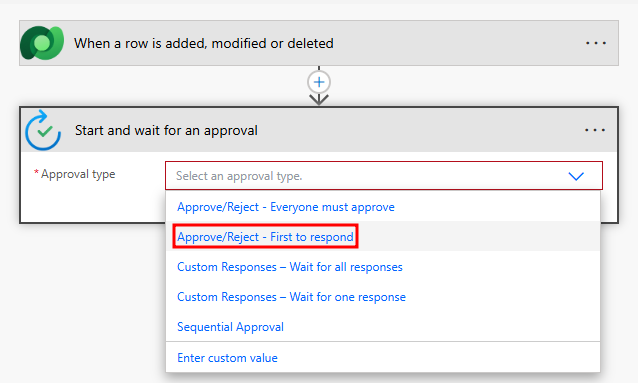
In the Approval type dropdown menu, select Approve/Reject - First to respond.
In the Title field, add some text and one piece of dynamic content. This dynamic content contains the Machine Name of the machine order request. Enter
New machine request forin the Title text box.Select Machine Name from the Dynamic content pane. (Ensure that you include a space between the word "for" and the Machine name)
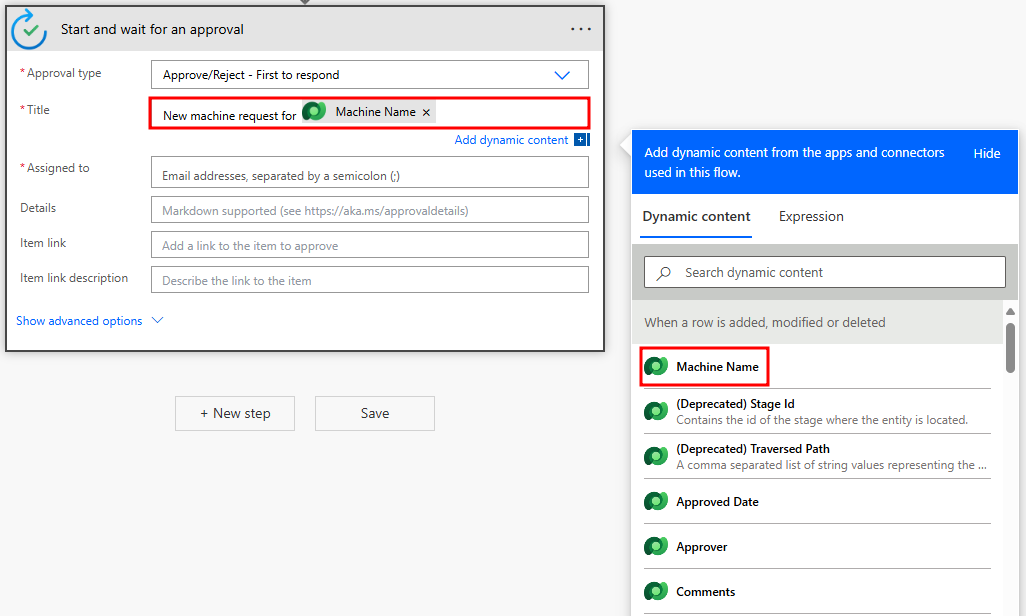
Note
If the Dynamic content box is not visible, select the Add dynamic content button.

Select the Assigned to field and then select Approver from the Dynamic content pane. Select the Add dynamic content button to show/hide the Dynamic content pane.
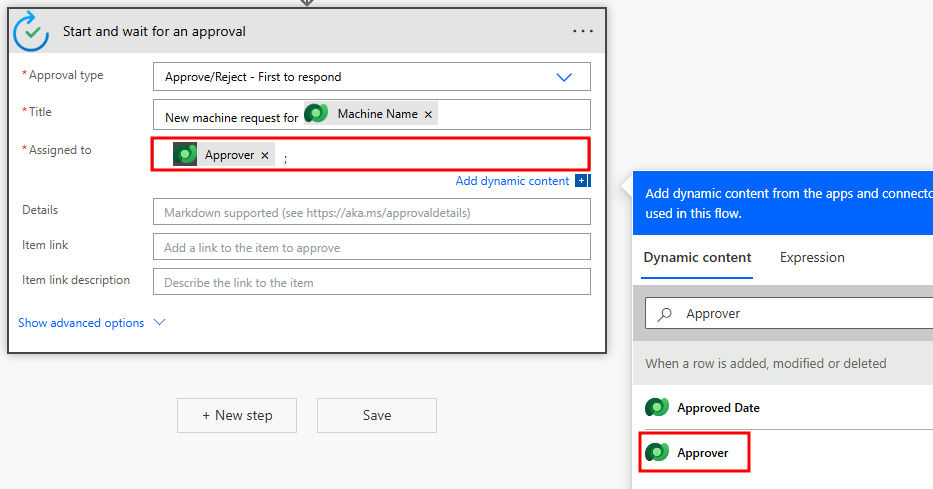
Note
Recall from the previous lab that this address is the approver's email address.
Save your flow.
Note
A warning might display in the Flow checker that Power Automate Approvals has not been installed for your environment. When you run the flow later in the lab it will initiate the provisioning of Power Automate Approvals.
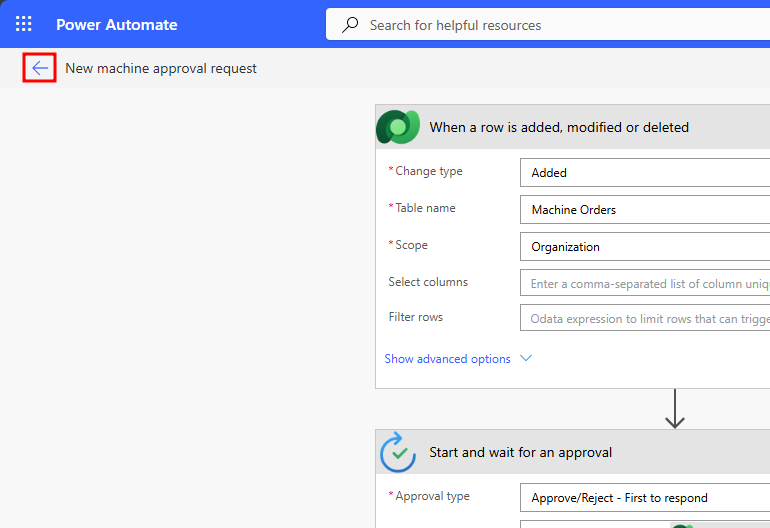
Select the back arrow next to your flow name in the upper left hand corner.
Note
If you get an error indicating your Dataverse connection is having an issue. Select the ellipses menu in your When a row is added... action and create a new connection.
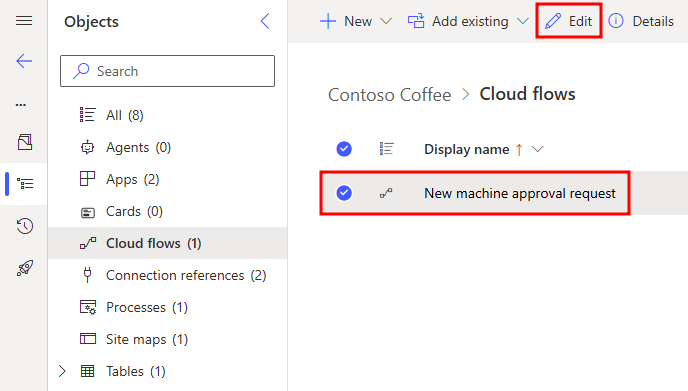
Now, you're back in your solution. Select your flow and select edit in the upper ribbon.
Note
You are now in the modern flow designer. The new designer provides a more modern experience, is faster, and easier to use, with several features customers have been asking for.
The rest of the labs will continue with the modern flow designer look.
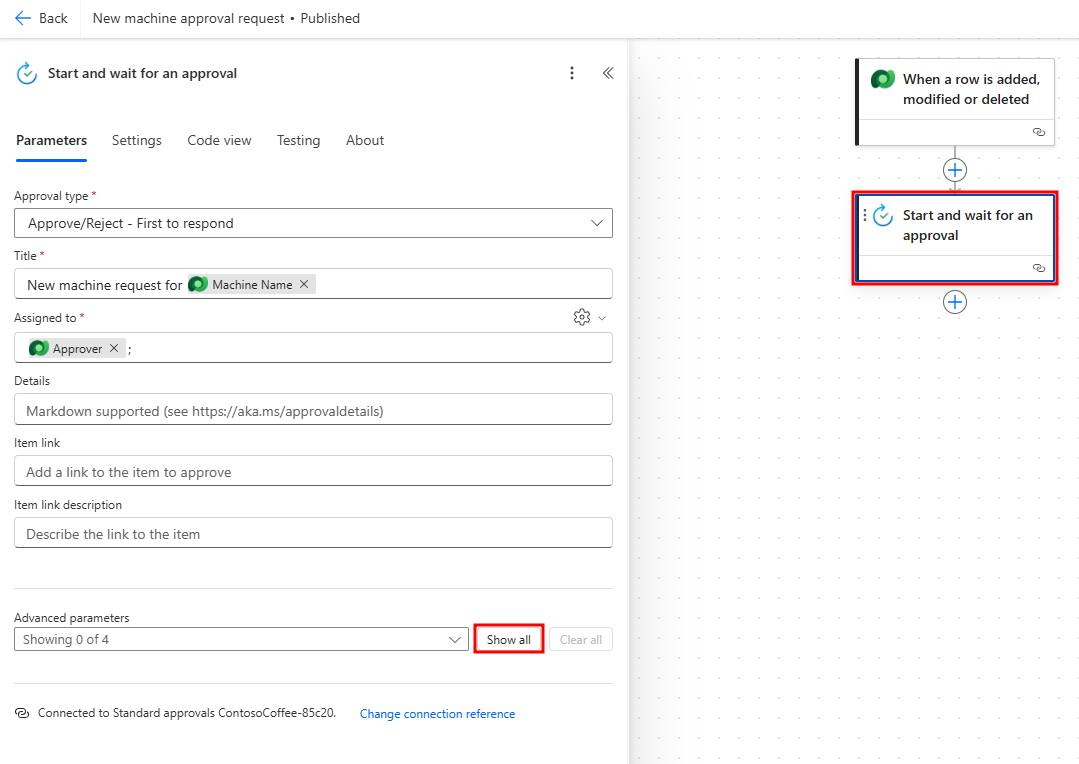
Select the Start and wait for an approval action. In the left hand panel, select Show all next to advanced parameters.
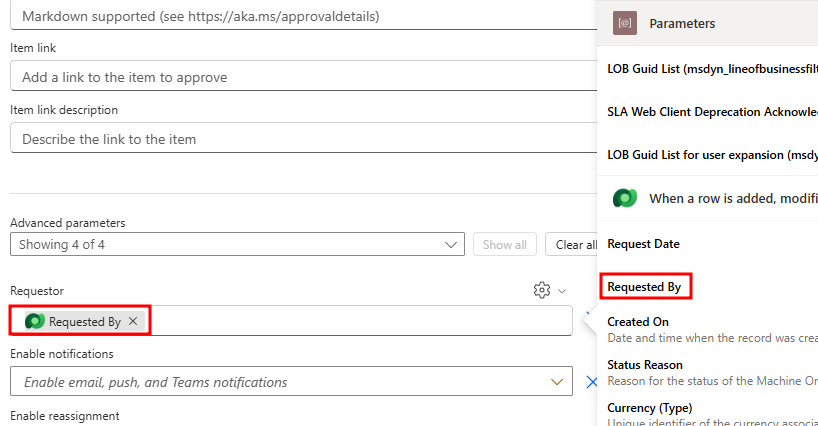
Next to the Requestor field, select the gear icon to allow access to dynamic content.
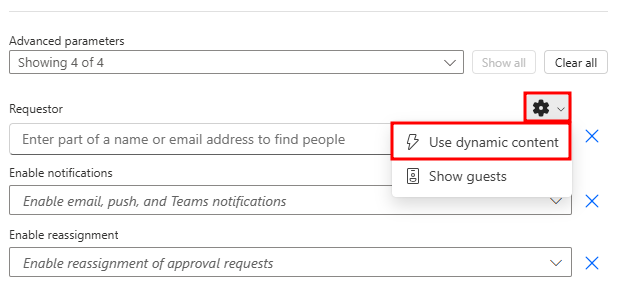
Select the Requestor field, and then select the lightning bolt icon and access the dynamic content.
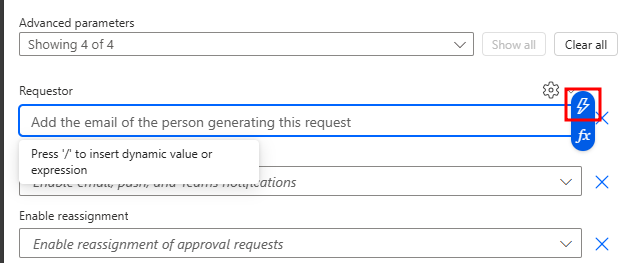
Select Requested By from the Dynamic content window.
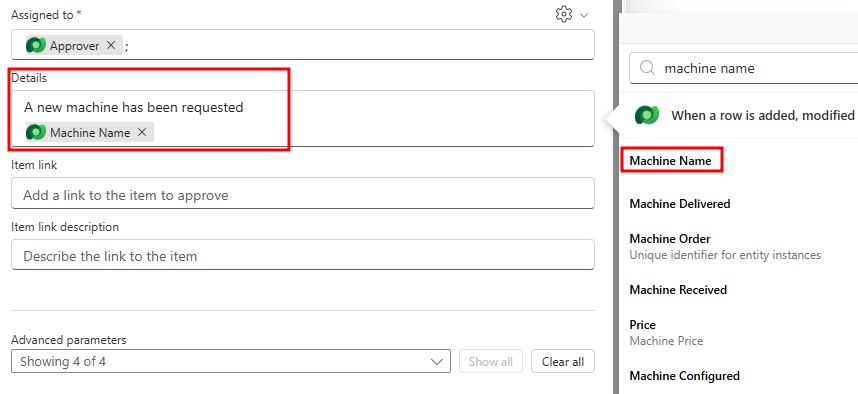
Scroll up to the Details field and enter
A new machine has been requestedthen press the Enter key.Select Machine Name from the Dynamic content pane.
Note
Select the lightning bolt icon to open the dynamic content pane.
Type
, $and then select Price. Rather than scrolling to find your dynamic content, use the search bar for ease to find the Price dynamic content.
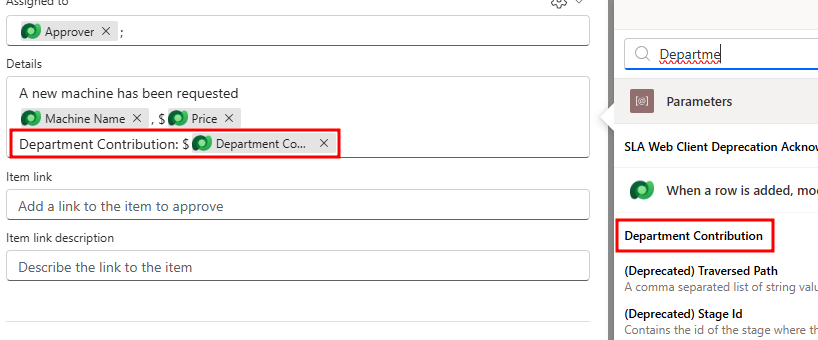
Press the Enter key and then type
Department Contribution: $.Then, select Department Contribution from the Dynamic content pane.
Press the Enter key, and then type
Comments:and select Comments.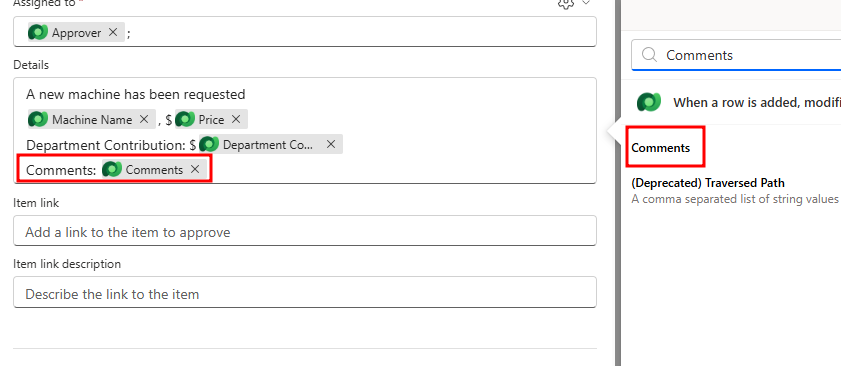
Save and Publish your flow.
Note
When saving the flow, you may receive a warning stating your flow was saved, but approvals may not yet be configured. This is a warning which will resolve itself the first time you run the flow later in the labs.
When creating your own approval flows, you might also include a clickable link that will be displayed in the approval email. In this scenario, you could include a link to view machine details in an online catalogue. You would include the Item link and Item link description.
You could also set the Item link to deep link into a Power Apps application to view more details about the request. In this scenario, you might pass an OrderID or a MachineID as a URL parameter. Power Apps accepts URL parameters.


Section 5 (Optional): Analyze your flow with Copilot
In this exercise, you’ll use Copilot in the Power Automate cloud designer to understand what each step in an existing cloud flow does. Instead of inspecting action settings manually, you’ll ask Copilot to explain the trigger and actions using natural language.
This exercise helps you learn how to:
- Read and understand existing Power Automate flows
- Use Copilot as a learning and troubleshooting assistant
- Validate your understanding of Dataverse triggers and approval actions
Scenario: You are reviewing a Power Automate cloud flow that performs the following tasks:
- Starts when a Dataverse row is added, modified, or deleted
- Sends the record through an approval process
The flow already exists, but you want to understand how it works and what each step does.
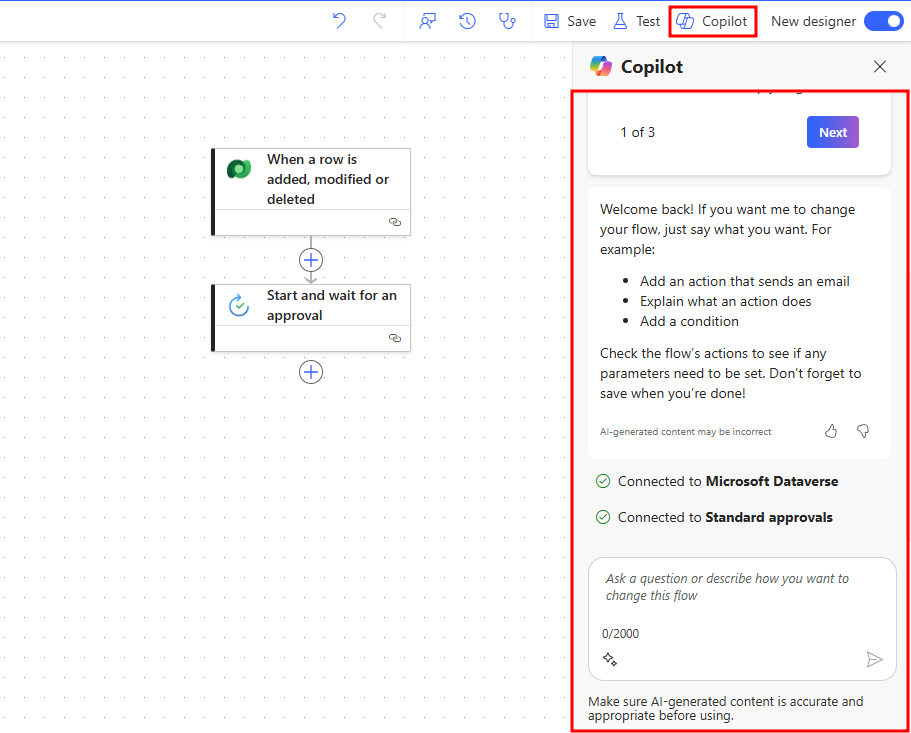
With the existing cloud flow opened in Edit mode, locate the Copilot pane on the right side of the screen.
If Copilot is collapsed, select Copilot to expand it. You’ll use this pane to ask Copilot questions about the flow.
The first step in the flow is a Dataverse trigger named When a row is added, modified, or deleted.
In the Copilot prompt box, enter the following question and Send:
What does the "When a row is added, modified, or deleted" trigger do?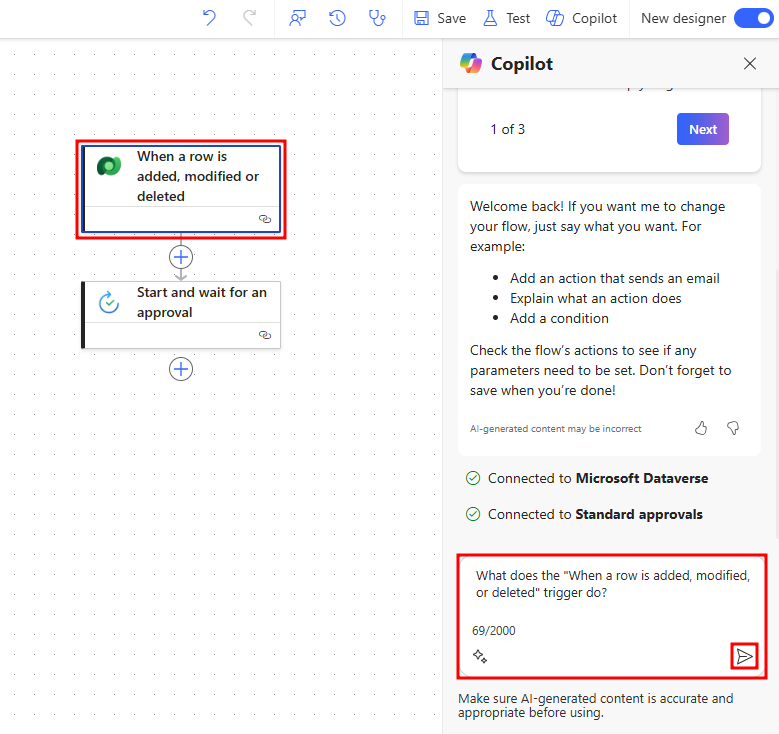
Copilot explains that this trigger:
- Runs automatically when a row is created, updated, or deleted in Dataverse
- Monitors a specific table
- Can be configured to respond to one or more change types
Use Copilot’s response to confirm which table and change types are configured for this flow.
The next step in the flow is an action named Start and wait for an approval.
In the Copilot prompt box, enter the following question and Send:
What does the "Start and wait for an approval" action do in this flow?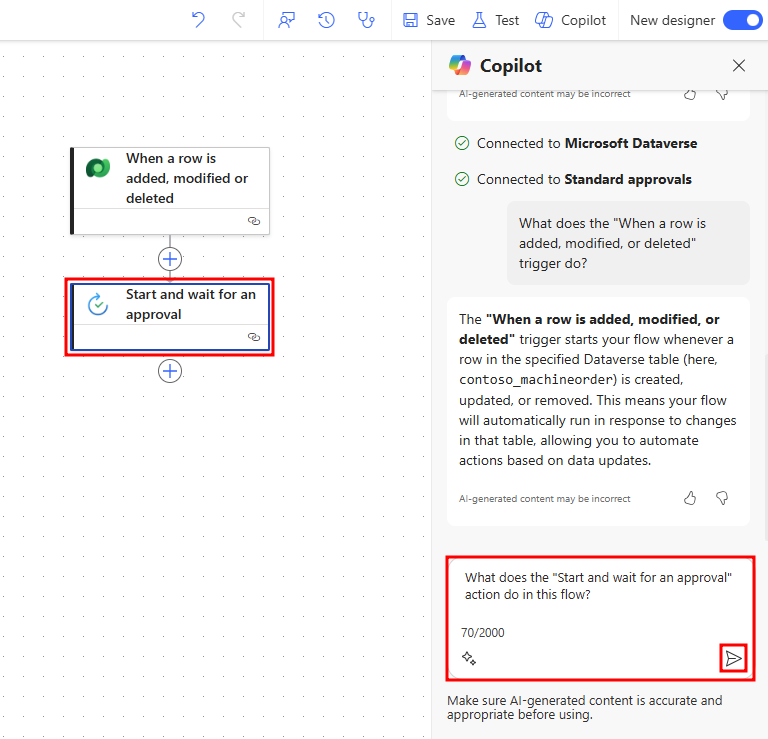
Copilot explains that this action:
- Creates an approval request
- Sends the request to one or more approvers
- Pauses the flow until an approval decision is made
- Returns the approval outcome for use in later steps
Use this explanation to understand why the flow waits at this step.
Now that you understand each step individually, ask Copilot how they work together as a sequence.
In the Copilot prompt box, enter and Send:
How do these steps work together in this flow?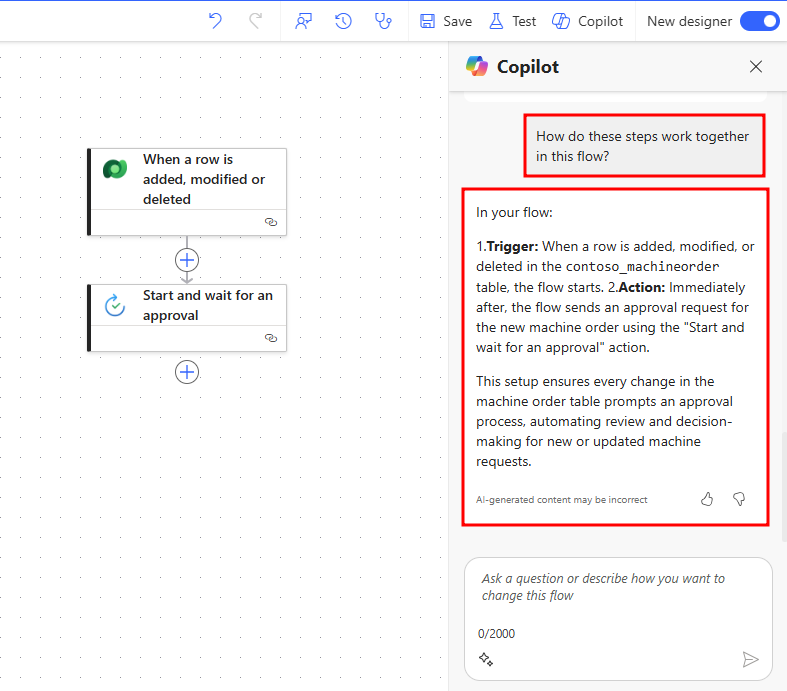
Copilot summarizes the flow logic by explaining that:
- A Dataverse change triggers the flow
- The flow sends the record for approval
- Processing continues only after an approver responds


This reinforces an end-to-end understanding of the flow.
In this exercise, you used Copilot in the Power Automate cloud designer to:
- Explain a Dataverse trigger
- Understand an approval action
- Describe how multiple steps work together in a flow
Using Copilot to explore existing flows helps you learn Power Automate concepts faster and more confidently.