Notiz
Zougrëff op dës Säit erfuerdert Autorisatioun. Dir kënnt probéieren, Iech unzemellen oder Verzeechnesser ze änneren.
Zougrëff op dës Säit erfuerdert Autorisatioun. Dir kënnt probéieren, Verzeechnesser ze änneren.
You can write and run your C++ unit tests by using the Test Explorer window. It works just like it does for other languages. For more information about using Test Explorer, see Run unit tests with Test Explorer.
Note
Some features such as Live Unit Testing, Coded UI Tests and IntelliTest aren't supported for C++.
Visual Studio includes these C++ test frameworks with no extra downloads required:
- Microsoft Unit Testing Framework for C++
- Google Test
- Boost.Test
- CTest
You can use the installed frameworks, or write your own test adapter for whatever framework you want to use within Visual Studio. A test adapter integrates unit tests with the Test Explorer window. Several non-Microsoft adapters are available on the Visual Studio Marketplace. For more information, see Install unit test frameworks.
Visual Studio 2017 and later (Professional and Enterprise)
C++ unit test projects support CodeLens.
Visual Studio 2017 and later (all editions)
Google Test Adapter is included as a default component of the Desktop development with C++ workload. It has a project template that you can add to a solution. Right-click on the solution node in Solution Explorer and choose Add > New Project on the shortcut menu to add the project template. It also has options you can configure by using Tools > Options. For more information, see How to: Use Google Test in Visual Studio.
Boost.Test is included as a default component of the Desktop development with C++ workload. It's integrated with Test Explorer, but currently doesn't have a project template. You must manually configure it. For more information, see How to: Use Boost.Test in Visual Studio.
CTest support is included with the C++ CMake tools component, which is part of the Desktop development with C++ workload. For more information, see How to: Use CTest in Visual Studio.
Earlier versions of Visual Studio
You can download the Google Test adapter and Boost.Test Adapter extensions on the Visual Studio Marketplace. Find them at Test adapter for Boost.Test and Test adapter for Google Test.
Tip
You can also use Copilot /tests slash command to generate unit tests from code. For example, you can type /tests using Boost framework to generate Boost.Test tests. For more information, see Use slash commands in Copilot Chat.
Basic test workflow
The following sections show the basic steps to get you started with C++ unit testing. The basic configuration is similar for both the Microsoft and Google Test frameworks. Boost.Test requires that you manually create a test project.
Create a test project in Visual Studio 2022
Define and run unit tests inside one or more test projects. A test project creates a separate app that calls the code in your executable and reports on its behavior. Create test projects in the same solution as the code you want to test.
To add a new test project to an existing solution:
- Right-click on the Solution node in Solution Explorer.
- In the context menu, choose Add > New Project.
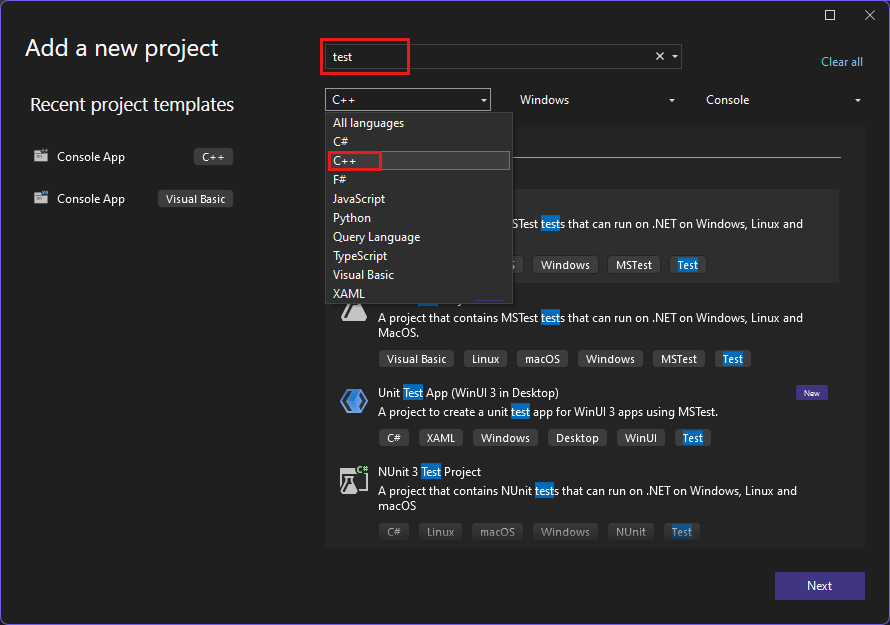
- Set Language to C++ and type test in the search box. The following screenshot shows the test projects that are available when the Desktop Development with C++ and the UWP Development workload are installed:
Create references to other projects in the solution
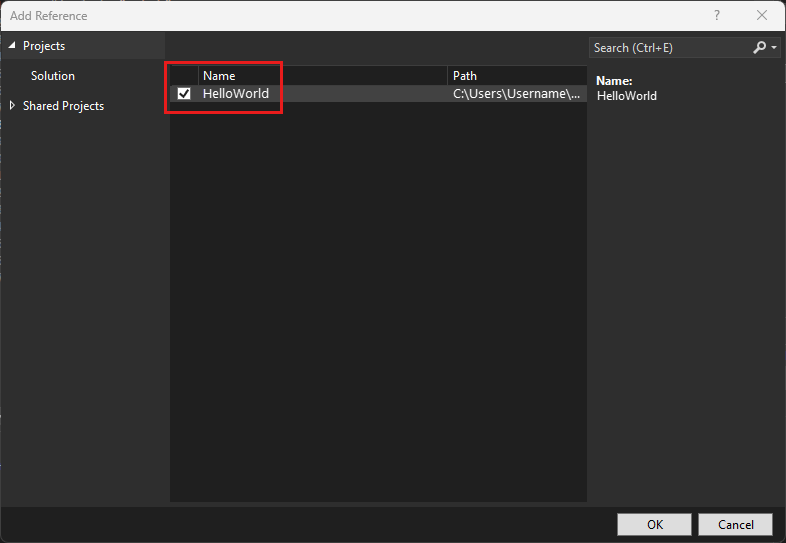
To enable access to the functions in the project under test, add a reference to the project in your test project. In Solution Explorer, expand your test project. Right-click References and then select Add > Reference. In the Add Reference dialog box, choose the projects you want to test.
Link to object or library files
If the test code doesn't export the functions that you want to test, add the output .obj or .lib files to the dependencies of the test project. For more information, see To link the tests to the object or library files. Don't include object files that have a main function or another standard entry point such as wmain, WinMain, or DllMain. When you add new source files to your project, update the test project dependencies to include the corresponding object files.
Add #include directives for header files
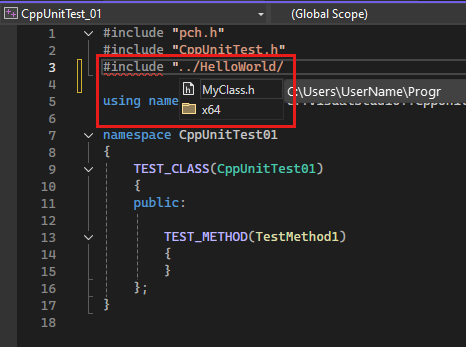
In your unit test .cpp file, add an #include directive for any header files that declare the types and functions you want to test. Type #include ", and then IntelliSense activates to help you choose. Repeat for any more headers.
Tip
To avoid having to type the full path in each include statement in the source file, add the required folders in Project > Properties > C/C++ > General > Additional Include Directories.
Write test methods
Note
This section shows syntax for the Microsoft Unit Testing Framework for C/C++. For more information, see Microsoft.VisualStudio.TestTools.CppUnitTestFramework API reference.
For Google Test documentation, see Google Test primer. For Boost.Test, see Boost Test library: The unit test framework.
The .cpp file in your test project has a stub class and method defined for you. They show an example of how to write test code. The signatures use the TEST_CLASS and TEST_METHOD macros, which make the methods discoverable from the Test Explorer window.
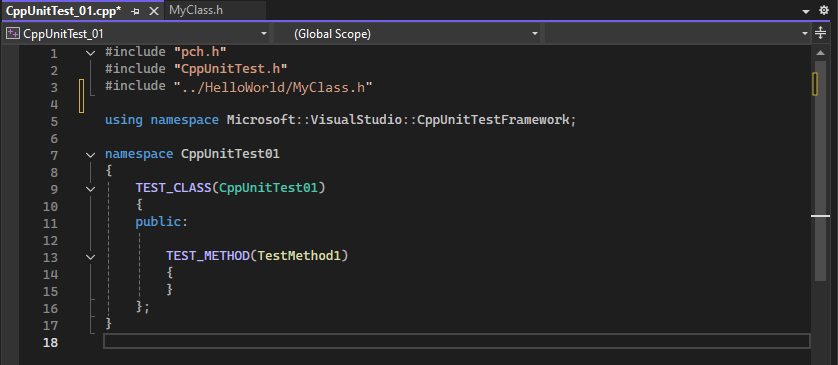
TEST_CLASS and TEST_METHOD are part of the Microsoft Native Test Framework. Test Explorer discovers test methods in other supported frameworks in a similar way.
A TEST_METHOD returns void. To produce a test result, use the static methods in the Assert class to test actual results against expected results. In the following example, assume MyClass has a constructor that takes a std::string. This example shows how you can test that the constructor initializes the class the way you expect:
TEST_METHOD(TestClassInit)
{
    std::string name = "Bill";
    MyClass mc(name);
    Assert::AreEqual(name, mc.GetName());
}
In the previous example, the result of the Assert::AreEqual call determines whether the test passes or fails. The Assert class contains many other methods to compare expected results with actual results.
You can add traits to test methods to specify test owners, priority, and other information. You can then use these values to sort and group tests in Test Explorer. For more information, see Run unit tests with Test Explorer.
Run the tests
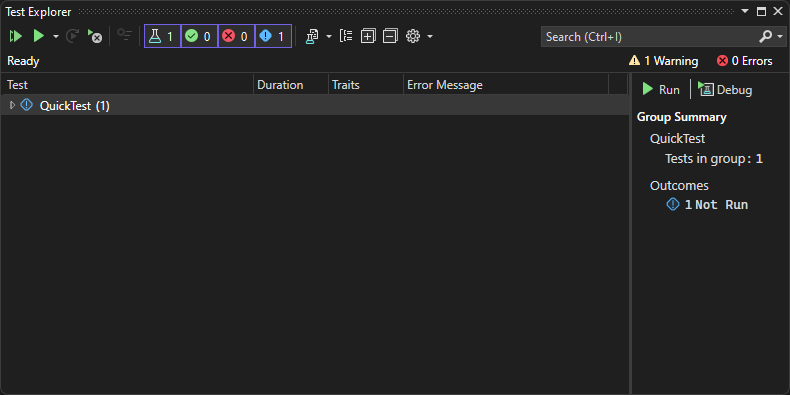
On the Test menu, choose Test Explorer. The following illustration shows a test project before you run tests.
Note
CTest integration with Test Explorer is not yet available. Run CTest tests from the CMake main menu.
If any of your tests are missing from the window, build the test project by right-clicking its node in Solution Explorer and choosing Build or Rebuild.
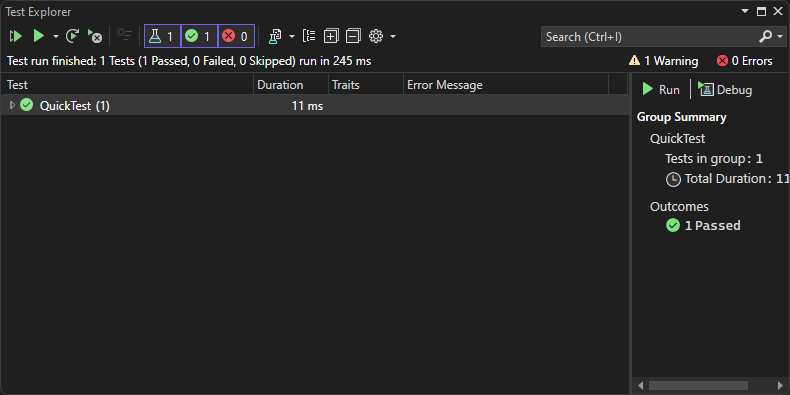
In Test Explorer, choose Run All, or select the specific tests you want to run. Right-click on a test for other options, including running it in debug mode with breakpoints enabled. After all the tests run, the window shows the tests that passed and the ones that failed.
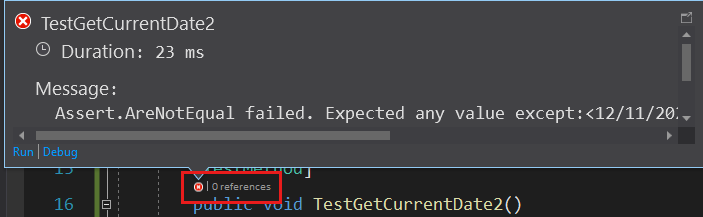
For failed tests, the message displays details that help to diagnose the cause. Right-click on the failing test for a pop-up menu. Choose Debug to step through the function where the failure occurred.
For more information on using Test Explorer, see Run unit tests with Test Explorer.
For more information on unit testing, see Unit test basics.
Use CodeLens
Visual Studio 2017 and later (Professional and Enterprise editions)
CodeLens lets you quickly see the status of a unit test without leaving the code editor.
Initialize CodeLens for a C++ unit test project in any of the following ways:
- Edit and build your test project or solution.
- Rebuild your project or solution.
- Run tests from the Test Explorer window.
After you initialize CodeLens, you can see the test status icons above each unit test.
![]()
Choose the icon for more information, or to run or debug the unit test: