Features in Configuration Manager technical preview version 2109
Applies to: Configuration Manager (technical preview branch)
This article introduces the features that are available in the technical preview for Configuration Manager, version 2109. Install this version to update and add new features to your technical preview site.
Review the technical preview article before installing this update. That article familiarizes you with the general requirements and limitations for using a technical preview, how to update between versions, and how to provide feedback.
The following sections describe the new features to try out in this version:
Improvements to Support Center Log File Viewer and OneTrace
The Support Center Log File Viewer and OneTrace now display status messages in an easy to read format. Entries starting with >> are status messages that are automatically converted into a readable format when a log is opened. Search or filter on the >> string to find status messages in the log.

Tip
When installing Support Center, you can install tools individually. To install only the OneTrace log viewer, use the Advanced option when using the Support Center installer . You can also use the ADDLOCAL property, for example supportcenterinstaller.msi ADDLOCAL=OneTraceApplication
Options for Support Center Data Collector and Client Tools
The following new command-line options have been added to the Support Center Data Collector and Client Tools:
| Option | Description | Use case |
|---|---|---|
-l |
Specifies to launch as current user without elevation | If -l is used, no elevation is requested and local connections are disabled -l can be used exclusively from -m and -p. If -m and/or -p is used without -l, elevation will still be requested. |
-m <machinename> |
Allows specifying a machine name | If -m <machinename> is used, an attempt is made to connect to the specified machine name using integrated authentication (unless -p is used) |
-p |
Disables integrated authentication | If -p is used, the connection screen is launched when the client tools are opened. If used with -m, the machine name gets pre-populated with the specified value |
--help |
Displays help |
Note
When using -m <machinename>, the account making the connection needs administrator access on the target machine to collect the data.
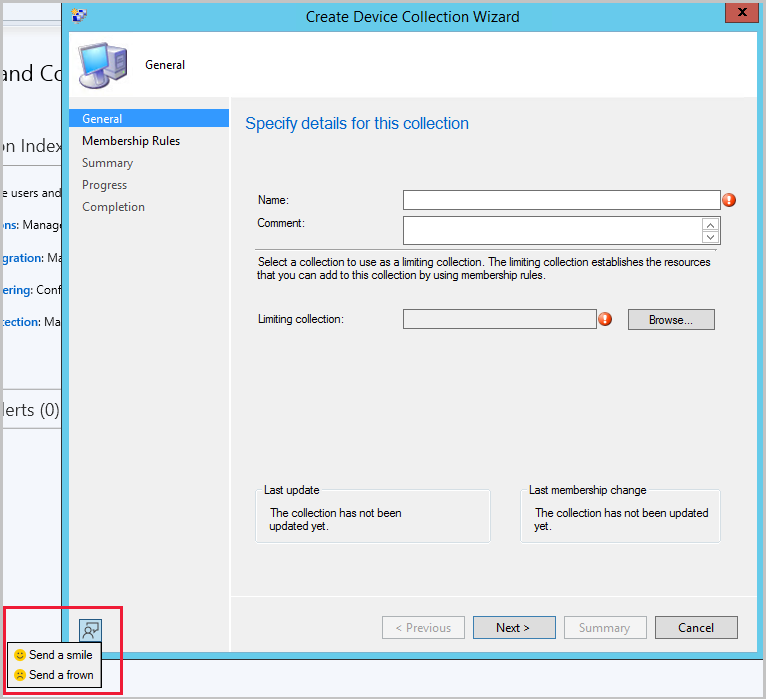
Send product feedback from wizard and property dialogs
Wizards and some property pages now include an icon to provide feedback. When you select the feedback icon, the Send a smile and Send a frown options are displayed in the drop-down menu. The additional feedback locations allow you to quickly send feedback right from your current activity. The feedback icon in the admin console's ribbon has also been updated to the new icon.
Implicit uninstall for user collections
In Configuration Manager current branch version 2107, you can enable an application deployment to support implicit uninstall.
Starting in this release, this behavior also applies to deployments to user collections. If a user is in a collection, the application installs. Then when you remove the user from the collection, the application uninstalls.
For more information, see implicit uninstall.
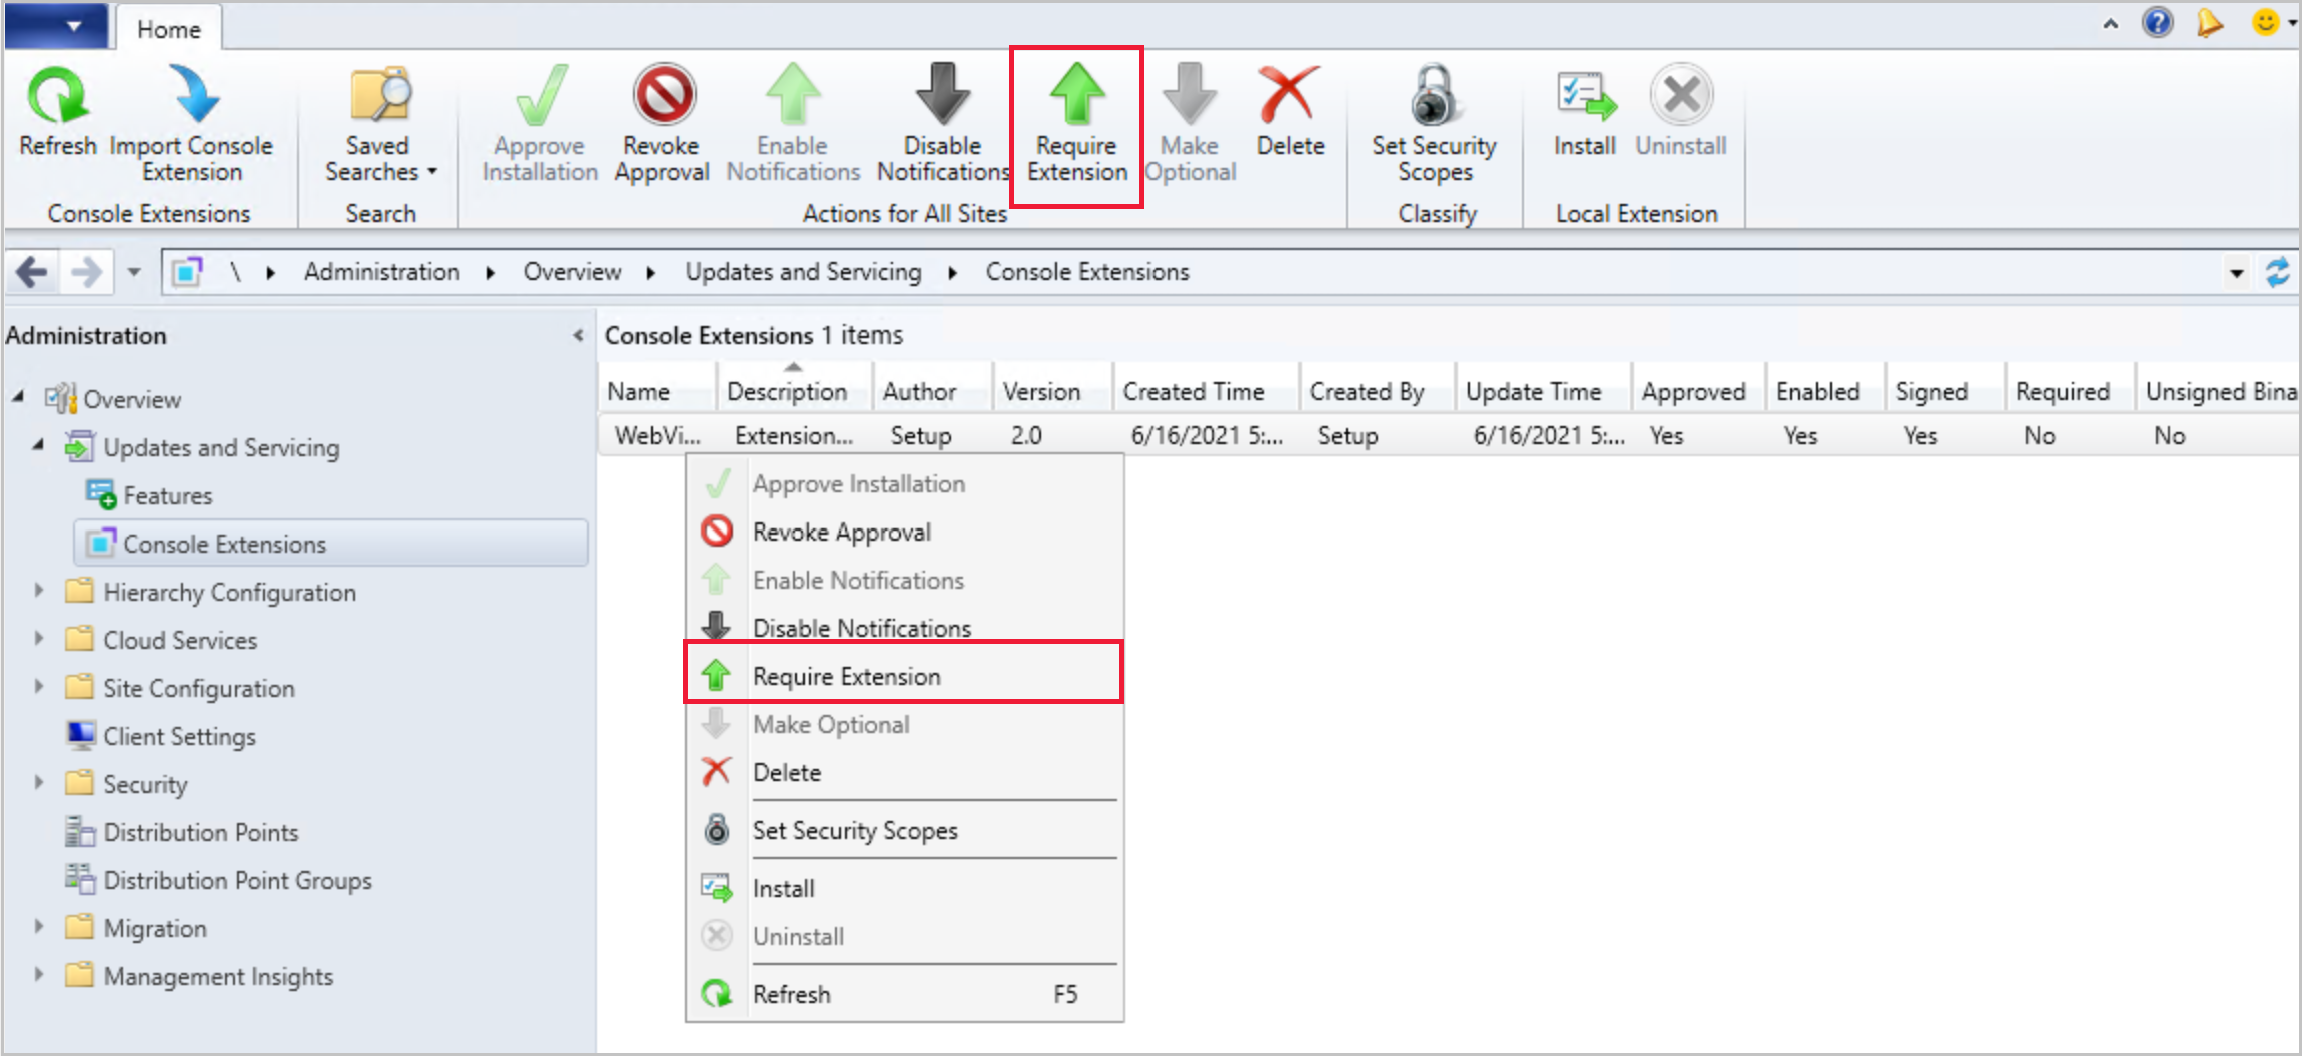
Require installation of a console extension
You can now require a console extension to be installed before it connects to the site. After you require an extension, it automatically installs for the local console the next time an admin launches it. To require the installation of a console extension:
- In the Configuration Manager console, go to the Administration workspace.
- Expand Updates and Servicing and select the Console Extensions node.
- Select the extension, then select Require Extension from either the right-click menu or the ribbon.
- Selecting Make Optional for an extension removes the extension requirement. Console users can still install it locally from the Console Extensions node.
- The next time the console is launched by a user within the extension's security scope, installation starts automatically.
- The user launching the console needs local administrator privileges for the extension installation.
Import console extensions wizard
There's a new wizard for importing console extensions that are managed for the hierarchy. You no longer need to use a PowerShell script to import a signed or unsigned console extension.
Import a console extension:
- From the Administration workspace, expand Updates and Servicing, then select the Console Extensions node.
- Select Import Console Extension from either the ribbon or the right-click menu.
- When the wizard launches, select Browse and navigate to the extension's cab file.
- If needed, select the option for Allow extension to be unsigned.
- Select Next to review the import summary, then complete the wizard to import the extension.
Note
- To import unsigned extensions, the Hierarchy approved console extensions can be unsigned option needs to be enabled in the Hierarchy Settings. For more information, see Allow unsigned hierarchy approved console extensions.
- If you import an extension into the console, the download will fail if you attempt to download the same extension from the Community hub. To download the same extension from Community hub, delete the imported extension and then download from Community hub.
Improvements to ADR search criteria
The Date Released or Revised search criteria for automatic deployment rules has the following options added:
- Older than 30 days
- Older than 60 days
- Older than 90 days
- Older than 6 months
- Older than 1 year
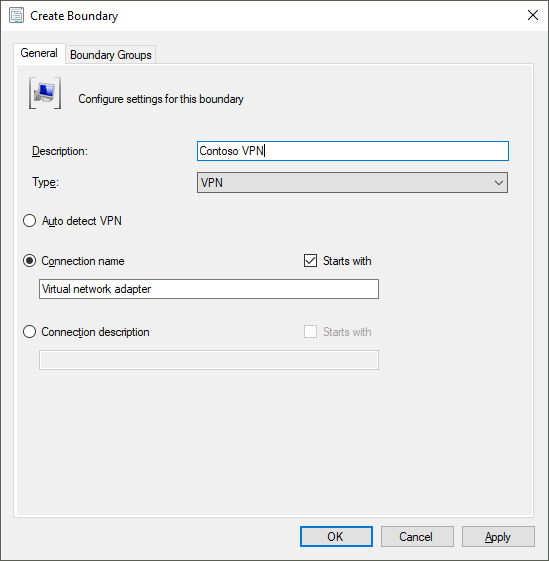
Improvements to VPN boundary types
If you use the VPN boundary type, you can now match the start of a connection name or description instead of the whole string. Some third-party VPN drivers dynamically create the connection, which starts with a consistent string but also has a unique connection identifier. For example, Virtual network adapter #19. When you use the Connection name or Connection description options, also use the new Starts with option.
Try it out!
Try to complete the tasks. Then send Feedback with your thoughts on the feature.
Change the Type to VPN.
Select Connection name.
Select Starts with.
Enter the first part of the connection name to match.
.NET version 4.6.2 prerequisite check is an error
Configuration Manager current branch version 2107 has a warning prerequisite rule that checks for Microsoft .NET Framework version 4.6.2. This version of .NET is required on site servers, specific site systems, clients, and the Configuration Manager console.
Starting in this technical preview release, this prerequisite rule for .NET 4.6.2 is an error. Until you upgrade .NET, you can't continue installing or updating the site to this version of Configuration Manager.
Note
If possible in your environment, .NET version 4.8 is recommended. Before you run setup to install or update the site, first update .NET and restart the system. For more information, Site and site system prerequisites.
External dependencies require .NET 4.6.2
All Configuration Manager libraries are now built using Microsoft .NET Framework version 4.6.2 or later. If you develop an application or tool that depends upon these libraries, it also needs to support .NET 4.6.2 or later. Microsoft recommends using .NET Framework version 4.8.
Applications or tools that use Configuration Manager WMI classes and methods, REST APIs, or PowerShell cmdlets aren't affected.
If you develop a third-party add-on to Configuration Manager, you should test your add-on with every monthly technical preview branch release. Regular testing helps confirm compatibility, and allows for early reporting of any issues with standard interfaces.
Copy GUID for ISV proxy certificate
Independent Software Vendors (ISVs) can create applications that extend Configuration Manager. They can use Configuration Manager to assign a certificate to an ISV proxy, which enables custom communication with the management point.
To simplify the management of these ISV proxy certificates, you can now copy its GUID in the Configuration Manager console.
In the Configuration Manager console, go to the Administration workspace.
Expand Security, and select the Certificates node.
Sort the list of the certificates by the Type column.
Select a certificate of type ISV Proxy.
In the ribbon, select Copy Certificate GUID.
This action copies this certificate's GUID, for example: aa05bf38-5cd6-43ea-ac61-ab101f943987
PowerShell release notes preview
These release notes summarize changes to the Configuration Manager PowerShell cmdlets in this technical preview release.
For more information about PowerShell for Configuration Manager, see Get started with Configuration Manager cmdlets.
Module changes
When you install the Configuration Manager console, the path to the ConfigurationManager PowerShell module is now added to the system environment variable, PSModulePath. For example, by default, this path is C:\Program Files (x86)\Microsoft Endpoint Manager\AdminConsole\bin.
With this change, it's easier to import this module with the following command: Import-Module ConfigurationManager
For more information, see about_PSModulePath.
New cmdlets
Get-CMFolder
Use this cmdlet to get all customized folders or folders from the specified parent path.
$parentPath = 'DeviceCollection'
$name = 'Folder1'
$name2 = 'Folder2'
$name3 = 'Folder3'
$root = New-CMFolder -ParentFolderPath $parentPath -Name $name
$folder = Get-CMFolder -FolderPath ($parentPath + '\' + $name + '\' + $name2 + '\' +$name3)
New-CMFolder
Use this cmdlet to create a new folder under the specified parent folder path.
$parentPath = 'DeviceCollection'
$name =  'Folder1'
$folder = New-CMFolder -ParentFolderPath $parentPath -Name $name
Remove-CMFolder
Use this cmdlet to remove the specified folder.
$parentPath = 'DeviceCollection'
$name =  'Folder1'
$name2 =  'Folder2'
$name3 =  'Folder3'
Remove-CMFolder -Name $name3 -ParentContainerNode (Get-CMFolder -Name $name2) -Force
(Get-CMFolder -Name $name2) | Remove-CMFolder -Force
Remove-CMFolder -FolderPath  ($parentPath + '\' + $name) -Force
Remove-CMSoftwareUpdateFromPackage
Use this cmdlet to remove the specified software update from a package.
Remove a software update and refresh the distribution point:
Remove-CMSoftwareUpdateFromPackage -SoftwareUpdatePackageId $packageId -SoftwareUpdateId $softwareUpdateId -RefreshDistributionPoint -Force
Remove two software updates but don't refresh the distribution point:
Remove-CMSoftwareUpdateFromPackage -SoftwareUpdatePackage $package -SoftwareUpdateName ($softwareUpdateName1, $softwareUpdateName2) -Force
Set-CMApplicationSupersedence
Use this cmdlet to set deployment type supersedence for the specified application.
Add or set deployment type supersedence:
$AppSupersededName = "Superseded app"
$AppSuperseded = New-CMApplication -Name $AppSupersededName
$OriginalDT = Add-CMScriptDeploymentType -ApplicationName $AppSuperseded -DeploymentTypeName "ScriptDT01" -InstallCommand 'appsetup.exe'

$AppSupersedingName = "Superseding app"
$AppSuperseding = New-CMApplication -Name $AppSupersedingName
$AppSupersedingDT = Add-CMScriptDeploymentType -ApplicationName $AppSuperseding -DeploymentTypeName "ScriptDT02" -InstallCommand 'appsetup2.exe'

Set-CMApplicationSupersedence -ApplicationId ($AppSuperseding.CI_ID) -CurrentDeploymentTypeId ($AppSupersedingDT.CI_ID) -SupersededApplicationId ($AppSuperseded.CI_ID) -OldDeploymentTypeId ($OriginalDT.CI_ID)
Remove deployment type supersedence:
Set-CMApplicationSupersedence -ApplicationName $AppSupersedingName -CurrentDeploymentTypeName ($AppSupersedingDT.LocalizedDisplayName) -SupersededApplicationName $AppSupersededName -OldDeploymentTypeName ($OriginalDT.LocalizedDisplayName) -RemoveSupersedence -Force
Set-CMFolder
Use this cmdlet to configure the specified folder. For example, rename it or move it to another folder.
$parentPath = 'DeviceCollection'
$name =  'Folder1'
$name2 =  'Folder2'
$name3 =  'Folder3'
$root = New-CMFolder -ParentFolderPath $parentPath -Name $name
Set-CMFolder -Name $name2 -ParentContainerNode (Get-CMFolder -Name $name) -NewName $newName
(Get-CMFolder -Name $newName) | Set-CMFolder -NewName $name2
$folder = Set-CMFolder -Name $name3 -ParentFolderPath ($parentPath + '\' + $name + '\' + $name2) -MoveToFolder $root
$folder = Set-CMFolder -Guid $sub2.FolderGuid -MoveToPath ($parentPath + '\' + $name + '\' + $name2)
Removed cmdlets
The following cmdlets are no longer available because the underlying feature is no longer supported:
- Get-CMTSStepConvertDisk
- New-CMTSStepConverDisk
- Remove-CMTSStepConvertDisk
- Set-CMTSStepConvertDisk
Deprecated cmdlets
The following cmdlets for deployment type supersedence are deprecated and may be removed in a future release:
- Add-CMDeploymentTypeSupersedence
- Set-CMDeploymentTypeSupersedence
For both cmdlets, instead use the new Set-CMApplicationSupersedence cmdlet.
Modified cmdlets
All Configuration Manager cmdlets with import and export verbs
For example, Import-CMAADClientApplication and Export-CMApplication.
Non-breaking changes
To allow for consistent parameter use across these cmdlets, they all have aliases for the parameter to specify the import path: FilePath, FileName, ImportFilePath, Path
Add-CMDistributionPoint
Bugs that were fixed
You can't specify the central administration site (CAS) for the SiteCode parameter, which doesn't support any client-facing site system roles.
General known issues
Configuration Manager console won't automatically update
If you update a technical preview site from version 2108 to a later version, the Configuration Manager console fails to update. This problem is because of a known issue in the extension installer.
To work around this issue, manually update the console. After you update the site from version 2108 to a later version, run ConsoleSetup.exe. For more information, see Install the Configuration Manager console.
Reports on SQL Server Reporting Services won't display
If you use Configuration Manager technical preview branch with SQL Server version 2012 or version 2014, when you update to Configuration Manager version 2109, reports aren't shown in the console. You'll see an error similar to the following string in the srsrp.log:
System.Web.Services.Protocols.SoapException: Error while loading code module: ...SrsResources, culture=neutral.... Details: Could not load file or assembly 'SrsResources, Culture=neutral' or one of its dependencies. This assembly is built by a runtime newer than the currently loaded runtime and cannot be loaded.
To work around this issue, update SQL Server Reporting Services to version 2016 or later. For more information, see Supported SQL Server versions.
Community hub download button is always enabled
The Download button for items in Community hub doesn't disable once an object has been downloaded. The download will fail if you attempt to download the item again.
Next steps
For more information about installing or updating the technical preview branch, see Technical preview.
For more information about the different branches of Configuration Manager, see Which branch of Configuration Manager should I use?.
Feedback
Coming soon: Throughout 2024 we will be phasing out GitHub Issues as the feedback mechanism for content and replacing it with a new feedback system. For more information see: https://aka.ms/ContentUserFeedback.
Submit and view feedback for