Note
Access to this page requires authorization. You can try signing in or changing directories.
Access to this page requires authorization. You can try changing directories.
Important
Test Base for Microsoft 365 will transition to end-of-life (EOL) on May 31, 2024. We're committed to working closely with each customer to provide support and guidance to make the transition as smooth as possible. If you have any questions, concerns, or need assistance, submit a support request.
This section provides all the steps necessary to create a new package containing binary files, for uploading and testing on Test Base. If you already have a pre-built .zip file, you can see Uploading pre-built Zip package, to upload your file.
Important
If you don't have a Test Base account, you'll need to create one before proceeding, as described in Creating a Test Base account.
Create a new package
In the Azure portal, go to the Test Base account for which you'll be creating and uploading your package and perform the steps that follow.
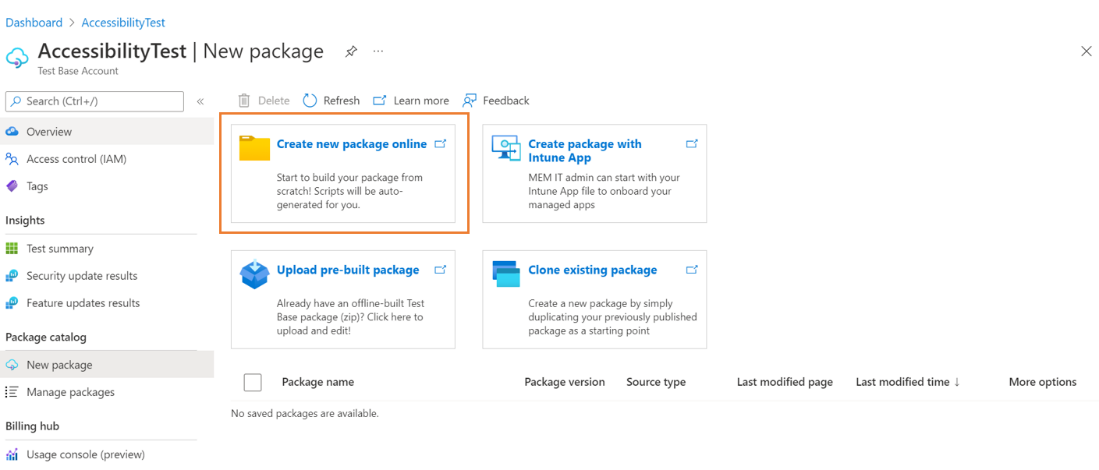
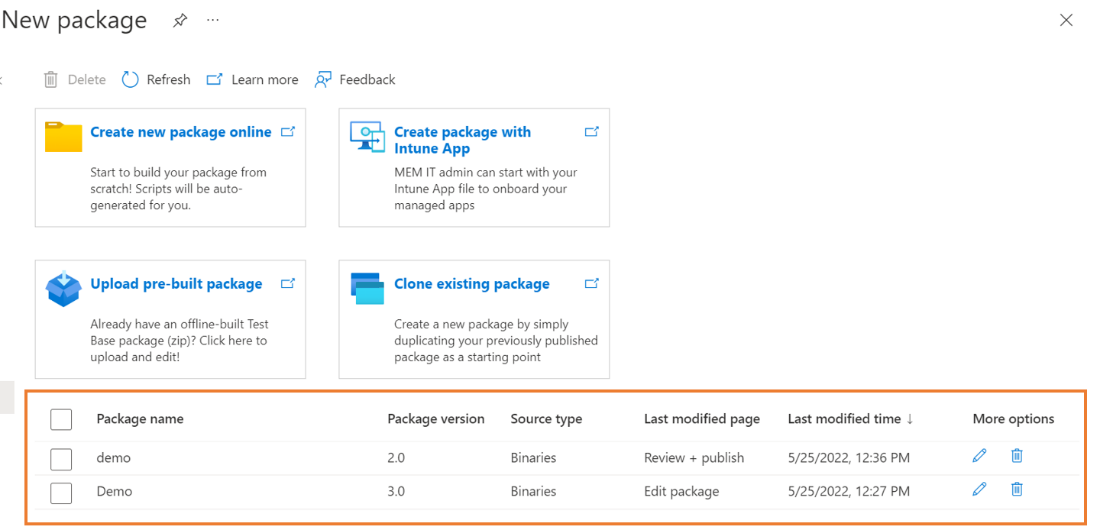
In the left-hand menu under Package catalog, select the New package. Then click the first card 'Create new package online' to build your package online within 5 steps!
Step 1: Define content
In the Package source section, select Binaries (for example: .exe, .msi) in the Package source type.
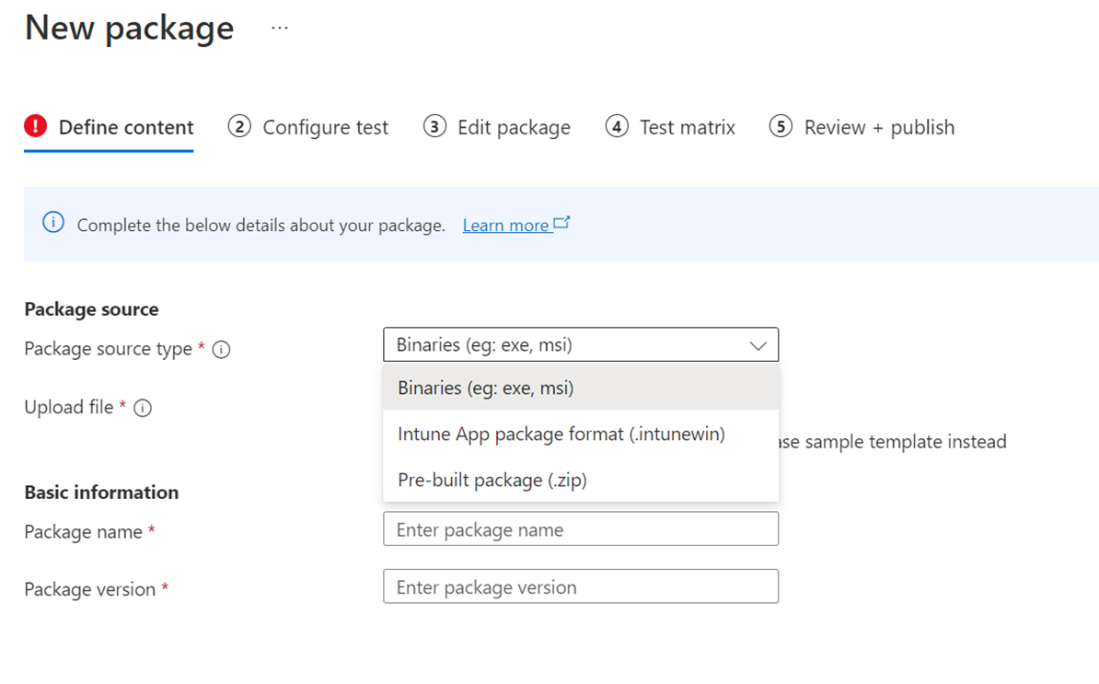
Then upload your app file by clicking 'Select file' button or checking the box to use the Test Base sample template as a starting point if you don't have your file ready yet.

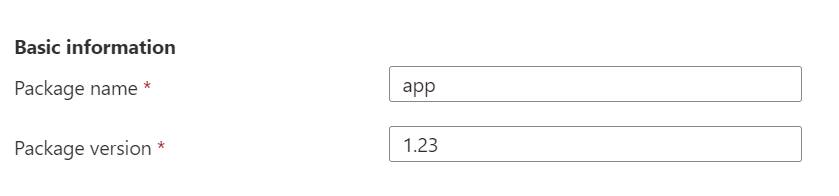
Type in your package's name and version in the Basic information section.
Note
The combination of package name and version must be unique within your Test Base account.
After all the requested information is specified, you can proceed to the next phase by clicking the Next: Configuration test button.

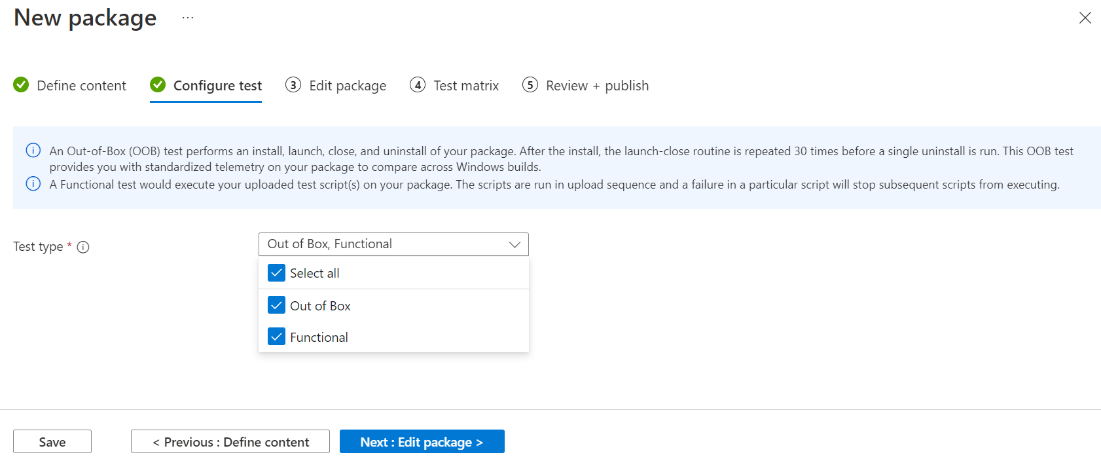
Step 2: Configure test
Select the Type of test. There are two test types supported:
- An Out of Box (OOB) test performs an install, launch, close, and uninstall of your package. After the install, the launch-close routine is repeated 30 times before a single uninstall is run. The OOB test provides you with standardized telemetry on your package to compare across Windows builds.
- A Functional test would execute your uploaded test script(s) on your package. The scripts are run in the sequence you specified and a failure in a particular script will stop subsequent scripts from executing.
- A Flown Driven test allows you to arrange your test scripts with enhanced flow control. To help you comprehensively validate the impact of an in-place Windows upgrade, you can use flow driven tests to execute your tests on both the baseline OS and target OS with a side-by-side test result comparison.
Note
Users can also select the pre-installed Microsoft apps option. This option will install Microsft apps, like Office, before the user application is installed.
Out of Box test is optional now.
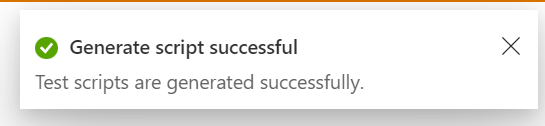
Once all required info is filled out, you can move to step 3 by clicking the Next button at the bottom. A notification will pop up when the test scripts are generated successfully.
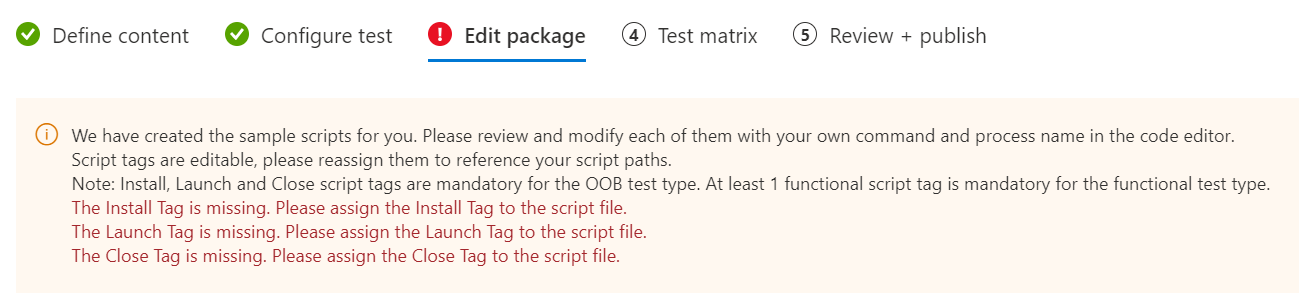
Step 3: Edit package
In the Edit package tab, you can
- Check your package folder and file structure in Package Preview.
- Edit your scripts online with the PowerShell code editor.
Note
Some sample scripts have been generated for your reference. You need to review each script carefully and replace the command and process name with your own.
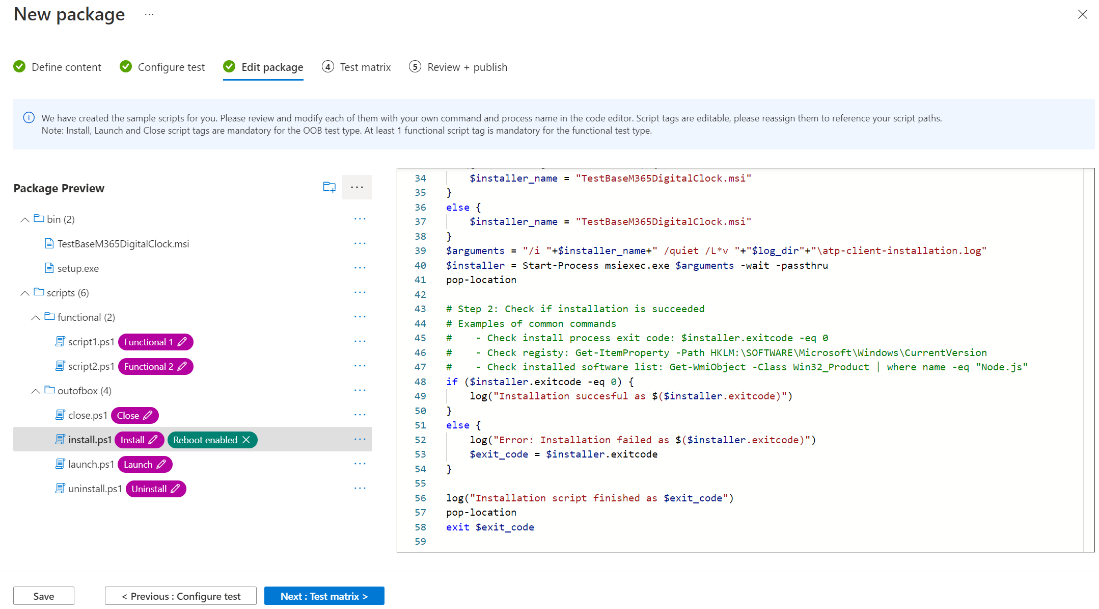
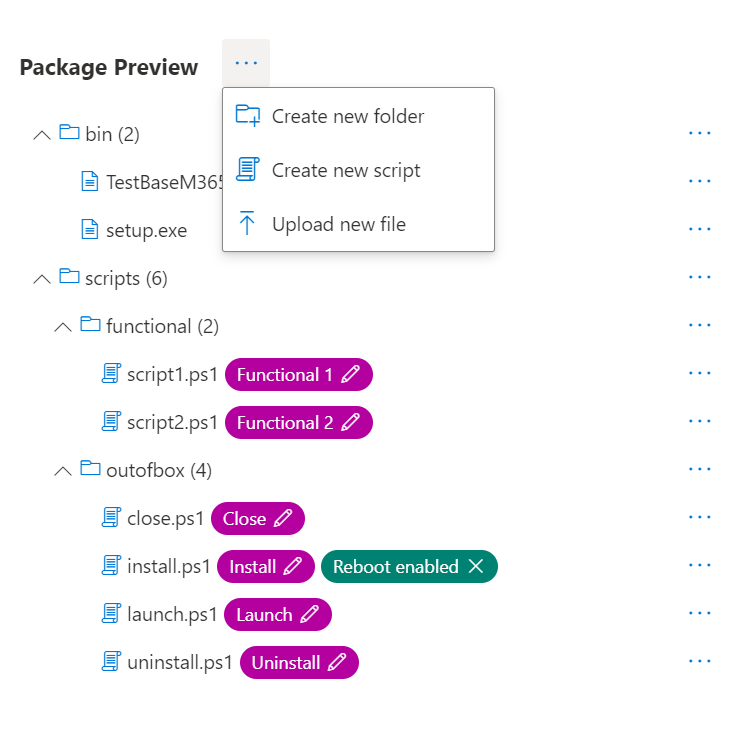
In the Package Preview, per your need, you can
- Create a new folder.
- Create a new script.
- Upload a new file.
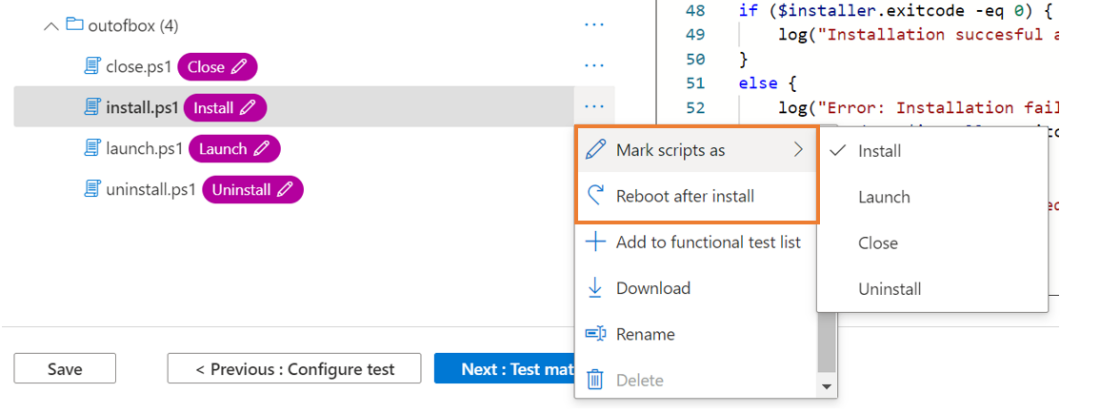
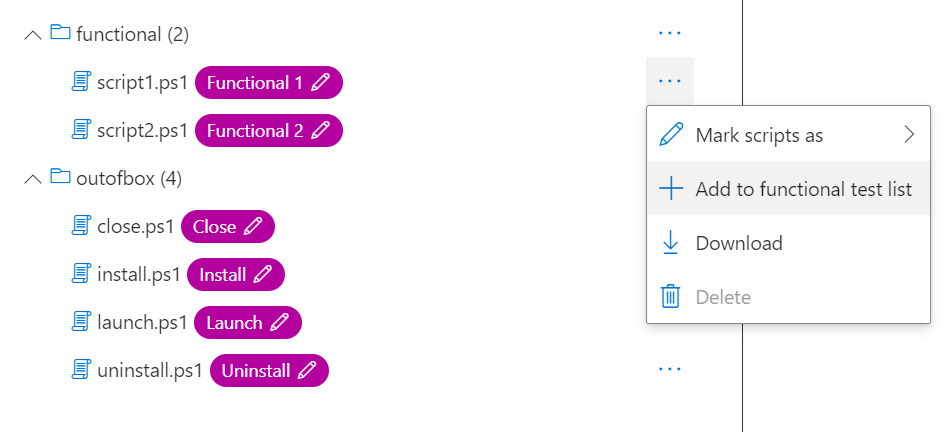
Under scripts folder, sample scripts and script tags have been created for you. All script tags are editable, you can reassign them to reference your script paths.
- If the Out of Box test is selected in step 2, you can see the outofbox folder under the scripts folder. You also have the option to add 'Reboot after install' tag for the Install script.
Note
Install, Launch and Close script tags are mandatory for the OOB test type. Reassigning tags ensures that the correct script path will be used when testing is initiated.
- If the Functional test is selected in step 2, you can see the functional folder under the scripts folder. More functional test scripts can be added using the 'Add to functional test list' button. You need a minimum of one (1) script and can add up to eight (8) functional test scripts.
Note
At least 1 functional script tag is mandatory for the functional test type.
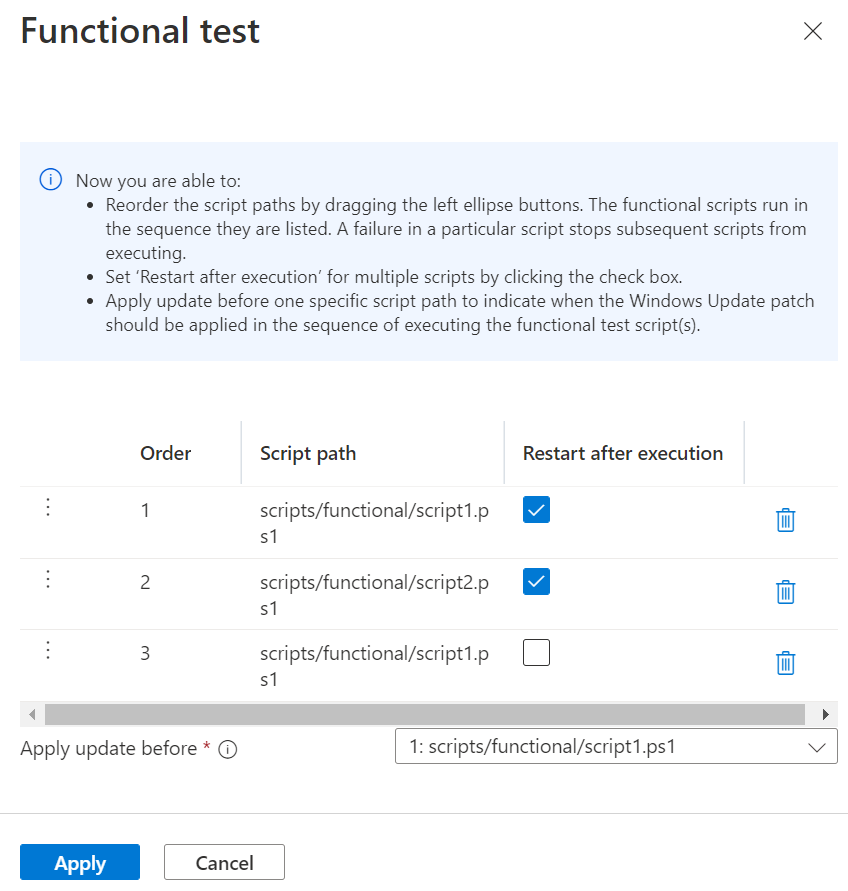
To add more Functional scripts, you can click the 'Add to functional test list'. Then the action panel will pop up, you can:
- Reorder the script paths by dragging with the left ellipse buttons. The functional scripts run in the sequence they're listed. A failure in a particular script stops subsequent scripts from executing.
- Set 'Restart after execution' for multiple scripts.
- Apply update before on specific script path. This is for users who wish to perform functional tests to indicate when the Windows Update patch should be applied in the sequence of executing their functional test scripts.
Once all required info is filled out, you can move to step 4 by clicking the Next button at the bottom.
Step 4: Set test matrix
The Test matrix tab is for you to indicate the specific Windows update program or Windows product that you may want your test to execute against.

Choose OS update type
- Test Base provides scheduled testing to make sure your applications performance won't break by the latest Windows updates.
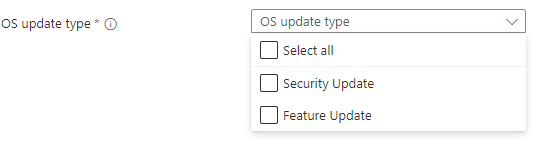
There are 2 available options:
- The Security updates enable your package to be tested against incremental churns of Windows monthly security updates.
- The Feature updates enable your package to be tested against new features in the latest Windows Insider Preview Builds from the Windows Insider Program.
Configure Security Update To set up for security updates, you must specify the Windows product(s) you want to test against from the dropdown list of "OS versions to test".
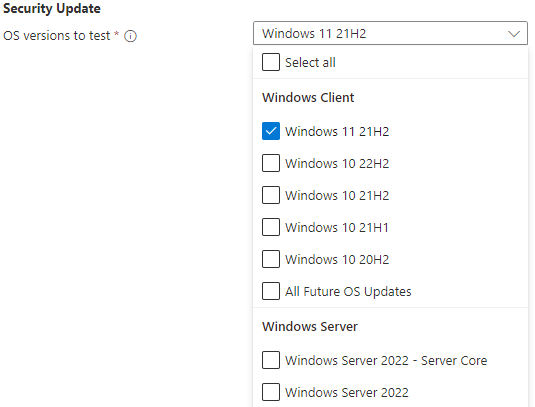
- Your selection will register your application for automatic test runs against the B release of Windows monthly quality updates of selected product(s).
- For customers who have Default Access customers on Test Base, their applications are validated against the final release version of the B release security updates, starting from Patch Tuesday.
- For customers who have Full Access customers on Test Base, their applications are validated against the pre-release versions of the B release security updates, starting up to 3-weeks before prior to Patch Tuesday. This allows time for the Full Access customers time to take proactive steps in resolving any issues found during testing before in advance of the final release on Patch Tuesday.
(How to become a Full Access customer? Please refer to Request to change access level | Microsoft Docs)
- Your selection will register your application for automatic test runs against the B release of Windows monthly quality updates of selected product(s).
Configure Feature Update
- To set up for feature updates, you must specify the target product and its preview channel from "Insider Channel" dropdown list.
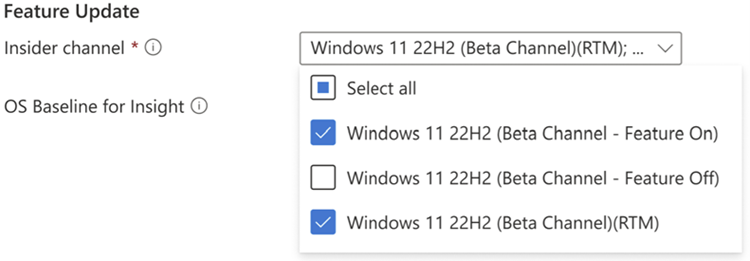
Your selection will register your application for automatic test runs against the latest feature updates of your selected product channel and all future new updates in the latest Windows Insider Preview Builds of your selection.
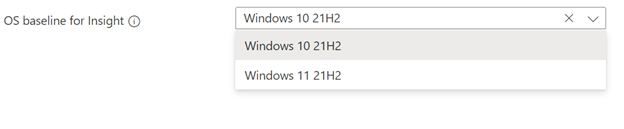
You may also set your current OS in "OS baseline for Insight". We would provide you more test insights by regression analysis of your as-is OS environment and the latest target OS.
Step 5: Review + publish
Review all the information for correctness and accuracy of your draft package. To make corrections, you can navigate back to early steps where you specified the settings as needed.
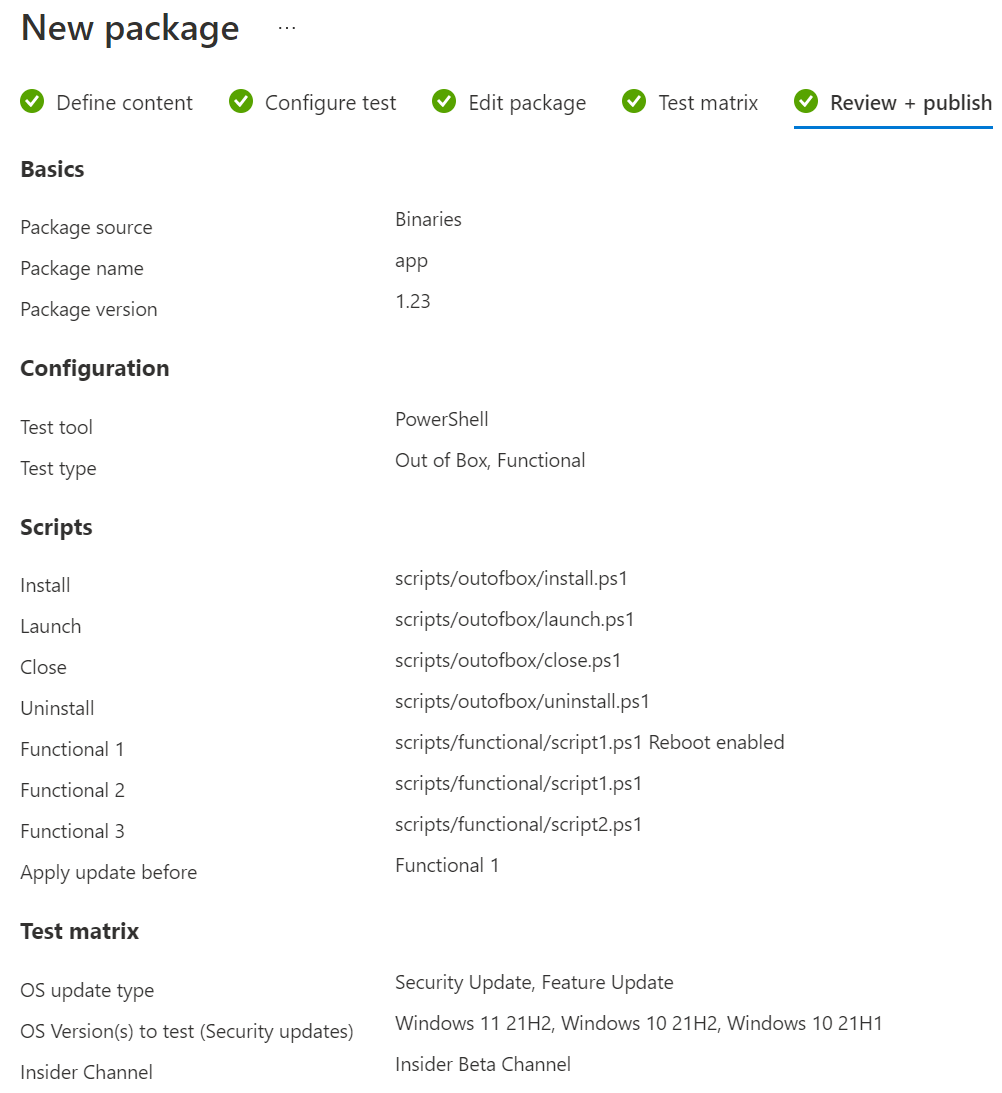
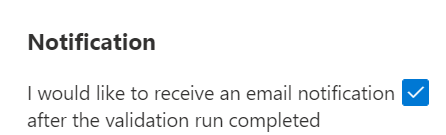
You can also check the notification box to receive the email notification of your package for the validation run completion notice.
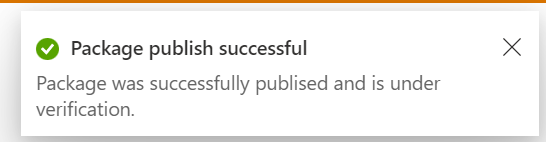
When you're done finalizing the input data configuration, click Publish to upload your package to Test Base. The notification that follows displays when the package is successfully published and has entered the Verification process.
Note
The package must be verified before it is accepted for future tests. The Verification can take up to 24 hours, as it includes running the package in an actual test environment.
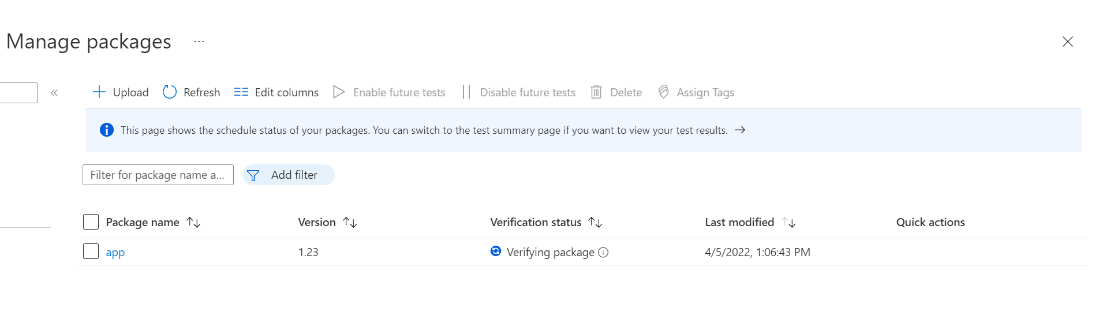
You'll be redirected to the Manage Packages page to check the progress of your newly uploaded package.
Note
When the Verification process is complete, the Verification status will change to Accepted. At this point, no further actions are required. Your package will be acquired automatically for execution whenever your configured operating systems have new updates available. If the Verification process fails, your package is not ready for testing. Please check the logs and assess whether any errors occurred. You may also need to check your package configuration settings for potential issues.
Resume creation of a saved draft package
If you have any previous draft packages, you can view the list of your saved draft packages on the New package page. By clicking the 'Edit' pencil icon, you can resume editing the package you selected from where you left off, as described in the Status column.
Note
The dashboard only shows the saved draft packages. To view published packages, you will need to go to the Manage Packages page.