Note
Access to this page requires authorization. You can try signing in or changing directories.
Access to this page requires authorization. You can try changing directories.
This guide shows you how to discover flexbox elements on a page, as well as inspect and modify the flexbox layouts in the Elements tool.
Use the flex badge to display the flexbox overlay
When an HTML element on a page has display: flex or display: inline-flex applied to it, a flex badge ( ) is displayed next to the element in the DOM tree in the Elements tool.
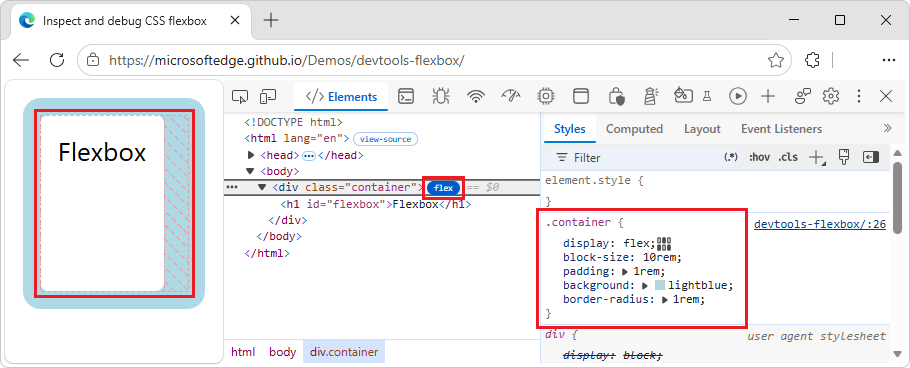
Clicking the flex badge displays the flexbox overlay in the webpage. In the webpage, the flexbox overlay is displayed over the page element, laid out with dotted lines to show the positions of the element's content.
To display the flexbox overlay:
Open a webpage, such as the Inspect and debug CSS flexbox demo.
Right-click the Flexbox box, and then select Inspect.
DevTools opens, with the Elements tool selected. Next to the
<div class="container">element is theflexbadge ():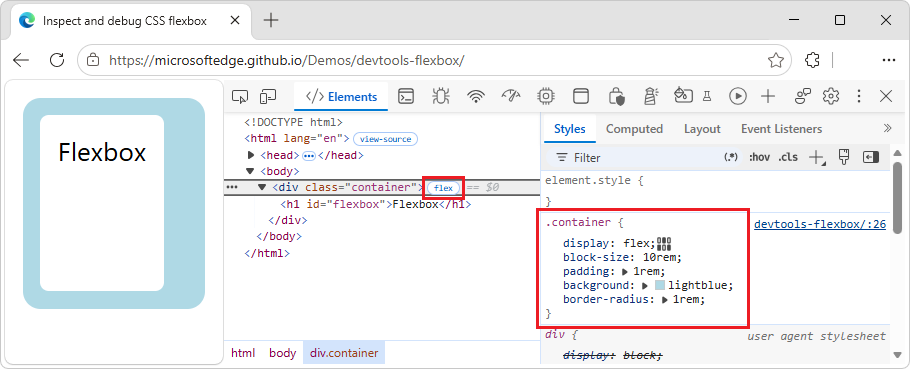
Click the
flexbadge.The flexbox overlay is displayed in the webpage:
See also:
Modify layout visually by using the flexbox editor
You can modify a flexbox layout visually, rather than through code, by using the flexbox editor. For example, you can center a flexbox element within its container, as follows.
To modify layout by using the flexbox editor:
Open a webpage, such as the Inspect and debug CSS flexbox demo.
Right-click the Flexbox box, and then select Inspect.
DevTools opens, with the Elements tool selected. In the DOM tree, next to the
<div class="container">element, theflexbadge is displayed.Click the
flexbadge ().The flexbox overlay is displayed in the webpage.
In the Styles tab of the Elements tool, in the
.containerrule, next to thedisplay: flex;CSS property, click the Open flexbox editor button ( ).
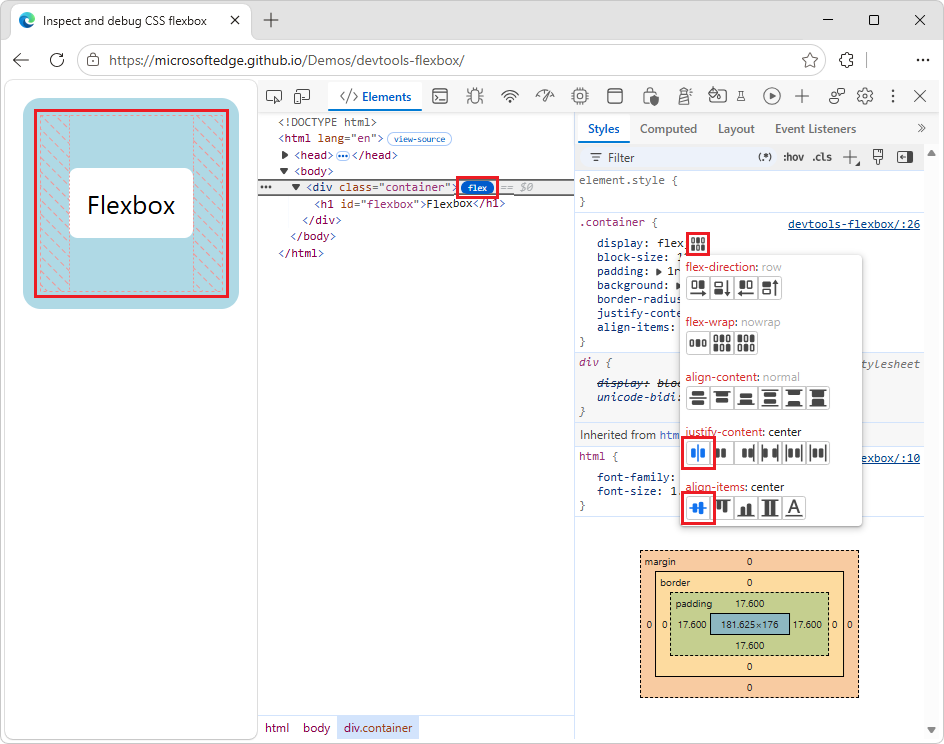
The flexbox editor opens, displaying a list of flexbox properties. Each property's value option is displayed as an icon button.
In the
justify-content:section, click the Add justify-content: center button.Click the
align-items: centerbutton.Click away from the flexbox editor.
The flexbox editor closes, and the Flexbox box is now centered within its container:
In the Styles tab, the
justify-content: centerandalign-items: centerdeclarations are added: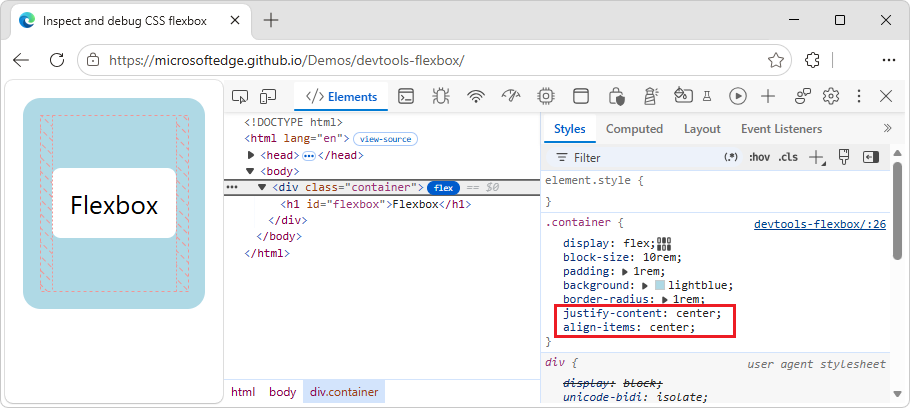
In the DOM tree, click the
flexbadge () again.The flexbox overlay is removed from the webpage.
See also:
- Select an element in CSS features reference.
Additional aspects of the flexbox editor
To momentarily visualize the layout, hover over the flexbox element in the Elements tool. Or, to show or hide the flexbox overlay, click the flex badge ().
The icons in the flexbox editor are context-aware; the icons in the flexbox editor rotate according to the layout direction.
To examine and modify a flexbox layout:
Open a webpage, such as the Inspect and debug CSS flexbox demo.
Right-click the Flexbox box, and then select Inspect.
DevTools opens, with the Elements tool selected. In the DOM tree, next to the
<div class="container">element, theflexbadge () is displayed.In the DOM tree, hover over the
<div class="container">element.In the webpage, the flexbox overlay appears over the page element (as long as you hover), laid out with dotted lines to show the positions of the element's content:
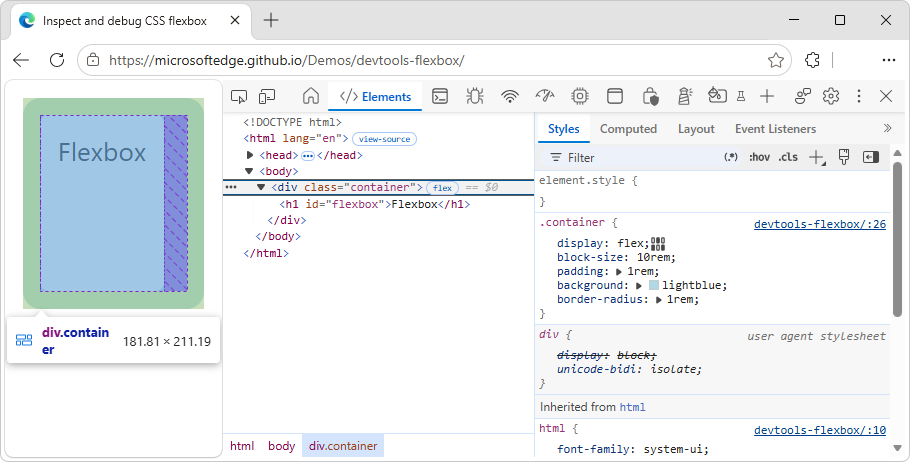
Click the
flexbadge ().The
flexbadge changes color, to indicate that it's selected. In the webpage, the flexbox overlay is displayed, without having to hover over the DOM tree:In the Styles tab of the Elements tool, in the
.containerrule, next to thedisplay: flex;CSS property, click the Open flexbox editor button ().The flexbox editor opens.
In the
justify-content:section, click the Add justify-content: flex-end button.In the webpage, the flexbox layout and flexbox overlay now show the flexbox horizontally aligned to the right side of its container:
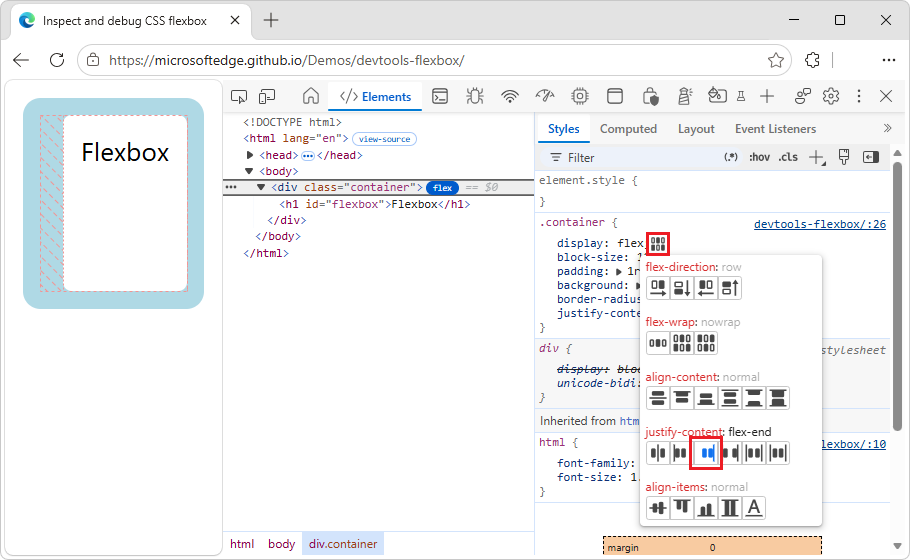
In the
align-items:section, click the Add align-items: center button.In the webpage, the flexbox layout and flexbox overlay now show the flexbox vertically aligned in the center of its container:
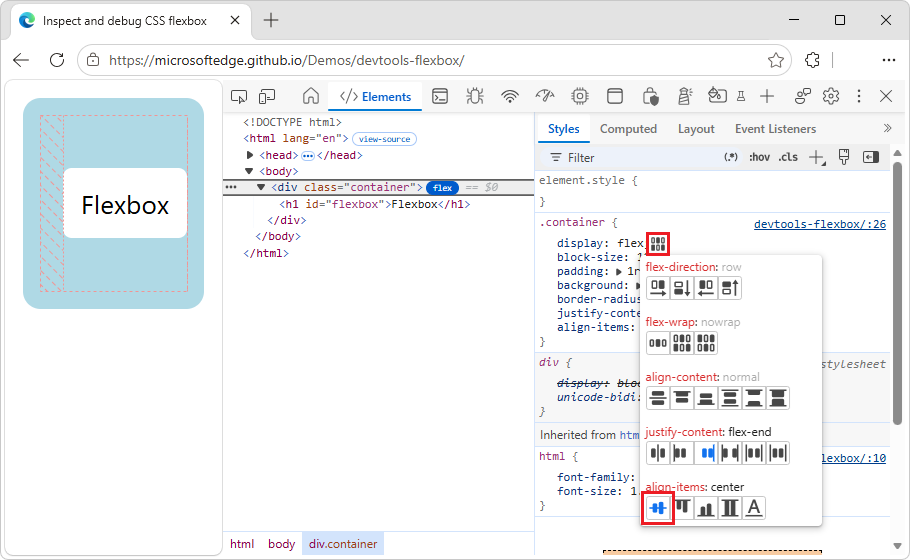
In the
flex-direction:section, select the Add flex-direction: column button.The icons in the flexbox editor are context-aware; the icons in the flexbox editor rotate according to the layout direction.
In the webpage, the flexbox is now aligned to the bottom of its container, and the flexbox overlay is updated:
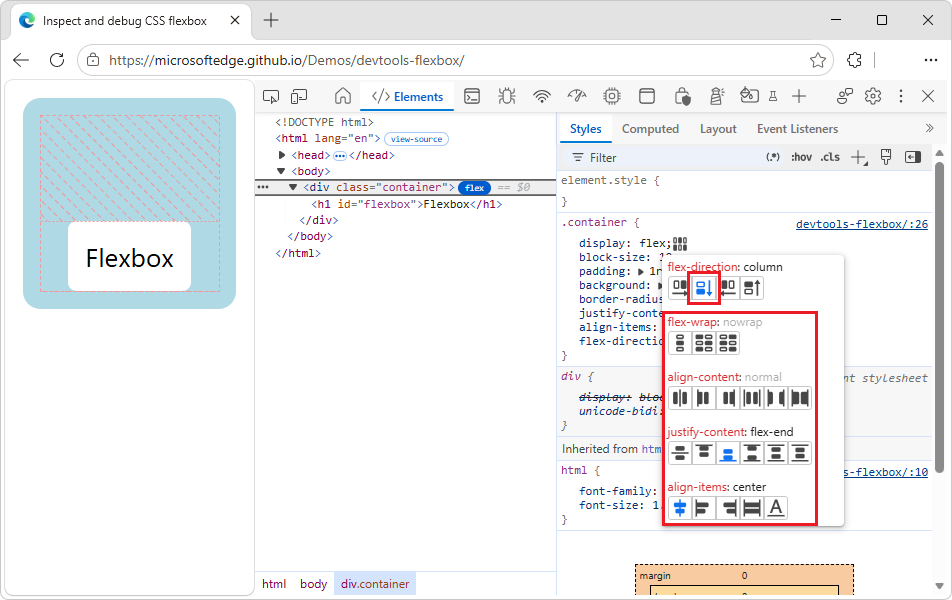
In the
.containerrule, the following properties have been added:justify-content: flex-end; align-items: center; flex-direction: column;Click the
flexbadge again.The
flexbadge changes color, to indicate that it's not selected. The flexbox overlay is removed from the webpage.
Adjust the color of the flexbox overlay
You can adjust the color of the flexbox overlay, such as to make the flexbox overlay easier to see when the flexbox container uses a colored background.
To adjust the color of the flexbox overlay:
Open a webpage, such as the Inspect and debug CSS flexbox demo.
Right-click the Flexbox box, and then select Inspect.
DevTools opens, with the Elements tool selected. Next to the
<div class="container">element is theflexbadge ().In the Elements tool, click the Layout tab, and then scroll down to the Flexbox section.
Each flexbox element of the page is listed, with a checkbox, color swatch, and Show element in the Elements panel button (
 ) next to it:
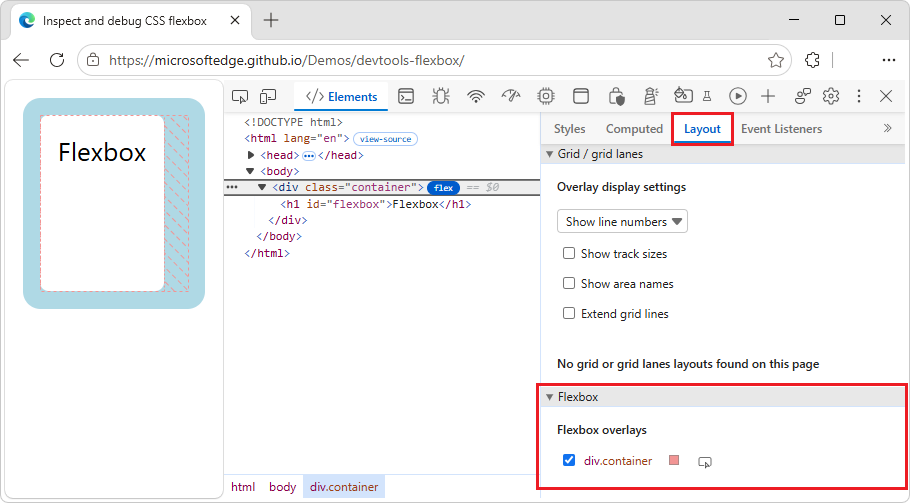
Select the
div.containercheckbox.- In the DOM tree, the
flexbadge changes color, to indicate that it's selected; selecting this checkbox is the same as selecting theflexbadge in the DOM tree. - In the webpage, the flexbox overlay is displayed.
- In the DOM tree, the
Next to
div.container, click the Choose the overlay color for this element (color swatch) button.A color picker opens.
Select a color, such as dark blue.
The color of the
containeroverlay changes to the selected color: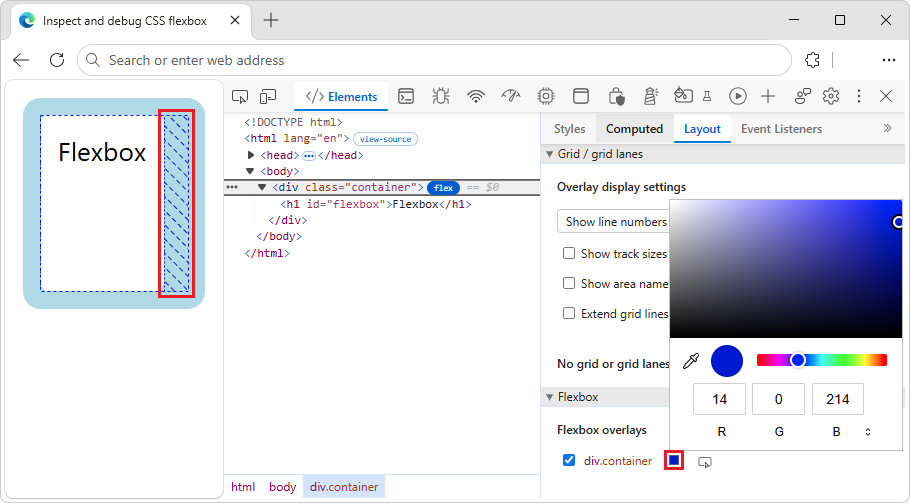
Next to
div.container, select the Show element in the Elements panel button ().In the DOM tree, the container element is selected.
See also
- Inspect, edit, and debug HTML and CSS with the Elements tool
- Select an element in CSS features reference.
- Change colors with the Color Picker in CSS features reference.
GitHub:
- Inspect and debug CSS flexbox - demo.
- /devtools-flexbox/ - source code.
Note
Portions of this page are modifications based on work created and shared by Google and used according to terms described in the Creative Commons Attribution 4.0 International License. The original page is found here and is authored by Jecelyn Yeen.
 This work is licensed under a Creative Commons Attribution 4.0 International License.