Nota
L-aċċess għal din il-paġna jeħtieġ l-awtorizzazzjoni. Tista’ tipprova tidħol jew tibdel id-direttorji.
L-aċċess għal din il-paġna jeħtieġ l-awtorizzazzjoni. Tista’ tipprova tibdel id-direttorji.
The Library management page in the Microsoft Defender portal allows you to manage files used during Microsoft Defender for Endpoint live response sessions. You can also add, view, and delete files in the library, instead of uploading them during a live response session.
This article describes how to view, add, and manage libraries for live response.
For more information about live response, see Investigate entities on devices using live response.
View the list of files
The Library management page shows a list of files used during live response sessions on your endpoints.

To view the list of files available for live response:
- In the Microsoft Defender portal, navigate to Settings > Endpoints > Library management.
- Review the following information for each file:
- Name: The name of the file.
- Type: The file extension, representing the file type.
- Created by: The user who uploaded the file.
- Creation date: The date the file was uploaded.
- Updated by: The user who last updated the file.
- Last updated date: The date the file was last updated.
- Has parameters: Indicates whether the file has parameters that can be configured during a live response session.
- Parameters description: A description of the parameters for the file.
Upload files
To add a new file for live response:
Select Upload from the menu.
In the Upload file to library page, select Upload file to library on the right.
The file name is displayed in the File content field.
In the File description field, optionally type a description for the file.
If you're uploading an updated version of an existing file, select Overwrite file. This replaces the existing file with the new version.
To add a description for the parameters of the file, select File parameters, and in the Parameters description field, type a description.
Select Submit to upload the file.
The file is visible in the list of files. You can now use this file during live response sessions.
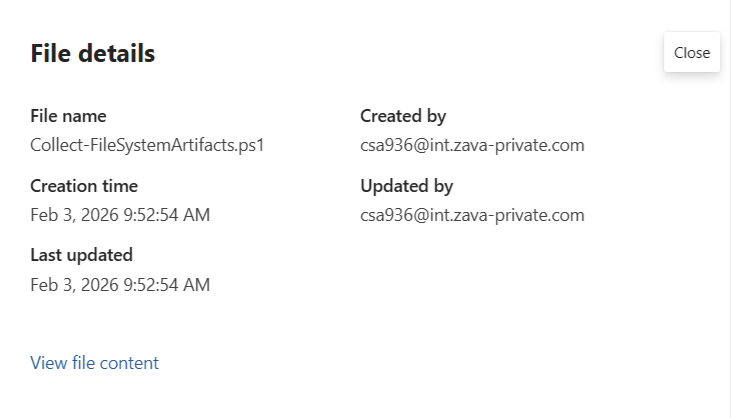
View file details
To view a file's details, select View details from the menu, or right-click the file, and select View details. A detailed pane opens, displaying information about the file, including its parameters and usage history.
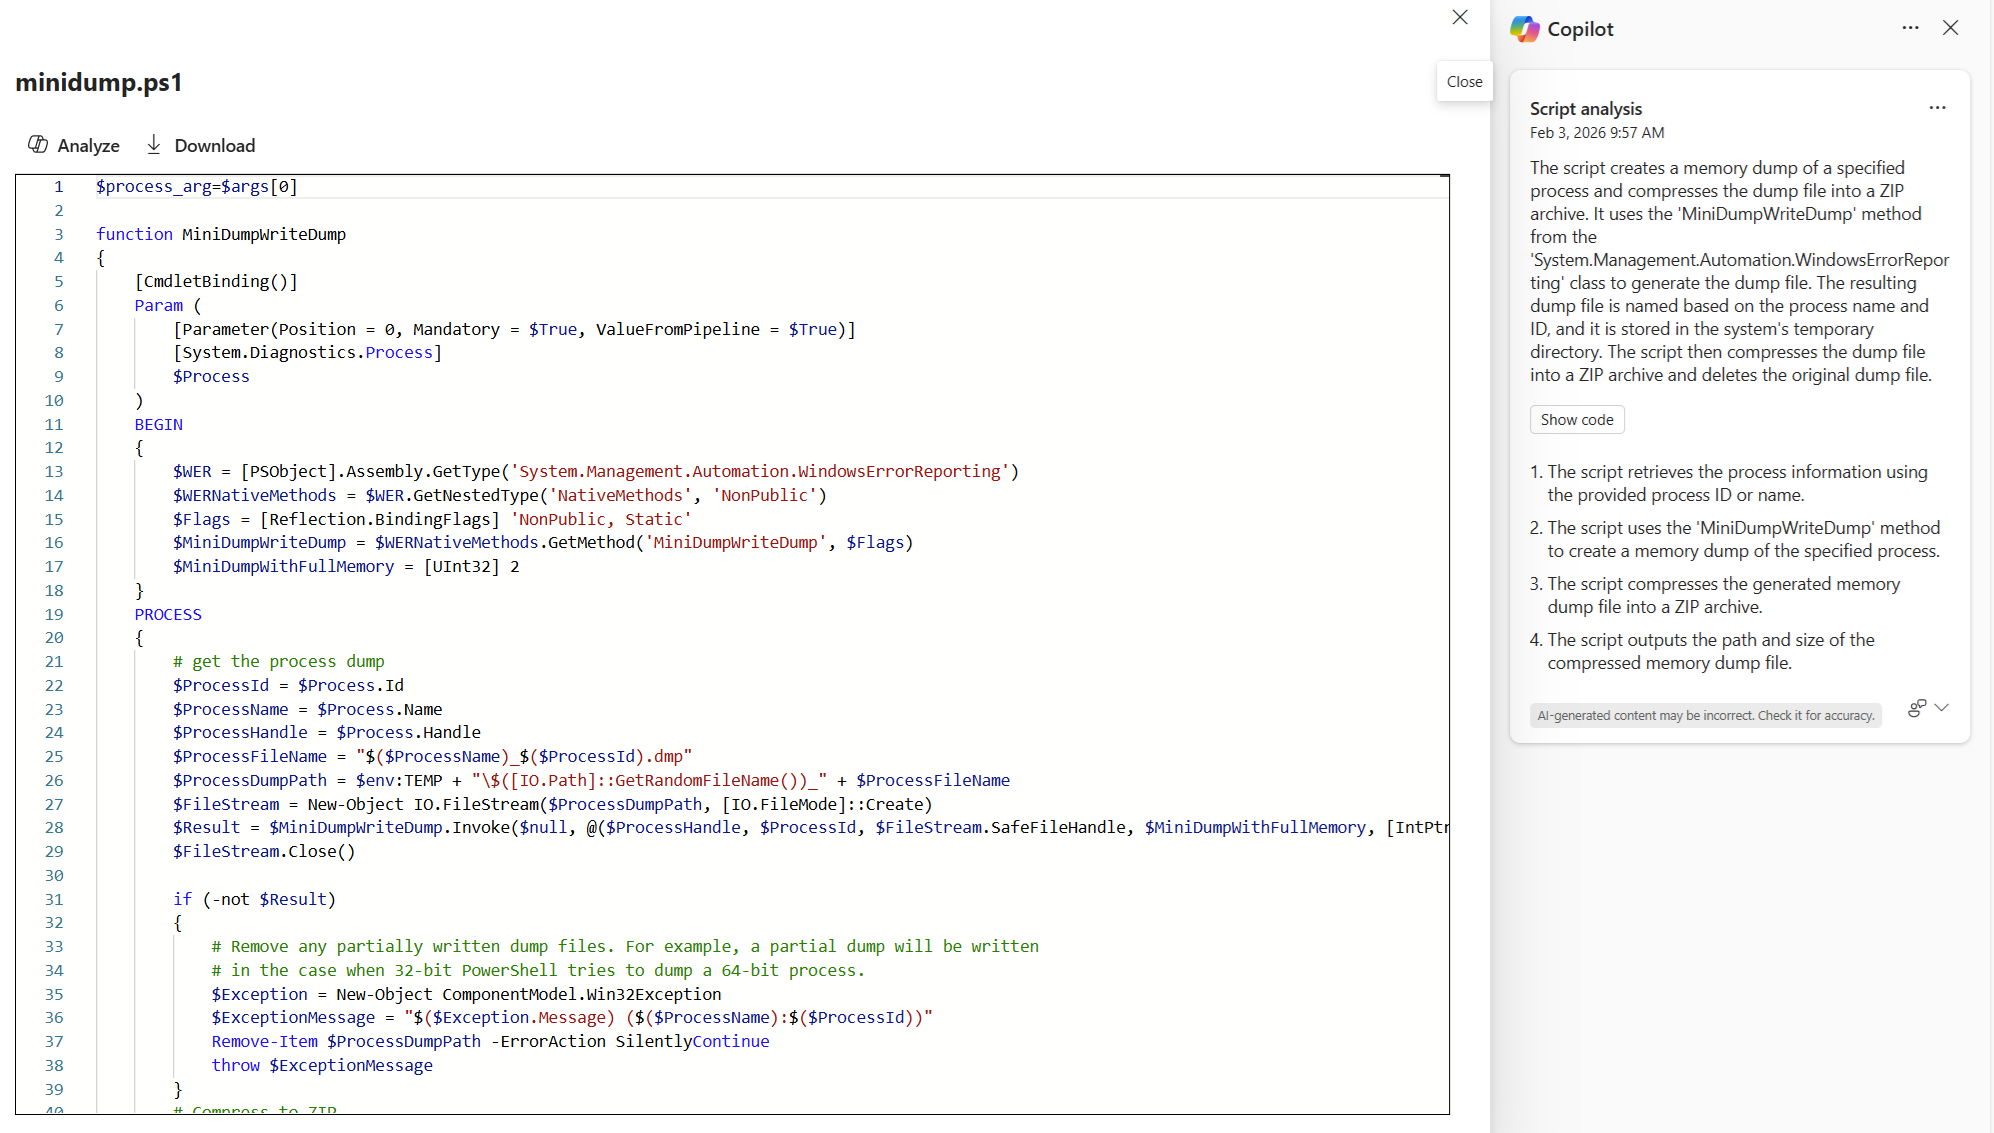
View and analyze files
To view and analyze a file:
Right-click the file and select View file or double-click the file row.
Select Download to download the file, or Analyze to open Copilot script analysis.
Note
You need a Microsoft Security Copilot license to analyze the files. If you don't have this license, you can only view files.
The analysis provides a description of the actions the script takes, and more information, including the methods used and output.

Manage files
The following options are available for managing existing files in the library:
| Option | Description | Available from |
|---|---|---|
| Upload | Upload a new file or an updated version of an existing file. | Top menu |
| Refresh | Refresh the list of files to see the most up-to-date information. | Top menu |
| View details | View detailed information about a selected file. | Top menu, right-click menu |
| View file | View the file's contents. | Top menu, right-click menu |
| Analyze | Analyze a file to get a description of the actions the script takes. | View file window |
| Download | Download a selected file to your local device. | Top menu, right-click menu, view file window |
| Delete | Remove a selected file from the list. | Top menu, right-click menu |
| Filter | Filter the list of files based on specific criteria, such as type or creation date. | Top menu |