Nota
L-aċċess għal din il-paġna jeħtieġ l-awtorizzazzjoni. Tista’ tipprova tidħol jew tibdel id-direttorji.
L-aċċess għal din il-paġna jeħtieġ l-awtorizzazzjoni. Tista’ tipprova tibdel id-direttorji.
In this quickstart, you create a minimal Model Context Protocol (MCP) server using the C# SDK for MCP, connect to it using GitHub Copilot, and publish it to NuGet (stdio transport only). MCP servers are services that expose capabilities to clients through the Model Context Protocol (MCP).
Note
The Microsoft.McpServer.ProjectTemplates template package is currently in preview.
Prerequisites
- .NET 10.0 SDK
- Visual Studio Code (optional)
- C# Dev Kit extension
- GitHub Copilot extension for Visual Studio Code
- NuGet.org account
- .NET 10.0 SDK
- Visual Studio Code (optional)
- Visual Studio (optional)
- GitHub Copilot / GitHub Copilot extension for Visual Studio Code
- NuGet.org account
Create the project
In a terminal window, install the MCP Server template:
dotnet new install Microsoft.McpServer.ProjectTemplatesNote
.NET 10.0 SDK or a later version is required to install
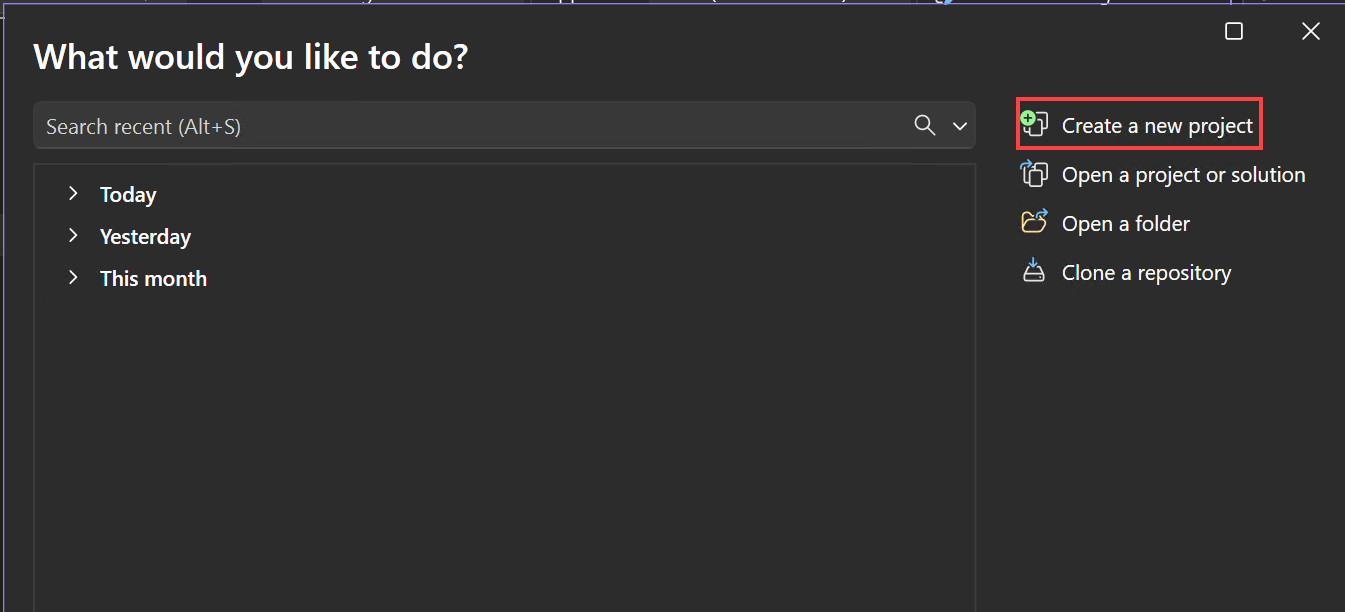
Microsoft.McpServer.ProjectTemplates.Open Visual Studio, and select Create a new project in the start window (or select File > New > Project/Solution from inside Visual Studio).
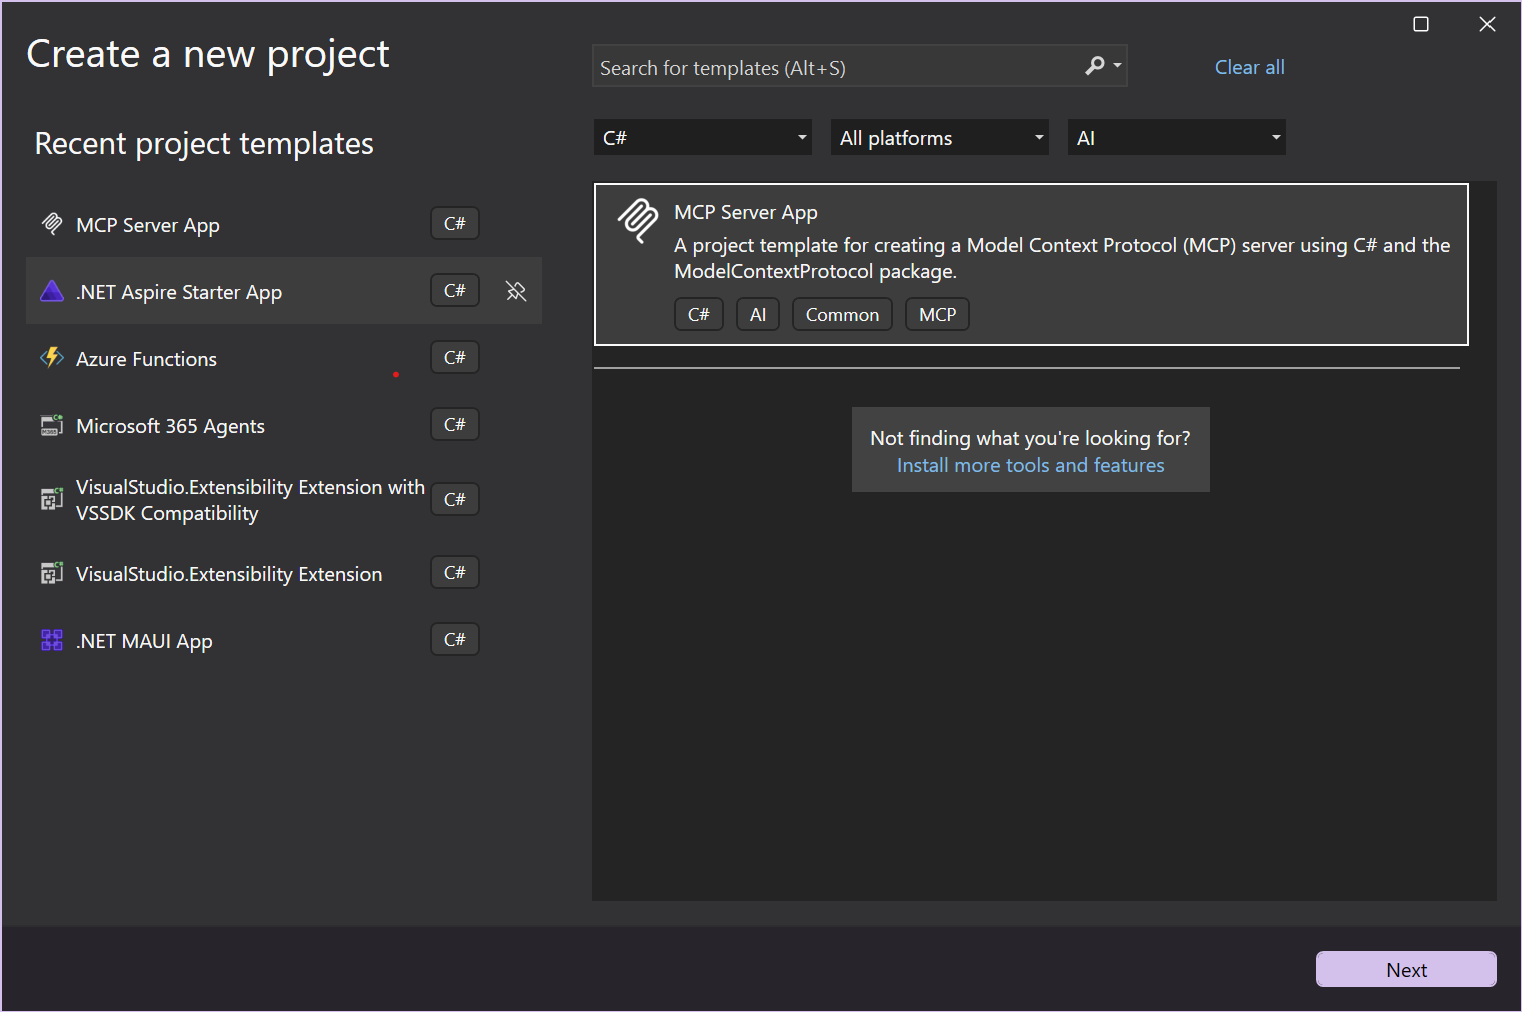
In the Create a new project window, select C# from the Language list and AI from the All project types list. After you apply the language and project type filters, select the MCP Server App template, and then select Next.
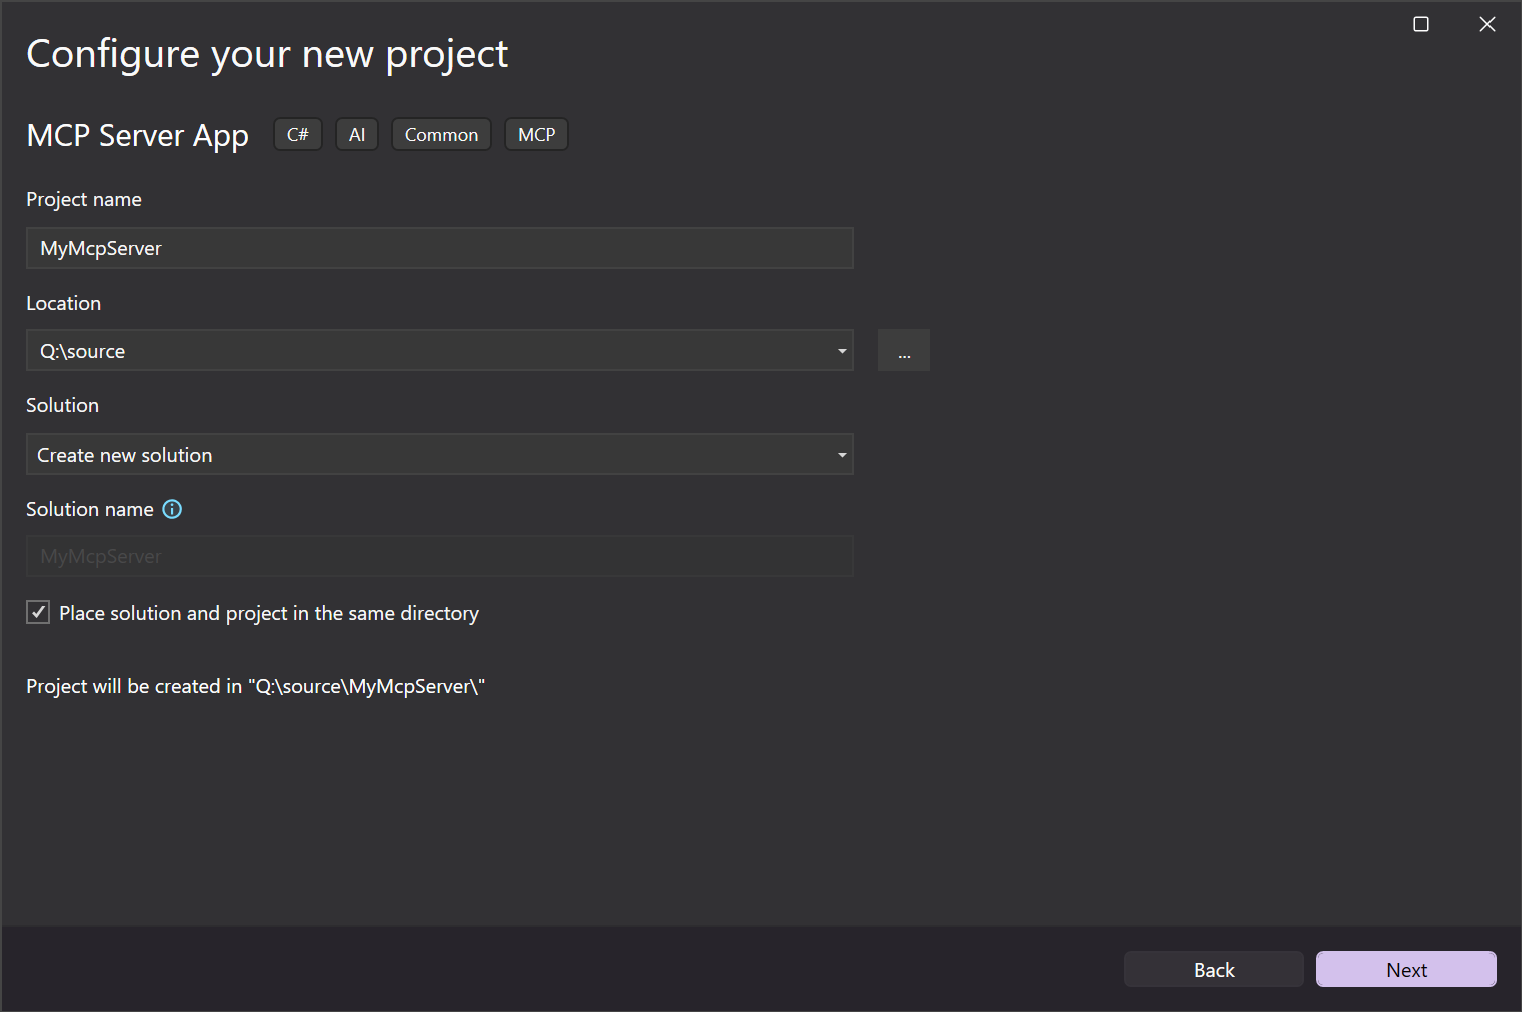
In the Configure your new project window, enter MyMcpServer in the Project name field. Then, select Next.
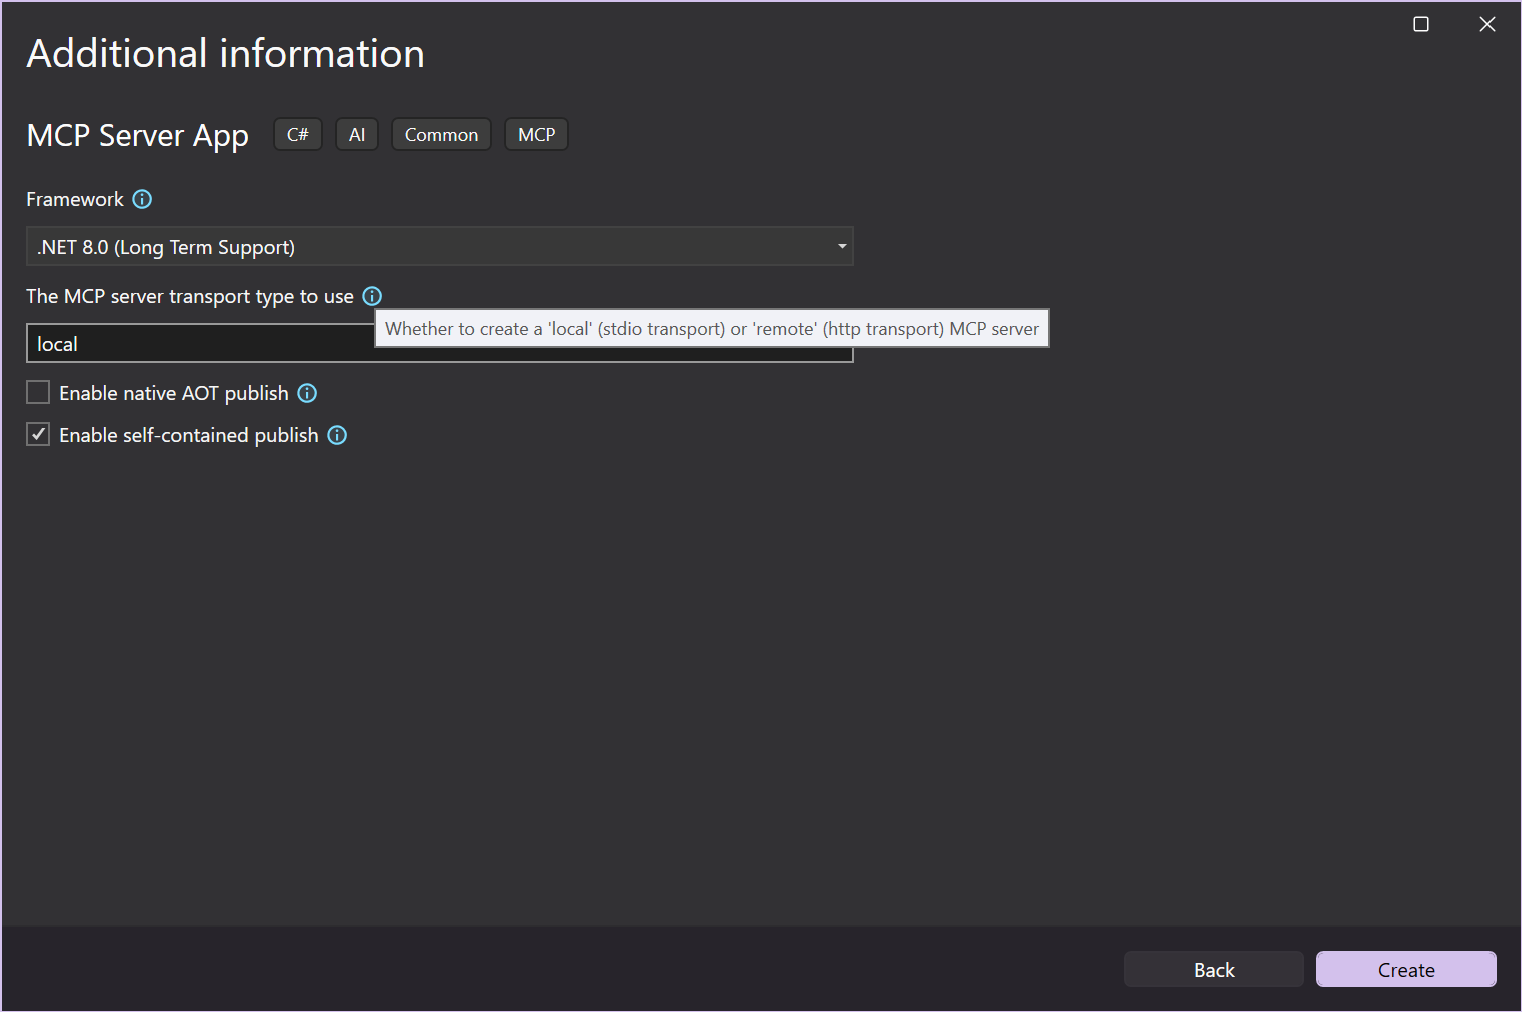
In the Additional information window, you can configure the following options:
- Framework: Select the target .NET framework.
- MCP Server Transport Type: Choose between creating a local (stdio) or a remote (http) MCP server.
- Enable native AOT (Ahead-Of-Time) publish: Enable your MCP server to be self-contained and compiled to native code. For more information, see the Native AOT deployment guide.
- Enable self-contained publish: Enable your MCP server to be published as a self-contained executable. For more information, see the Self-contained deployment section of the .NET application publishing guide.
Choose your preferred options or keep the default ones, and then select Create.
Visual Studio opens your new project.
Update the
<PackageId>in the.csprojfile to be unique on NuGet.org, for example<NuGet.org username>.SampleMcpServer.
In a terminal window, install the MCP Server template:
dotnet new install Microsoft.McpServer.ProjectTemplatesNote
.NET 10.0 SDK or later is required to install
Microsoft.McpServer.ProjectTemplates.Open Visual Studio Code.
Go to the Explorer view and select Create .NET Project. Alternatively, you can bring up the Command Palette using Ctrl+Shift+P (Command+Shift+P on MacOS) and then type ".NET" to find and select the .NET: New Project command.
This action will bring up a dropdown list of .NET projects.
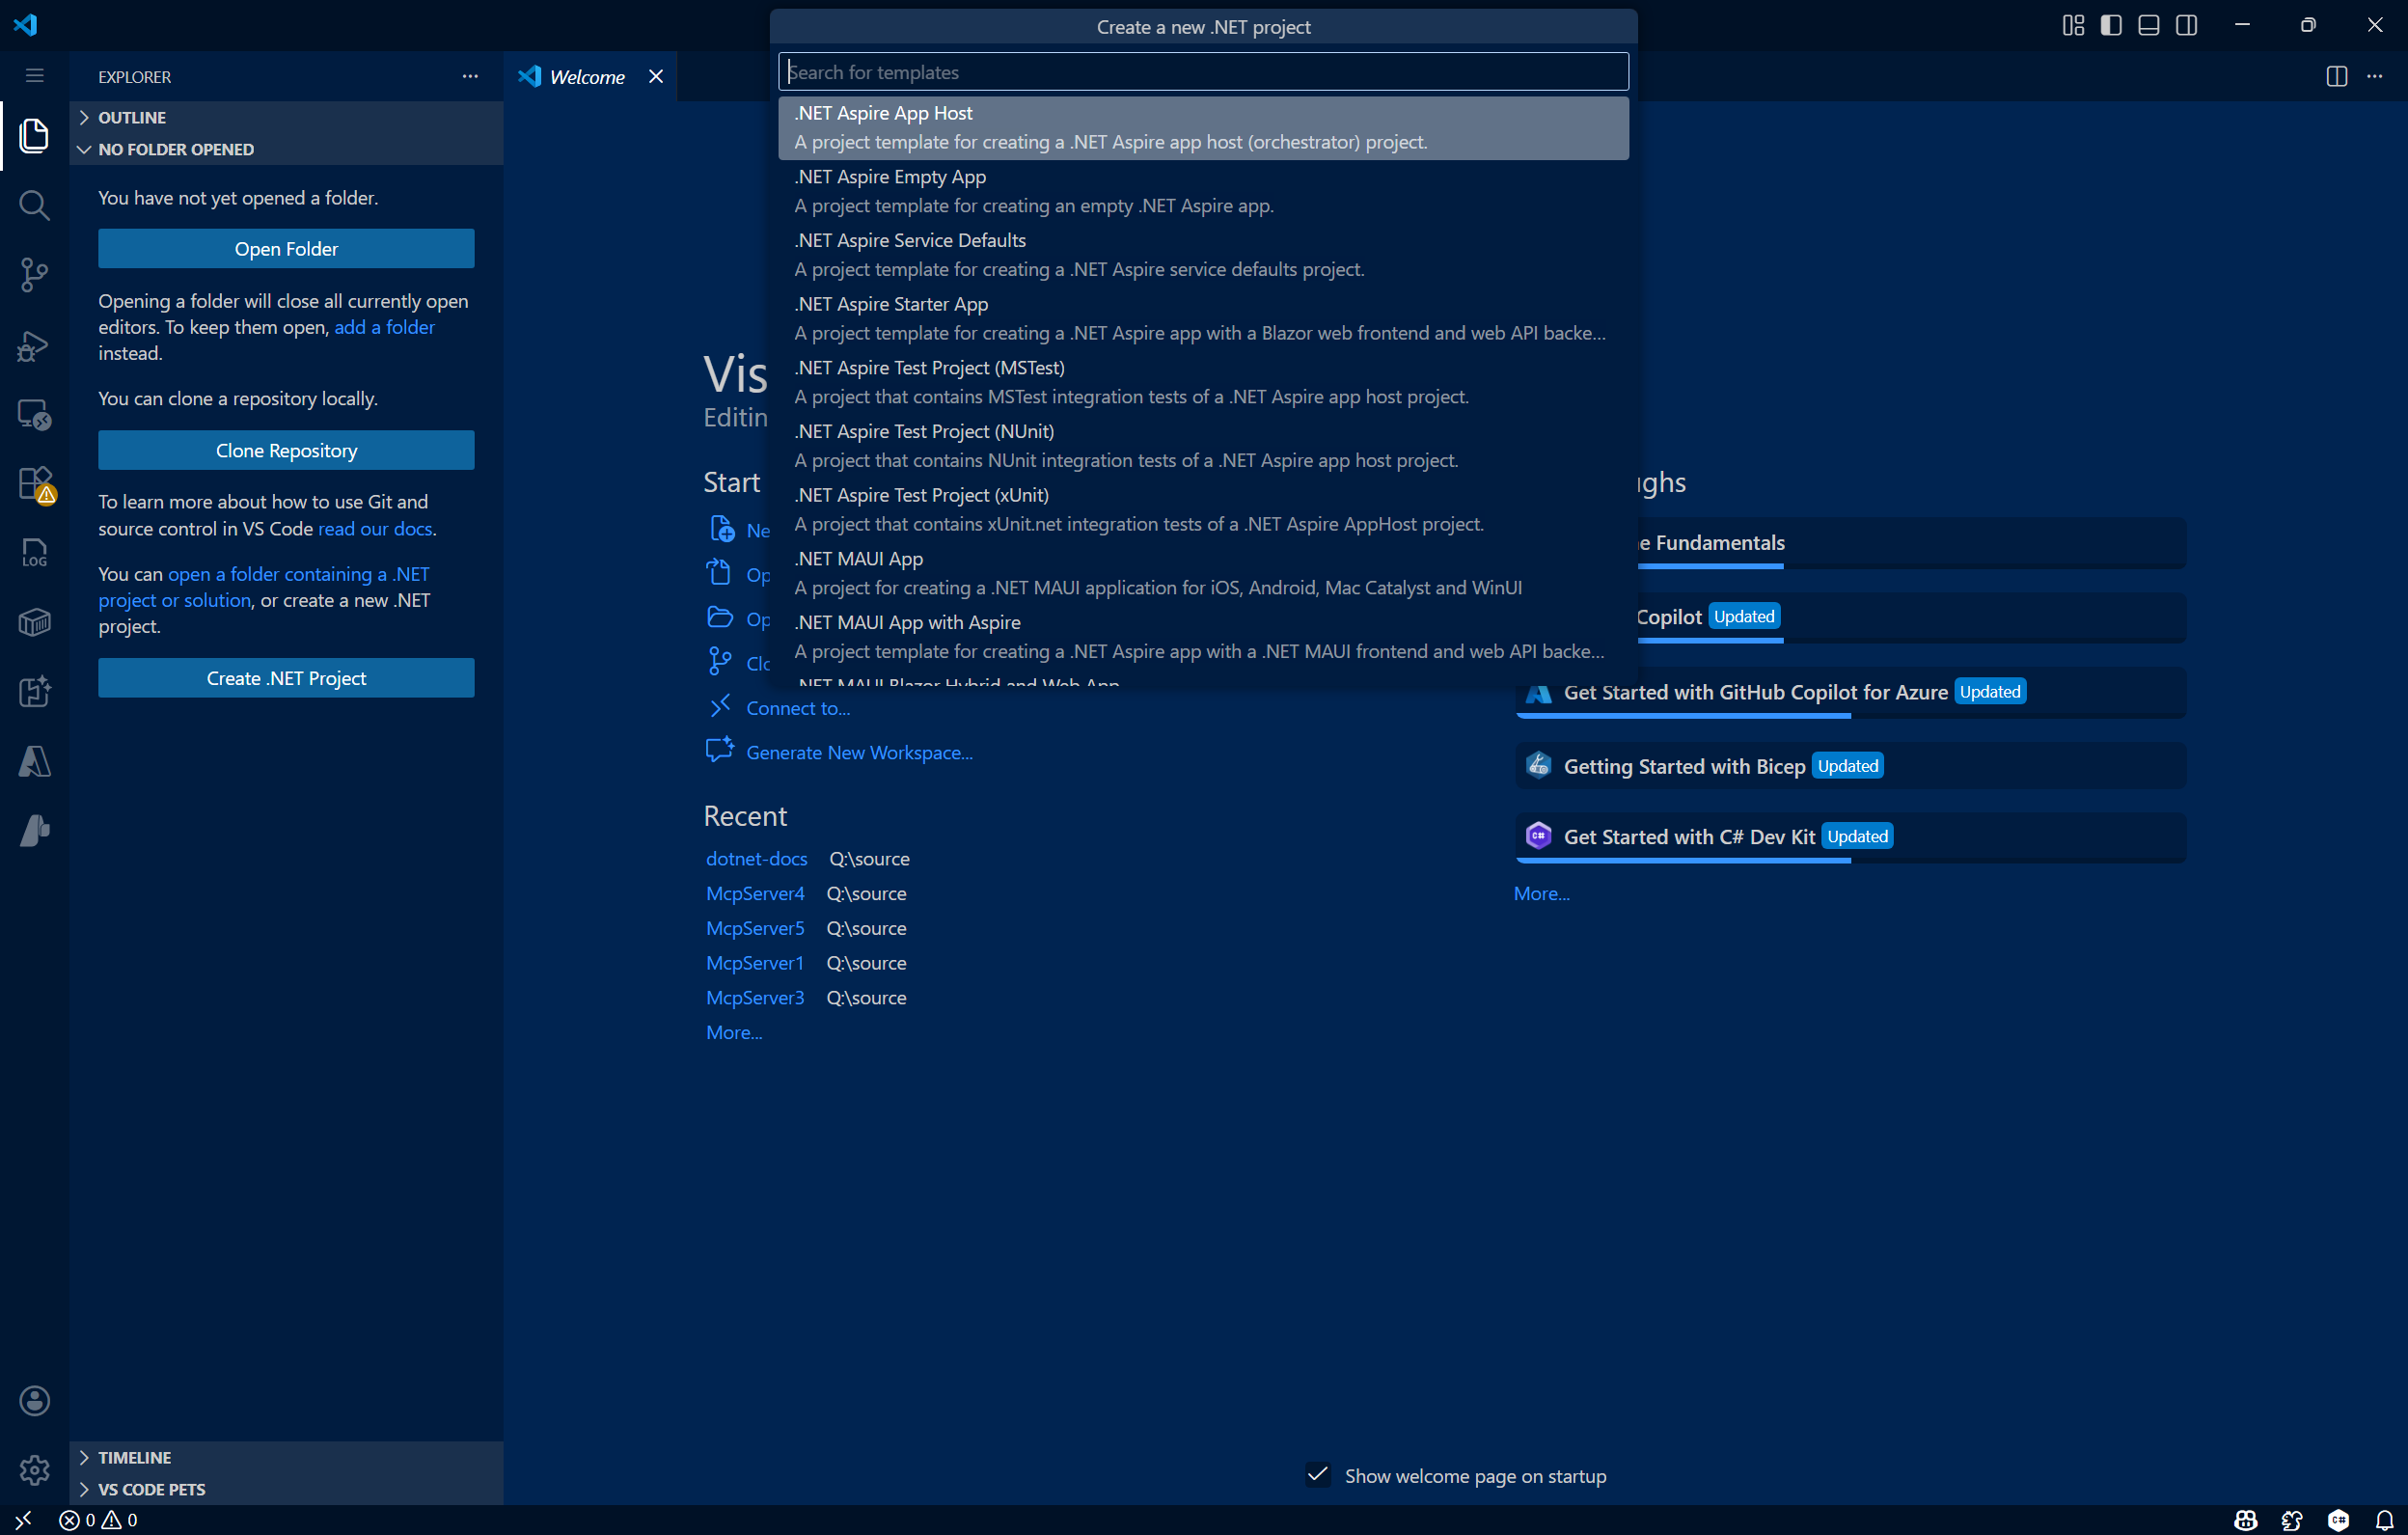
After selecting the command, use the Search bar in the Command Palette or scroll down to locate the MCP Server App template.

Select the location where you would like the new project to be created.
Give your new project a name, MyMCPServer. Press Enter.

Select your solution file format (
.slnor.slnx).Select Template Options. Here, you can configure the following options:
- Framework: Select the target .NET framework.
- MCP Server Transport Type: Choose between creating a local (stdio) or a remote (http) MCP server.
- Enable native AOT (Ahead-Of-Time) publish: Enable your MCP server to be self-contained and compiled to native code. For more information, see the Native AOT deployment guide.
- Enable self-contained publish: Enable your MCP server to be published as a self-contained executable. For more information, see the Self-contained deployment section of the .NET application publishing guide.
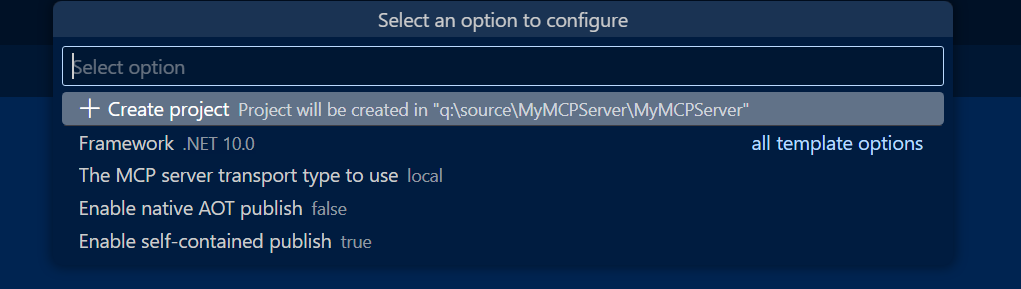
Choose your preferred options or keep the default ones, and then select Create Project.
VS Code opens your new project.
Update the
<PackageId>in the.csprojfile to be unique on NuGet.org, for example<NuGet.org username>.SampleMcpServer.
Create a new MCP server app with the
dotnet new mcpservercommand:dotnet new mcpserver -n SampleMcpServerBy default, this command creates a self-contained tool package targeting all of the most common platforms that .NET is supported on. To see more options, use
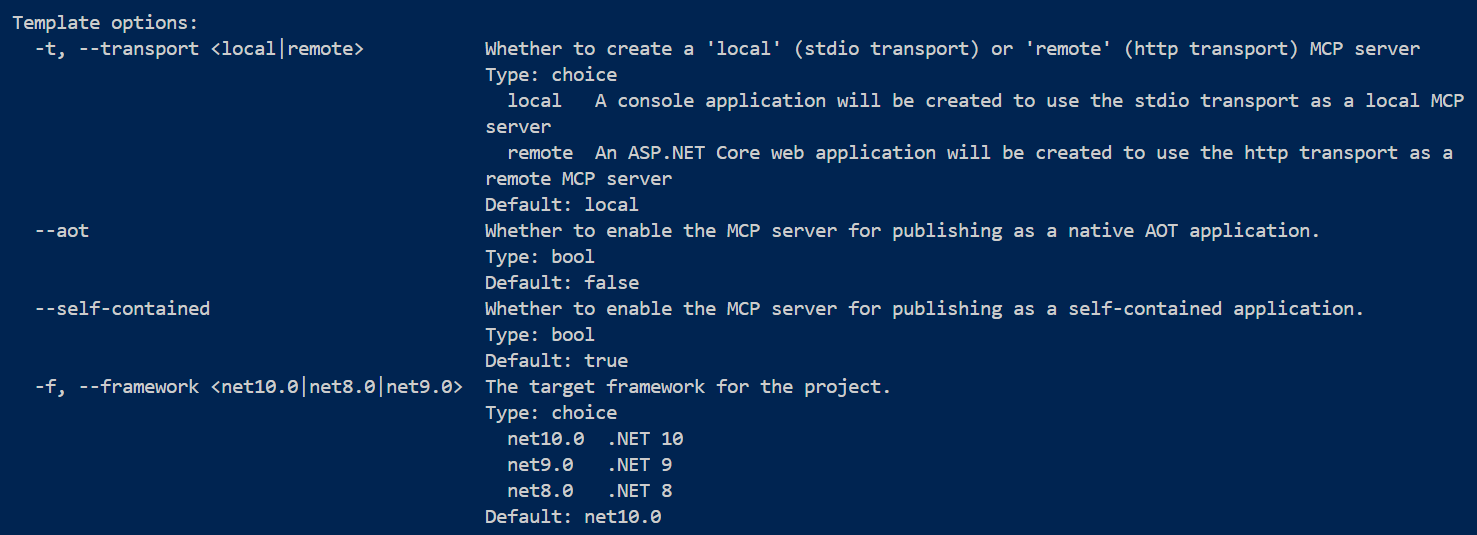
dotnet new mcpserver --help.Using the
dotnet new mcpserver --helpcommand gives you several template options you can add when creating a new MCP server:- Framework: Select the target .NET framework.
- MCP Server Transport Type: Choose between creating a local (stdio) or a remote (http) MCP server.
- Enable native AOT (Ahead-Of-Time) publish: Enable your MCP server to be self-contained and compiled to native code. For more information, see the Native AOT deployment guide.
- Enable self-contained publish: Enable your MCP server to be published as a self-contained executable. For more information, see the Self-contained deployment section of the .NET application publishing guide.
Navigate to the
SampleMcpServerdirectory:cd SampleMcpServerBuild the project:
dotnet buildUpdate the
<PackageId>in the.csprojfile to be unique on NuGet.org, for example<NuGet.org username>.SampleMcpServer.
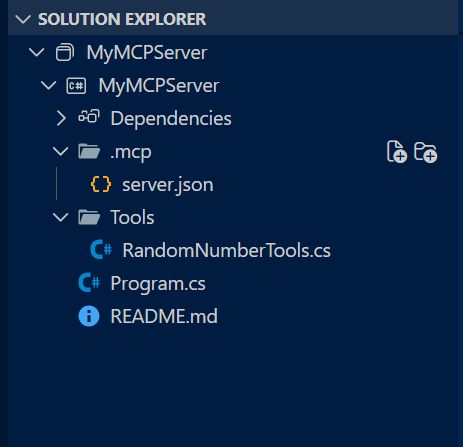
Tour the MCP Server Project
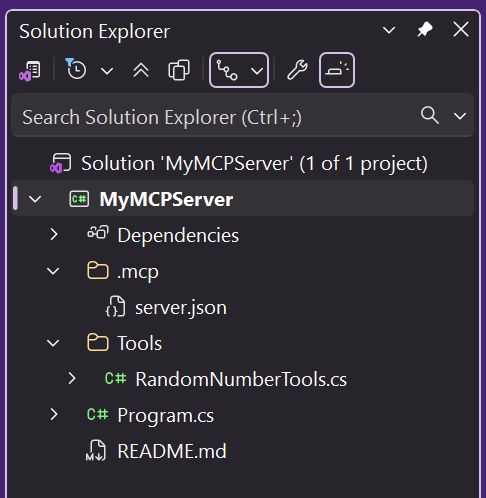
Creating your MCP server project via the template gives you the following major files:
Program.cs: A file defining the application as an MCP server and registering MCP services such as transport type and MCP tools.- Choosing the (default) stdio transport option in when creating the project, this file will be configured to define the MCP Server as a local one (that is,
.withStdioServerTransport()). - Choosing the http transport option will configure this file to include remote transport-specific definitions (that is,
.withHttpServerTransport(),MapMcp()).
- Choosing the (default) stdio transport option in when creating the project, this file will be configured to define the MCP Server as a local one (that is,
RandomNumberTools.cs: A class defining an example MCP server tool that returns a random number between user-specified min/max values.- [HTTP Transport Only]
[MCPServerName].http: A file defining the default host address for an HTTP MCP server and JSON-RPC communication. server.json: A file defining how and where your MCP server is published.
Configure the MCP server
Configure GitHub Copilot for Visual Studio to use your custom MCP server.
In Visual Studio, select the GitHub Copilot icon in the top right corner and select Open Chat Window.
In the GitHub Copilot Chat window, click the Select Tools wrench icon followed by the plus icon in the top right corner.
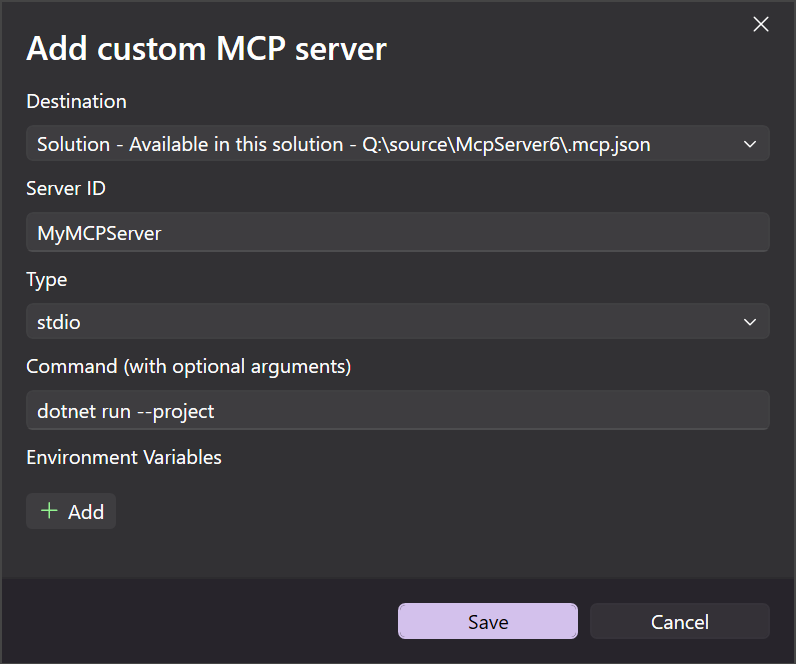
In the Add Custom MCP Server dialog window, enter the following info:
- Destination: Choose the scope of where your MCP server is configured:
- Solution - The MCP server is available only across the active solution.
- Global - The MCP server is available across all solutions.
- Server ID: The unique name / identifier for your MCP server.
- Type: The transport type of your MCP server (stdio or HTTP).
- Command (Stdio transport only): The command to run your stdio MCP server (that is,
dotnet run --project [relative path to .csproj file]) - URL (HTTP transport only): The address of your HTTP MCP server
- Environment Variables (optional)
- Destination: Choose the scope of where your MCP server is configured:
Select Save. A
.mcp.jsonfile will be added to the specified destination.
Stdio Transport .mcp.json
Add the relative path to your .csproj file under the "args" field.
{
  "inputs": [],
  "servers": {
    "MyMcpServer": {
      "type": "stdio",
      "command": "dotnet",
      "args": [
        "run",
        "--project",
        "<relative-path-to-project-file>"
      ]
    }
  }
}
HTTP Transport .mcp.json
{
 "inputs": [],
  "servers": {
    "MyMCPServer": {
      "url": "http://localhost:6278",
      "type": "http",
      "headers": {}
    }
  }
}
Configure GitHub Copilot for Visual Studio Code to use your custom MCP server, either via the VS Code Command Palette or manually.
Command Palette configuration
Open the Command Palette using Ctrl+Shift+P (Command+Shift+P on macOS). Search "mcp" to locate the
MCP: Add Servercommand.Select the type of MCP server to add (typically the transport type you selected at project creation).
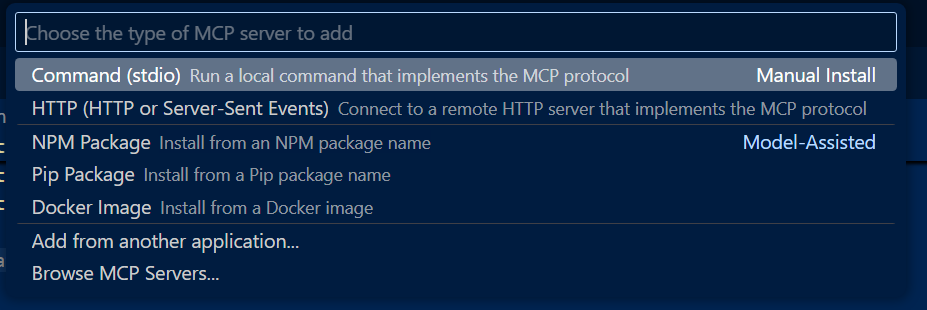
If adding a stdio MCP server, enter a command and optional arguments. For this example, use
dotnet run --project.If adding an HTTP MCP server, enter the localhost or web address.
Enter a unique server ID (example: "MyMCPServer").
Select a configuration target:
Global: Make the MCP server available across all workspaces. The generated
mcp.jsonfile will appear under your global user configuration.Workspace: Make the MCP server available only from within the current workspace. The generated
mcp.jsonfile will appear under the.vscodefolder within your workspace.

After you complete the previous steps, an
.mcp.jsonfile will be created in the location specified by the configuration target.
Stdio Transport mcp.json
Add the relative path to your .csproj file under the "args" field.
{
  "servers": {
    "MyMcpServer": {
      "type": "stdio",
      "command": "dotnet",
      "args": [
        "run",
        "--project",
        "<relative-path-to-project-file>"
      ]
    }
  }
}
HTTP Transport mcp.json
{
  "servers": {
    "MyMCPServer": {
      "url": "http://localhost:6278",
      "type": "http"
    }
  },
  "inputs": []
}
Manual configuration
Create a
.vscodefolder at the root of your project.Add an
mcp.jsonfile in the.vscodefolder with the following content:{ "servers": { "SampleMcpServer": { "type": "stdio", "command": "dotnet", "args": [ "run", "--project", "<relative-path-to-project-file>" ] } } }Note
VS Code executes MCP servers from the workspace root. The
<relative-path-to-project-file>placeholder should point to your .NET project file. For example, the value for this SampleMcpServer app would beSampleMcpServer.csproj.Save the file.
Test the MCP server
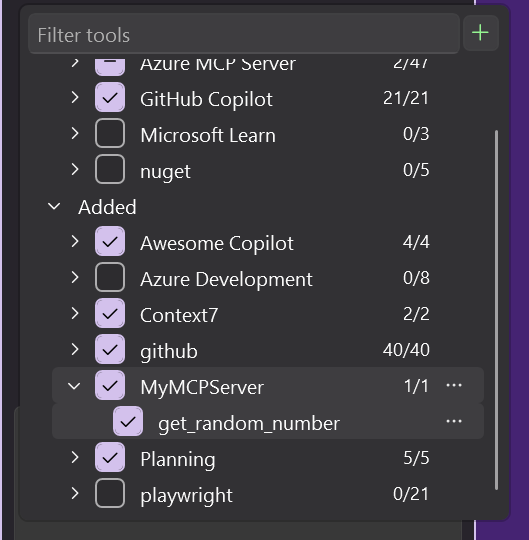
The MCP server template includes a tool called get_random_number you can use for testing and as a starting point for development.
Open GitHub Copilot chat in Visual Studio and switch to Agent mode.
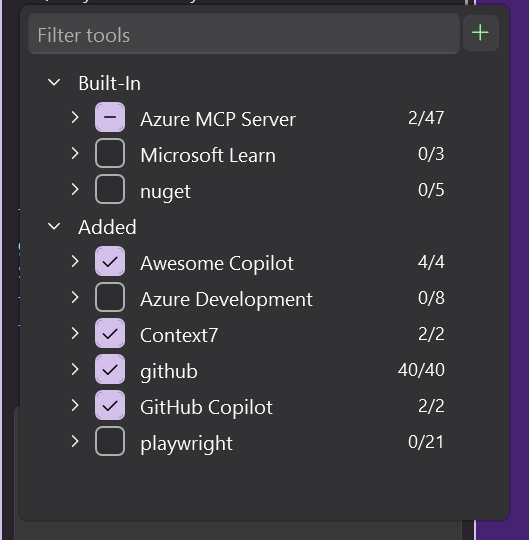
Select the Select tools icon to verify your MyMCPServer is available with the sample tool listed.
Enter a prompt to run the get_random_number tool:
Give me a random number between 1 and 100.GitHub Copilot requests permission to run the get_random_number tool for your prompt. Select Continue or use the arrow to select a more specific behavior:
- Current session always runs the operation in the current GitHub Copilot Agent Mode session.
- Current solution always runs the command for the current VS solution.
- Always allow sets the operation to always run for any GitHub Copilot Agent Mode session.
Verify that the server responds with a random number:
Your random number is 42.
The MCP server template includes a tool called get_random_number you can use for testing and as a starting point for development.
Open GitHub Copilot chat in VS Code and switch to Agent mode.
Select the Select tools icon to verify your MyMCPServer is available with the sample tool listed.
Enter a prompt to run the get_random_number tool:
Give me a random number between 1 and 100.GitHub Copilot requests permission to run the get_random_number tool for your prompt. Select Continue or use the arrow to select a more specific behavior:
- Current session always runs the operation in the current GitHub Copilot Agent Mode session.
- Current workspace always runs the command for the current VS Code workspace.
- Always allow sets the operation to always run for any GitHub Copilot Agent Mode session.
Verify that the server responds with a random number:
Your random number is 42.
Add inputs and configuration options
In this example, you enhance the MCP server to use a configuration value set in an environment variable. This could be configuration needed for the functioning of your MCP server, such as an API key, an endpoint to connect to, or a local directory path.
Add another tool method after the
GetRandomNumbermethod inTools/RandomNumberTools.cs. Update the tool code to use an environment variable.[McpServerTool] [Description("Describes random weather in the provided city.")] public string GetCityWeather( [Description("Name of the city to return weather for")] string city) { // Read the environment variable during tool execution. // Alternatively, this could be read during startup and passed via IOptions dependency injection var weather = Environment.GetEnvironmentVariable("WEATHER_CHOICES"); if (string.IsNullOrWhiteSpace(weather)) { weather = "balmy,rainy,stormy"; } var weatherChoices = weather.Split(","); var selectedWeatherIndex = Random.Shared.Next(0, weatherChoices.Length); return $"The weather in {city} is {weatherChoices[selectedWeatherIndex]}."; }Update the
.vscode/mcp.jsonto set theWEATHER_CHOICESenvironment variable for testing.{ "servers": { "SampleMcpServer": { "type": "stdio", "command": "dotnet", "args": [ "run", "--project", "<relative-path-to-project-file>" ], "env": { "WEATHER_CHOICES": "sunny,humid,freezing" } } } }Try another prompt with Copilot in VS Code, such as:
What is the weather in Redmond, Washington?VS Code should return a random weather description.
Update the
.mcp/server.jsonto declare your environment variable input. Theserver.jsonfile schema is defined by the MCP Registry project and is used by NuGet.org to generate VS Code MCP configuration.Use the
environmentVariablesproperty to declare environment variables used by your app that will be set by the client using the MCP server (for example, VS Code).Use the
packageArgumentsproperty to define CLI arguments that will be passed to your app. For more examples, see the MCP Registry project.
{
  "$schema": "https://static.modelcontextprotocol.io/schemas/2025-10-17/server.schema.json",
  "description": "<your description here>",
  "name": "io.github.<your GitHub username here>/<your repo name>",
  "version": "<your package version here>",
  "packages": [
    {
      "registryType": "nuget",
      "registryBaseUrl": "https://api.nuget.org",
      "identifier": "<your package ID here>",
      "version": "<your package version here>",
      "transport": {
        "type": "stdio"
      },
      "packageArguments": [],
      "environmentVariables": [
        {
          "name": "WEATHER_CHOICES",
          "value": "{weather_choices}",
          "variables": {
            "weather_choices": {
              "description": "Comma separated list of weather descriptions to randomly select.",
              "isRequired": true,
              "isSecret": false
            }
          }
        }
      ]
    }
  ],
  "repository": {
    "url": "https://github.com/<your GitHub username here>/<your repo name>",
    "source": "github"
  }
}
The only information used by NuGet.org in the
server.jsonis the firstpackagesarray item with theregistryTypevalue matchingnuget. The other top-level properties aside from thepackagesproperty are currently unused and are intended for the upcoming central MCP Registry. You can leave the placeholder values until the MCP Registry is live and ready to accept MCP server entries.
You can test your MCP server again before moving forward.
Pack and publish to NuGet
Pack the project:
dotnet pack -c ReleaseThis command produces one tool package and several platform-specific packages based on the
<RuntimeIdentifiers>list inSampleMcpServer.csproj.Publish the packages to NuGet:
dotnet nuget push bin/Release/*.nupkg --api-key <your-api-key> --source https://api.nuget.org/v3/index.jsonBe sure to publish all
.nupkgfiles to ensure every supported platform can run the MCP server.If you want to test the publishing flow before publishing to NuGet.org, you can register an account on the NuGet Gallery integration environment: https://int.nugettest.org. The
pushcommand would be modified to:dotnet nuget push bin/Release/*.nupkg --api-key <your-api-key> --source https://apiint.nugettest.org/v3/index.json
For more information, see Publish a package.
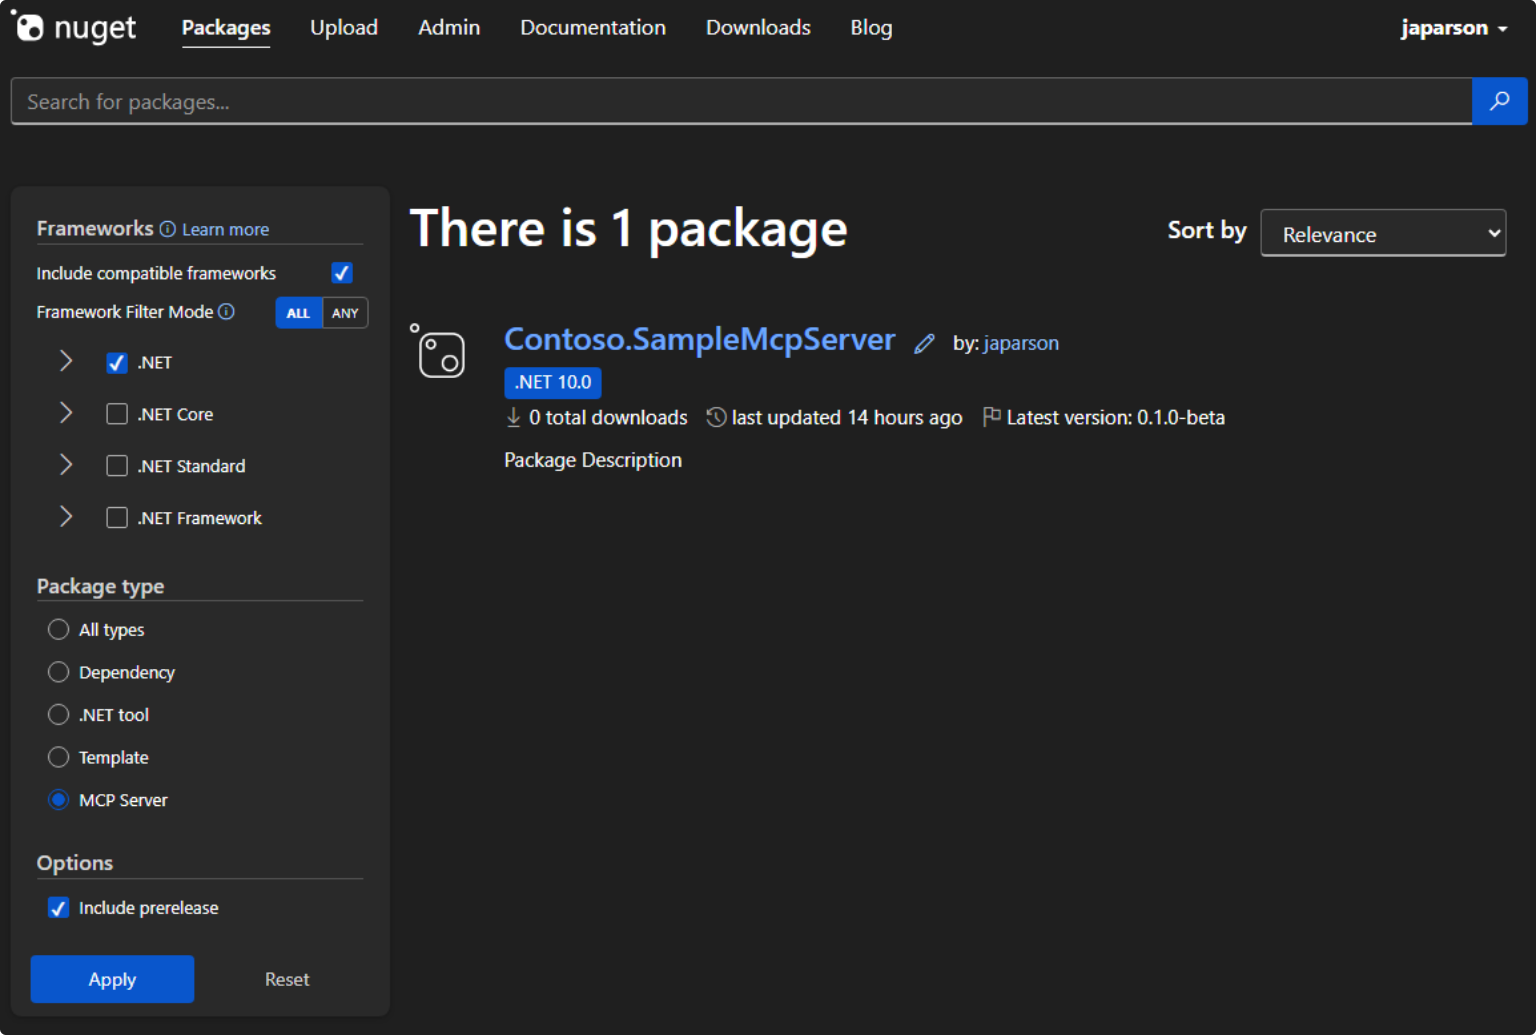
Discover MCP servers on NuGet.org
Search for your MCP server package on NuGet.org (or int.nugettest.org if you published to the integration environment) and select it from the list.
View the package details and copy the JSON from the "MCP Server" tab.
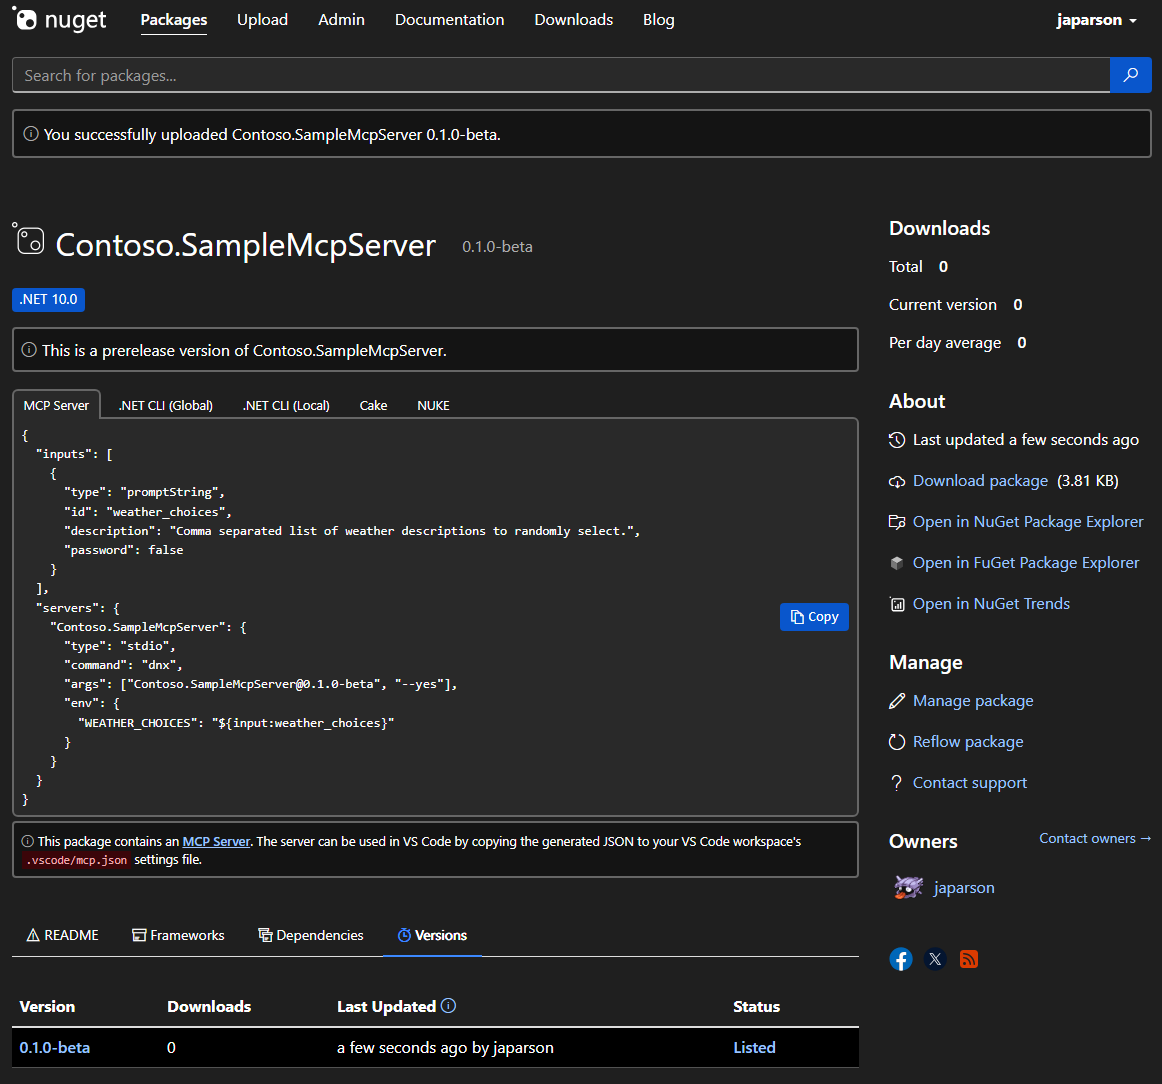
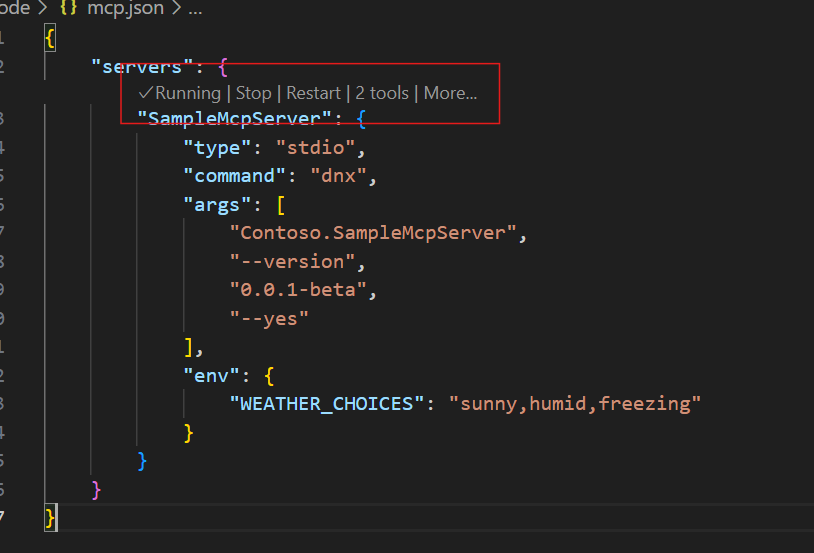
In your
mcp.jsonfile in the.vscodefolder, add the copied JSON, which looks like this:{ "inputs": [ { "type": "promptString", "id": "weather_choices", "description": "Comma separated list of weather descriptions to randomly select.", "password": false } ], "servers": { "Contoso.SampleMcpServer": { "type": "stdio", "command": "dnx", "args": ["Contoso.SampleMcpServer@0.0.1-beta", "--yes"], "env": { "WEATHER_CHOICES": "${input:weather_choices}" } } } }If you published to the NuGet Gallery integration environment, you need to add
"--add-source", "https://apiint.nugettest.org/v3/index.json"at the end of the"args"array.Save the file.
In GitHub Copilot, select the Select tools icon to verify your SampleMcpServer is available with the tools listed.
Enter a prompt to run the new get_city_weather tool:
What is the weather in Redmond?If you added inputs to your MCP server (for example,
WEATHER_CHOICES), you will be prompted to provide values.Verify that the server responds with the random weather:
The weather in Redmond is balmy.
Common issues
The command "dnx" needed to run SampleMcpServer was not found
If VS Code shows this error when starting the MCP server, you need to install a compatible version of the .NET SDK.
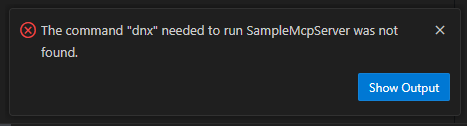
The dnx command is shipped as part of the .NET SDK, starting with version 10. Install the .NET 10 SDK to resolve this issue.
GitHub Copilot doesn't use your tool (an answer is provided without invoking your tool)
Generally speaking, an AI agent like GitHub Copilot is informed that it has some tools available by the client application, such as VS Code. Some tools, such as the sample random number tool, might not be leveraged by the AI agent because it has similar functionality built in.
If your tool is not being used, check the following:
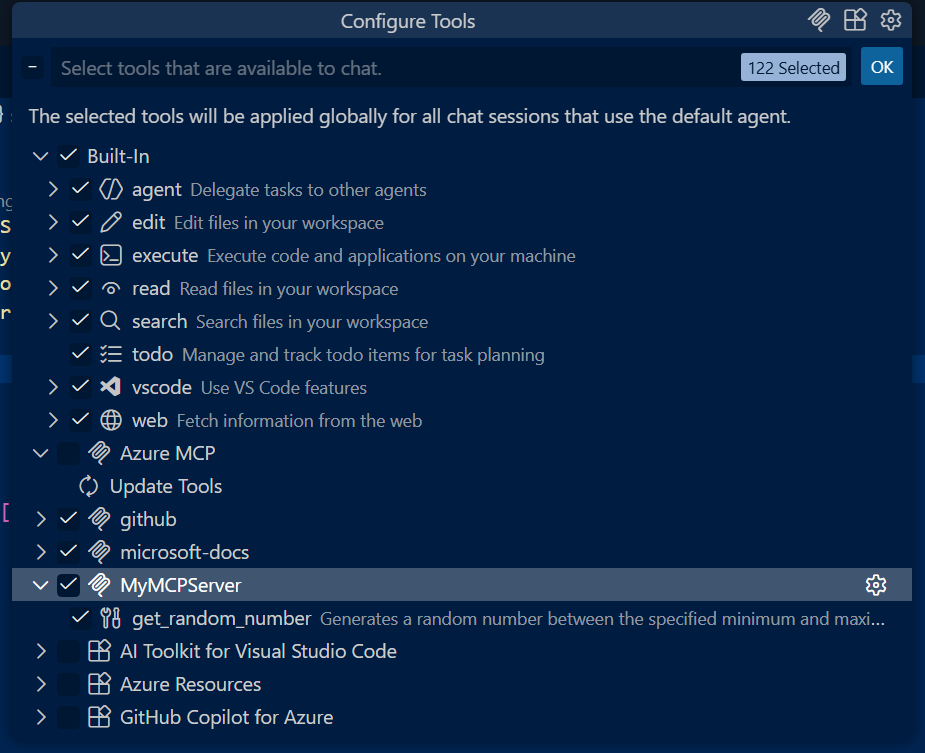
- Verify that your tool appears in the list of tools that VS Code has enabled. See the screenshot in Test the MCP server for how to check this.
- Explicitly reference the name of the tool in your prompt. In VS Code, you can reference your tool by name. For example,
Using #get_random_weather, what is the weather in Redmond?. - Verify your MCP server is able to start. You can check this by clicking the "Start" button visible above your MCP server configuration in the VS Code user or workspace settings.
Related content
Ikkollabora magħna fuq GitHub
Is-sors għal dan il-kontenut jista’ jinstab fuq GitHub, fejn tista’ wkoll toħloq u tirrevedi l-problemi u t-talbiet għall-immerġjar. Għal aktar informazzjoni, ara l-gwida għall-kontributuri tagħna.