Nota
L-aċċess għal din il-paġna jeħtieġ l-awtorizzazzjoni. Tista’ tipprova tidħol jew tibdel id-direttorji.
L-aċċess għal din il-paġna jeħtieġ l-awtorizzazzjoni. Tista’ tipprova tibdel id-direttorji.
These Power Query best practices help you improve query performance, take advantage of query folding, select correct data types, organize transformations, and reuse logic with parameters and custom functions. They apply to both Power Query Desktop and Power Query Online experiences.
Choose the right connector
Power Query offers many data connectors. These connectors range from data sources such as TXT, CSV, and Excel files, to databases such as Microsoft SQL Server, and popular software as a service (SaaS) products such as Microsoft Dynamics 365 and Salesforce. If a purpose-built connector isn't available in the Get Data window, use a generic connector such as ODBC or OLE DB.
Choose the purpose-built connector for your data source when one is available. For example, the SQL Server connector provides a better Get Data experience than the generic ODBC connector when you connect to a SQL Server database. The SQL Server connector also supports performance features such as query folding. To learn more, go to Overview of query evaluation and query folding in Power Query.
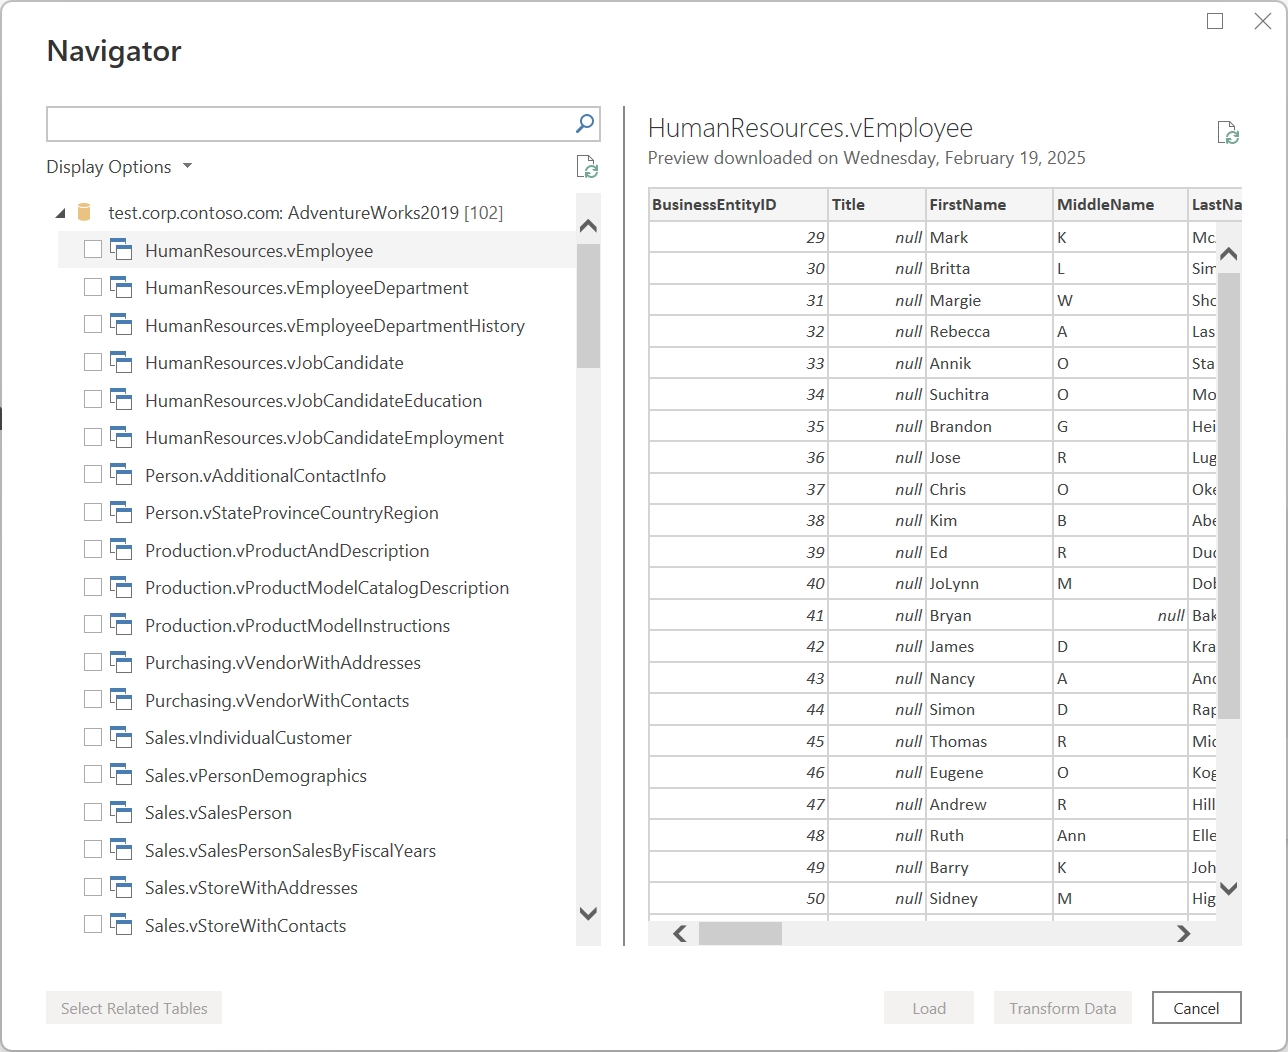
Each data connector follows a standard experience as explained in Getting data. This standardized experience has a stage called Data Preview. In this stage, you're provided with a user-friendly window to select the data that you want to get from your data source, if the connector allows it, and a simple data preview of that data. You can even select multiple data sets from your data source through the Navigator window.
Note
To see the full list of available connectors in Power Query, go to Connectors in Power Query.
Filter data early to improve performance
Filter data as early as possible to reduce the number of rows that Power Query processes in later transformations. For connectors that support query folding, Power Query can push filters back to the data source, as described in Overview of query evaluation and query folding in Power Query. Filtering out irrelevant data also limits the data shown in the data preview.
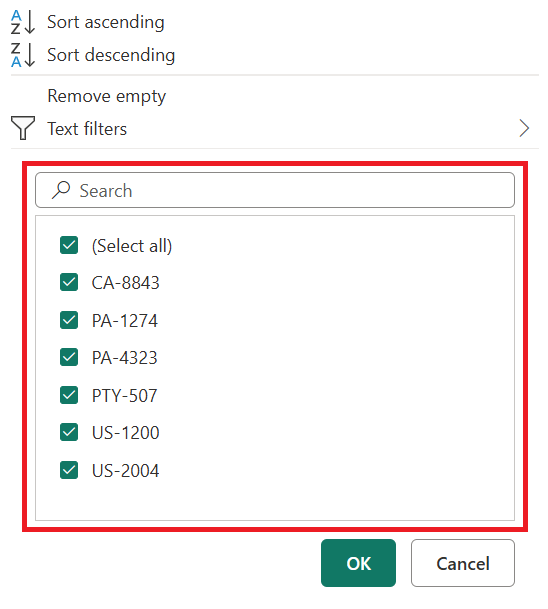
Use the auto filter menu, which shows a distinct list of the values found in your column, to select the values that you want to keep or filter out. Use the search bar to help you find the values in your column.
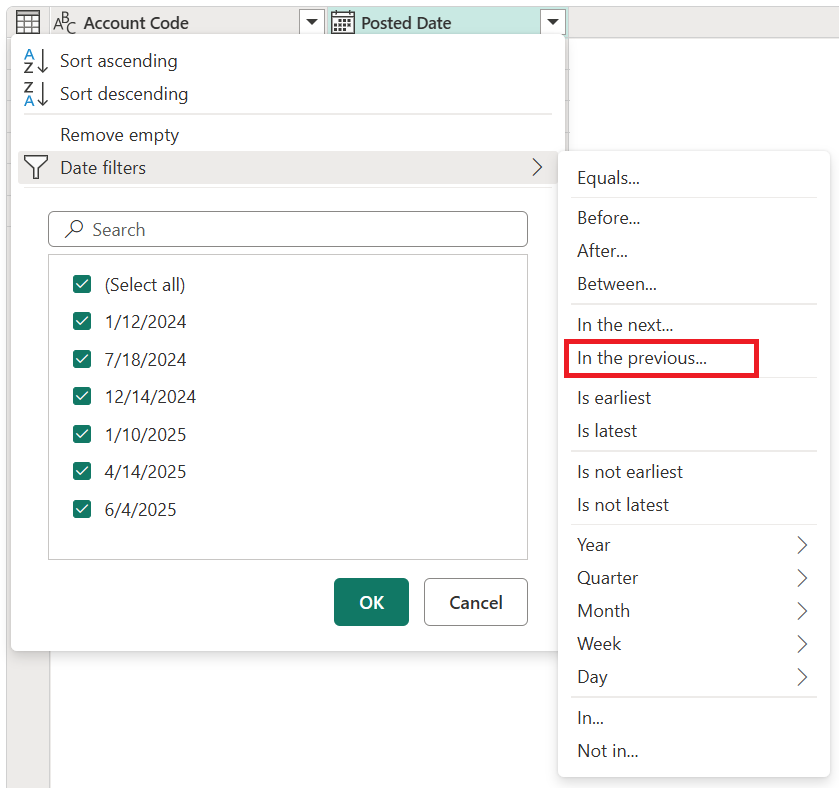
You can also take advantage of the type-specific filters such as In the previous for a date, datetime, or even date timezone column.
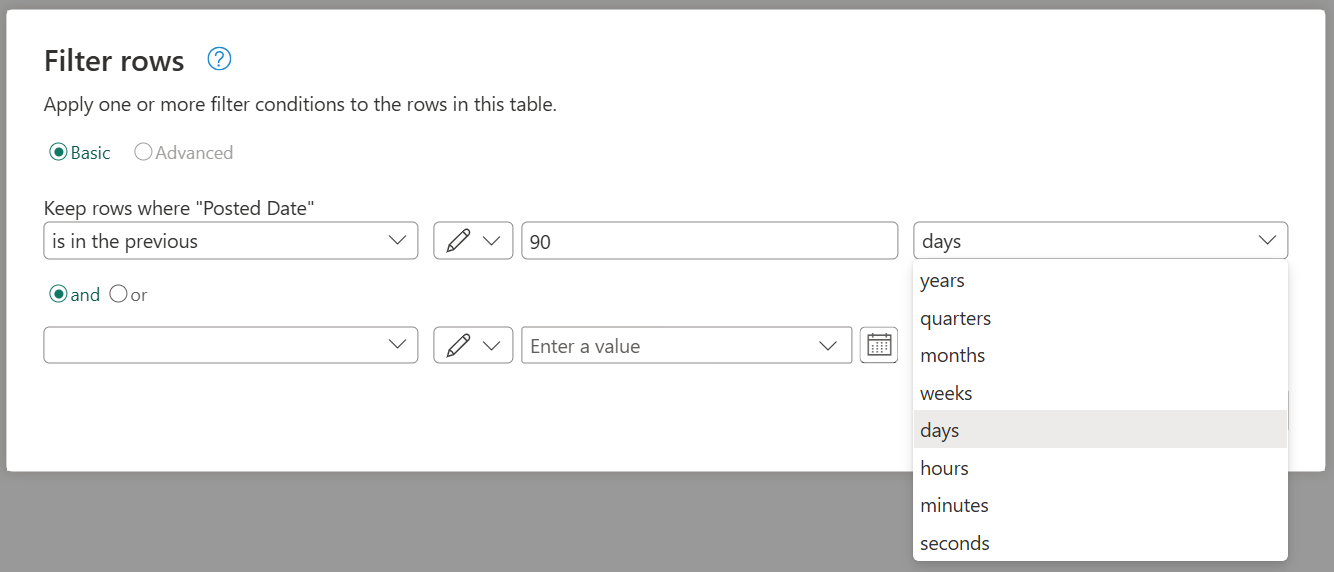
These type-specific filters can help you create a dynamic filter that always retrieves data that's in the previous x number of seconds, minutes, hours, days, weeks, months, quarters, or years.
Note
To learn more about filtering your data based on values from a column, go to Filter by values.
Do expensive operations last to improve performance
To improve preview performance in the Power Query editor, perform expensive operations last. Certain operations require reading the full data source to return any results and are therefore slow to preview. For example, if you perform a sort, it's possible that the first few sorted rows are at the end of the source data. To return any results, the sort operation must first read all the rows.
Other operations (such as filters) don't need to read all the data before returning any results. Instead, they operate over the data in what's called a "streaming" fashion. The data "streams" by, and results are returned along the way. In the Power Query editor, such operations only need to read enough of the source data to populate the preview.
When possible, perform such streaming operations first, and do any more expensive operations last. Performing operations in this order helps minimize the amount of time you spend waiting for the preview to render each time you add a new step to your query.
Use a data subset while developing a query
If adding new steps in the Power Query editor is slow, use Keep First Rows to limit the data processed while you develop the query. After you add all the required steps, remove the Keep First Rows step so the completed query processes the full data set.
Use the correct data types
Set the correct data type for each column so Power Query can make type-specific transformations and filters available. For example, when you select a date column, you can use the options under the Date and time column group in the Add Column menu. If the column doesn't have a data type set, these options are grayed out.

A similar situation occurs for the type-specific filters, since they're specific to certain data types. If your column doesn't have the correct data type defined, these type-specific filters aren't available.
It's crucial that you always work with the correct data types for your columns. When you work with structured data sources such as databases, the data type information is brought from the table schema found in the database. But for unstructured data sources such as TXT and CSV files, it's important that you set the correct data types for the columns coming from that data source. By default, Power Query offers an automatic data type detection for unstructured data sources. You can read more about this feature and how it can help you in Data types.
Note
To learn more about the importance of data types and how to work with them, go to Data types.
Profile and explore your data
Before you prepare your data and add transformation steps, enable the Power Query data profiling tools to discover information about your data.
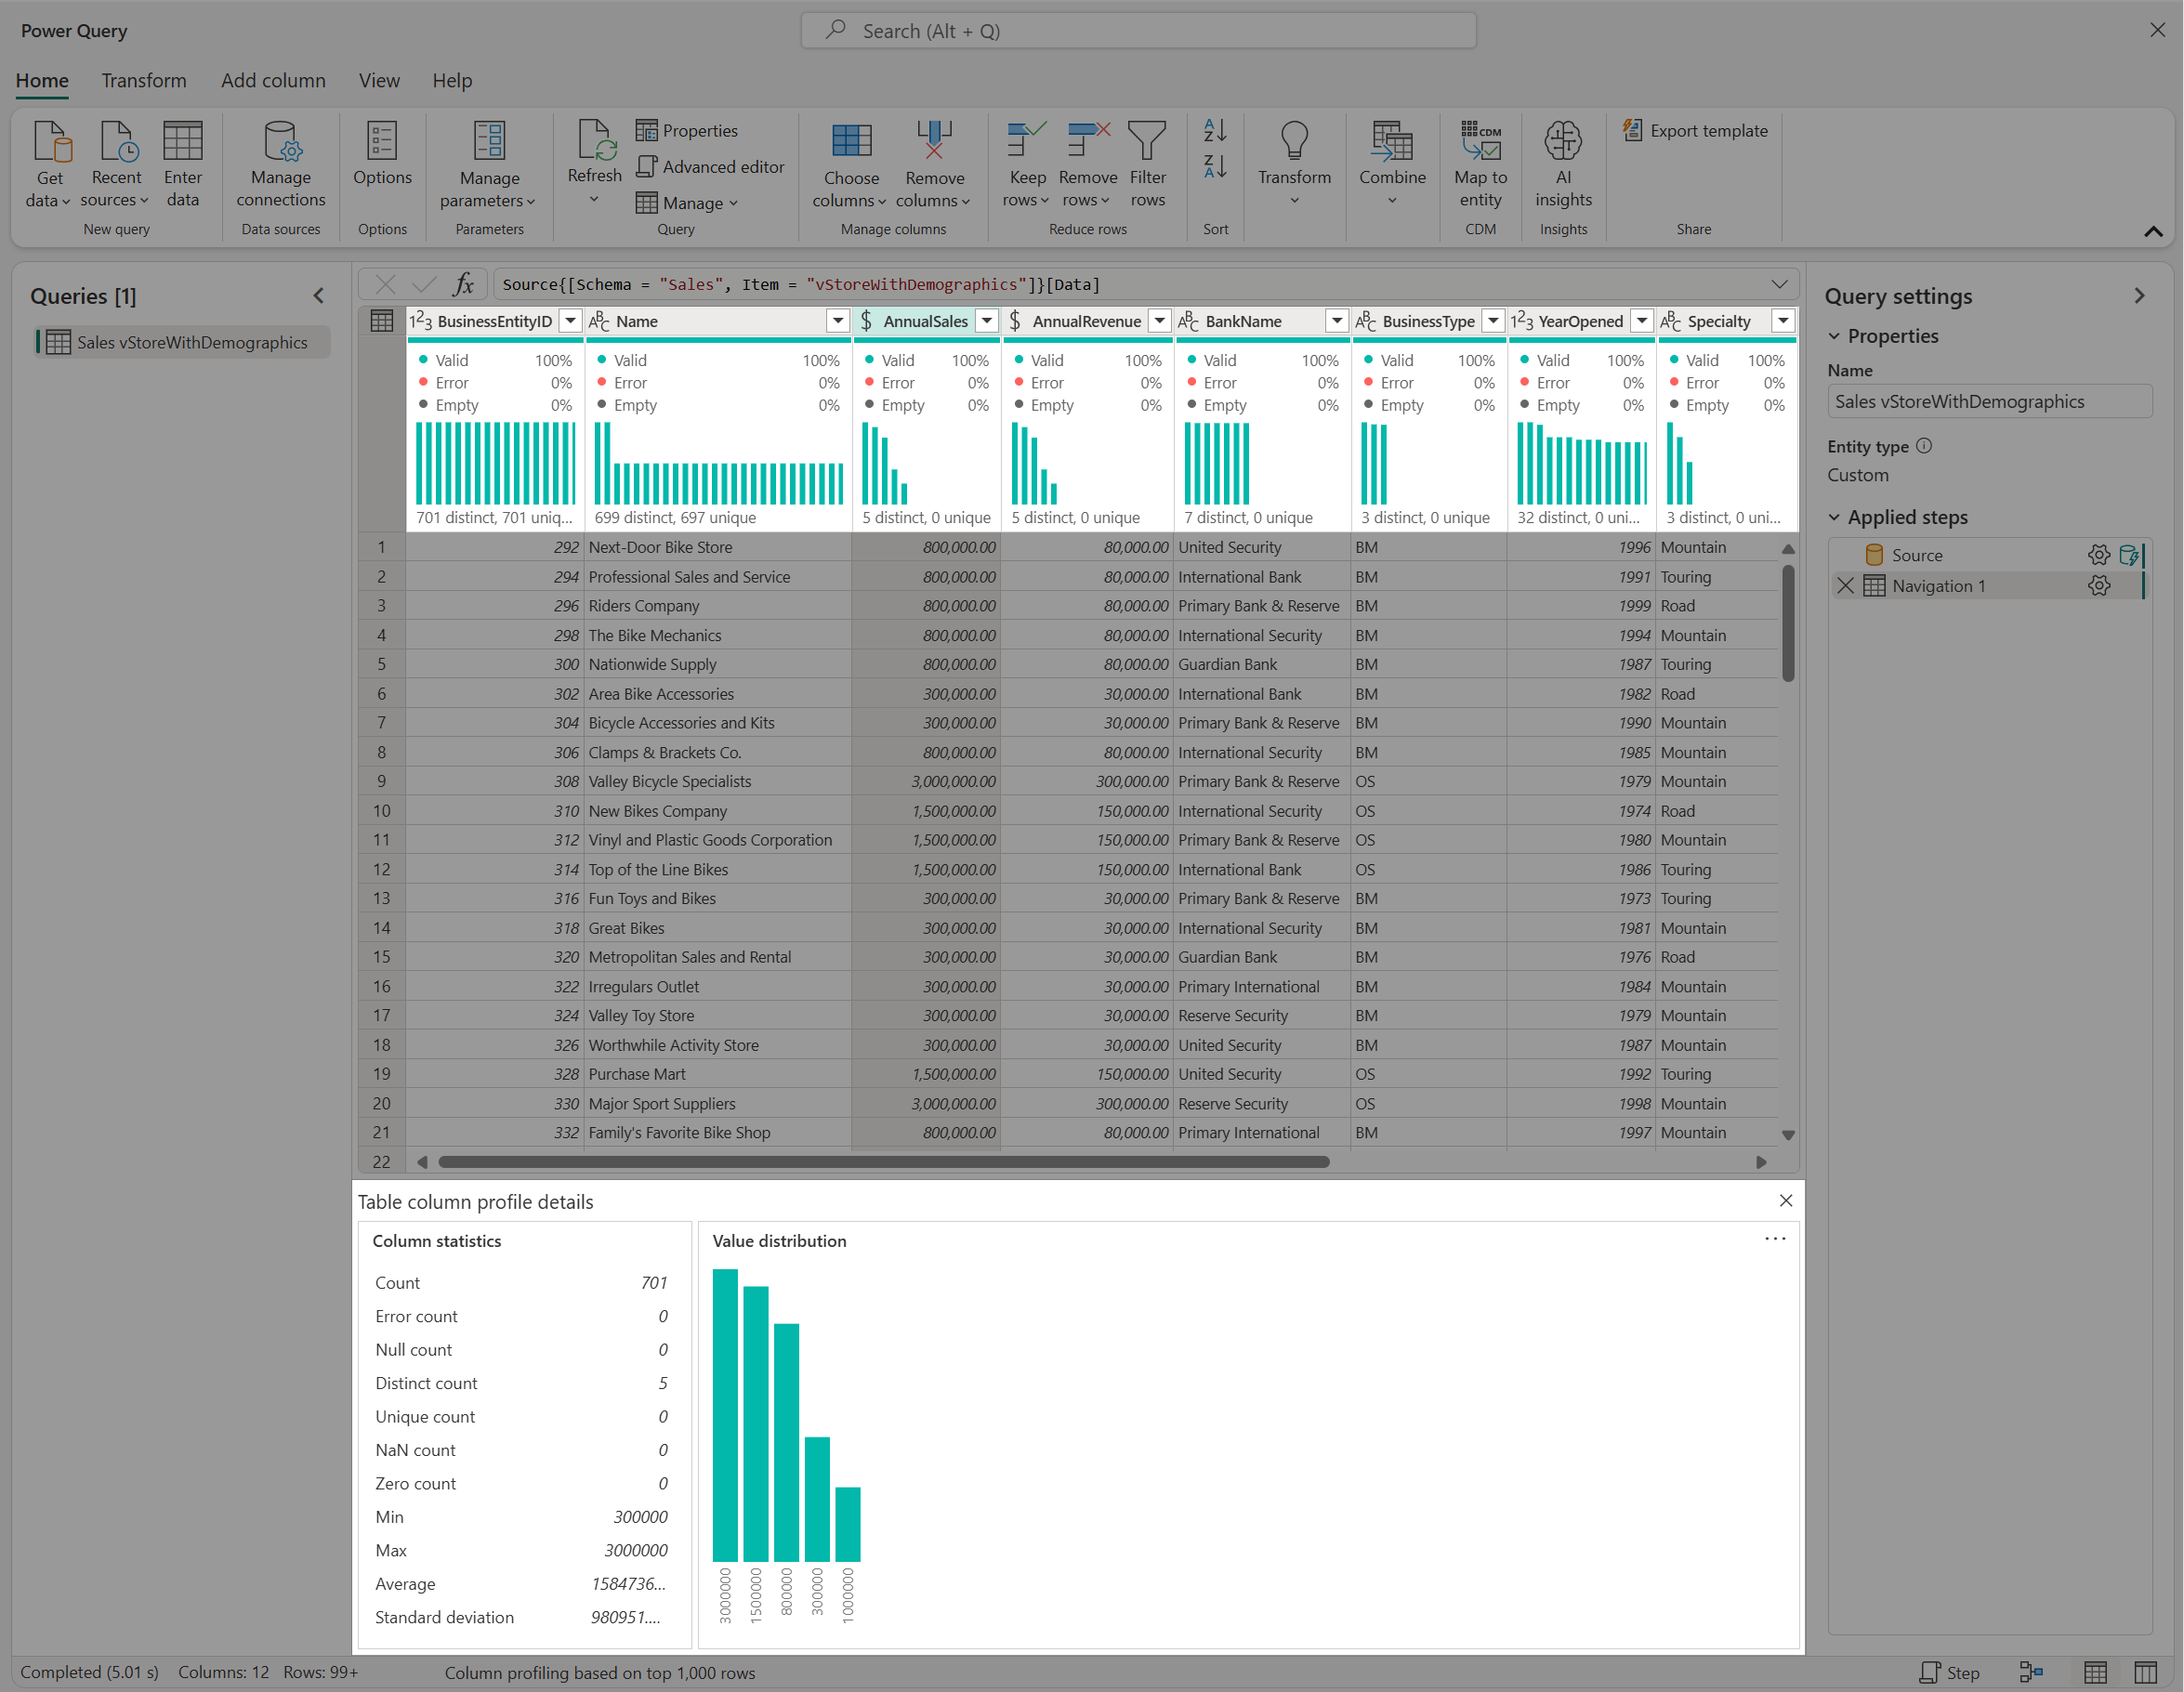
Power Query provides three data profiling tools:
| Tool | What it shows |
|---|---|
| Column quality | The proportion of values in a column that are valid, contain errors, or are empty. |
| Column distribution | The frequency and distribution of values in each column. |
| Column profile | Detailed statistics about a selected column. |
You can also interact with these features, which helps you prepare your data.
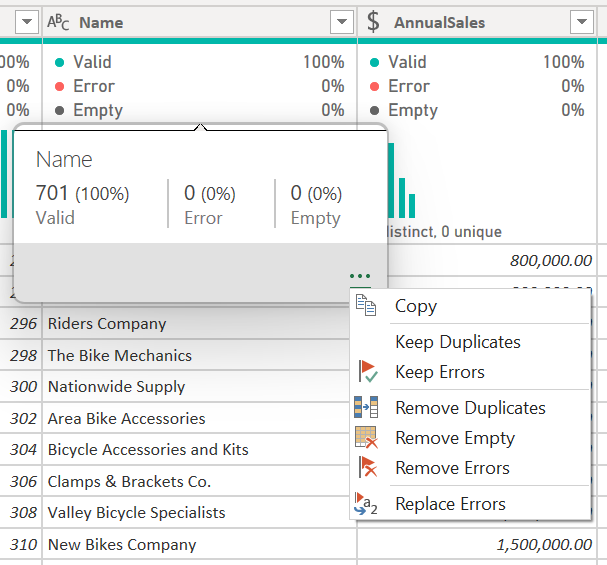
Note
To learn more about the data profiling tools, go to Data profiling tools.
Document your work
Document a Power Query solution by giving steps, queries, and groups meaningful names and descriptions. These details make the purpose of each transformation easier to understand and maintain.
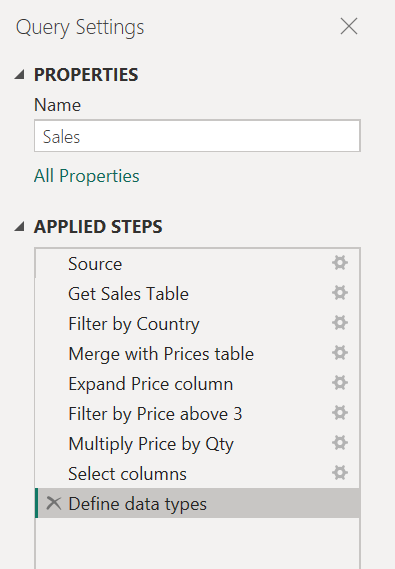
While Power Query automatically creates a step name for you in the applied steps pane, you can also rename your steps or add a description to any of them.
Note
To learn more about all the available features and components found inside the applied steps pane, go to Using the Applied steps list.
Split large queries into modules
Split a large Power Query query into smaller referenced queries to make its transformation phases easier to understand and maintain. Although a single query can contain all the transformations and calculations that you need, a query with many steps is easier to manage when one query references the next.
For example, the following query has nine steps and includes a Merge with Prices table step.
You could split this query into two at the Merge with Prices table step. That way it's easier to understand the steps that were applied to the sales query before the merge. To do this operation, you right-click the Merge with Prices table step and select the Extract Previous option.
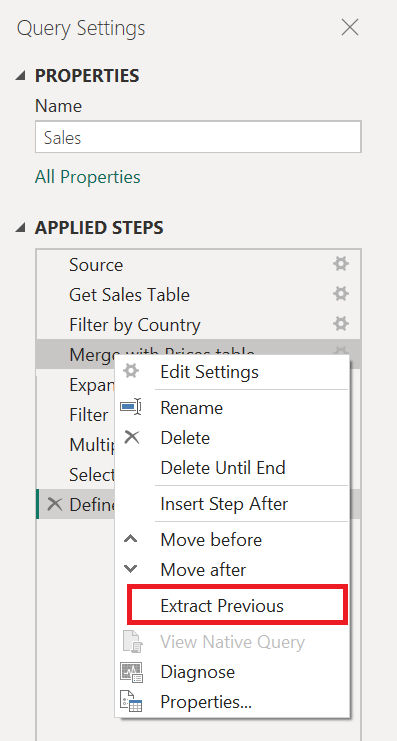
You're then prompted with a dialog to give your new query a name. This step effectively splits your query into two queries. One query has all the steps before the merge. The other query has an initial step that references your new query and the rest of the steps that you had in your original query from the Merge with Prices table step downward.
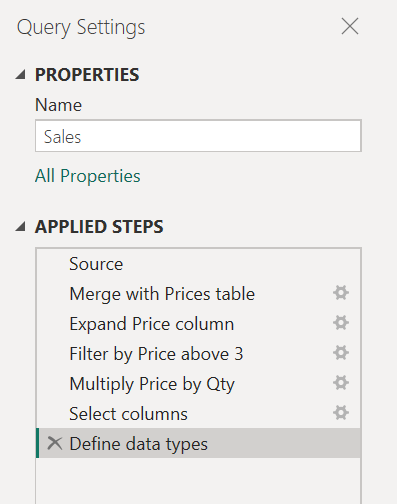
You can also use query referencing as you see fit. But it's a good idea to keep your queries at a level that doesn't seem daunting at first glance with so many steps.
Note
To learn more about query referencing, go to Understanding the queries pane.
Organize queries into groups
Use groups in the queries pane to keep your work organized.
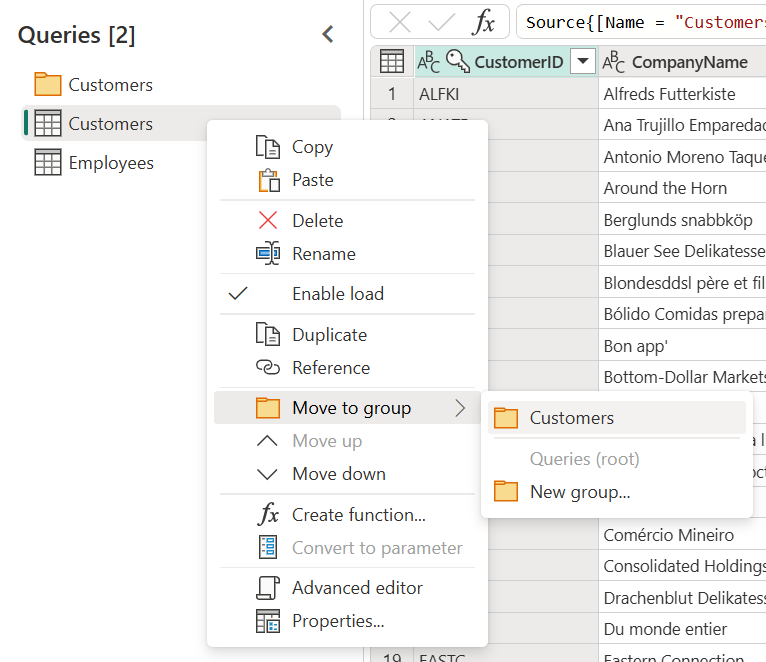
The sole purpose of groups is to help you keep your work organized by serving as folders for your queries. You can create groups within groups should you ever need to. Moving queries across groups is as easy as drag and drop.
Try to give your groups a meaningful name that makes sense to you and your case.
Note
To learn more about all the available features and components found inside the queries pane, go to Understanding the queries pane.
Future-proof queries
Design queries to handle expected changes in the source data so future refreshes continue to succeed. Power Query provides transformations that make a query resilient when the rows, columns, or values in a data source change.
Define the scope of your query, including what it should do and what it should account for in terms of structure, layout, column names, data types, and any other relevant component.
The following transformations can help a query remain resilient to changes:
| Source-data scenario | Power Query transformation | Learn more |
|---|---|---|
| The number of data rows changes, but you must remove a fixed number of footer rows. | Remove bottom rows | Filter a table by row position |
| The number of columns changes, but the query only needs specific columns. | Choose columns | Choose or remove columns |
| The number of columns changes, but the query must unpivot only a specific subset. | Unpivot only selected columns | Unpivot columns |
| A data type conversion produces errors for values that don't conform to the target type. | Remove the rows that contain errors. | Dealing with errors |
Use parameters
Use Power Query parameters to store and manage values that you can reuse in transformations, data source functions, and custom functions. Parameters make queries easier to update because you can change a value in one location instead of editing each query that uses it. Two common scenarios are:
Step argument: Use a parameter as the argument of multiple transformations driven from the user interface.
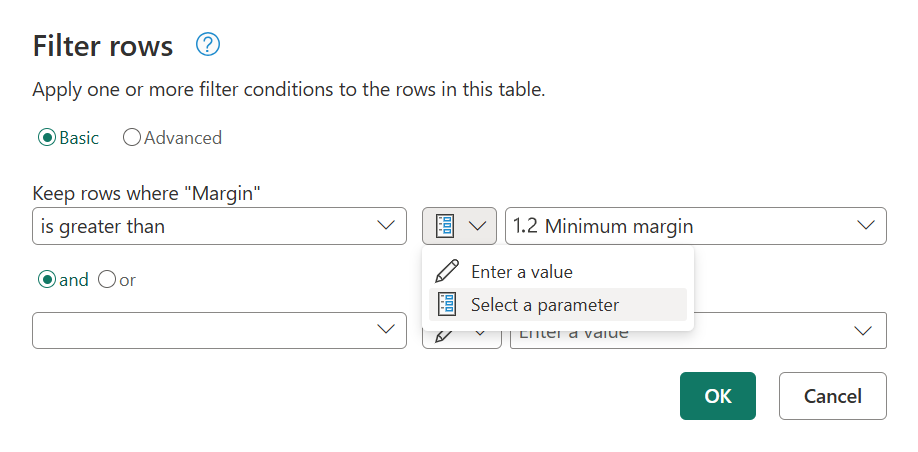
Custom Function argument: Create a new function from a query, and reference parameters as the arguments of your custom function.
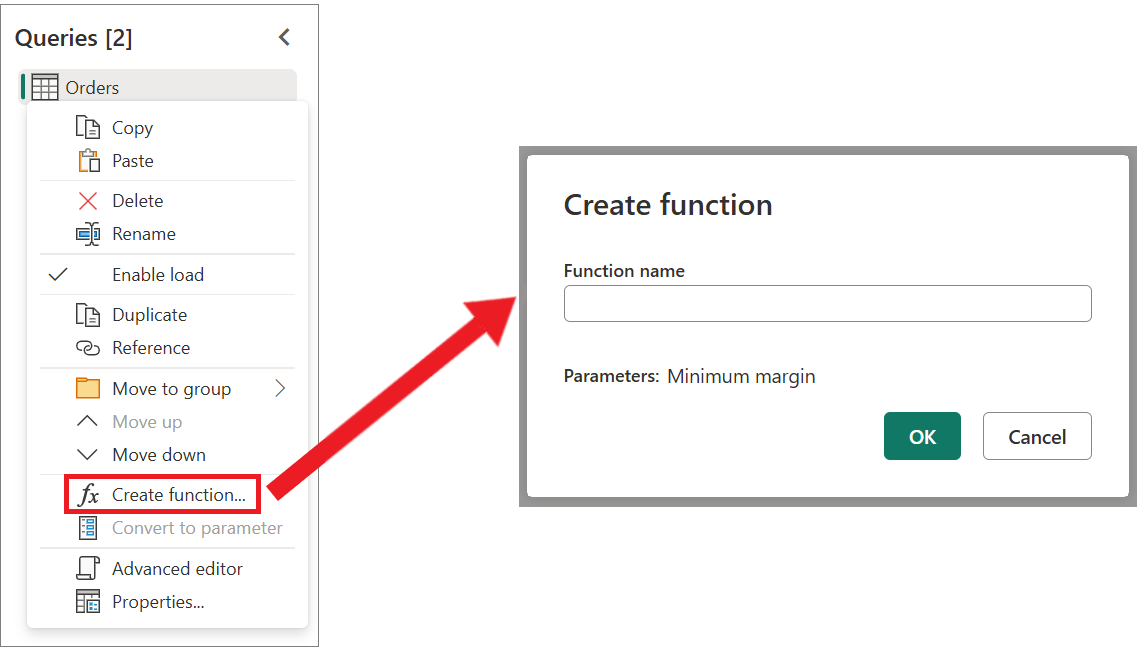
The main benefits of creating and using parameters are:
Centralized view of all your parameters through the Manage Parameters window.
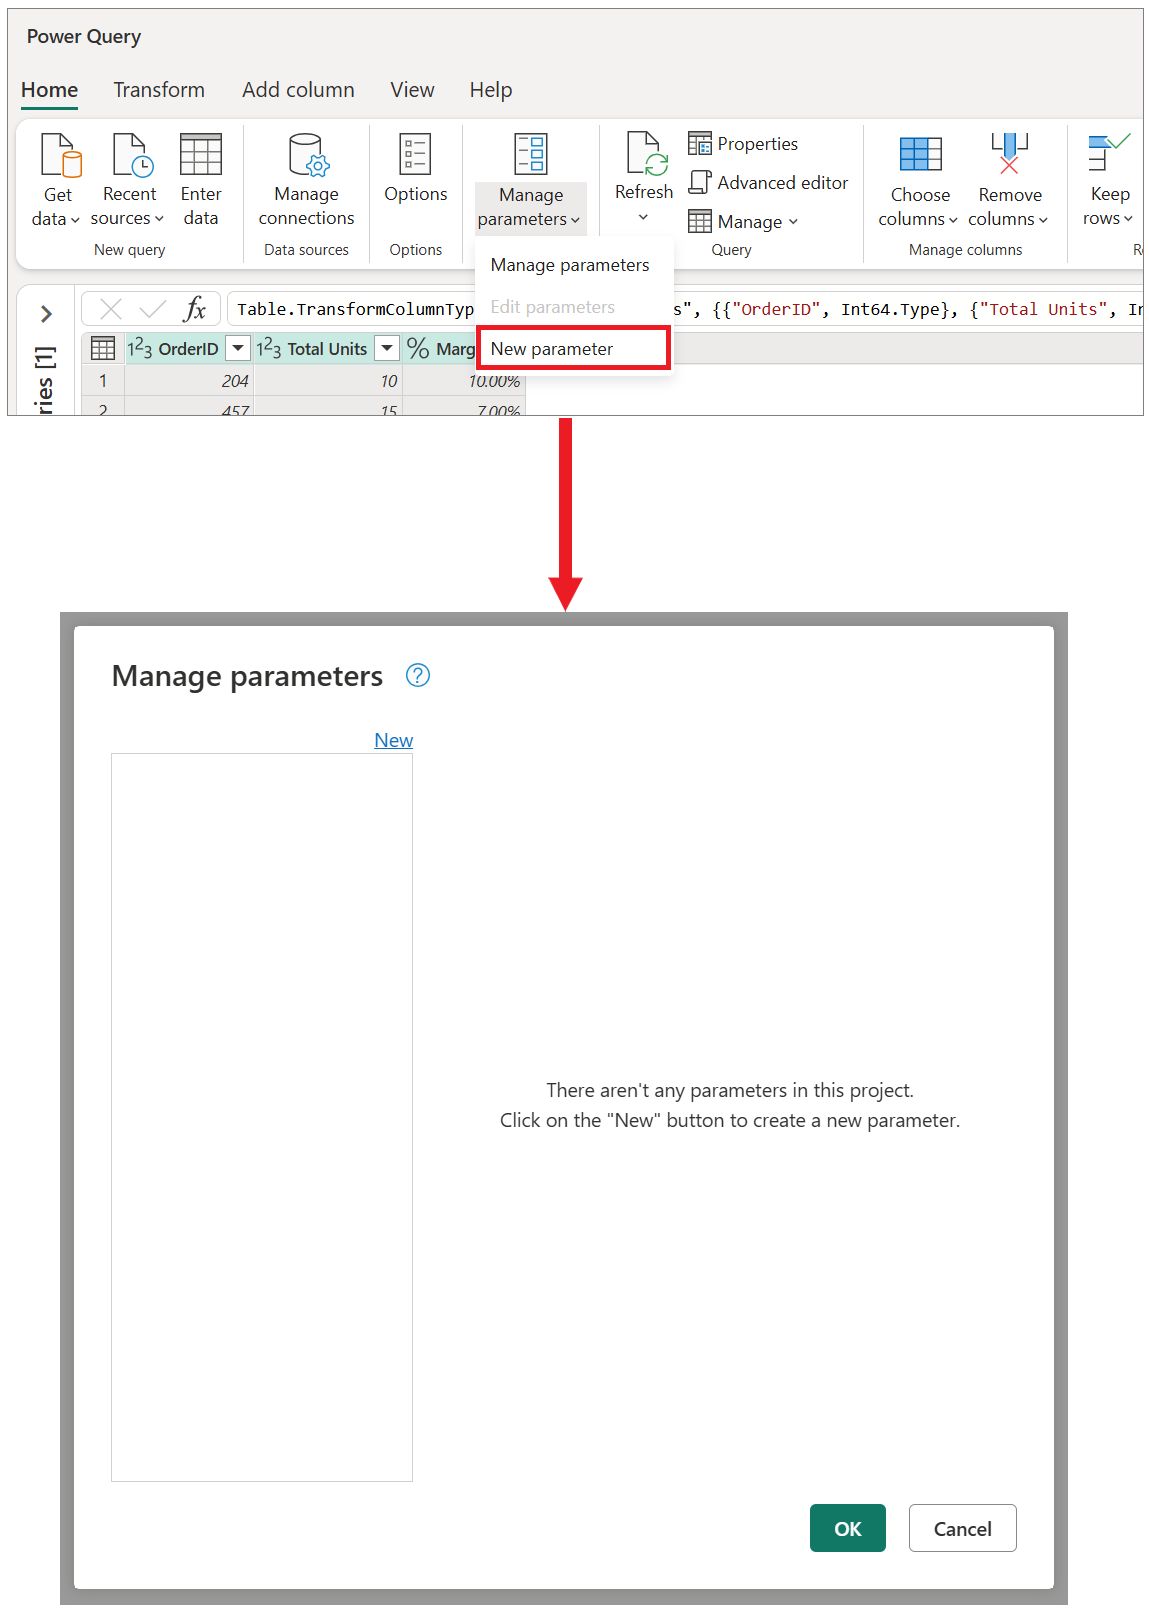
Reusability of the parameter in multiple steps or queries.
Makes the creation of custom functions straightforward and easy.
You can even use parameters in some of the arguments of the data connectors. For example, you could create a parameter for your server name when connecting to your SQL Server database. Then you could use that parameter inside the SQL Server database dialog.
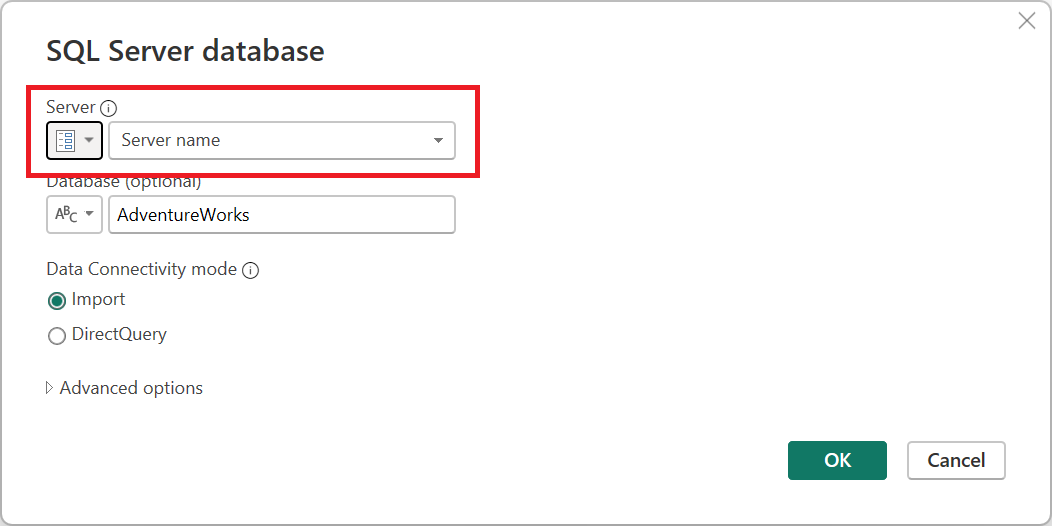
If you change your server location, all you need to do is update the parameter for your server name, and your queries are updated.
Note
To learn more about creating and using parameters, go to Using parameters.
Create reusable functions
Create a Power Query custom function when you need to apply the same set of transformations to different queries or values. A Power Query custom function maps a set of input values to a single output value and is created from native Power Query M formula language functions and operators.
For example, say you have multiple queries or values that require the same set of transformations. You could create a custom function that you later invoke against the queries or values of your choice. This custom function saves you time and helps you manage your set of transformations in a central location, which you can modify at any time.
Power Query custom functions can be created from existing queries and parameters. For example, imagine a query that has several codes as a text string and you want to create a function that decodes those values.
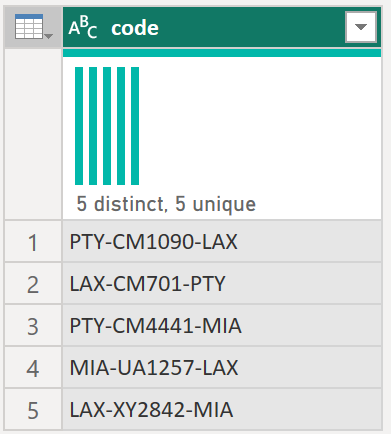
You start by having a parameter with a value that serves as an example.
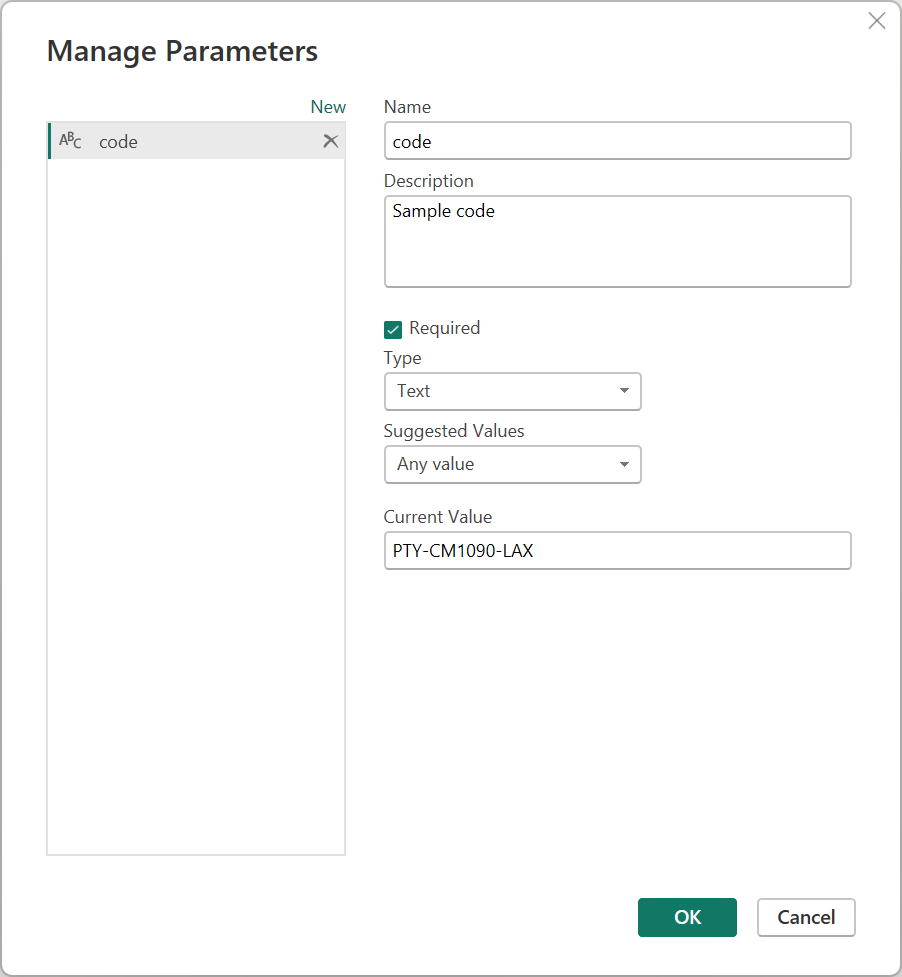
From that parameter, you create a new query where you apply the transformations that you need. For this case, you want to split the code PTY-CM1090-LAX into multiple components:
- Origin = PTY
- Destination = LAX
- Airline = CM
- FlightID = 1090
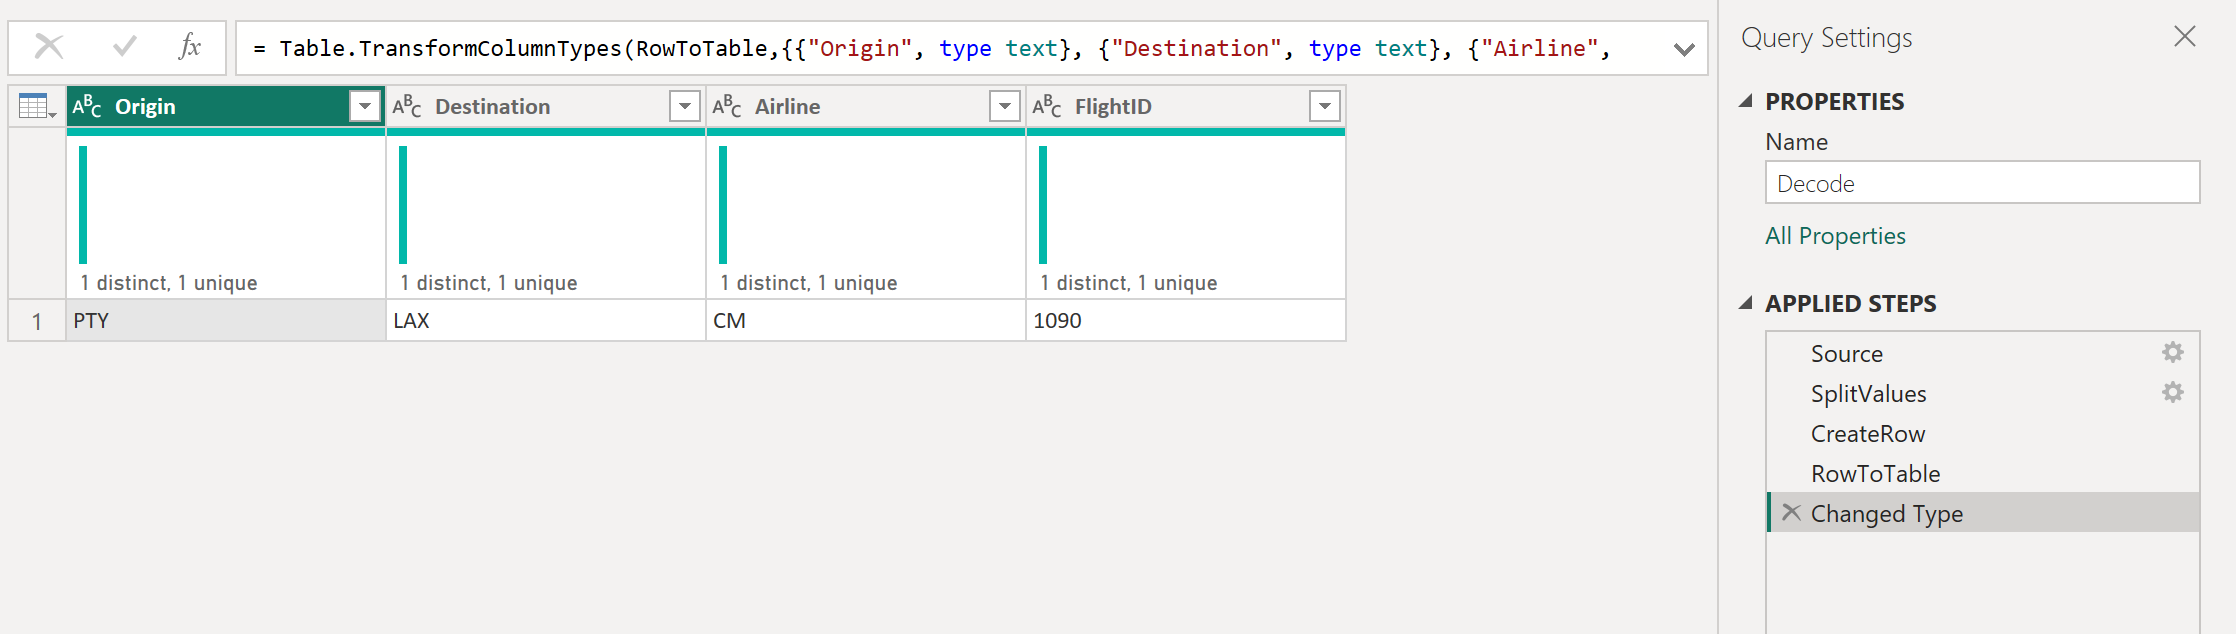
You can then transform that query into a function by right-clicking the query and selecting Create Function. Finally, you can invoke your custom function into any of your queries or values.
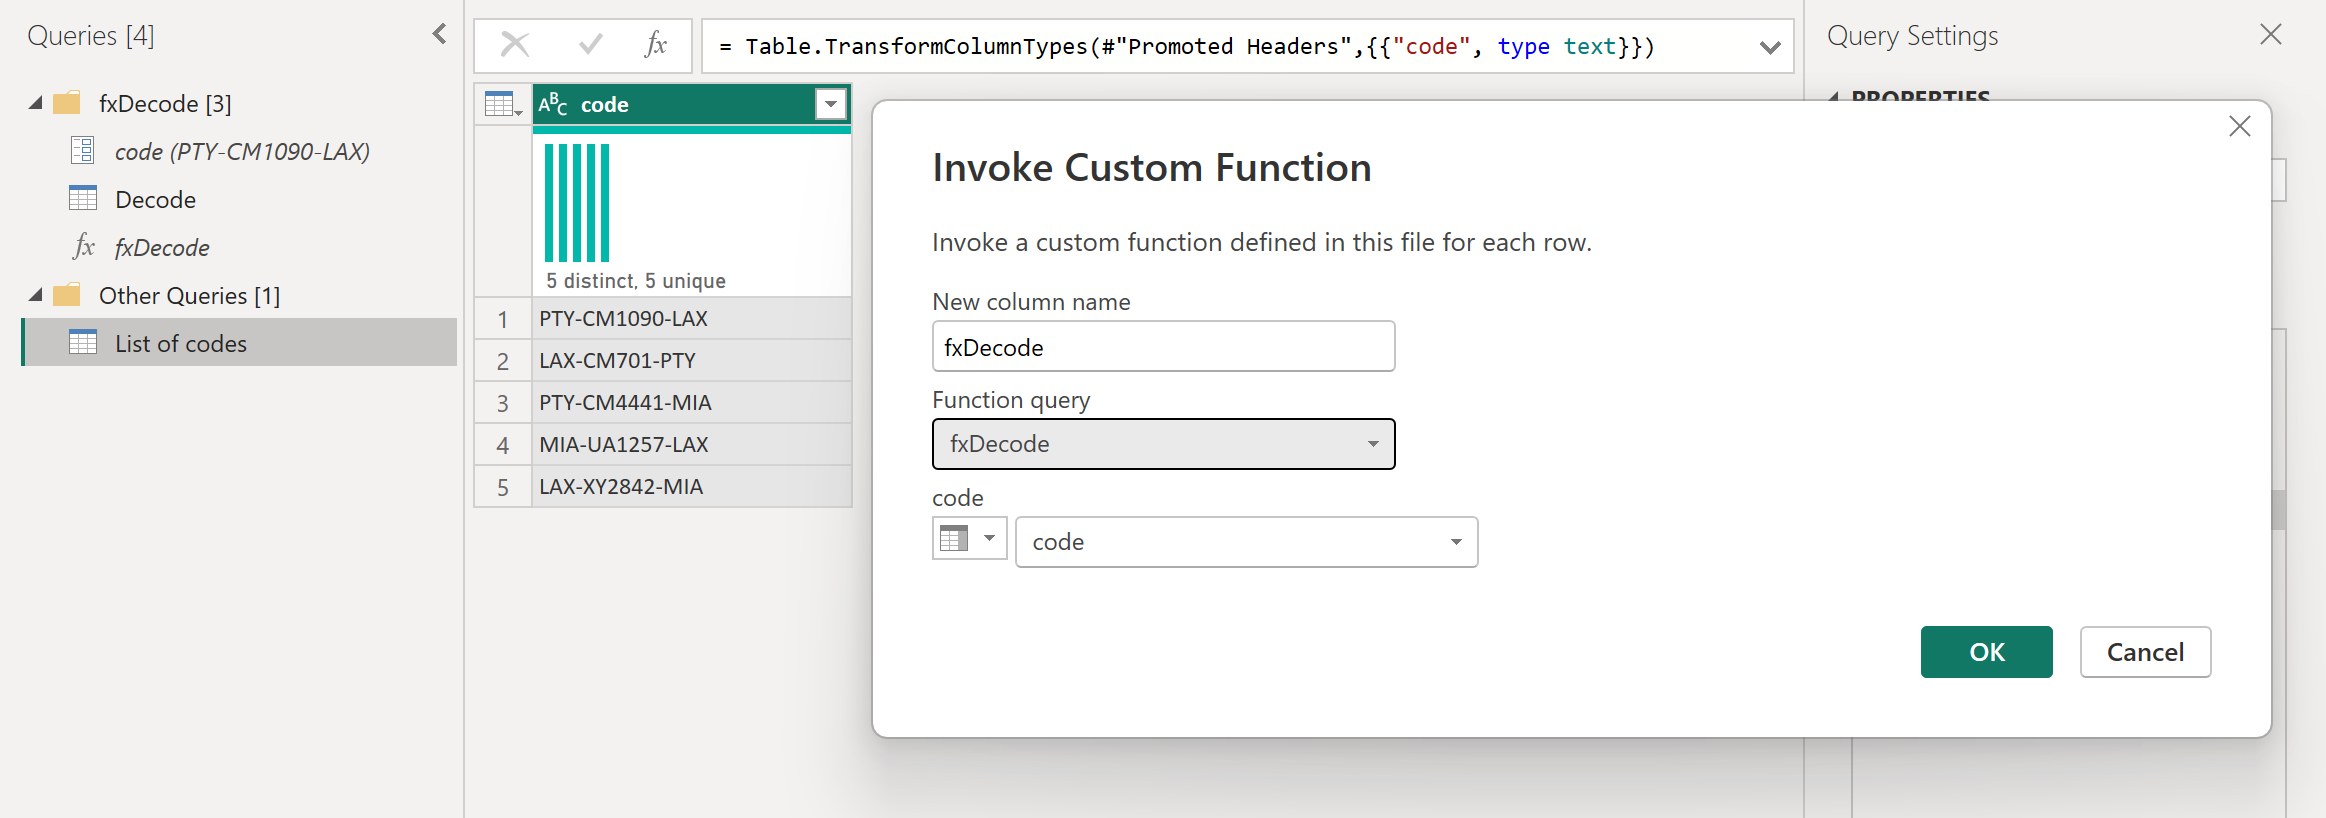
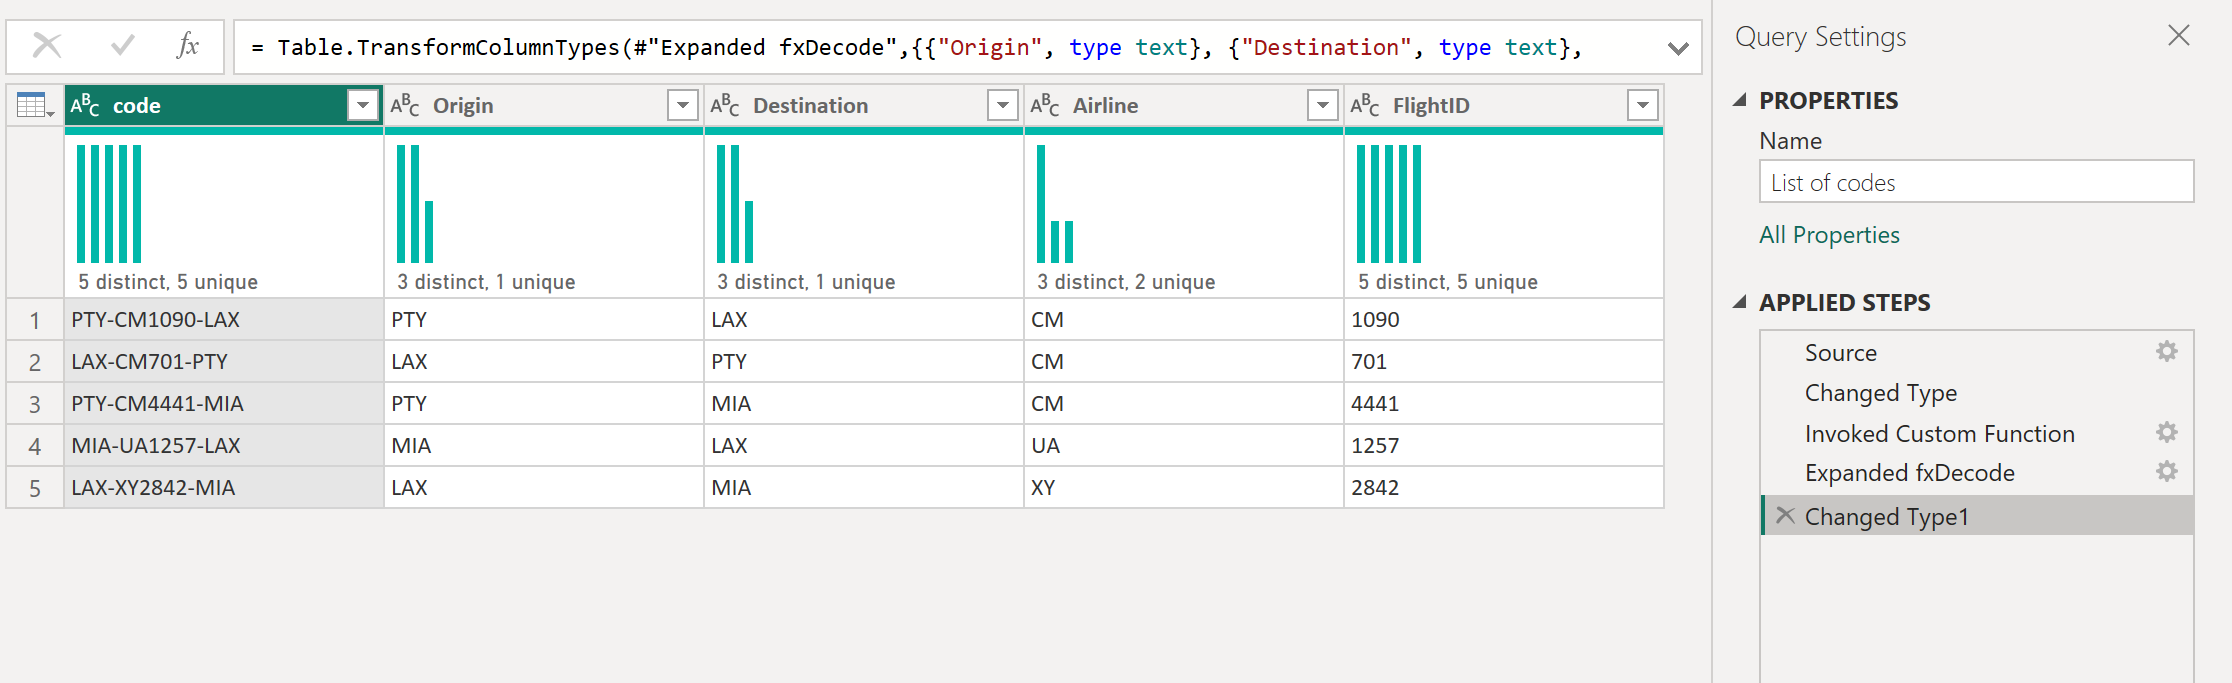
After a few more transformations, you can see that you reached your desired output and applied the logic for such a transformation from a custom function.
Note
To learn more about how to create and use custom functions in Power Query, see Custom Functions.