Quickstart: Use Azure Cache for Redis with an ASP.NET Core web app
In this quickstart, you incorporate Azure Cache for Redis into an ASP.NET Core web application that connects to Azure Cache for Redis to store and get data from the cache.
You can use a caching provider in your ASP.NET Core web app. To quickly start using Redis with minimal changes to your existing code, see:
- ASP.NET Core output cache provider
- ASP.NET Core distributed caching provider
- ASP.NET Core Redis session provider
Skip to the code
This article describes how to modify the code for a sample app to create a working app that connects to Azure Cache for Redis.
If you want to go straight to the code, see the ASP.NET Core quickstart sample on GitHub.
You can clone the Azure Cache for Redis samples GitHub repository, and then go to the quickstart/aspnet-core directory to view the completed source code for the steps that are described in this article.
The quickstart/aspnet-core directory is also configured as an Azure Developer CLI template. Use the open-source azd tool to streamline provisioning and deployment from a local environment to Azure. Optionally, run the azd up command to automatically provision an Azure Cache for Redis instance, and to configure the local sample app to connect to it:
azd up
Explore the eShop sample
As a next step, you can see a real-world scenario eShop application that demonstrates the ASP.NET Core caching providers: ASP.NET Core eShop by using Redis caching providers.
Features include:
- Redis distributed caching
- Redis session state provider
Deployment instructions are in the README.md file in the ASP.NET Core quickstart sample on GitHub.
Prerequisites
- An Azure subscription. Create one for free
- .NET Core SDK
Create a cache
To create a cache, sign in to the Azure portal. On the portal menu, select Create a resource.

On the Get Started pane, enter Azure Cache for Redis in the search bar. In the search results, find Azure Cache for Redis, and then select Create.

On the New Redis Cache pane, on the Basics tab, configure the following settings for your cache:
Setting Action Description Subscription Select your Azure subscription. The subscription to use to create the new instance of Azure Cache for Redis. Resource group Select a resource group, or select Create new and enter a new resource group name. A name for the resource group in which to create your cache and other resources. By putting all your app resources in one resource group, you can easily manage or delete them together. DNS name Enter a unique name. The cache name must be a string of 1 to 63 characters that contains only numbers, letters, and hyphens. The name must start and end with a number or letter, and it can't contain consecutive hyphens. Your cache instance's host name is \<DNS name>.redis.cache.windows.net.Location Select a location. An Azure region that is near other services that use your cache. Cache SKU Select a SKU. The SKU determines the size, performance, and feature parameters that are available for the cache. For more information, see Azure Cache for Redis overview. Cache size Select a cache size. For more information, see Azure Cache for Redis overview. Select the Networking tab or select Next: Networking.
On the Networking tab, select a connectivity method to use for the cache.
Select the Advanced tab or select Next: Advanced.
On the Advanced tab, select the Microsoft Entra Authentication checkbox to enable Microsoft Entra authentication.
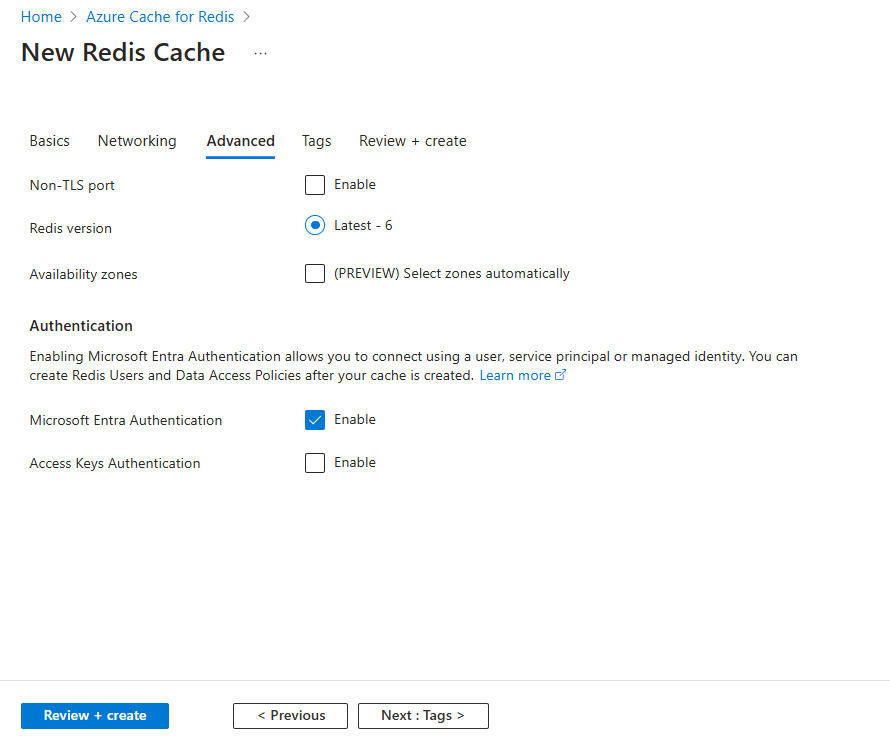
Important
For optimal security, we recommend that you use Microsoft Entra ID with managed identities to authorize requests against your cache if possible. Authorization by using Microsoft Entra ID and managed identities provides superior security and ease of use over shared access key authorization. For more information about using managed identities with your cache, see Use Microsoft Entra ID for cache authentication.
(Optional) Select the Tags tab or select Next: Tags.
(Optional) On the Tags tab, enter a tag name and value if you want to categorize your cache resource.
Select the Review + create button.
On the Review + create tab, Azure automatically validates your configuration.
After the green Validation passed message appears, select Create.
A new cache deployment occurs over several minutes. You can monitor the progress of the deployment on the Azure Cache for Redis Overview pane. When Status displays Running, the cache is ready to use.
Get the host name
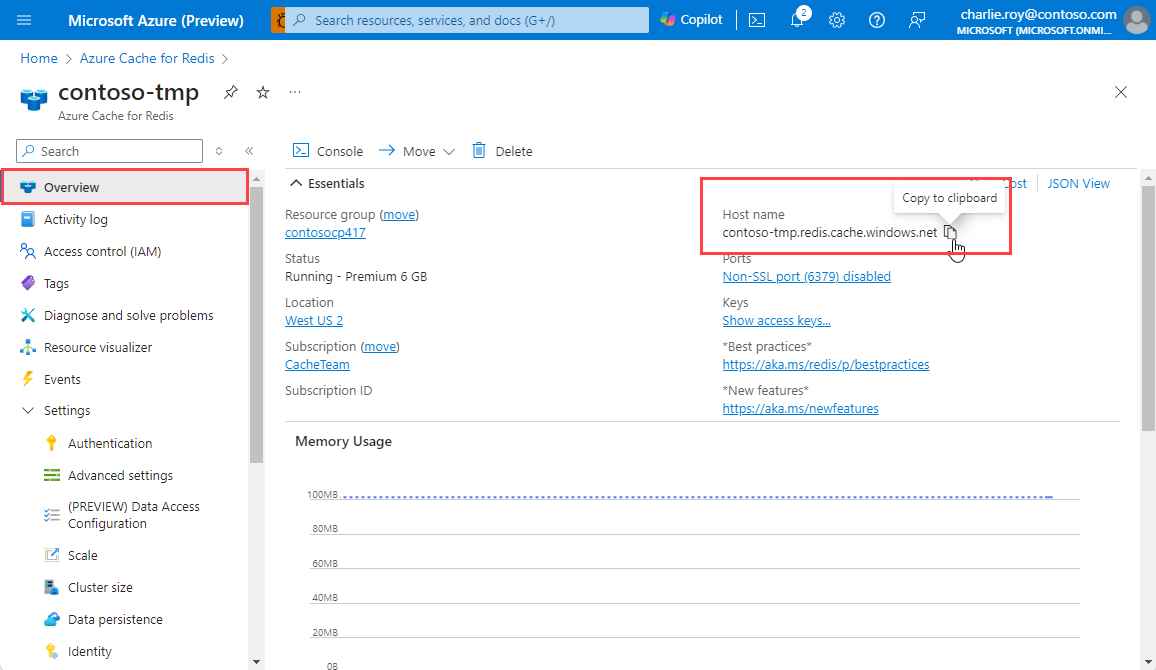
To connect to your Azure Cache for Redis server, the cache client needs the cache's host name and other information. Some clients might refer to the items by using slightly different names. You can get the host name in the Azure portal.
- In the Azure portal, go to your cache.
- On the service menu, select Overview.
- Under Essentials, for Host name, select the Copy icon to copy the host name value. The host name value has the form
<DNS name>.redis.cache.windows.net.
Add a new Redis user access policy
The identity that accesses Azure Cache for Redis must be assigned a data access policy. For this example, you assign a data access policy to the same Microsoft Entra ID account that you use to sign in to the Azure CLI or Visual Studio.
In the Azure portal, go to your cache.
On the service menu, under Settings, select Data Access Configuration.
On the Data Access Configuration pane, select Add > New Redis User.

On the New Redis User pane, select the Data Contributor policy, and then select Next: Redis Users.
Choose Select Member to open the flyout menu. Search for your user account and select it in the results.
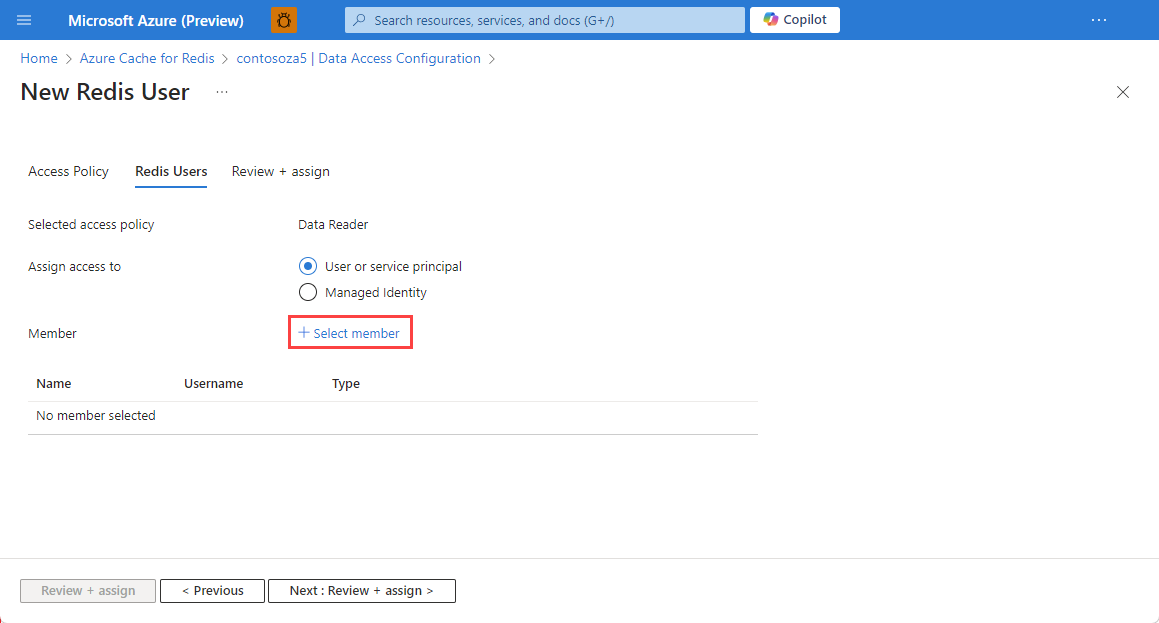
Select Review + assign to assign the policy to the selected user.
Add a local secret for the host name
In your command window, run the following command to store a new secret named RedisHostName. In the code, replace the placeholders, including angle brackets, with your cache name and primary access key:
dotnet user-secrets set RedisHostName "<cache-name>.redis.cache.windows.net"
Connect to the cache by using RedisConnection
The RedisConnection class manages the connection to your cache. The connection is made in this statement in HomeController.cs in the Controllers folder:
_redisConnection = await _redisConnectionFactory;
The RedisConnection.cs file includes the StackExchange.Redis and Azure.Identity namespaces at the top of the file to include essential types to connect to Azure Cache for Redis:
using StackExchange.Redis;
using Azure.Identity;
The RedisConnection class code ensures that there's always a healthy connection to the cache. The connection is managed by the ConnectionMultiplexer instance from StackExchange.Redis. The RedisConnection class re-creates the connection when a connection is lost and can't reconnect automatically.
For more information, see StackExchange.Redis and the code in the StackExchange.Redis GitHub repo.
Verify layout views in the sample
The home page layout for this sample is stored in the _Layout.cshtml file. In the next section, you test the cache by using the controller that you add here.
Open Views\Shared\_Layout.cshtml.
Verify that the following line is in
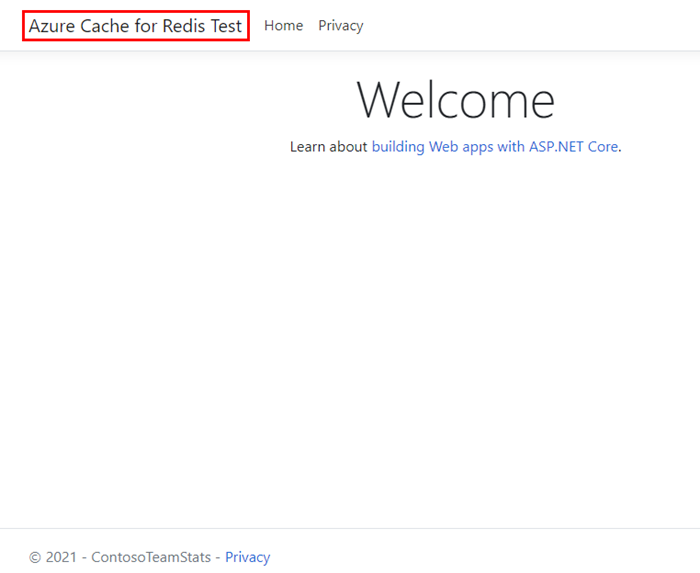
<div class="navbar-header">:<a class="navbar-brand" asp-area="" asp-controller="Home" asp-action="RedisCache">Azure Cache for Redis Test</a>
Show data from the cache
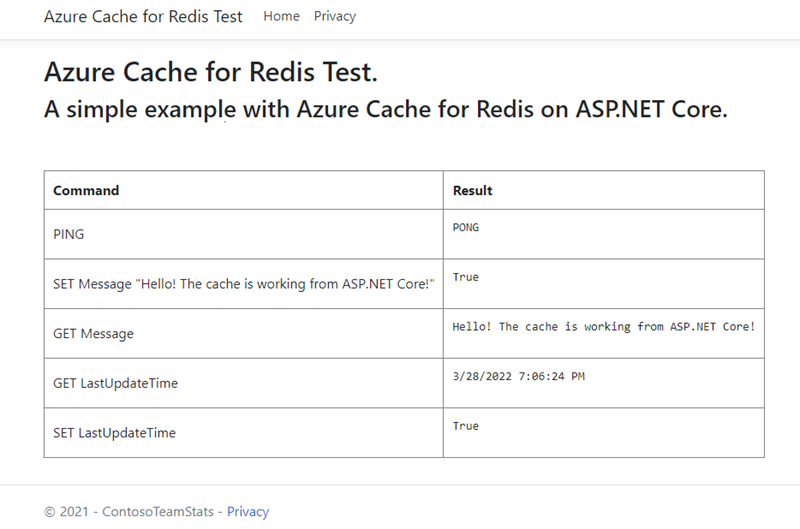
On the home page, select Azure Cache for Redis Test in the navigation bar to see the sample output.
In Solution Explorer, expand the Views folder, and then right-click the Home folder.
Verify that the following code is in the RedisCache.cshtml file:
@{
    ViewBag.Title = "Azure Cache for Redis Test";
}

<h2>@ViewBag.Title.</h2>
<h3>@ViewBag.Message</h3>
<br /><br />
<table border="1" cellpadding="10">
    <tr>
        <th>Command</th>
        <th>Result</th>
    </tr>
    <tr>
        <td>@ViewBag.command1</td>
        <td><pre>@ViewBag.command1Result</pre></td>
    </tr>
    <tr>
        <td>@ViewBag.command2</td>
        <td><pre>@ViewBag.command2Result</pre></td>
    </tr>
    <tr>
        <td>@ViewBag.command3</td>
        <td><pre>@ViewBag.command3Result</pre></td>
    </tr>
    <tr>
        <td>@ViewBag.command4</td>
        <td><pre>@ViewBag.command4Result</pre></td>
    </tr>
    <tr>
        <td>@ViewBag.command5</td>
        <td><pre>@ViewBag.command5Result</pre></td>
    </tr>
</table>
Run the app locally
In a Command Prompt window, build the app by using the following command:
dotnet buildRun the app by using this command:
dotnet runIn a web browser, go to
https://localhost:5001.On the webpage navigation bar, select Azure Cache for Redis Test to test cache access.
Clean up resources
If you want to continue to use the resources you created in this article, keep the resource group.
Otherwise, to avoid charges related to the resources, if you're finished using the resources, you can delete the Azure resource group that you created.
Warning
Deleting a resource group is irreversible. When you delete a resource group, all the resources in the resource group are permanently deleted. Make sure that you do not accidentally delete the wrong resource group or resources. If you created the resources inside an existing resource group that has resources you want to keep, you can delete each resource individually instead of deleting the resource group.
Delete a resource group
Sign in to the Azure portal, and then select Resource groups.
Select the resource group to delete.
If there are many resource groups, in Filter for any field, enter the name of the resource group you created to complete this article. In the list of search results, select the resource group.
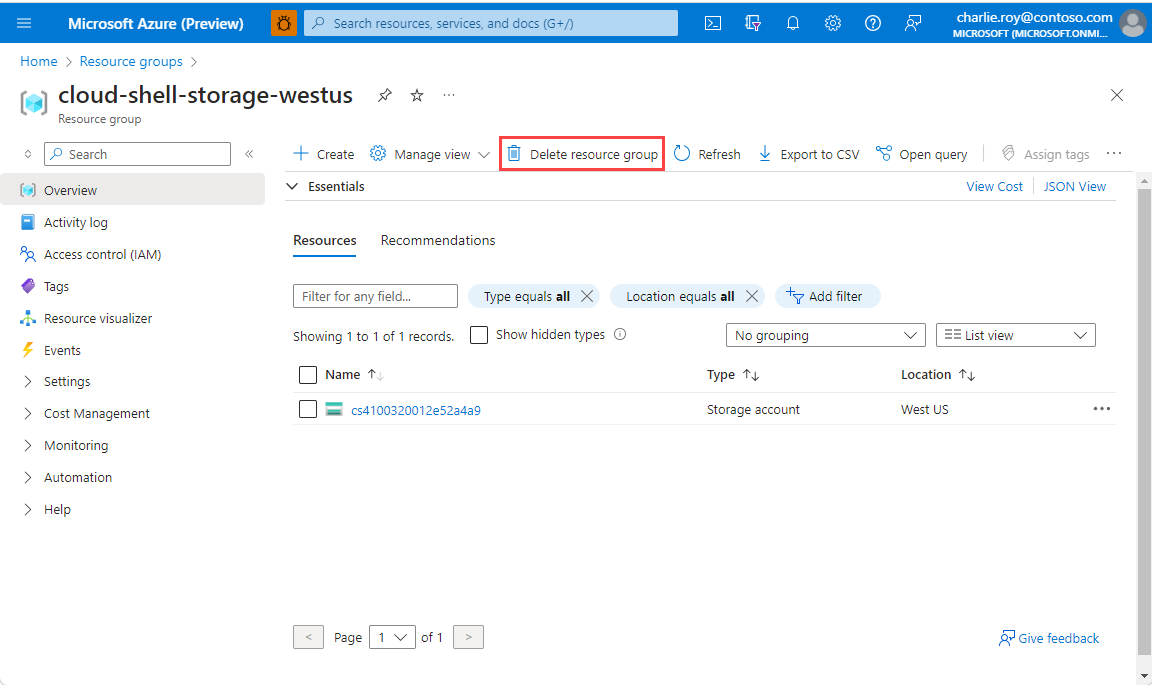
Select Delete resource group.
In the Delete a resource group pane, enter the name of your resource group to confirm, and then select Delete.
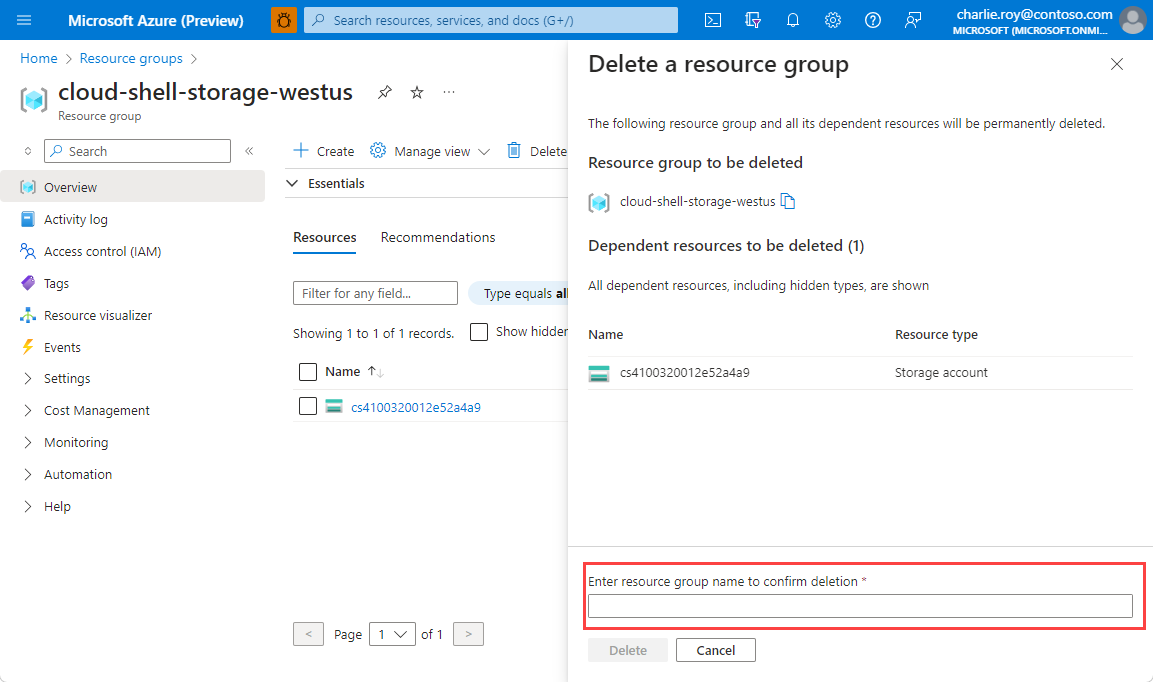
Within a few moments, the resource group and all of its resources are deleted.