Work with datasets using the QGIS plugin
QGIS is an open-source geographic information system (GIS) application that supports viewing, editing, and analysis of geospatial data.
The Azure Maps QGIS plugin is used to view and edit datasets in QGIS. It enables you to navigate floors using a custom floor-picker and perform CRUD operations for multiple features simultaneously. All QGIS functionalities, such as copying features, rotating, resizing, flipping, can be used to for advanced editing. The plugin also supports error handling for data editing. Logs created by the plugin are useful to understand the APIs and debug errors.
Prerequisites
- Understanding of Creator concepts.
- An Azure Maps Creator dataset. If you have never used Azure Maps Creator to create an indoor map, you might find the Use Creator to create indoor maps tutorial helpful.
- A basic working knowledge of QGIS
Get started
This section provides information on how to install QGIS and the Azure Maps QGIS plugin, then how to open and view a dataset.
Install QGIS
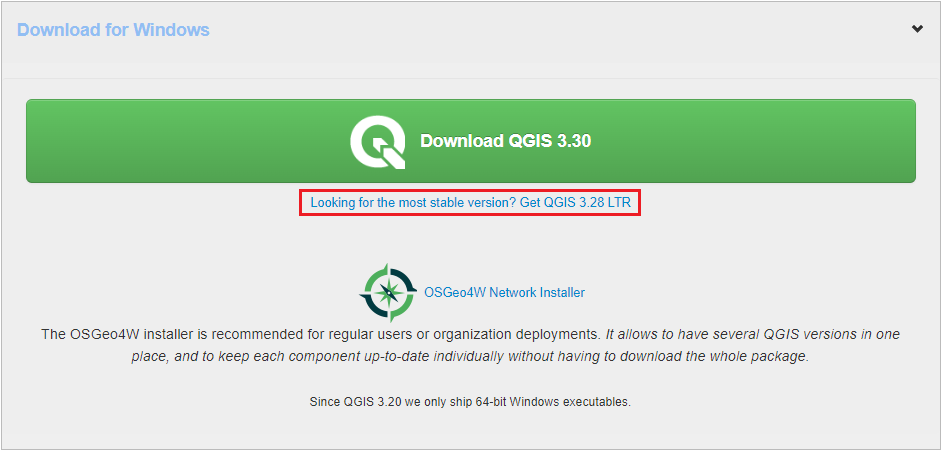
If you don't already have QGIS installed, see Download QGIS. You can use the latest version, however, it's recommended using the most stable version, which can be found on the same page, by selecting "Looking for the most stable version?".
Install the Azure Maps QGIS plugin
To install the Azure Maps QGIS plugin:
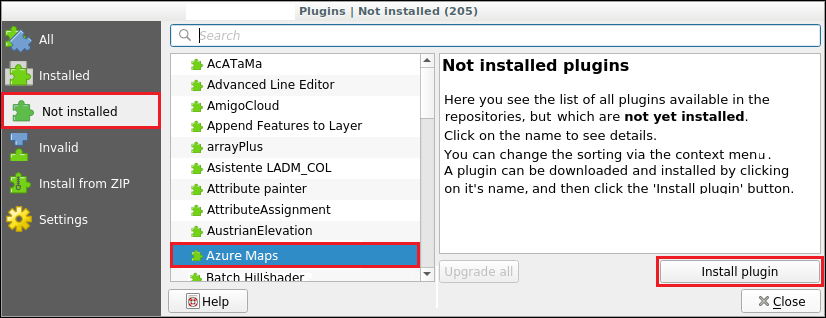
Select Manage and Install Plugins from the Plugins menu to open the Plugin Manager.
In the dialog that opens, select the Azure Maps plugin then the Install plugin:
For detailed instructions on installing a plugin in QGIS, see Installing New Plugins in the QGIS Documentation.
Once you have the plugin installed, the AzureMaps symbol appears on the plugins toolbar.

Working with datasets in the QGIS plugin
Your Azure Maps dataset contains the data describing your indoor map. A dataset consists of layers that define a building. Each layer contains entries called features. Each feature is a row in the dataset. A feature usually has a geometry associated with it. Each geometry consists of a set of properties that describe it.
A featureClass is a collection of similar features. A building has facility and level feature classes, containing features such as rooms and furniture. For example, a building has a facility featureClass, containing facility features. It also has a levels featureClass that defines the levels of the building, each level is a feature with its own set of properties that describe that level. Another featureClass could be furniture, with each individual piece of furniture described as a feature of the featureClass with its own unique set of properties.
Open dataset
The following steps describe how to open your dataset in QGIS using the Azure Maps QGIS plugin.
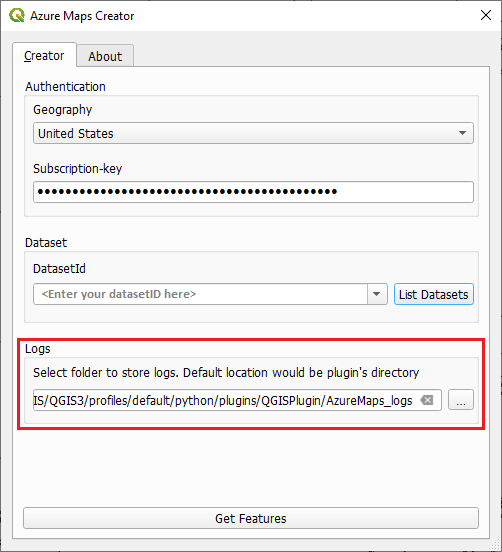
Select the Azure Maps symbol on the QGIS toolbar to open the Azure Maps plugin dialog box.
Select your location, the United States or Europe, from the Geography drop down list.
Enter your subscription key.
To get a list of all the dataset IDs associated with your Azure Maps account, select the List Datasets button.
Select the desired
datasetIdfrom the DatasetId drop down list.(Optional) Change the location where your logs are saved if you don't want them saved to the default location.
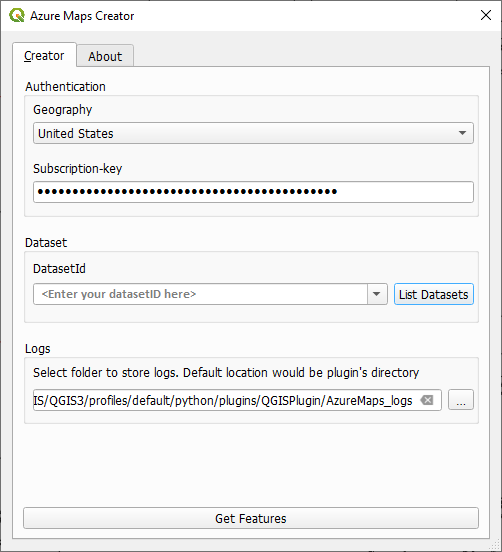
Select the Get Features button to load your indoor map data into QGIS, once loaded your map appears in the Map canvas.

View dataset
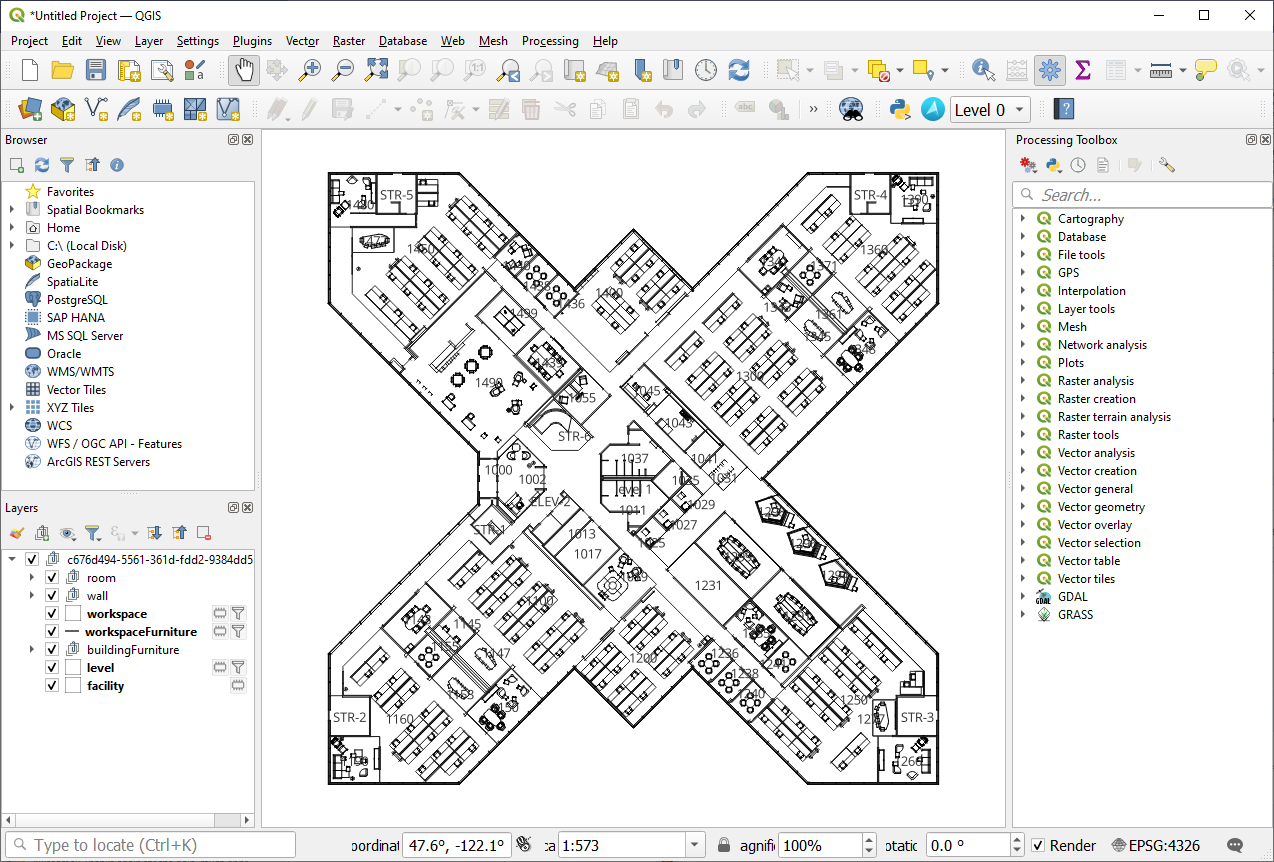
Once the dataset has been loaded, you can view the different feature classes it contains in the Layers panel. The ordering of the layers determines how features are shown on the map; layers at a higher order in the list are displayed on top.
Some layers have a drop-down containing multiple layers within it, followed by the geometry of the layer, as the following image shows:
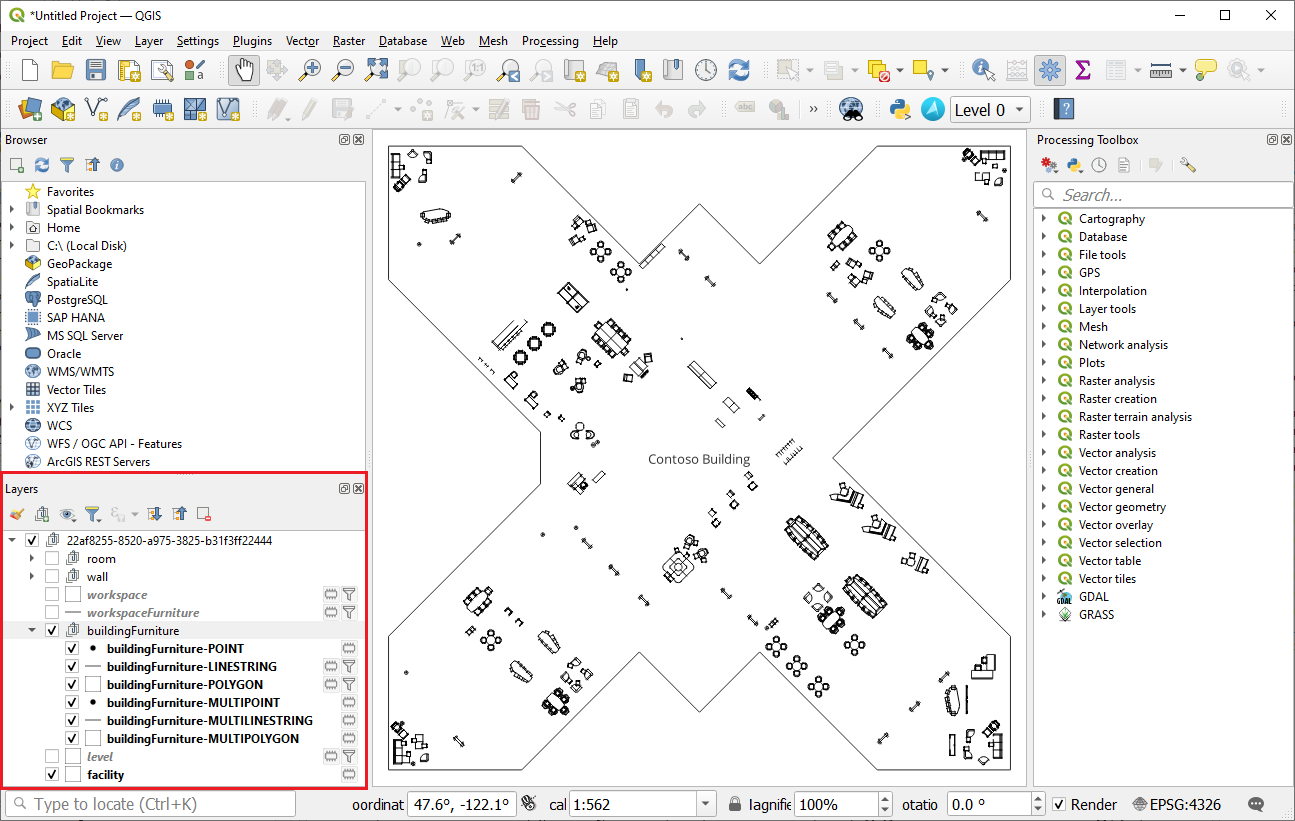
This happens in the case when the layer definition shows that the layer can hold features of different geometries. since QGIS only supports one geometry per layer, the plugin splits these layers by their possible geometries.
Note
The geometry geometryCollection is not supported by QGIS.
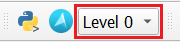
You can navigate to different floor by using the Level drop-down list in the plugins toolbar, located next to the Azure Maps plugin symbol as sown in the following image:
Edit dataset
You can add, edit and delete the features of your dataset using QGIS.
Tip
You will be using the digitizing toolbar when editing the features of your dataset in QGIS, for more information, see Digitizing an existing layer.
Add features
Dataset additions involve adding features to a layer.
In the Layers panel, select the layer that you want to add the new feature to.
Toggle edit mode to
onin the digitizing toolbar. To view the digitizing toolbar, navigate to View > Toolbar > Digitizing Toolbar.
Select any add feature options from the digitizing toolbar and make the desired changes.
Select the save button in the digitizing toolbar to save changes

Edit features
Dataset edits involve editing feature geometries and properties.
Edit a feature geometry
In the Layers panel, select the layer containing the feature you want to edit.
Toggle edit mode to
onin the digitizing toolbar.Select the Vertex tool from the digitizing toolbar.

Once you're done with your changes, select the save button in the digitizing toolbar.
Edit a feature property
To edit a feature property using the attribute table
Open the attribute table for the layer containing the feature you want to edit.
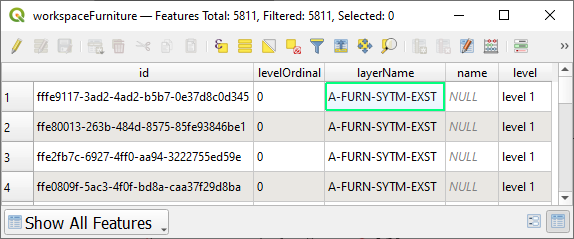
Note
The attribute table shows each feature, with their properties, in a tabular form. It can be accessed by right-clicking on any layer in the Layers panel then selecting Open Attribute Table.
Toggle edit mode on.
Edit the desired property.
Select the save button to save changes.
Delete feature
Select the feature you want to delete.
Select the delete feature option from the digitizing toolbar.

Select the save button in the digitizing toolbar to save changes.
Advanced editing
To learn more about advance editing features offered in QGIS, such as moving, scaling, copying and rotating features, see Advanced digitizing in the QGIS Documentation.
Logs
Azure Maps QGIS plugin logs information related to the requests made to Azure Maps. You can set the location of log file in the Azure Maps plugin Dialog box. By default, log files are stored in the folder containing your downloaded plugin.
You can view your log files in two ways:
QGIS. You can view the Logs in QGIS by activating the Logs Message Panel:
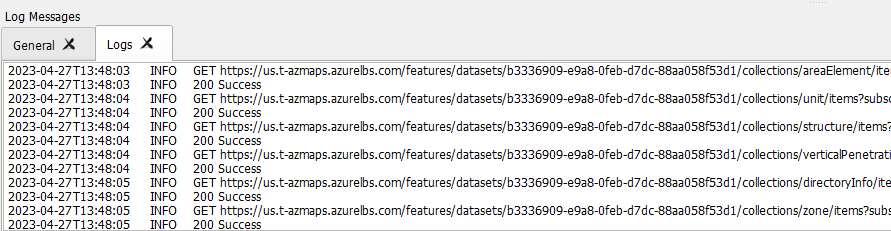
Logs contain:
- Information about server requests and response.
- Errors received from the server or QGIS.
- Statistics about the number of features loaded
Error logs for edits
Error logs for edits are also stored in a separate folder called "AzureMaps_ErrorLogs". They contain more detailed information about the request made, including headers and body, and the response received from the server.
Python Logs
Any errors received from the QGIS framework are displayed in the Python Logs tab.
Additional information
If you have question related to Azure Maps, see MICROSOFT Q&A. Be sure and tag your questions with "Azure Maps".
Tilbakemeldinger
Kommer snart: Gjennom 2024 faser vi ut GitHub Issues som tilbakemeldingsmekanisme for innhold, og erstatter det med et nytt system for tilbakemeldinger. Hvis du vil ha mer informasjon, kan du se: https://aka.ms/ContentUserFeedback.
Send inn og vis tilbakemelding for