Restore SAP HANA database instance snapshots on Azure VMs
This article describes how to restore a backed-up SAP HANA database instance to another target virtual machine (VM) via snapshots.
Note
If you want to do an in-place restore (that is, overwrite the backed-up VM by detaching the existing disks and attaching new disks), detach the existing disks and see the following sections.
You can restore the HANA snapshot and storage snapshot as disks by selecting Attach and then mount them to the target machine. However, Azure Backup won't automatically restore the HANA system to the required point.
Here are the two workflows:
- Restore the entire HANA system (the system database and all tenant databases) to a single snapshot-based restore point.
- Restore the system database and all tenant databases to a different logpoint-in-time over a snapshot.
Note
SAP HANA recommends that you recover the entire system during the snapshot restore. This means that you would also restore the system database. If the system database is restored, the users/access information is also overwritten or updated, and subsequent attempts at recovery of tenant databases might fail after the system database recovery. The two options to resolve this issue are:
- Both the backed-up VM and the target VM have the same backup key (including username and password). This means that the HANA backup service can connect with the same credentials and continue to recover tenant databases.
- If the backed-up VM and the target VM have different keys, the preregistration script must be run after the system database recovery. This action updates the credentials on the target VM, and then the tenant databases can be recovered.
Prerequisites
Permissions required for the snapshot restore
During the restore, Azure Backup uses the target VM’s managed identity to read disk snapshots from a user-specified resource group, create disks in a target resource group, and attach them to the target VM.
The resource, permissions, and scope are listed in the following table:
| Entity | Built-in role | Scope of permission | Description |
|---|---|---|---|
| Target VM | Virtual Machine Contributor | The backup admin who configures and runs the HANA snapshot restore and the target VM’s managed service identity. | Restores from disk snapshots to create new managed disks and attach or mount to the target VM or operating system. |
| Source snapshot resource group | Disk Snapshot Contributor | The target. | Restores from disk snapshots. |
| The target disk resource group (where all existing disks of target VM are present, for revert). The target disk resource group (where all new disks will be created during restore). |
Disk Restore Operator | The target VM’s managed service identity. | Restores from disk snapshots to create new managed disks and attach or mount to the target VM or operating system. |
After the restore is completed, you can revoke these permissions.
Note
- The credentials that are used should have permissions to grant roles to other resources. The roles should be Owner or User Access Administrator, as mentioned in Steps to assign an Azure role.
- You can use the Azure portal to assign all the preceding permissions during the restore.
Learn about the SAP HANA instance snapshot restore architecture.
Establish network connectivity
Learn about the network configurations required for HANA instance snapshot.
Restore the entire system to a snapshot restore point
In the following sections, you'll learn how to restore the system to the snapshot restore point.
Select and mount the snapshot
To select and mount the snapshot, do the following:
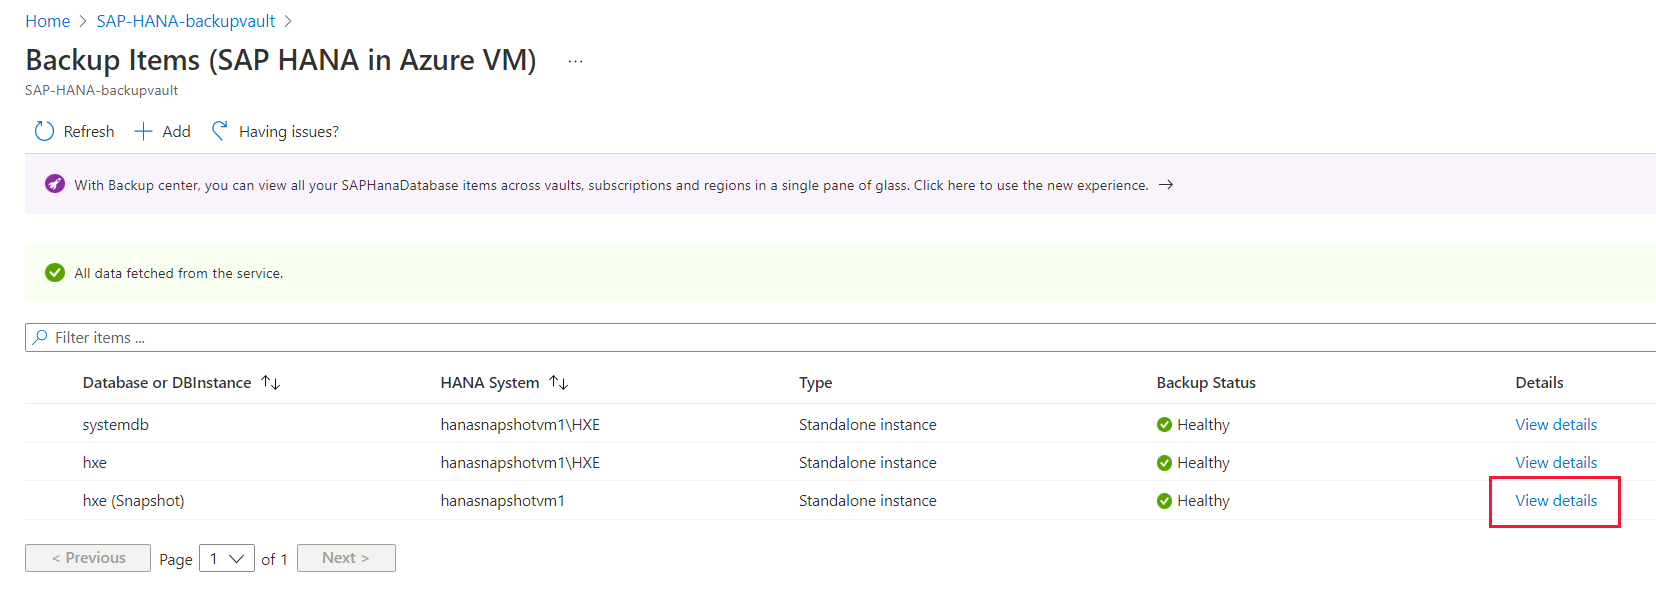
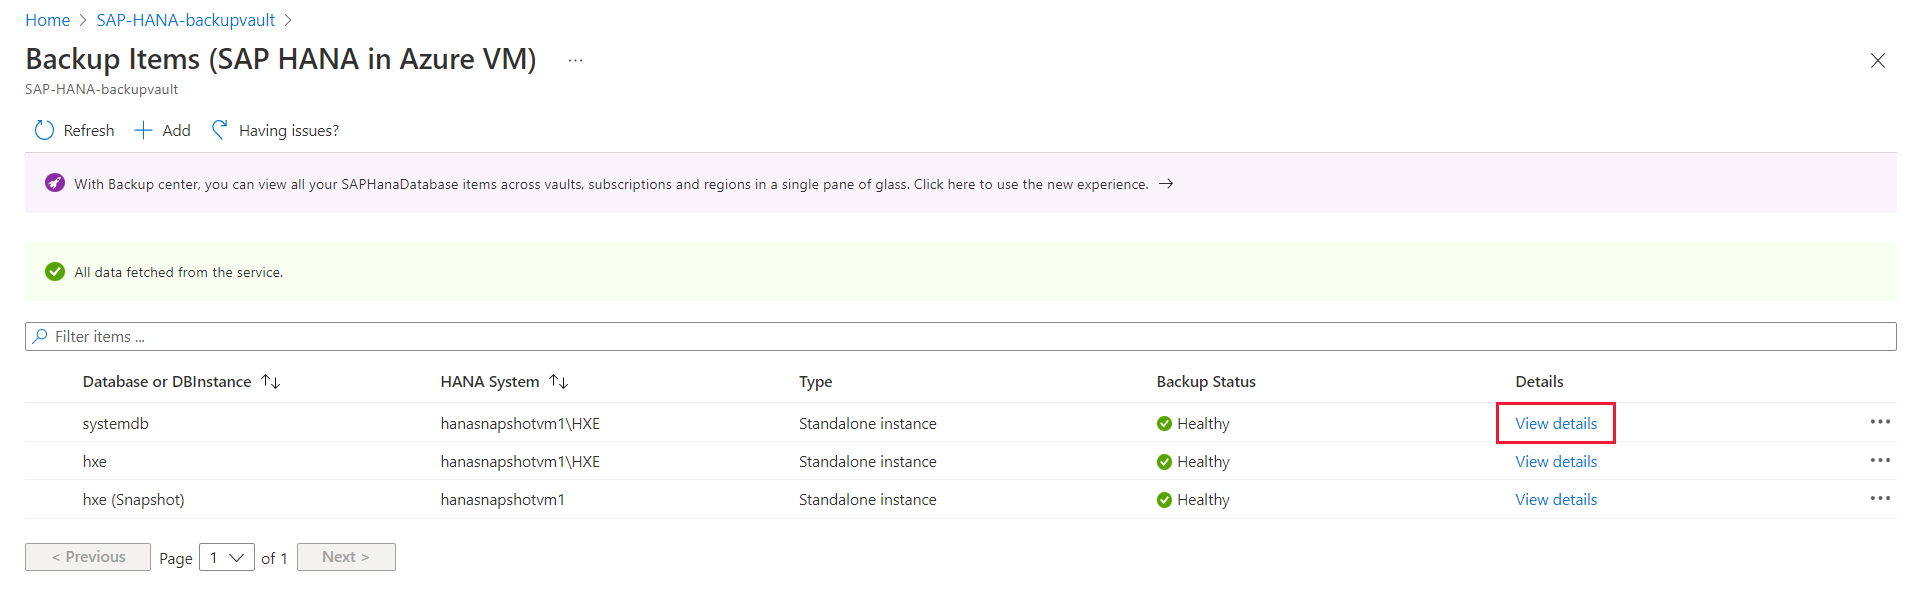
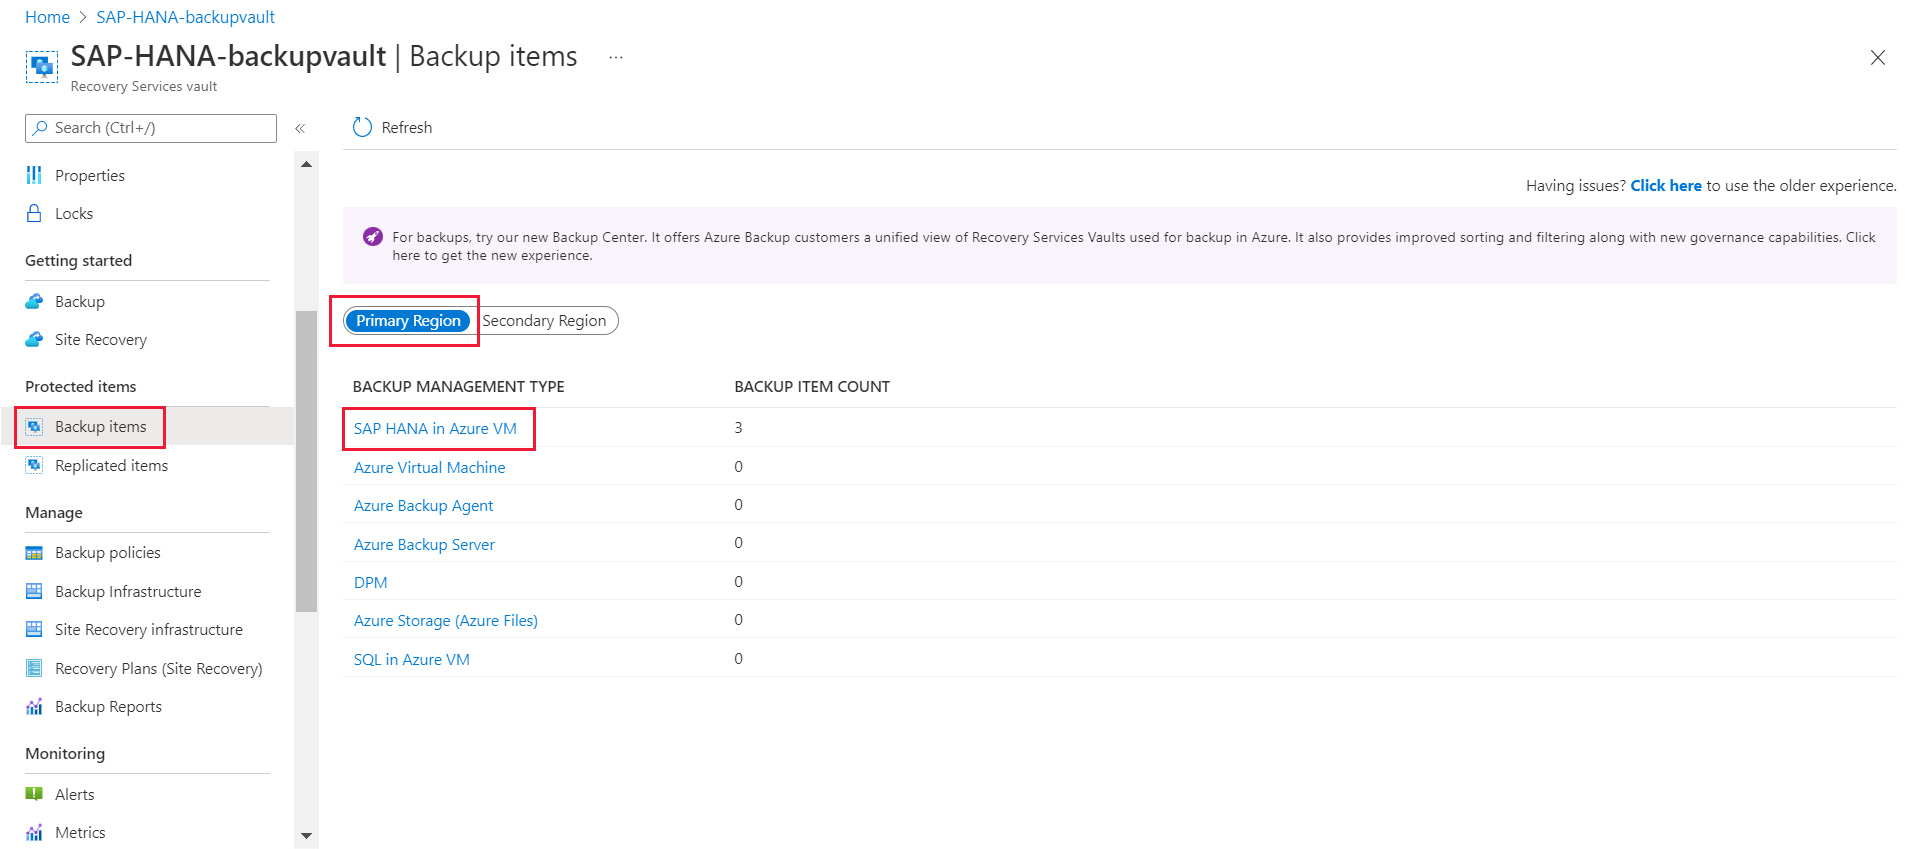
In the Azure portal, go to the Recovery Services vault.
On the left pane, select Backup items.
Select Primary Region, and then select SAP HANA in Azure VM.

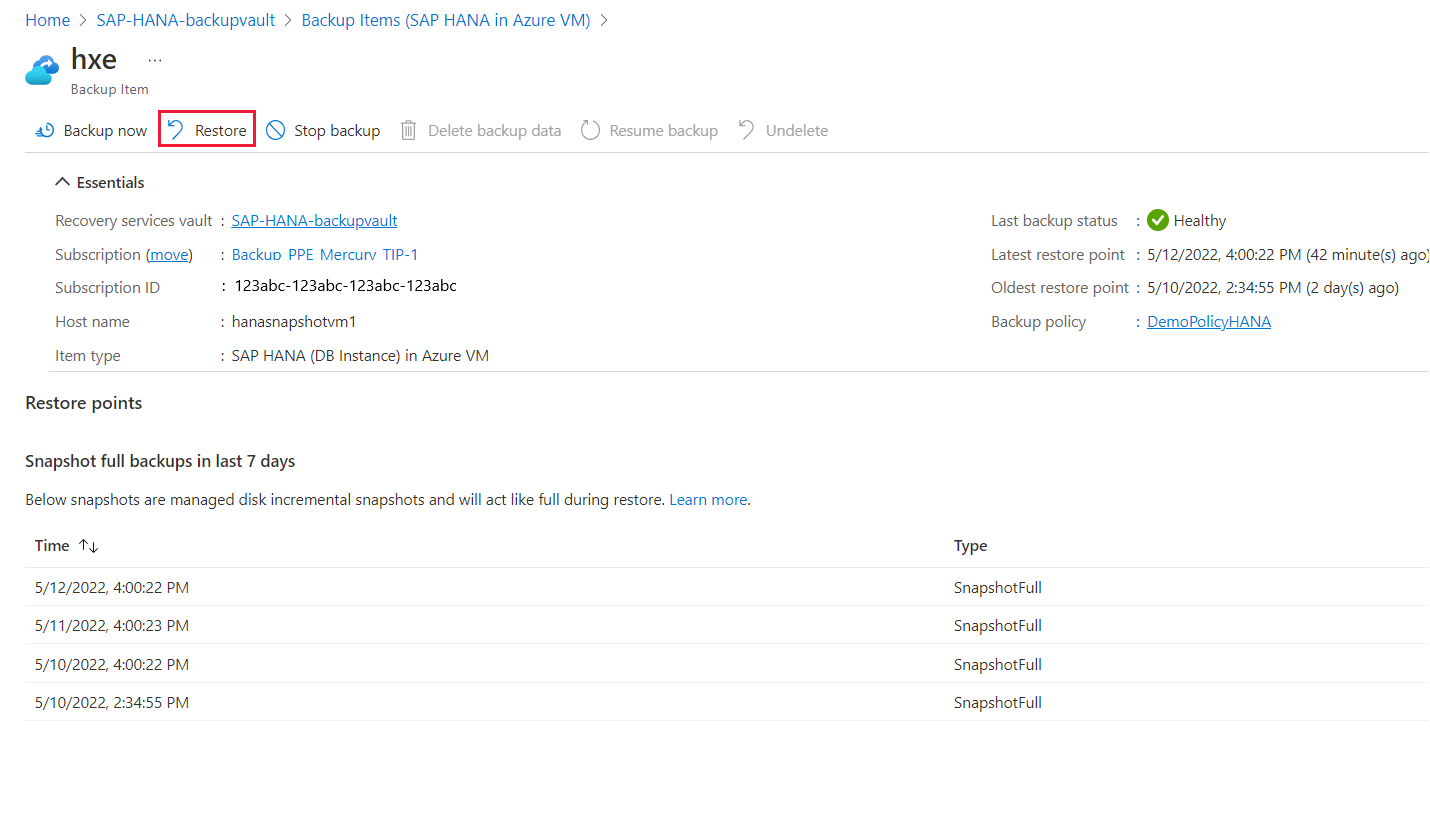
On the Backup Items page, select View details corresponding to the SAP HANA snapshot instance.
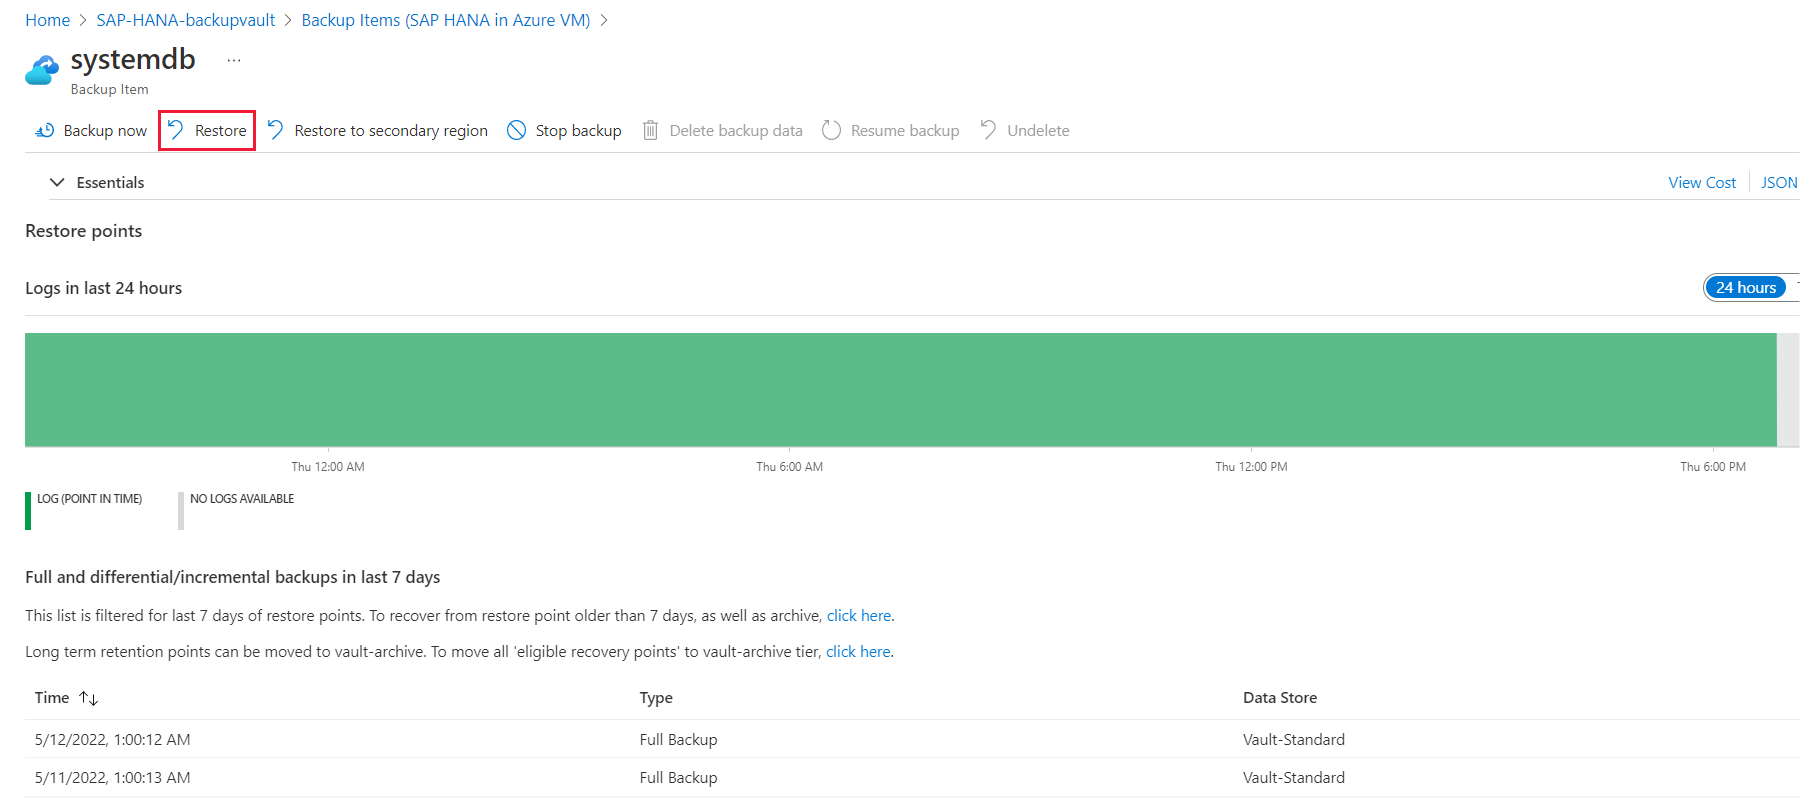
Select Restore.
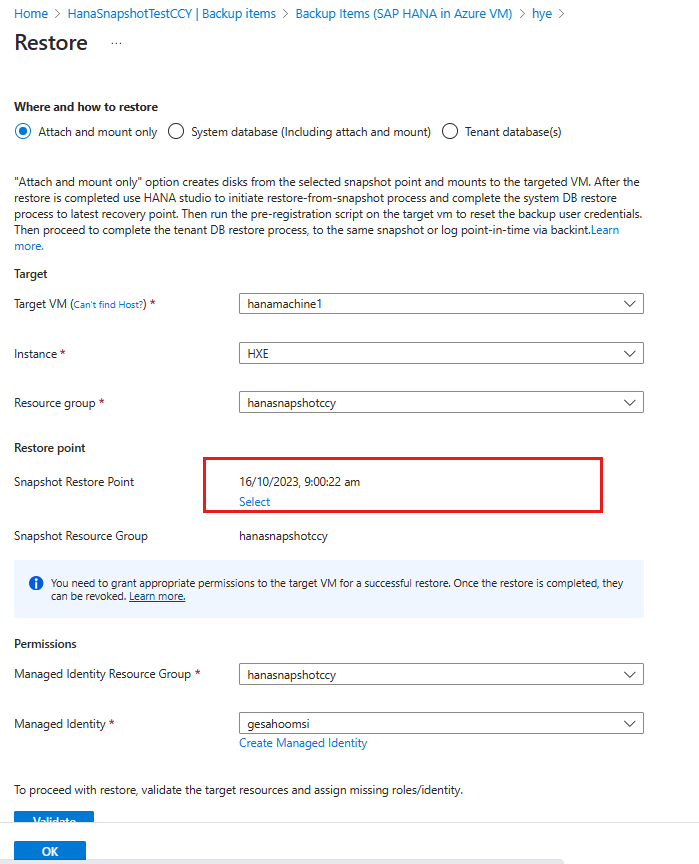
On the Restore pane, select the target VM to which the disks should be attached, the required HANA instance, and the resource group.
On the Restore Point pane, choose Select.
Note
Attach and mount only option creates disks from the selected snapshot point and mounts to the targeted VM. After the restore is complete, use HANA studio to initiate the restore-from-snapshot process and complete the system database restore to the latest recovery point. Then run the pre-registration script on the target VM to reset the backup user credentials. Then proceed to complete the tenant DB restore process, to the same snapshot or logpoint-in-time via backing
On the Select restore point pane, select a recovery point, and then select OK.
Select the corresponding resource group and the managed identity to which all permissions are assigned for restore.
Select Validate to check to ensure that all the permissions are assigned to the managed identity for the relevant scopes.
If the permissions aren't assigned, select Assign missing roles/identity.
After the roles are assigned, the Azure portal automatically re-validates the permission updates.
Select OK to create disks from snapshots, attach them to the target VM, and mount them.

Restore the system database
To restore the system database using the Azure portal, follow these steps:
Go to the Restore pane, and then select System Database (Including attach and mount).

Note
This option creates disks from the selected snapshot restore point and attaches these disks to the specified target VM. It also restores the system database on the target VM.
On VM, select the target VM from the dropdown list.
Under Snapshot Restore Point, click Select and choose the restore point.
Select Validate.
After the validation is complete, select OK to restore.

To recover the system database from the data snapshot by using HANA Studio. For more information, see the SAP documentation.
Note
After you've restored the system database, you need to run the preregistration script on the target VM to update the user credentials.
Restore tenant databases
When the system database is restored, run the preregistration script on the target VM and restore the tenant databases.
To restore the tenant databases using the Azure portal, follow these steps:
Go to the Restore pane, and then select Tenant database(s).
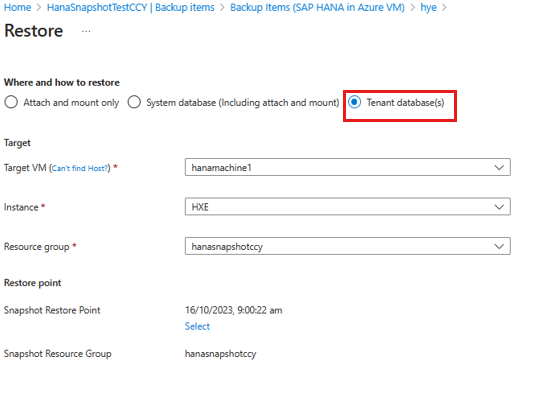
On VM, select the target VM from the dropdown list.
Under Snapshot Restore Point, click Select and choose the restore point.
Select Validate.
After the validation is complete, select OK to restore.
You can also use HANA Studio to recover all tenant databases from a data snapshot. For more information, see the HANA documentation.
Restore the database to a different logpoint-in-time over a snapshot
To restore the database to a different logpoint-in-time, do the following.
Select and mount the nearest snapshot
First, identify the snapshot that's nearest to the required logpoint-in-time. Then attach and mount that snapshot to the target VM.
Restore system database
To select and restore the required point in time for the system database, follow these steps:
In the Recovery Services vault, on the left pane, select Backup items.
Select Primary Region, and then select SAP HANA in Azure VM.
On the Backup Items pane, select the View details link for the system database instance.
On the systemdb items pane, select Restore.
On the Restore pane, select Restore logs over snapshot.
Select the required VM and resource group.
Below the Restore Point box, select the Select link.

On the Select restore point pane, select the restore point, and then select OK.
Note
The logs appear after the snapshot point that you previously restored.
Select OK.
Restore the tenant database
To restore the tenant database, do the following:
In the Azure portal, go to the Recovery Services vault.
On the left pane, select Backup items.
Select Primary Region, and then select SAP HANA in Azure VM.
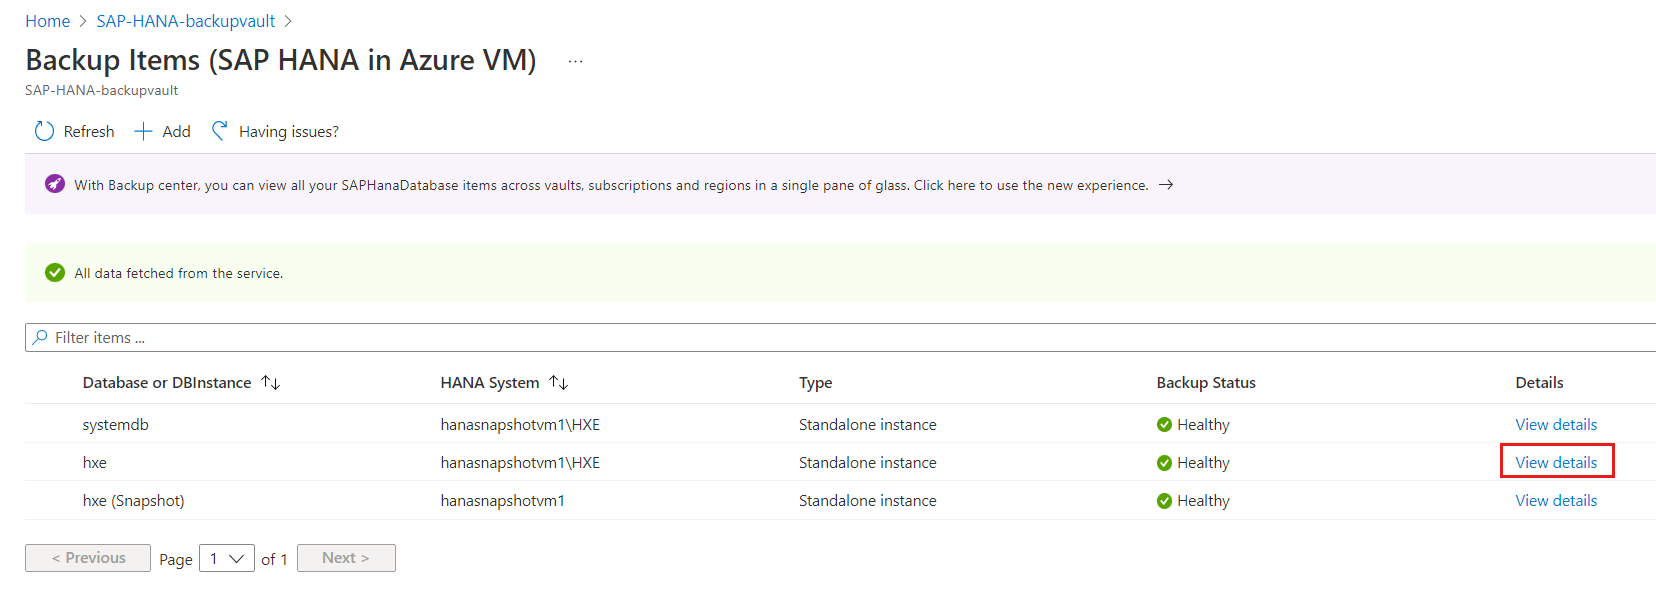
On the Backup Items pane, select the View details link for the SAP HANA tenant database.
Select Restore.

On the Restore pane, select the target VM to which the disks should be attached, the required HANA instance, and the resource group.
Ensure that the target VM and target disk resource group have relevant permissions by using the PowerShell or CLI script.
In Restore Point, choose Select.
On the Select restore point pane, select the restore point, and then select OK.
Note
The logs appear after the snapshot point that you previously restored.
Select OK.
Note
Ensure that you've restored all the tenant databases according to SAP HANA guidelines.
Cross region restore
The managed disk snapshots don't get transferred to the Recovery Services vault. So, cross-region restore is the only possible option via Backint stream backups.
Next steps
Tilbakemeldinger
Kommer snart: Gjennom 2024 faser vi ut GitHub Issues som tilbakemeldingsmekanisme for innhold, og erstatter det med et nytt system for tilbakemeldinger. Hvis du vil ha mer informasjon, kan du se: https://aka.ms/ContentUserFeedback.
Send inn og vis tilbakemelding for