Document Translation in Language Studio (Preview)
Important
Document Translation in Language Studio is currently in Public Preview. Features, approaches and processes may change, prior to General Availability (GA), based on user feedback.
Currently, virtual network connectivity isn't supported for the Document Translation feature in the Language Studio.
Document Translation in Azure AI Language Studio is a no-code user interface that lets you interactively translate documents from local or Azure Blob Storage.
Supported regions
The Document Translation feature in the Language Studio is currently available in the following regions;
| DisplayName | Name |
|---|---|
| East US | eastus |
| East US 2 | eastus2 |
| West US 2 | westus2 |
| West US 3 | westus3 |
| UK South | uksouth |
| South Central US | southcentralus |
| Australia East | australiaeast |
| Central India | centralindia |
| North Europe | northeurope |
| West Europe | westeurope |
| Switzerland North | switzerlandnorth |
Prerequisites
If you or an administrator have previously setup a Translator resource with a system-assigned managed identity, enabled a Storage Blob Data Contributor role assignment, and created an Azure Blob Storage account, you can skip this section and Get started right away.
Note
Document Translation is currently supported in the Translator (single-service) resource only, and is not included in the Azure AI services (multi-service) resource.
Document Translation is only supported in the S1 Standard Service Plan (Pay-as-you-go) or in the D3 Volume Discount Plan. See Azure AI services pricing—Translator.
Document Translation in Language Studio requires the following resources:
An active Azure account. If you don't have one, you can create a free account.
A single-service Translator resource (not a multi-service Azure AI services resource) with system-assigned managed identity enabled and a Storage Blob Data Contributor role assigned. For more information, see Managed identities for Document Translation. Also, make sure the region and pricing sections are completed as follows:
Resource Region. For this project, choose a geographic region such as East US. For Document Translation, system-assigned managed identity isn't supported for the Global region.
Pricing tier. Select Standard S1 or D3 to try the service. Document Translation isn't supported in the free tier.
An Azure Blob Storage account. An active Azure Blob Storage account is required to use Document Translation in the Language Studio.
Now that you've completed the prerequisites, let's start translating documents!
Get started
At least one source document is required. You can download our document translation sample document. The source language is English.
Navigate to Language Studio.
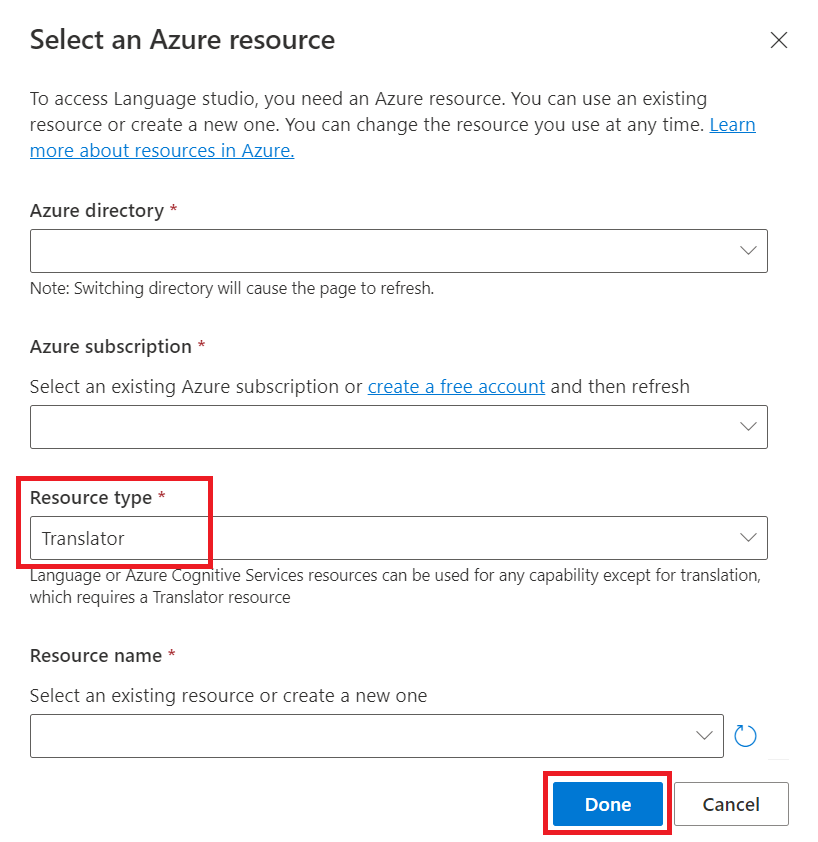
If you're using the Language Studio for the first time, a Select an Azure resource pop-up screen appears. Make the following selections:
- Azure directory.
- Azure subscription.
- Resource type. Choose Translator.
- Resource name. The resource you select must have managed identity enabled.
Tip
You can update your selected directory and resource by selecting the Translator settings icon located in the left navigation section.
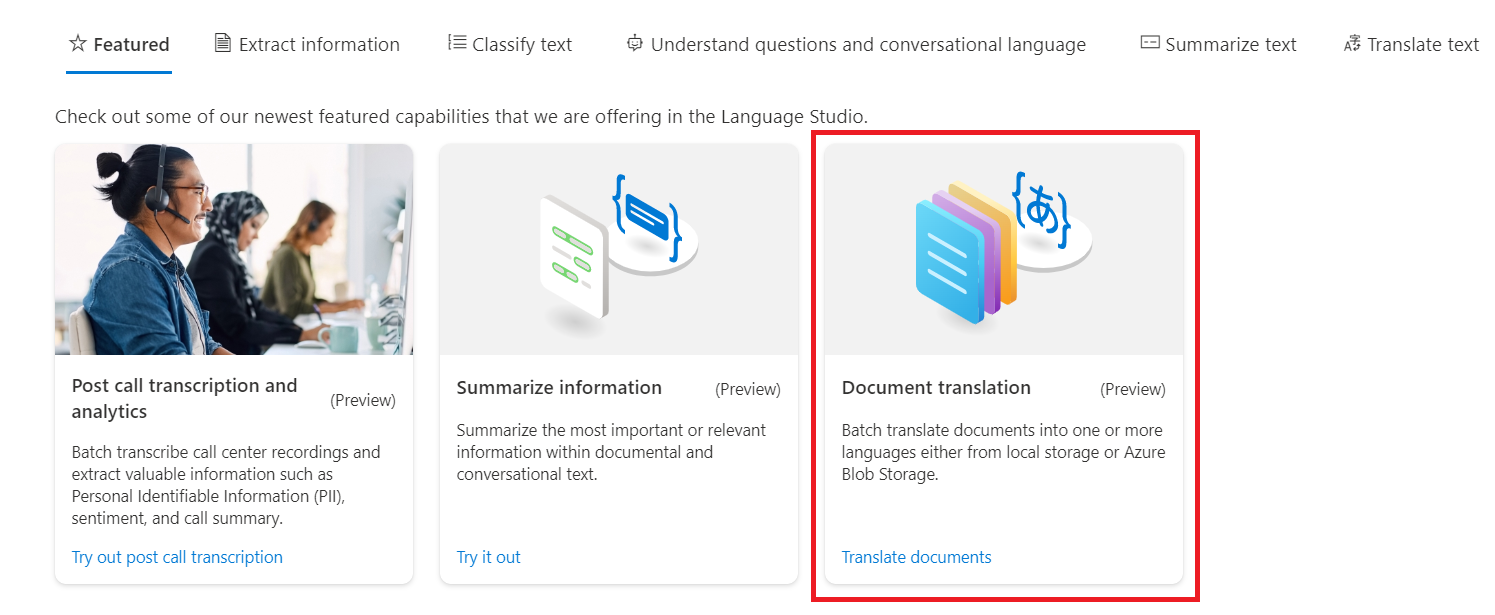
Navigate to Language Studio and select the Document Translation tile:
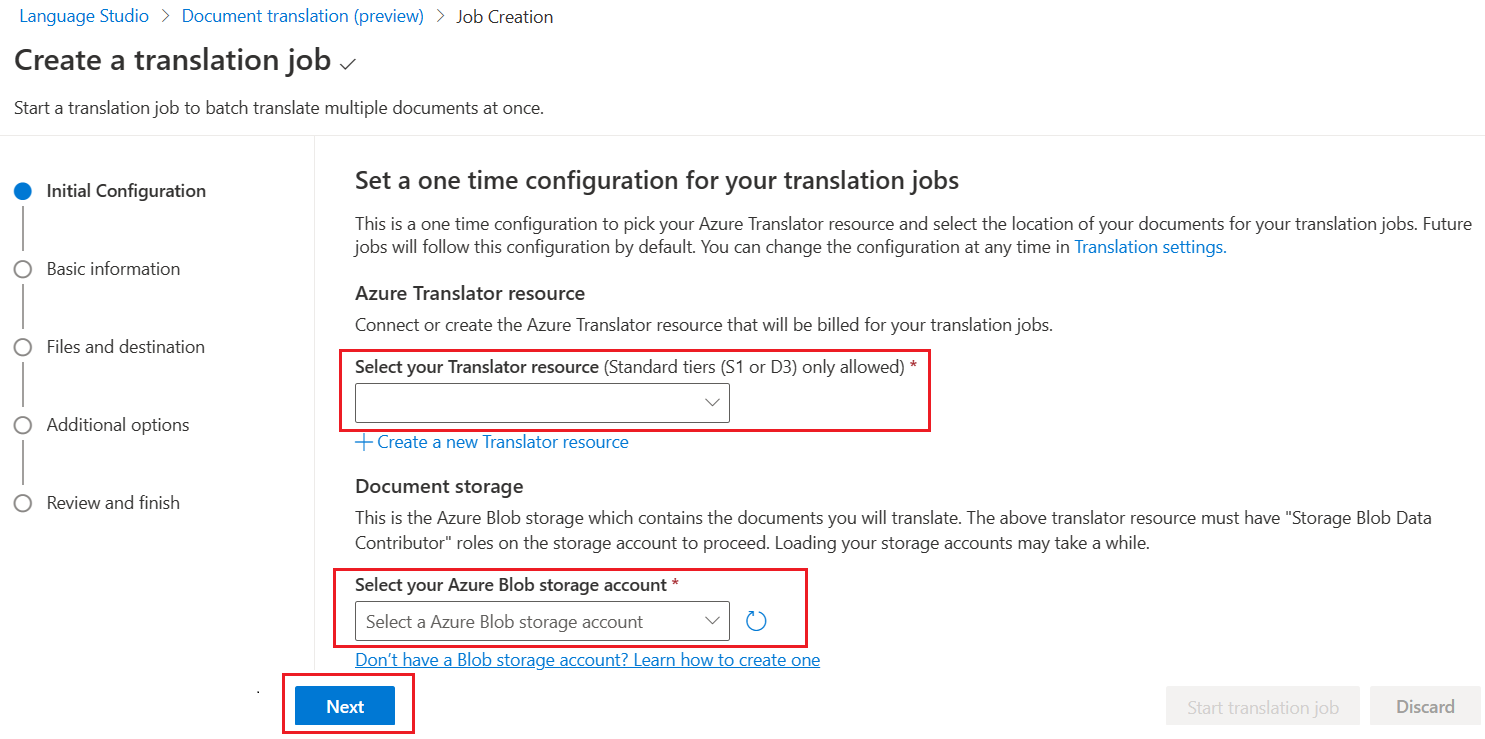
If you're using the Document Translation feature for the first time, start with the Initial Configuration to select your Azure AI Translator resource and Document storage account:
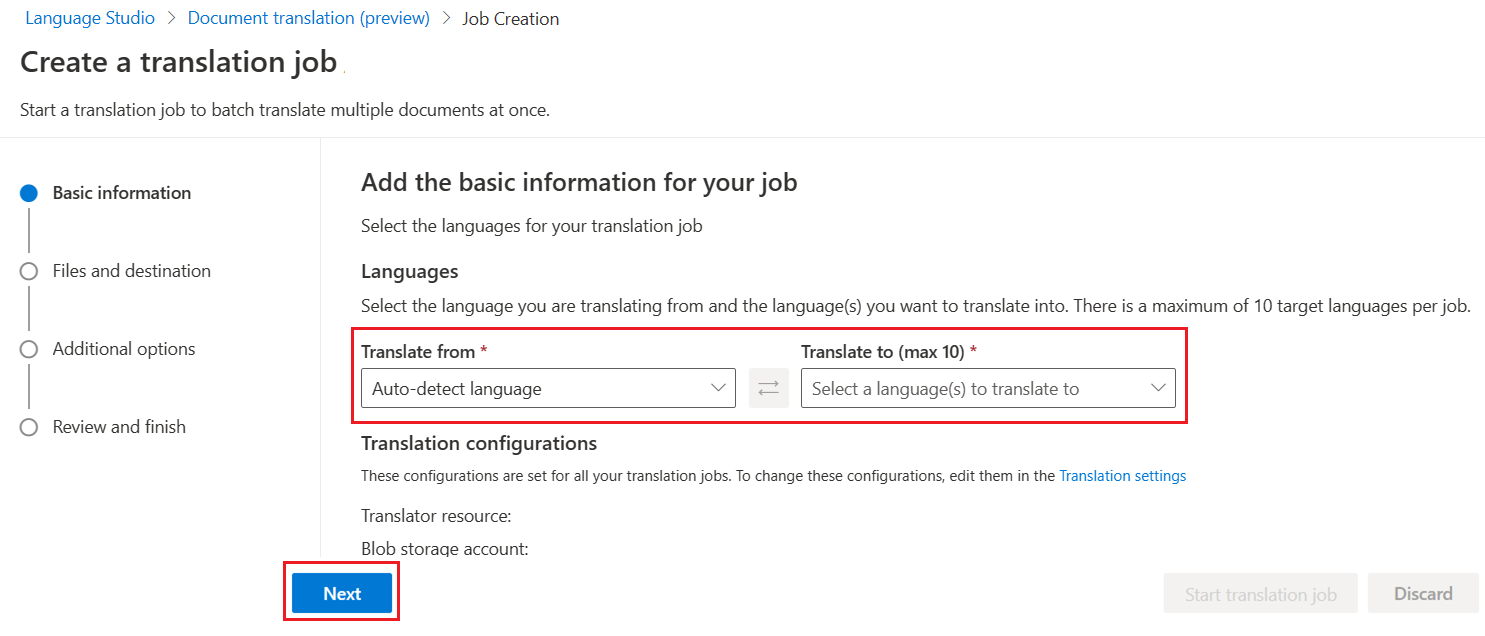
In the Job section, choose the language to Translate from (source) or keep the default Auto-detect language and select the language to Translate to (target). You can select a maximum of 10 target languages. Once you've selected your source and target language(s), select Next:
File location and destination
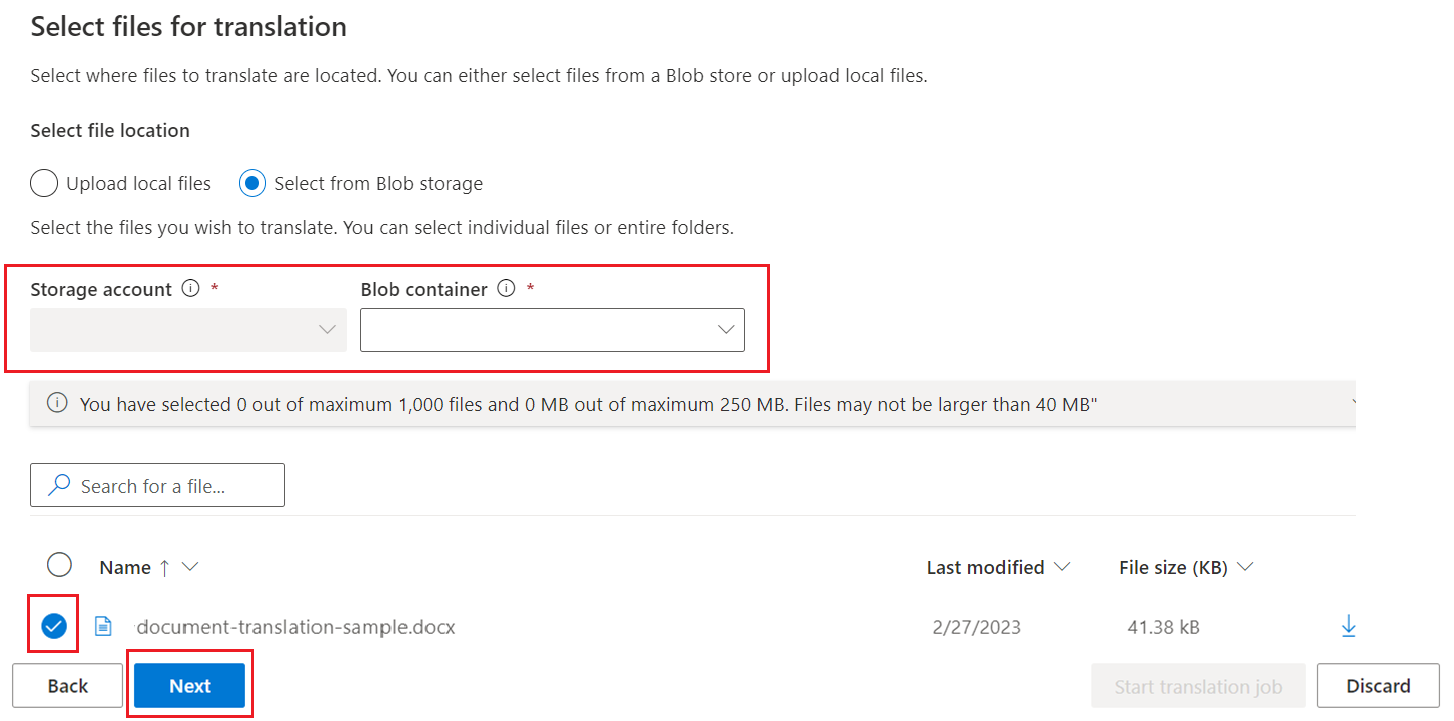
Your source and target files can be located in your local environment or your Azure Blob Storage container. Follow the steps to select where to retrieve your source and store your target files:
Choose a source file location
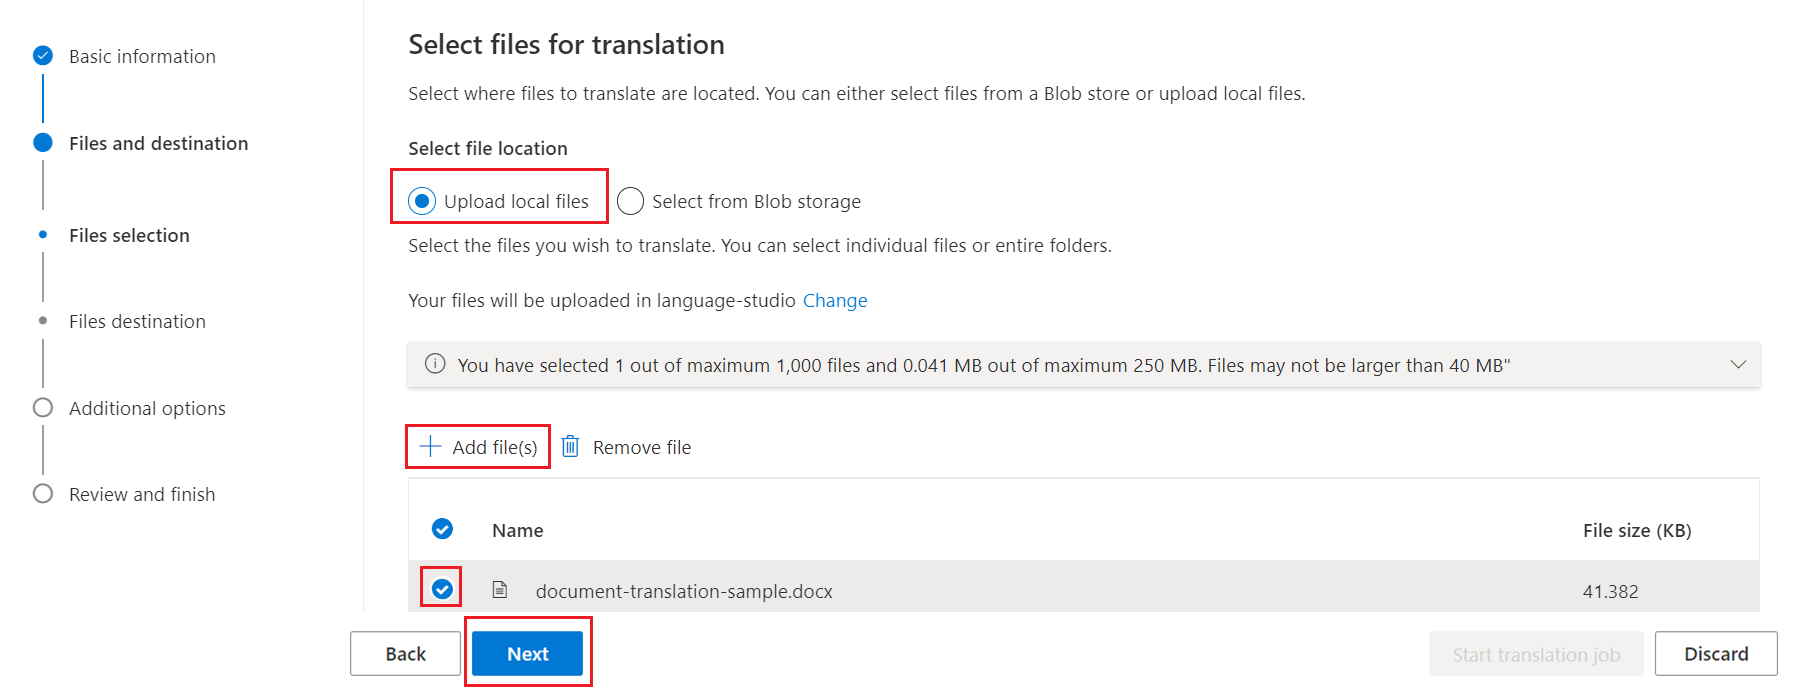
In the files and destination section, choose the files for translation by selecting the Upload local files button.
Next, select ➕ Add file(s), choose the file(s) for translation, then select Next:
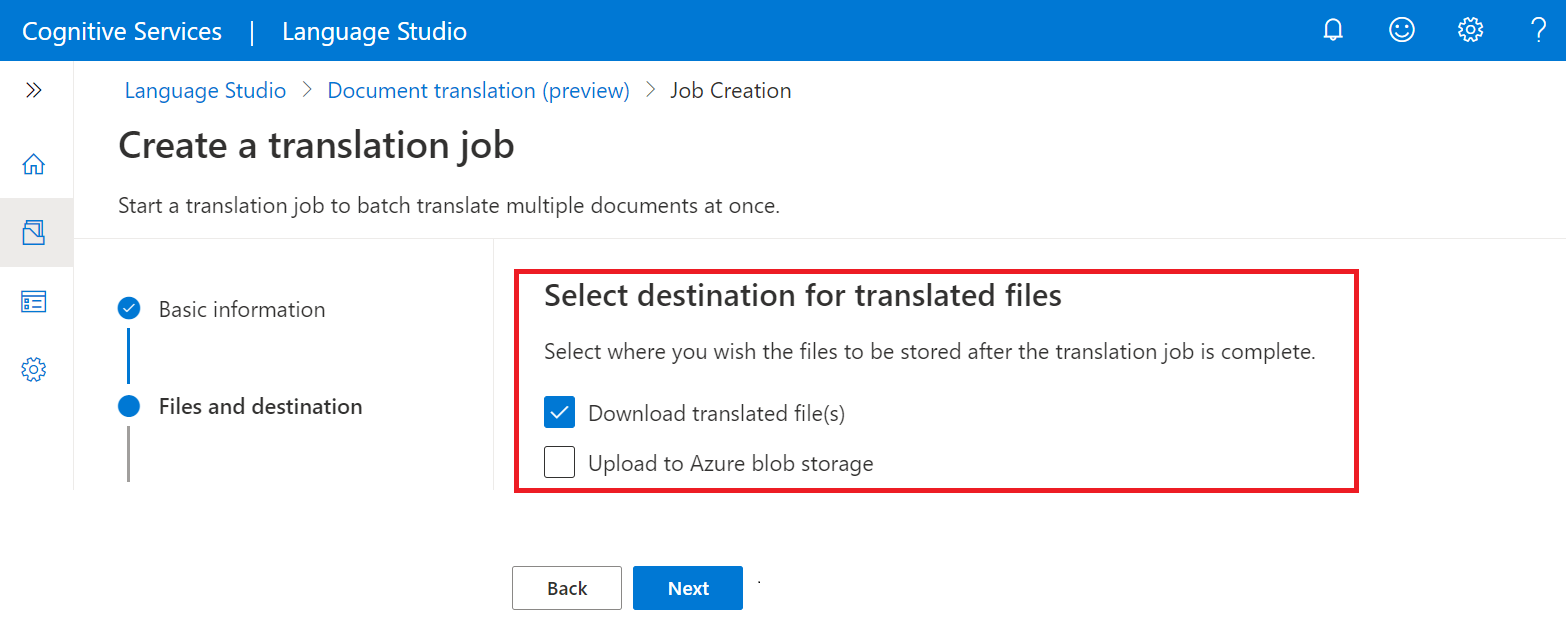
Choose a target file destination
While still in the files and destination section, select Download translated file(s). Once you have made your choice, select Next:
Optional selections and review
(Optional) You can add additional options for custom translation and/or a glossary file. If you don't require these options, just select Next.
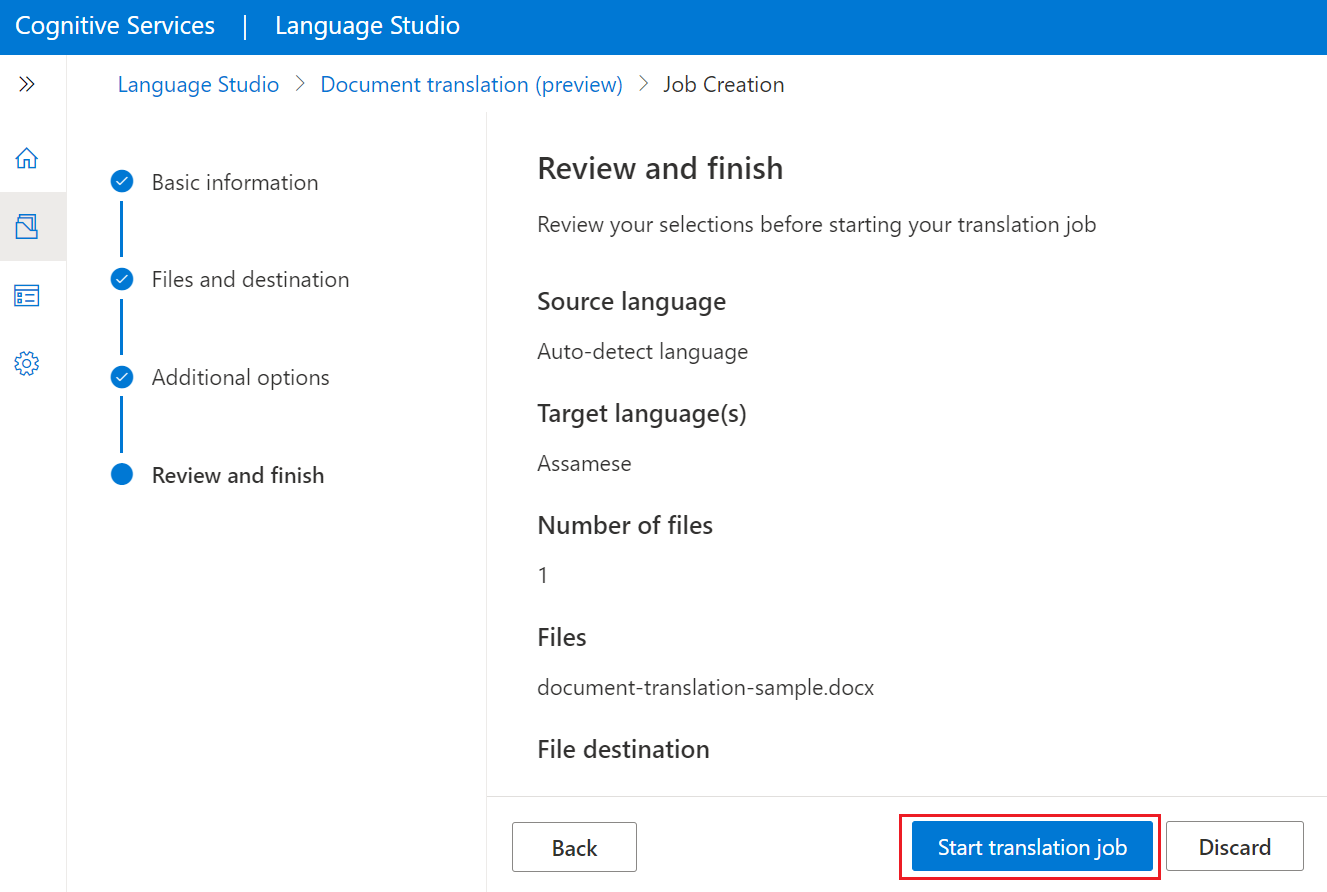
On the Review and finish page, check to make sure that your selections are correct. If not, you can go back. If everything looks good, select the Start translation job button.
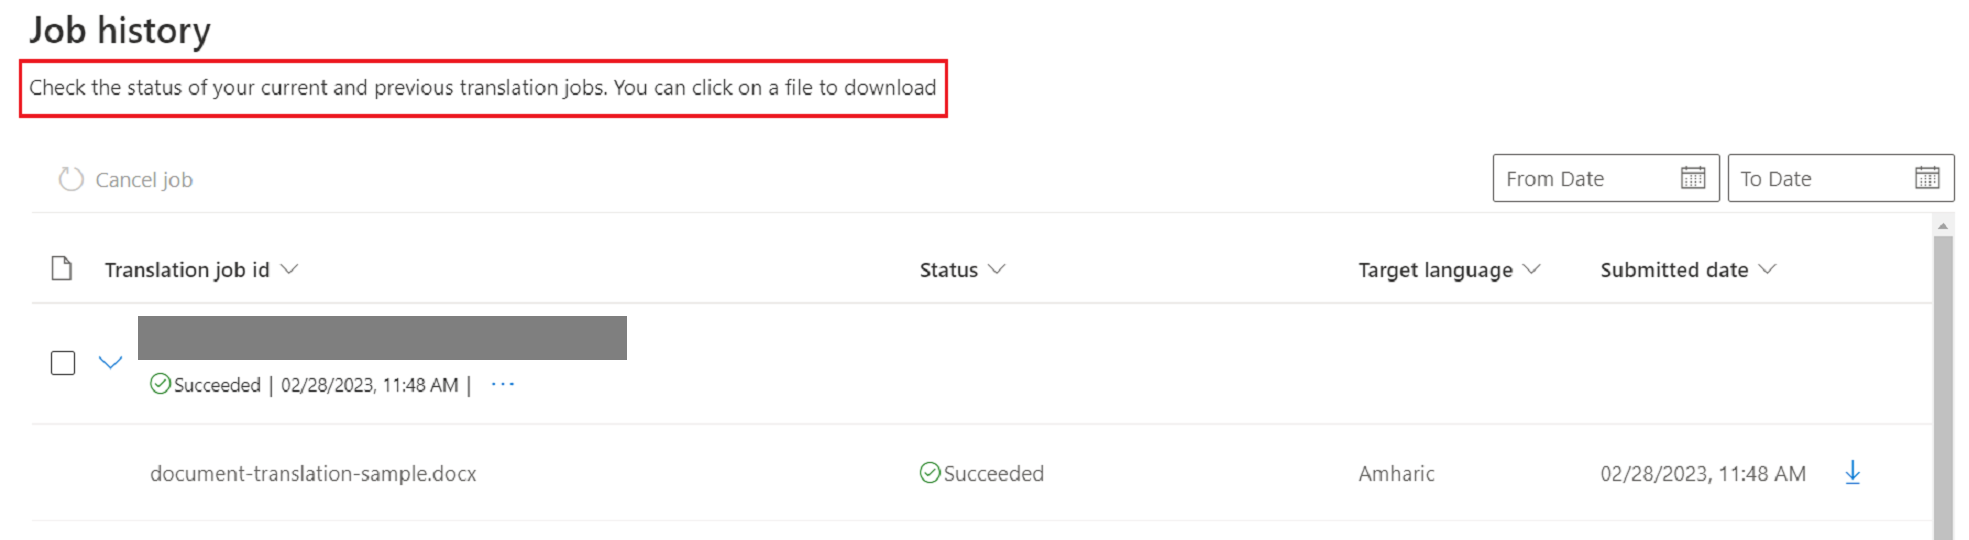
The Job history page contains the Translation job id and job status.
Note
The list of translation jobs on the job history page includes all the jobs that were submitted through the chosen translator resource. If your colleague used the same translator resource to submit a job, you will see the status of that job on the job history page.
That's it! You now know how to translate documents using Azure AI Language Studio.
Next steps
Tilbakemeldinger
Kommer snart: Gjennom 2024 faser vi ut GitHub Issues som tilbakemeldingsmekanisme for innhold, og erstatter det med et nytt system for tilbakemeldinger. Hvis du vil ha mer informasjon, kan du se: https://aka.ms/ContentUserFeedback.
Send inn og vis tilbakemelding for