Tutorial: Complete a proxy update by using Device Update for Azure IoT Hub
If you haven't already done so, review Using proxy updates with Device Update for Azure IoT Hub.
Set up a test device or virtual machine
This tutorial uses an Ubuntu Server 18.04 LTS virtual machine (VM) as an example.
Install the Device Update Agent and dependencies
Register packages.microsoft.com in an APT package repository:
sudo apt-get update

sudo apt install curl

curl https://packages.microsoft.com/config/ubuntu/18.04/multiarch/prod.list > ~/microsoft-prod.list

sudo cp ~/microsoft-prod.list /etc/apt/sources.list.d/

curl https://packages.microsoft.com/keys/microsoft.asc | gpg --dearmor > ~/microsoft.gpg

sudo cp ~/microsoft.gpg /etc/apt/trusted.gpg.d/

sudo apt-get update
Install the deviceupdate-agent on the IoT device. Download the latest Device Update Debian file from packages.microsoft.com:
sudo apt-get install deviceupdate-agentAlternatively, copy the downloaded Debian file to the test VM. If you're using PowerShell on your computer, run the following shell command:
scp <path to the .deb file> tester@<your vm's ip address>:~Then remote into your VM and run the following shell command in the home folder:
#go to home folder
cd ~
#install latest Device Update agent
sudo apt-get install ./<debian file name from the previous step>
Go to Azure IoT Hub and copy the primary connection string for your IoT device's Device Update module. Replace any default value for the
connectionDatafield with the primary connection string in the du-config.json file:sudo nano /etc/adu/du-config.jsonNote
You can copy the primary connection string for the device instead, but we recommend that you use the string for the Device Update module. For information about setting up the module, see Device Update Agent provisioning.
Ensure that /etc/adu/du-diagnostics-config.json contains the correct settings for log collection. For example:
{
  "logComponents":[
    {
      "componentName":"adu",
       "logPath":"/var/log/adu/"
    },
    {
      "componentName":"do",
      "logPath":"/var/log/deliveryoptimization-agent/"
    }
  ],
  "maxKilobytesToUploadPerLogPath":50
}
Restart the Device Update agent:
sudo systemctl restart deviceupdate-agent
Set up mock components
For testing and demonstration purposes, we'll create the following mock components on the device:
- Three motors
- Two cameras
- "hostfs"
- "rootfs"
Important
The preceding component configuration is based on the implementation of an example component enumerator extension called libcontoso-component-enumerator.so. It also requires this mock component inventory data file: /usr/local/contoso-devices/components-inventory.json.
Copy the demo folder to your home directory on the test VM. Then, run the following command to copy required files to the right locations:
`~/demo/tools/reset-demo-components.sh`The
reset-demo-components.shcommand takes the following steps on your behalf:It copies components-inventory.json and adds it to the /usr/local/contoso-devices folder.
It copies the Contoso component enumerator extension (libcontoso-component-enumerator.so) from the Assets folder and adds it to the /var/lib/adu/extensions/sources folder.
It registers the extension:
sudo /usr/bin/AducIotAgent -E /var/lib/adu/extensions/sources/libcontoso-component-enumerator.so
Import an example update
If you haven't already done so, create a Device Update account and instance, including configuring an IoT hub. Then start the following procedure.
From the latest Device Update release, under Assets, download the import manifests and images for proxy updates.
Sign in to the Azure portal and go to your IoT hub with Device Update. On the left pane, select Device Management > Updates.
Select the Updates tab.
Select + Import New Update.
Select + Select from storage container, and then choose your storage account and container.
Select Upload to add the files that you downloaded in step 1.
Upload the parent import manifest, child import manifest, and payload files to your container.
The following example shows sample files uploaded to update cameras connected to a smart vacuum cleaner device. It also includes a pre-installation script to turn off the cameras before the over-the-air update.
In the example, the parent import manifest is contoso.Virtual-Vacuum-virtual-camera.1.4.importmanifest.json. The child import manifest with details for updating the camera is Contoso.Virtual-Vacuum.3.3.importmanifest.json. Both manifest file names follow the required format and end with .importmanifest.json.
Choose Select.
The UI now shows the list of files that will be imported to Device Update. Select Import update.
The import process begins, and the screen changes to the Import History section. Select Refresh to view progress until the import process finishes. Depending on the size of the update, the import might finish in a few minutes or take longer.
When the Status column indicates that the import has succeeded, select the Available Updates tab. You should see your imported update in the list now.
For more information about the import process, see Import an update to Device Update.
View device groups
Device Update uses groups to organize devices. Device Update automatically sorts devices into groups based on their assigned tags and compatibility properties. Each device belongs to only one group, but groups can have multiple subgroups to sort different device classes.
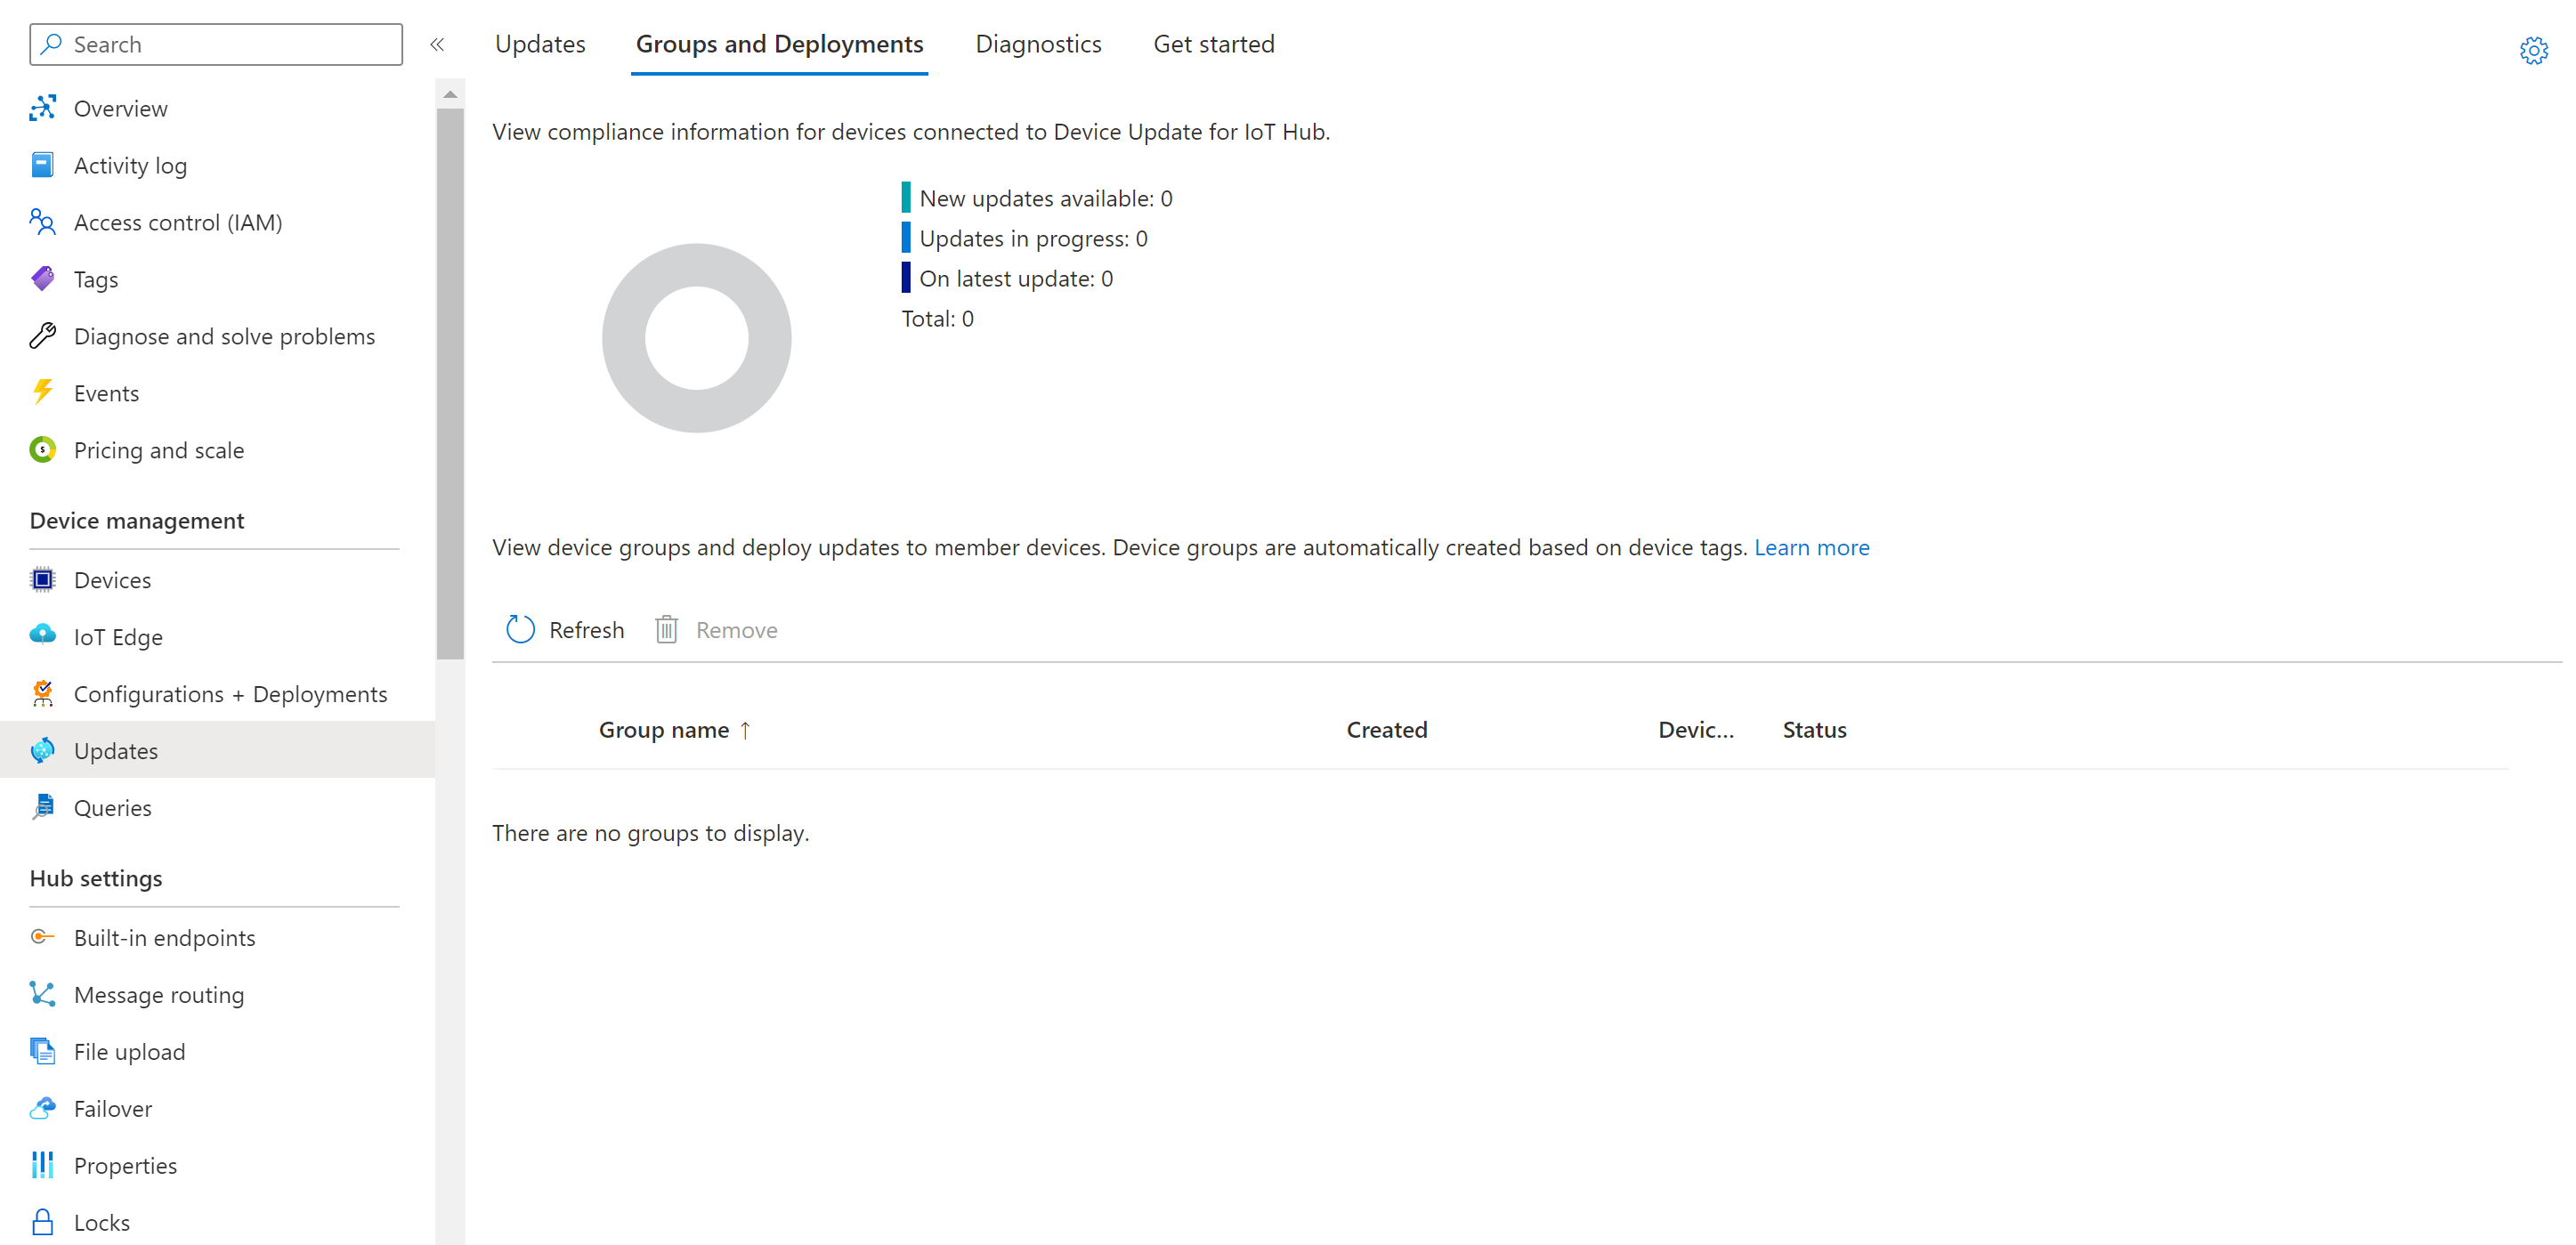
Go to the Groups and Deployments tab at the top of the page.
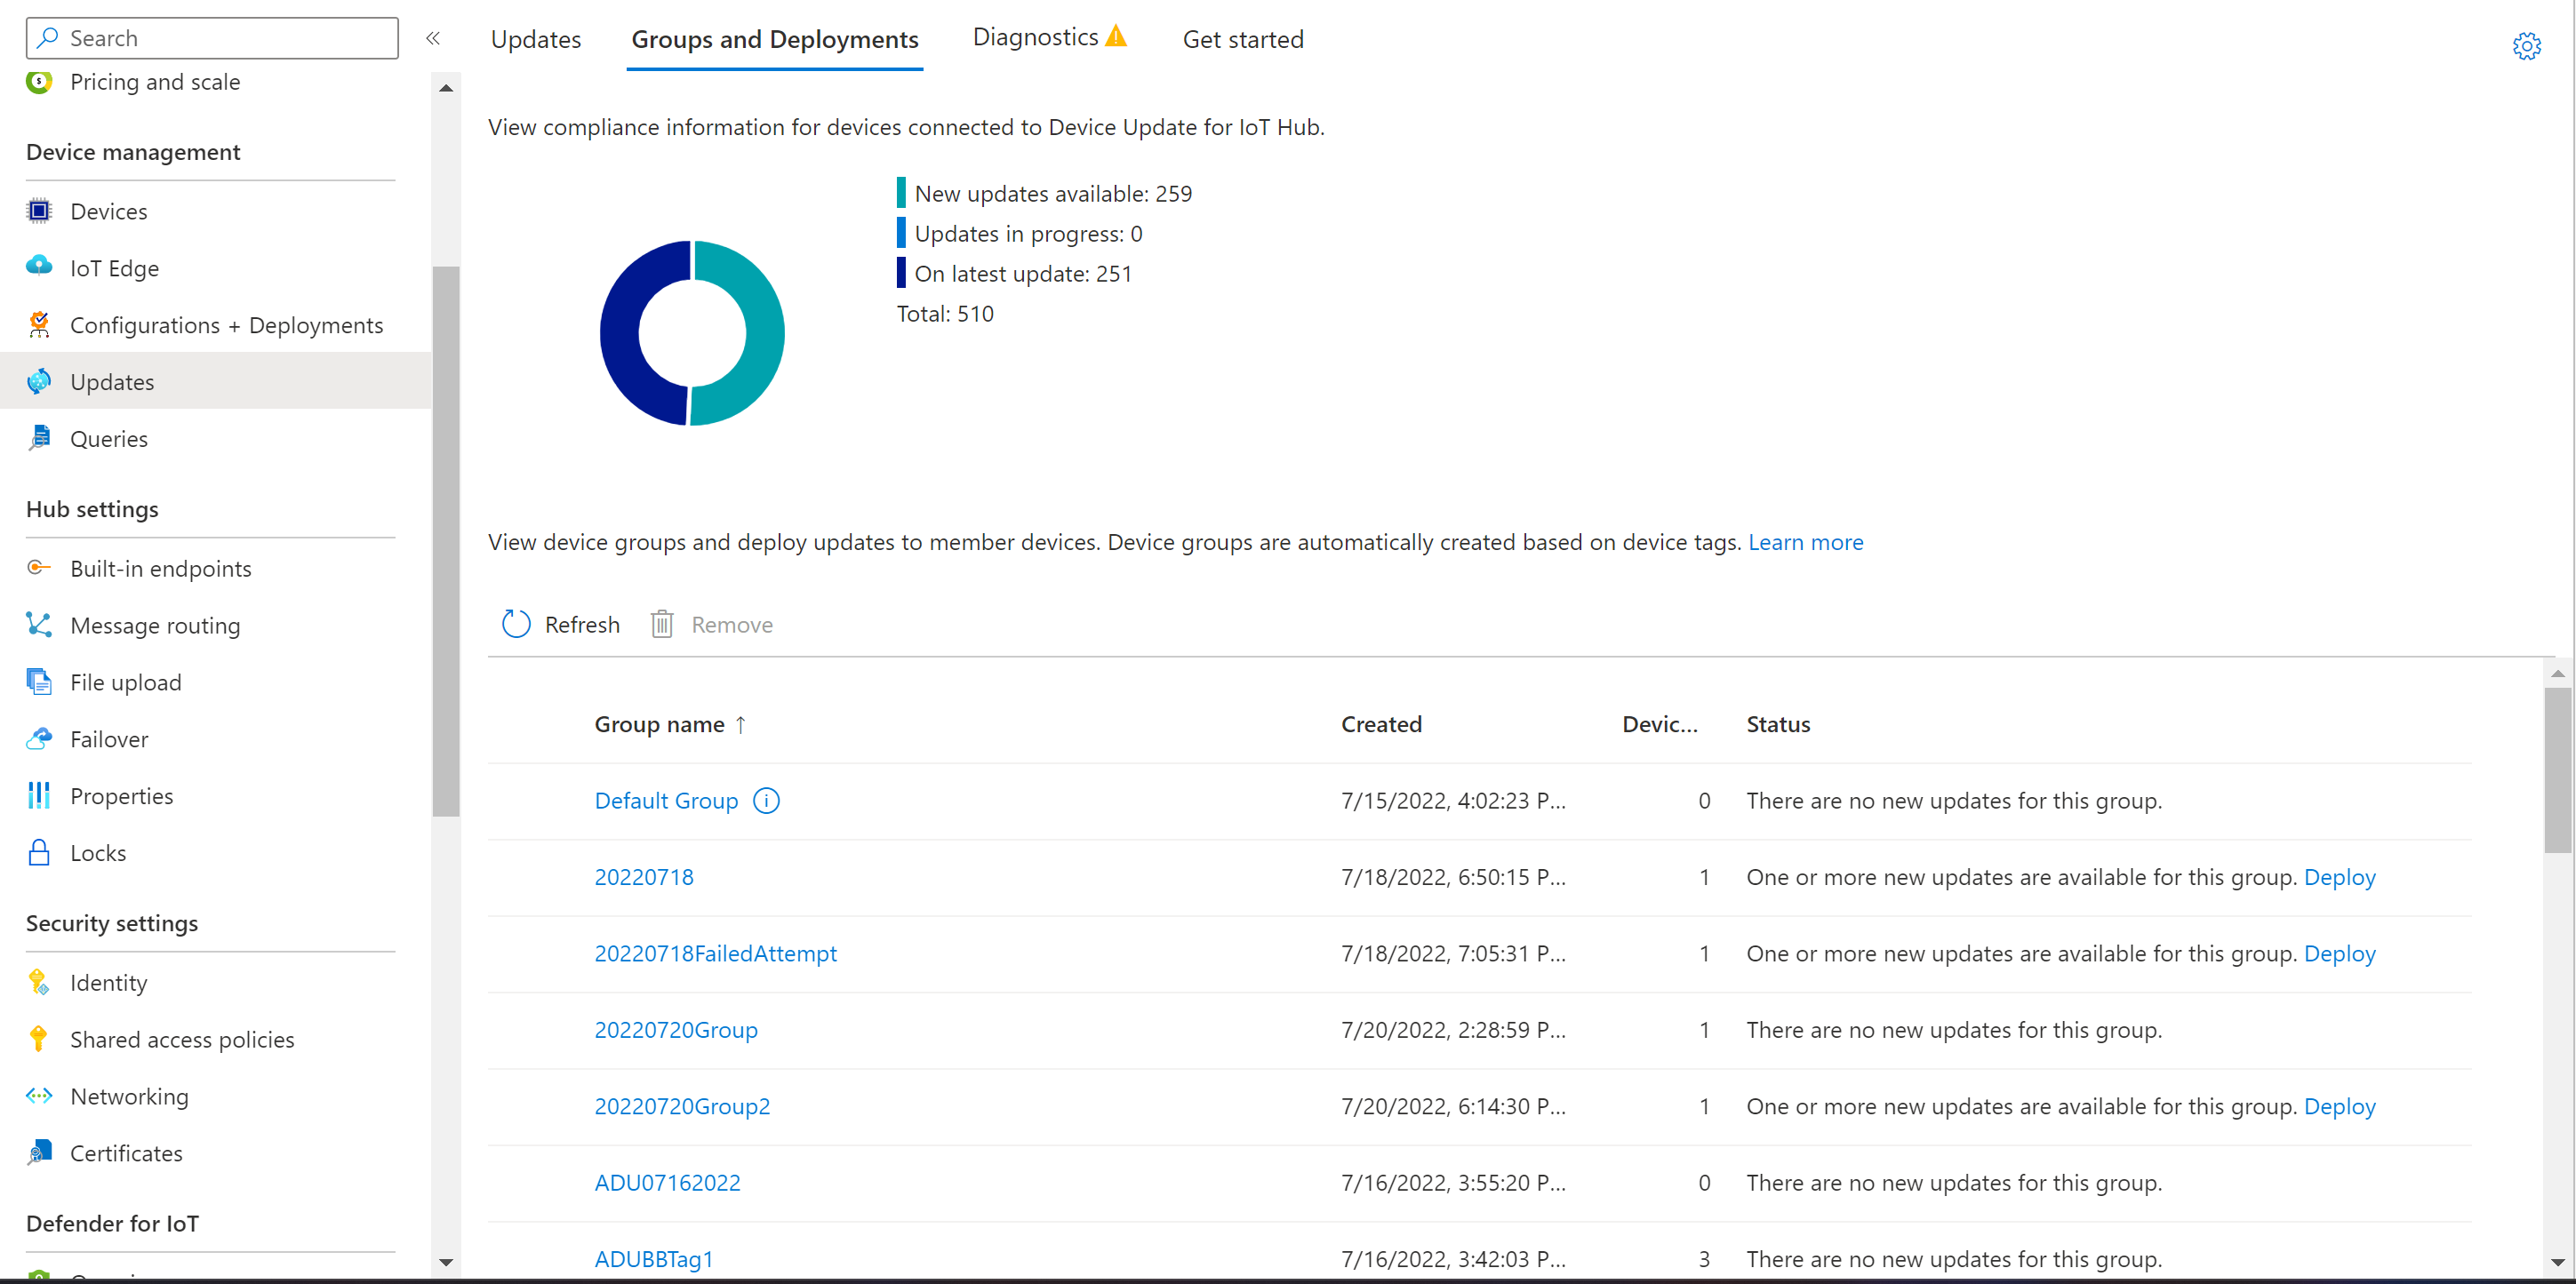
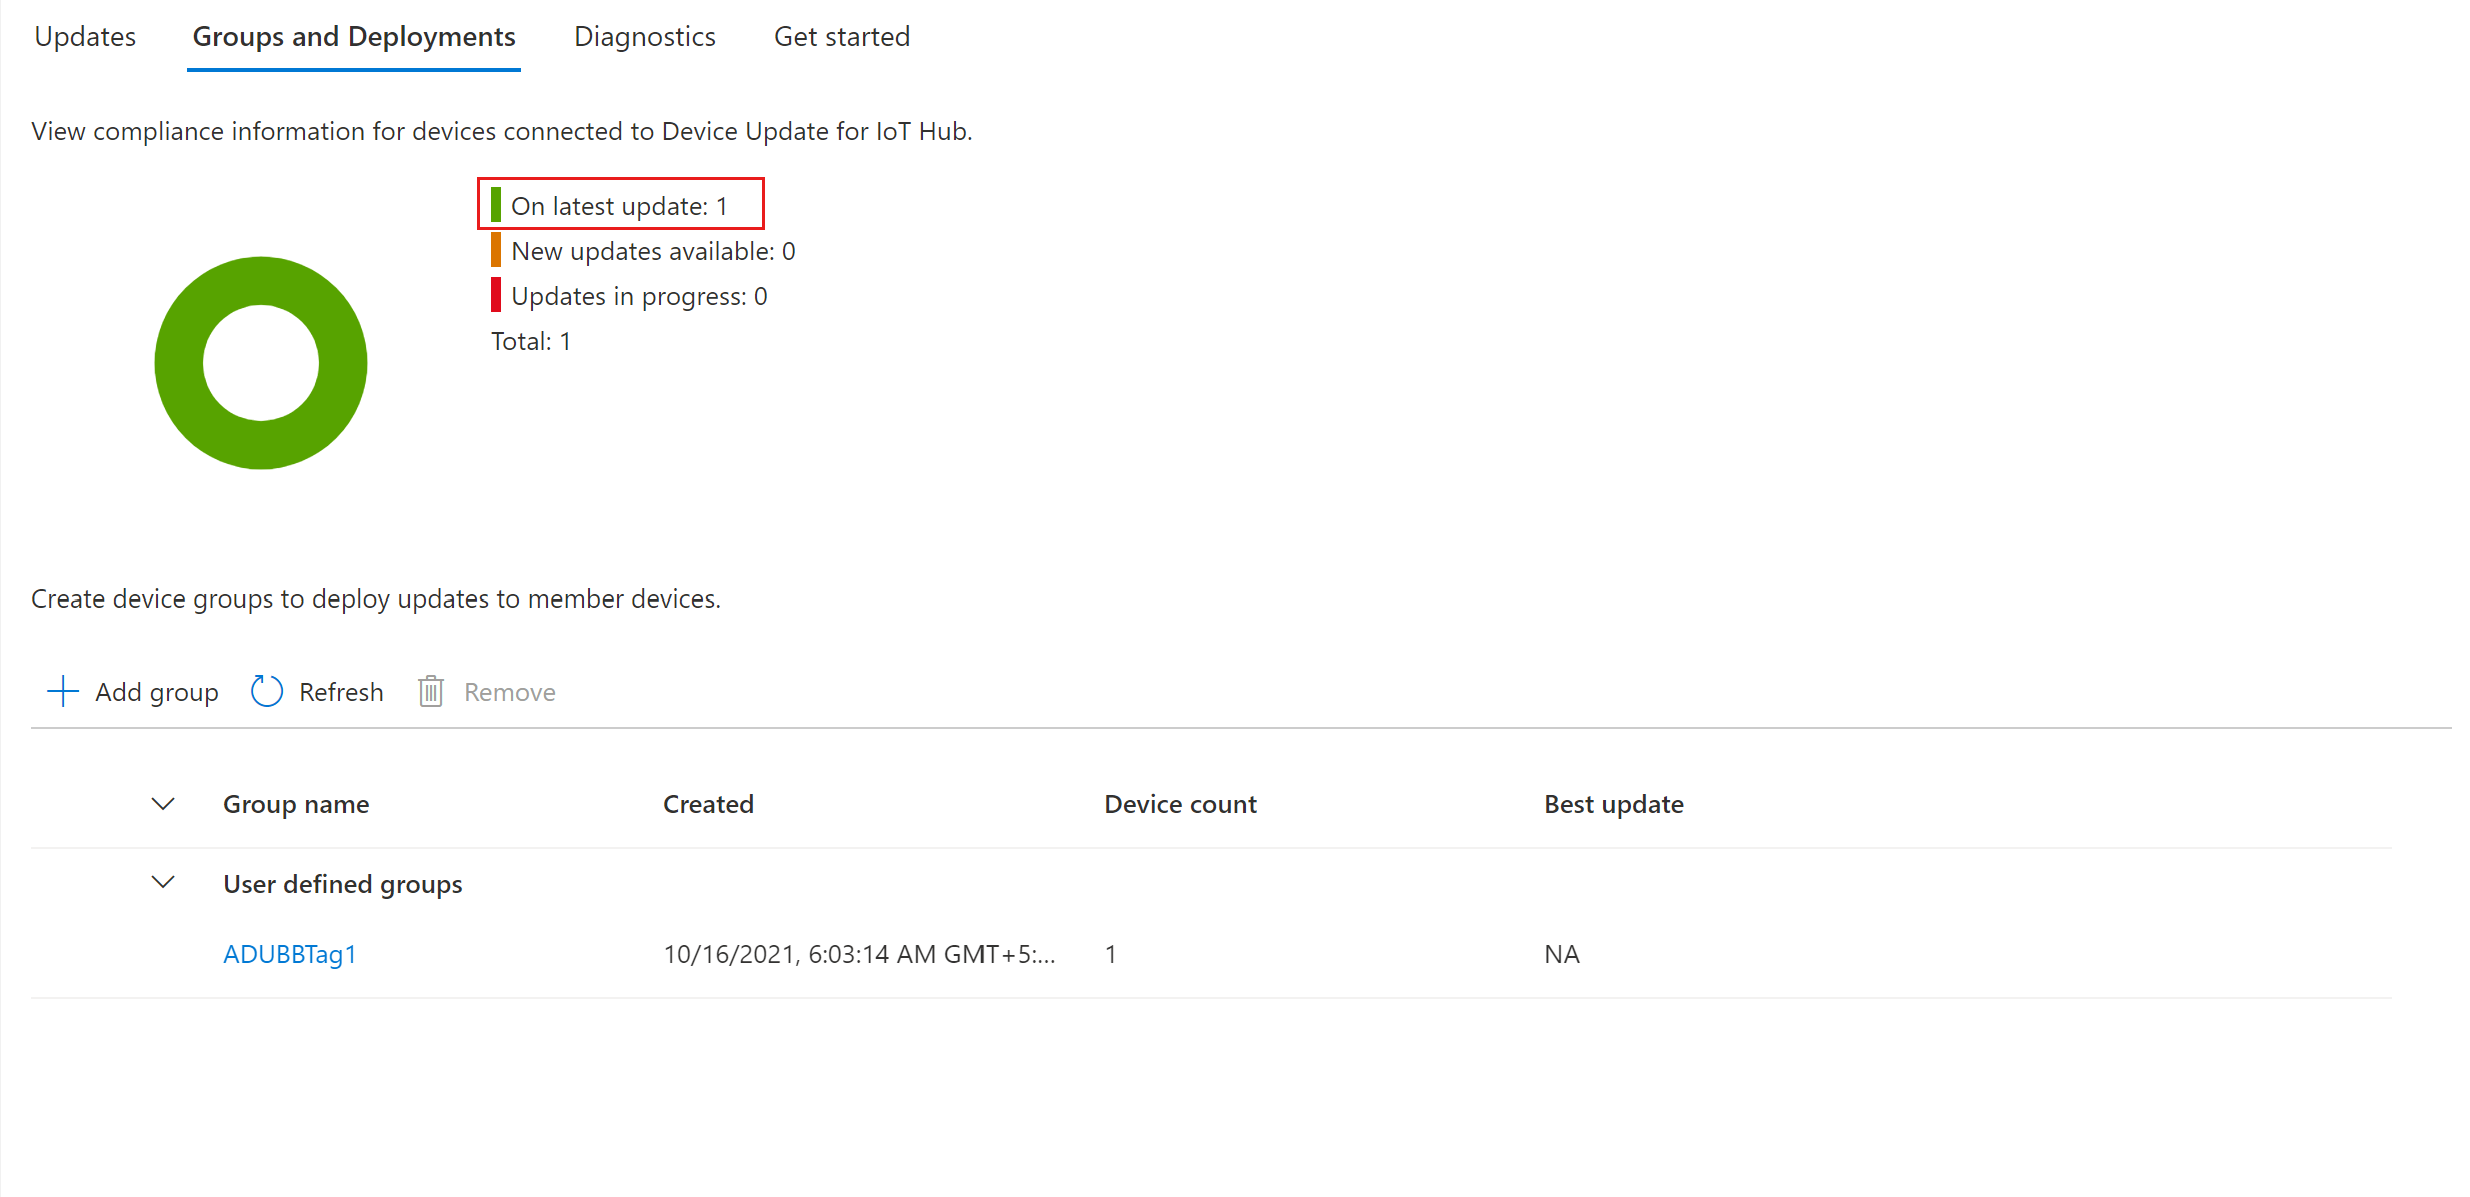
View the list of groups and the update compliance chart. The update compliance chart shows the count of devices in various states of compliance: On latest update, New updates available, and Updates in progress. Learn about update compliance.
You should see a device group that contains the simulated device you set up in this tutorial along with any available updates for the devices in the new group. If there are devices that don't meet the device class requirements of the group, they'll show up in a corresponding invalid group. To deploy the best available update to the new user-defined group from this view, select Deploy next to the group.
For more information about tags and groups, see Manage device groups.
Deploy update
Once the group is created, you should see a new update available for your device group, with a link to the update under Best Update (you may need to Refresh once).
For more information about compliance, see Device Update compliance.
Select the target group by clicking on the group name. You'll be directed to the group details under Group basics.
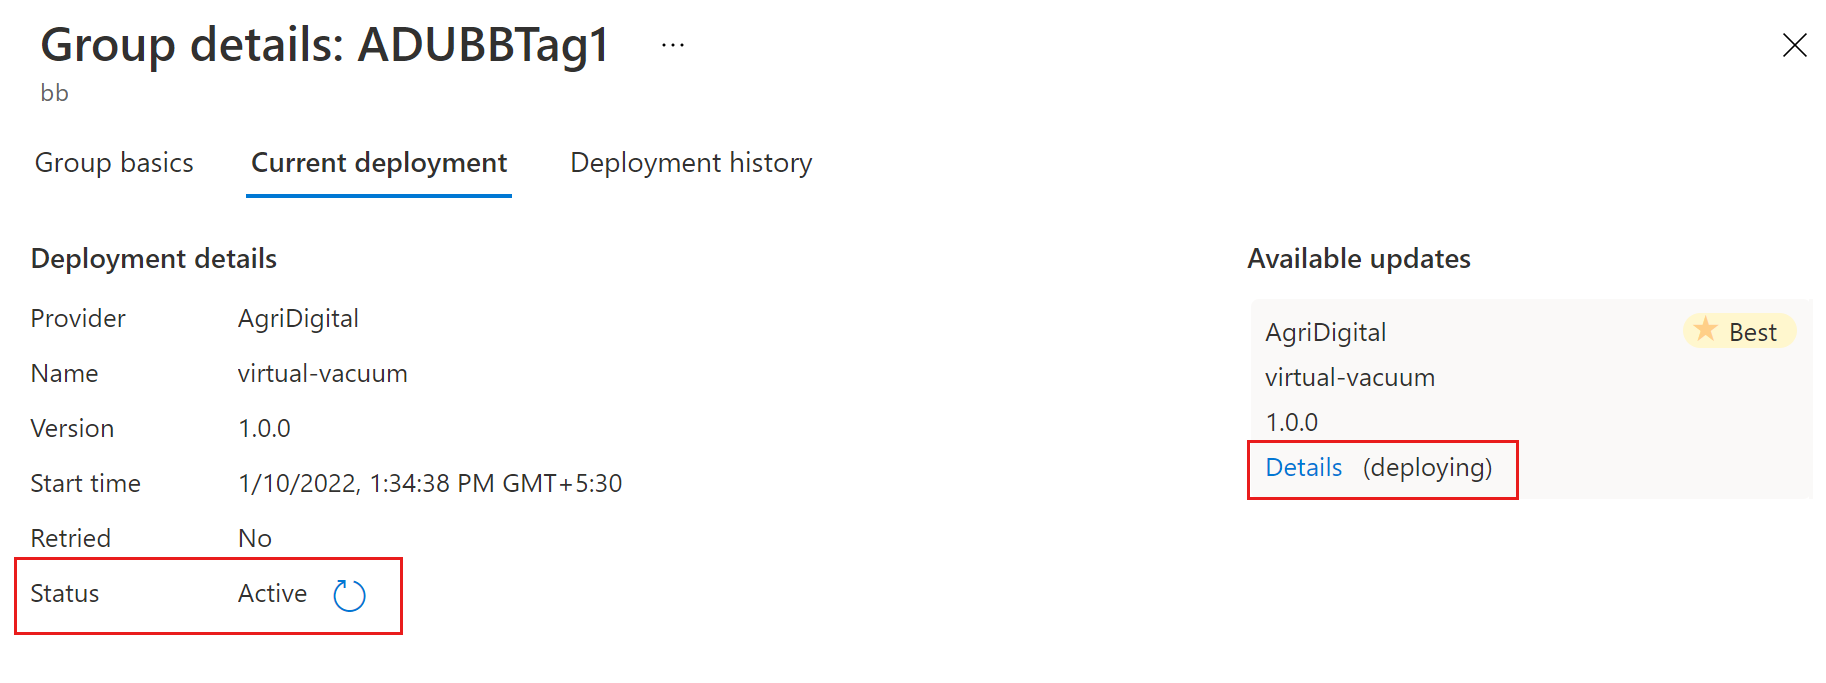
To initiate the deployment, go to the Current deployment tab. Select the deploy link next to the desired update from the Available updates section. The best, available update for a given group will be denoted with a "Best" highlight.
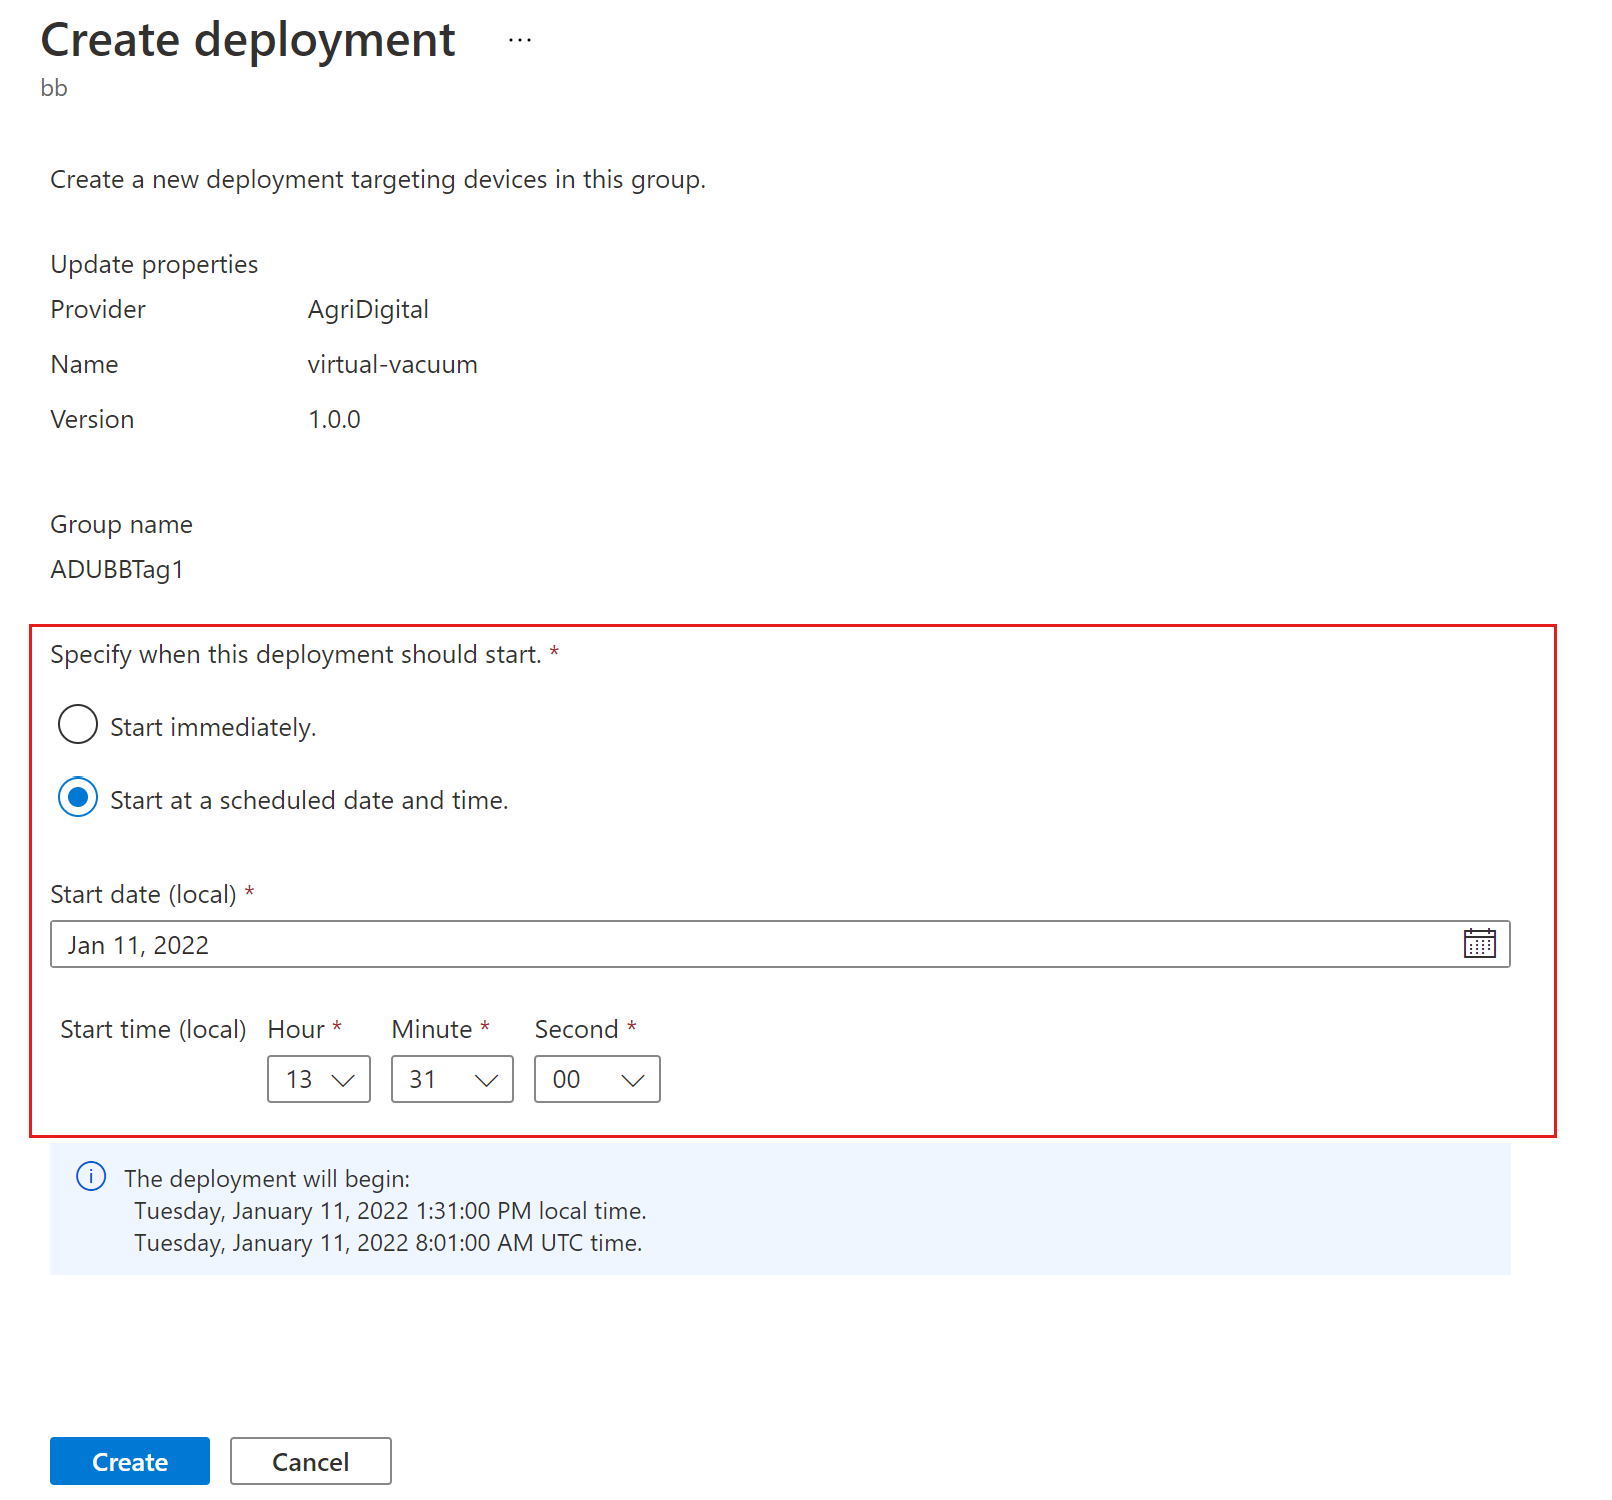
Schedule your deployment to start immediately or in the future, then select Create.
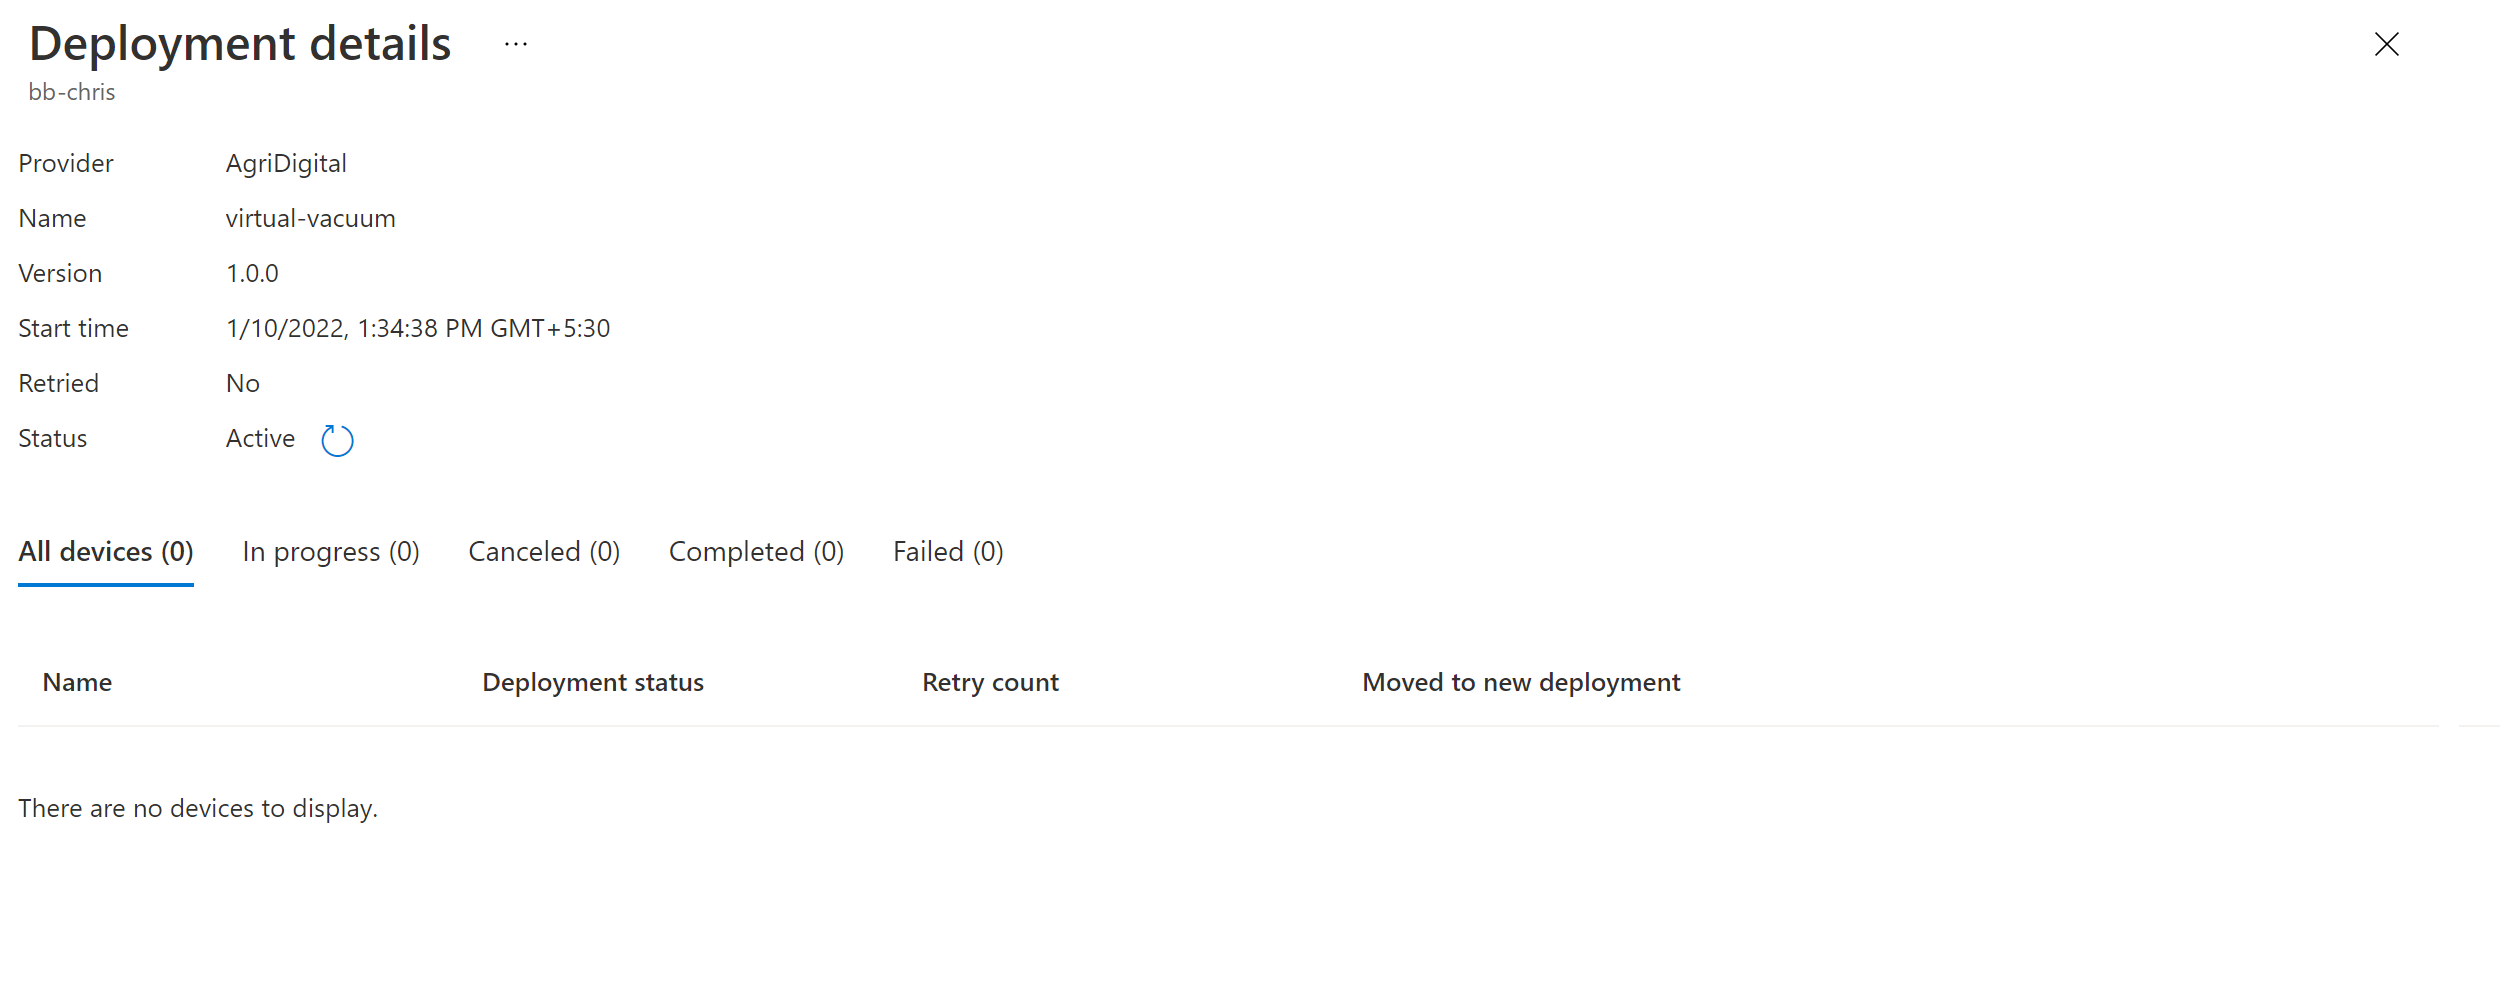
The Status under Deployment details should turn to Active, and the deployed update should be marked with "(deploying)".
View the compliance chart. You should see the update is now in progress.
After your device is successfully updated, you should see your compliance chart and deployment details are updated to reflect the same.
Monitor an update deployment
Select the Deployment history tab at the top of the page.
Select the details link next to the deployment you created.
Select Refresh to view the latest status details.
You've now completed a successful end-to-end proxy update by using Device Update for IoT Hub.
Clean up resources
When you no longer need them, clean up your Device Update account, instance, IoT hub, and IoT device.


