Merk
Tilgang til denne siden krever autorisasjon. Du kan prøve å logge på eller endre kataloger.
Tilgang til denne siden krever autorisasjon. Du kan prøve å endre kataloger.
As part of your migration journey to Azure, assess your on-premises workloads to measure cloud readiness, identify risks, and estimate costs and complexity.
This article shows you how to assess discovered ASP.NET web apps running on IIS web servers in preparation for migration to Azure App Service Code and Azure App Service Containers, using the Azure Migrate: Discovery and assessment tool. Learn more about Azure App Service.
As part of your migration journey to Azure, assess your on-premises workloads to measure cloud readiness, identify risks, and estimate costs and complexity.
This article shows you how to assess discovered Java web apps running on Tomcat servers in preparation for migration to Azure App Service Code and Azure App Service Containers, using the Azure Migrate: Discovery and assessment tool. Learn more about Azure App Service.
In this tutorial, you learn how to:
- Run an assessment based on web apps configuration data.
- Review an Azure App Service assessment.
Note
Tutorials show the quickest path for trying out a scenario and use default options where possible.
Prerequisites
- If you don't have an Azure subscription, create a free account before you begin.
- Before you follow this tutorial to assess your web apps for migration to Azure App Service, make sure you've discovered the web apps you want to assess using the Azure Migrate appliance for VMware, Hyper-V, or Physical servers.
- If you want to try out this feature in an existing project, ensure that you have completed the prerequisites in this article.
Run an assessment
To run an assessment, follow these steps:
Sign into the Azure portal and search for Azure Migrate.
On the Azure Migrate page, under Migration goals, select Servers, databases and web apps.
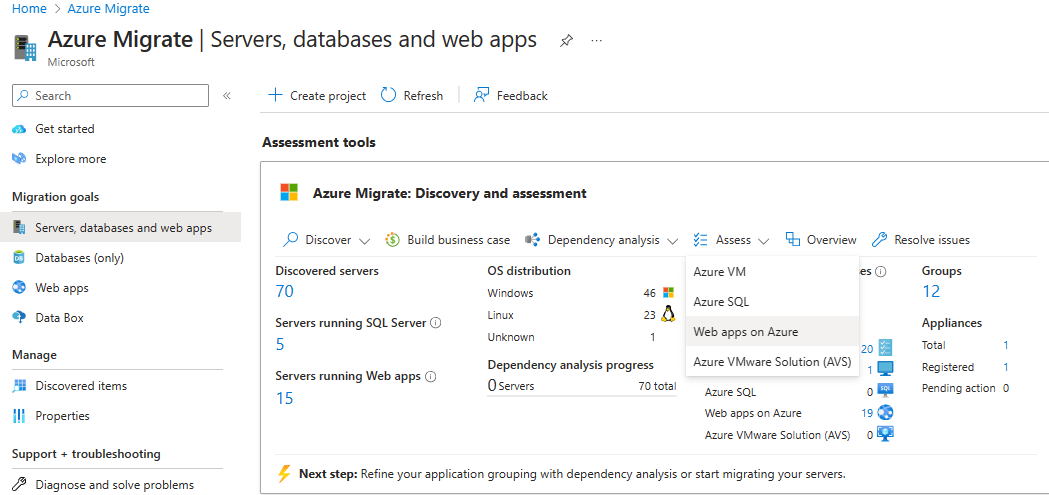
On the Servers, databases and web apps page, under Assessments tools, select Web apps on Azure from the Assess dropdown menu.
On the Create assessment page, under Basics tab, do the following:
The assessment type is pre-selected as Web apps on Azure and the discovery source defaulted to Servers discovered from Azure Migrate appliance. Select the Scenario as Web apps to App Service.
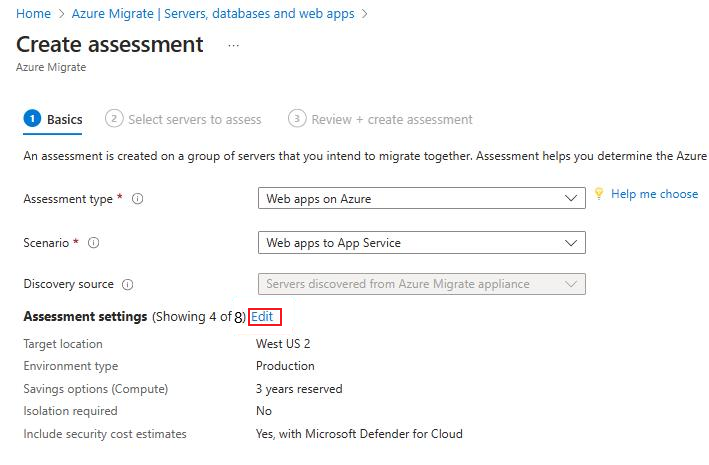
Select Edit to review the assessment properties.
The following are included in Azure App Service assessment properties:
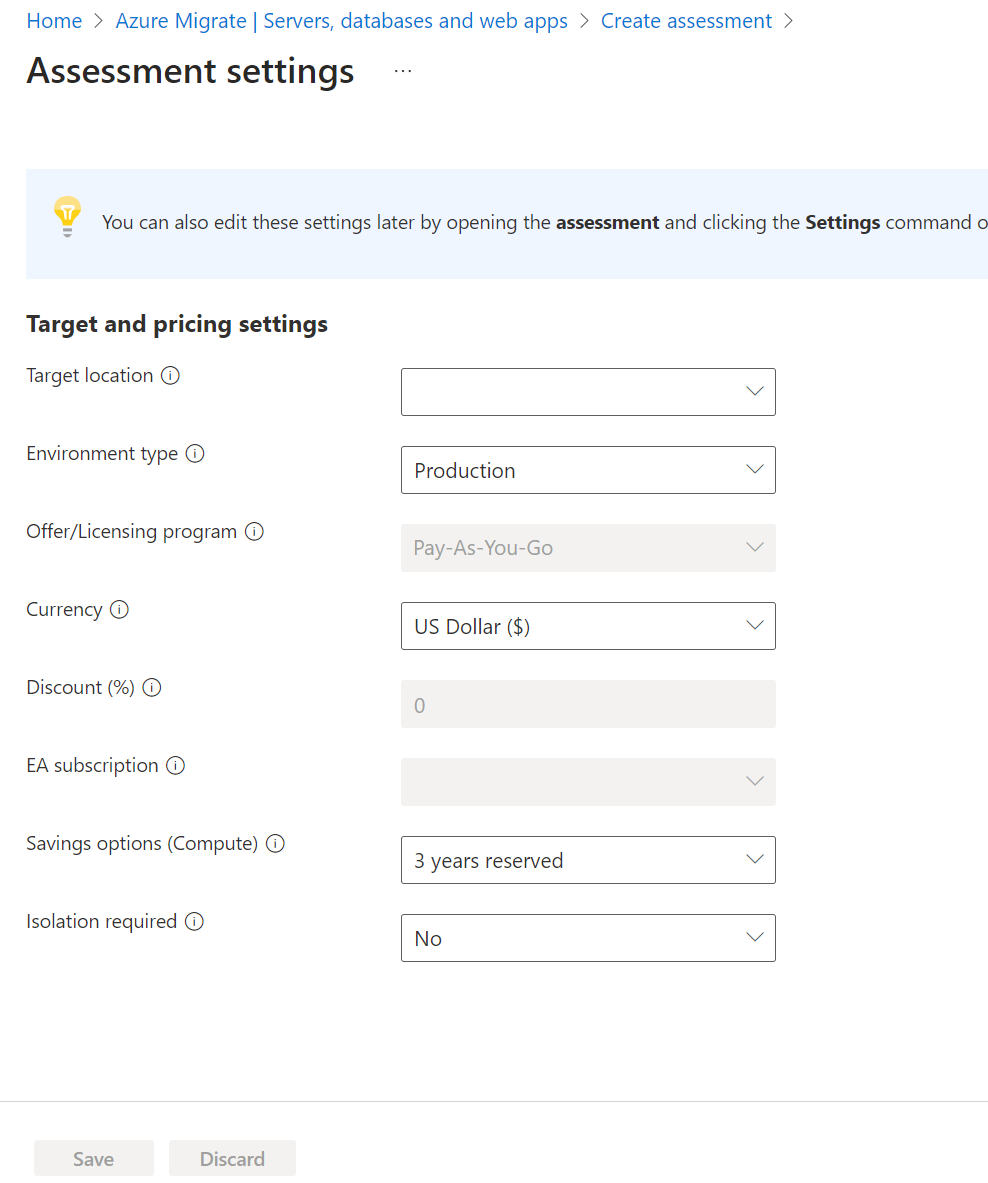
Property Details Target location The Azure region to which you want to migrate. Azure App Service configuration and cost recommendations are based on the location that you specify. Environment type Type of environment in which it's running. Offer The Azure offer in which you're enrolled. The assessment estimates the cost for that offer. Currency The billing currency for your account. Discount (%) Any subscription-specific discounts that you receive on top of the Azure offer. The default setting is 0%. EA subscription Specifies that an Enterprise Agreement (EA) subscription is used for cost estimation. Takes into account the discount applicable to the subscription.
Retain the default settings for reserved instances and discount (%) properties.Savings options (Compute) The Savings option the assessment must consider. Isolation required Select Yes if you want your web apps to run in a private and dedicated environment in an Azure datacenter.
- In Savings options (Compute), specify the savings option that you want the assessment to consider, helping to optimize your Azure Compute cost.
- Azure reservations (one year or three year reserved) are a good option for the most consistently running resources.
- Azure Savings Plan (one year or three year savings plan) provides additional flexibility and automated cost optimization. Ideally post migration, you could use Azure reservation and savings plan at the same time (reservation is consumed first), but in the Azure Migrate assessments, you can only see cost estimates of 1 savings option at a time.
- When you select None, the Azure Compute cost is based on the Pay-as-you-go rate or based on actual usage.
- You need to select Pay-as-you-go in offer/licensing program to be able to use Reserved Instances or Azure Savings Plan. When you select any savings option other than None, the Discount (%) setting isn't applicable.
- Select Save if you made any changes.
On the Create assessment page, select Next: Select servers to assess.
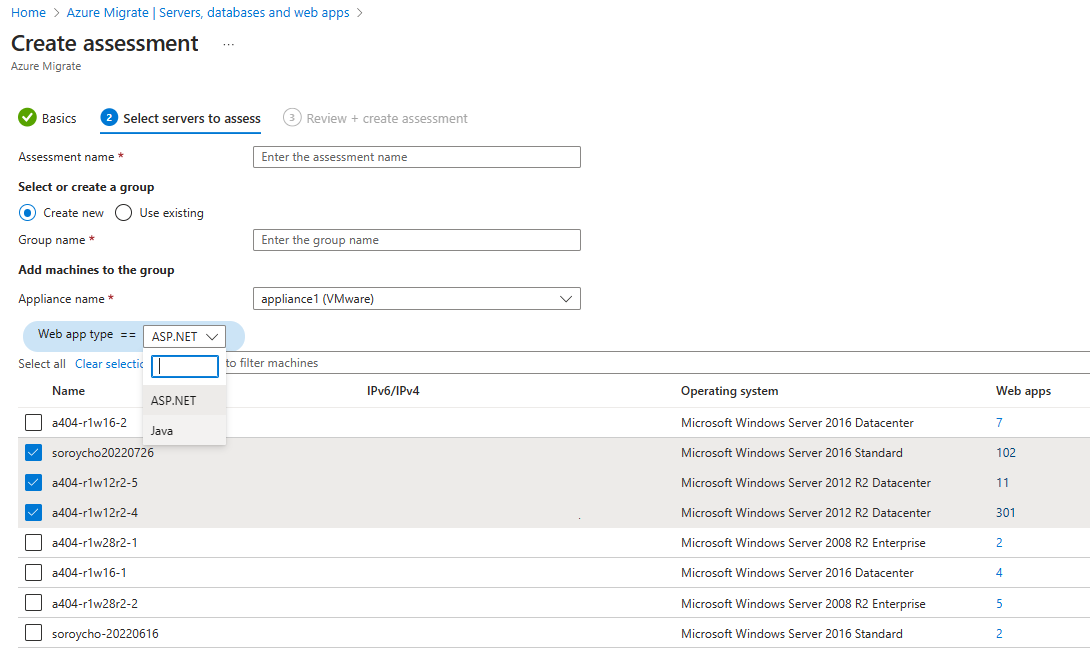
Under the Select servers to assess tab, do the following:
- Assessment name: Specify a name for the assessment.
- Select or create a group: Select Create New and specify a group name. You can also use an existing group.
- Appliance name: Select the appliance.
- Web app type: Select ASP.NET.
- Web app type: Select Java.
- Select the servers that you want to add to the group from the table.
- Select Next.
Under Review + create assessment tab, review the assessment details, and select Create assessment to create the group and run the assessment.
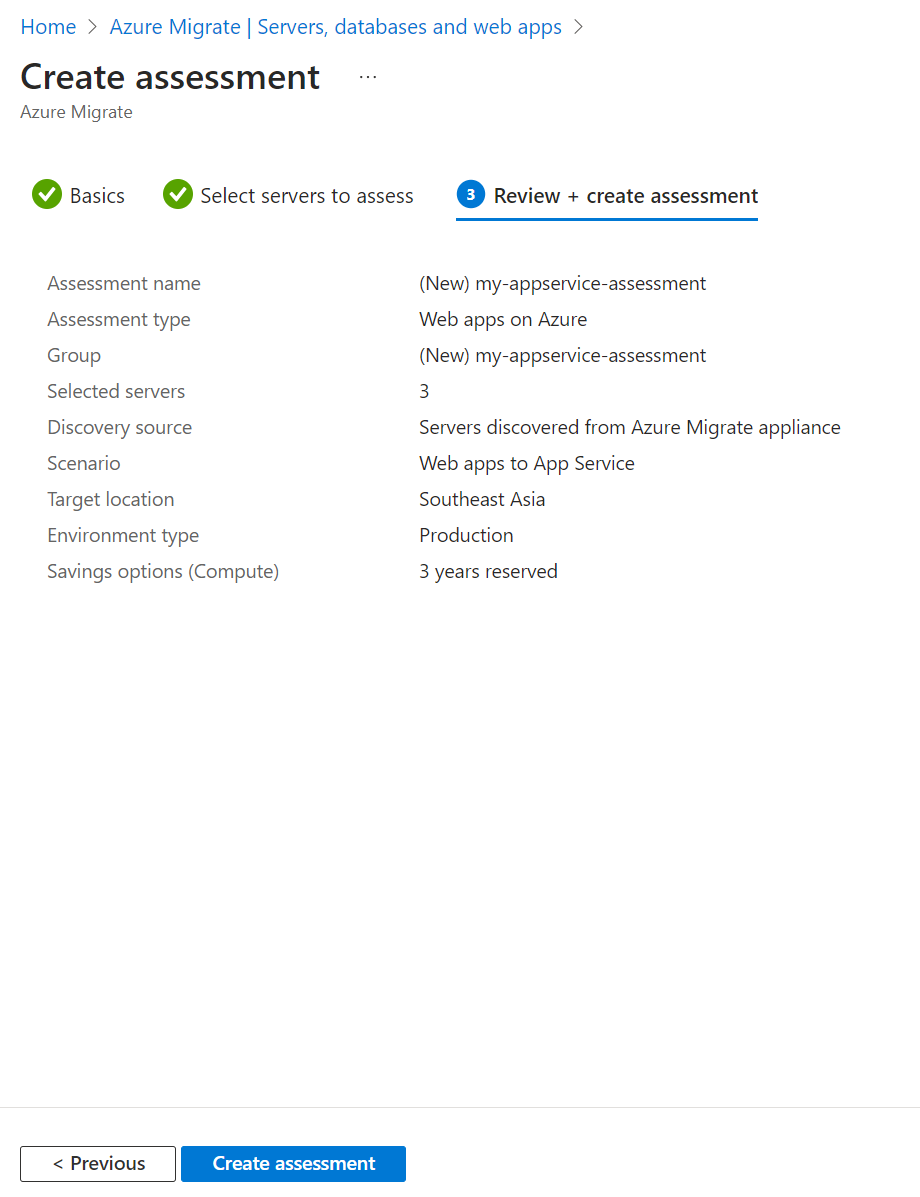
After the assessment is created, go to Servers, databases and web apps > Azure Migrate: Discovery and assessment. Refresh the tile data by selecting the Refresh option on top of the tile. Wait for the data to refresh.
On the Servers, databases and web apps page, under Assessment tools > Assessments, select the number next to Web apps on Azure in the Assessment section.
Select the assessment name, which you wish to view.
Next steps
- Learn how to perform at-scale agentless migration of ASP.NET web apps to Azure App Service.
- Learn more about how Azure App Service assessments are calculated.