Quickstart: Use Terraform to create a Windows VM
Applies to: ✔️ Windows VMs
This article shows you how to create a complete Windows environment and supporting resources with Terraform. Those resources include a virtual network, subnet, public IP address, and more.
Terraform enables the definition, preview, and deployment of cloud infrastructure. Using Terraform, you create configuration files using HCL syntax. The HCL syntax allows you to specify the cloud provider - such as Azure - and the elements that make up your cloud infrastructure. After you create your configuration files, you create an execution plan that allows you to preview your infrastructure changes before they're deployed. Once you verify the changes, you apply the execution plan to deploy the infrastructure.
In this article, you learn how to:
- Create a random value for the Azure resource group name using random_pet.
- Create an Azure resource group using azurerm_resource_group.
- Create a virtual network (VNET) using azurerm_virtual_network.
- Create a subnet using azurerm_subnet.
- Create a public IP using azurerm_public_ip.
- Create a network security group using azurerm_network_security_group.
- Create a network interface using azurerm_network_interface.
- Create an association between the network security group and the network interface using azurerm_network_interface_security_group_association.
- Generate a random value for a unique storage account name using random_id.
- Create a storage account for boot diagnostics using azurerm_storage_account.
- Create a Windows VM with an IIS web server using azurerm_windows_virtual_machine.
- Create a Windows VM extension using azurerm_virtual_machine_extension.
Prerequisites
- Azure subscription: If you don't have an Azure subscription, create a free account before you begin.
Implement the Terraform code
Note
The sample code for this article is located in the Azure Terraform GitHub repo. You can view the log file containing the test results from current and previous versions of Terraform.
See more articles and sample code showing how to use Terraform to manage Azure resources
Create a directory in which to test the sample Terraform code and make it the current directory.
Create a file named
providers.tfand insert the following code:terraform { required_version = ">=1.0" required_providers { azurerm = { source = "hashicorp/azurerm" version = "~>3.0" } random = { source = "hashicorp/random" version = "~>3.0" } } } provider "azurerm" { features {} }Create a file named
main.tfand insert the following code:resource "azurerm_resource_group" "rg" { location = var.resource_group_location name = "${random_pet.prefix.id}-rg" } # Create virtual network resource "azurerm_virtual_network" "my_terraform_network" { name = "${random_pet.prefix.id}-vnet" address_space = ["10.0.0.0/16"] location = azurerm_resource_group.rg.location resource_group_name = azurerm_resource_group.rg.name } # Create subnet resource "azurerm_subnet" "my_terraform_subnet" { name = "${random_pet.prefix.id}-subnet" resource_group_name = azurerm_resource_group.rg.name virtual_network_name = azurerm_virtual_network.my_terraform_network.name address_prefixes = ["10.0.1.0/24"] } # Create public IPs resource "azurerm_public_ip" "my_terraform_public_ip" { name = "${random_pet.prefix.id}-public-ip" location = azurerm_resource_group.rg.location resource_group_name = azurerm_resource_group.rg.name allocation_method = "Dynamic" } # Create Network Security Group and rules resource "azurerm_network_security_group" "my_terraform_nsg" { name = "${random_pet.prefix.id}-nsg" location = azurerm_resource_group.rg.location resource_group_name = azurerm_resource_group.rg.name security_rule { name = "RDP" priority = 1000 direction = "Inbound" access = "Allow" protocol = "*" source_port_range = "*" destination_port_range = "3389" source_address_prefix = "*" destination_address_prefix = "*" } security_rule { name = "web" priority = 1001 direction = "Inbound" access = "Allow" protocol = "Tcp" source_port_range = "*" destination_port_range = "80" source_address_prefix = "*" destination_address_prefix = "*" } } # Create network interface resource "azurerm_network_interface" "my_terraform_nic" { name = "${random_pet.prefix.id}-nic" location = azurerm_resource_group.rg.location resource_group_name = azurerm_resource_group.rg.name ip_configuration { name = "my_nic_configuration" subnet_id = azurerm_subnet.my_terraform_subnet.id private_ip_address_allocation = "Dynamic" public_ip_address_id = azurerm_public_ip.my_terraform_public_ip.id } } # Connect the security group to the network interface resource "azurerm_network_interface_security_group_association" "example" { network_interface_id = azurerm_network_interface.my_terraform_nic.id network_security_group_id = azurerm_network_security_group.my_terraform_nsg.id } # Create storage account for boot diagnostics resource "azurerm_storage_account" "my_storage_account" { name = "diag${random_id.random_id.hex}" location = azurerm_resource_group.rg.location resource_group_name = azurerm_resource_group.rg.name account_tier = "Standard" account_replication_type = "LRS" } # Create virtual machine resource "azurerm_windows_virtual_machine" "main" { name = "${var.prefix}-vm" admin_username = "azureuser" admin_password = random_password.password.result location = azurerm_resource_group.rg.location resource_group_name = azurerm_resource_group.rg.name network_interface_ids = [azurerm_network_interface.my_terraform_nic.id] size = "Standard_DS1_v2" os_disk { name = "myOsDisk" caching = "ReadWrite" storage_account_type = "Premium_LRS" } source_image_reference { publisher = "MicrosoftWindowsServer" offer = "WindowsServer" sku = "2022-datacenter-azure-edition" version = "latest" } boot_diagnostics { storage_account_uri = azurerm_storage_account.my_storage_account.primary_blob_endpoint } } # Install IIS web server to the virtual machine resource "azurerm_virtual_machine_extension" "web_server_install" { name = "${random_pet.prefix.id}-wsi" virtual_machine_id = azurerm_windows_virtual_machine.main.id publisher = "Microsoft.Compute" type = "CustomScriptExtension" type_handler_version = "1.8" auto_upgrade_minor_version = true settings = <<SETTINGS { "commandToExecute": "powershell -ExecutionPolicy Unrestricted Install-WindowsFeature -Name Web-Server -IncludeAllSubFeature -IncludeManagementTools" } SETTINGS } # Generate random text for a unique storage account name resource "random_id" "random_id" { keepers = { # Generate a new ID only when a new resource group is defined resource_group = azurerm_resource_group.rg.name } byte_length = 8 } resource "random_password" "password" { length = 20 min_lower = 1 min_upper = 1 min_numeric = 1 min_special = 1 special = true } resource "random_pet" "prefix" { prefix = var.prefix length = 1 }Create a file named
variables.tfand insert the following code:variable "resource_group_location" { default = "eastus" description = "Location of the resource group." } variable "prefix" { type = string default = "win-vm-iis" description = "Prefix of the resource name" }Create a file named
outputs.tfand insert the following code:output "resource_group_name" { value = azurerm_resource_group.rg.name } output "public_ip_address" { value = azurerm_windows_virtual_machine.main.public_ip_address } output "admin_password" { sensitive = true value = azurerm_windows_virtual_machine.main.admin_password }
Initialize Terraform
Run terraform init to initialize the Terraform deployment. This command downloads the Azure provider required to manage your Azure resources.
terraform init -upgrade
Key points:
- The
-upgradeparameter upgrades the necessary provider plugins to the newest version that complies with the configuration's version constraints.
Create a Terraform execution plan
Run terraform plan to create an execution plan.
terraform plan -out main.tfplan
Key points:
- The
terraform plancommand creates an execution plan, but doesn't execute it. Instead, it determines what actions are necessary to create the configuration specified in your configuration files. This pattern allows you to verify whether the execution plan matches your expectations before making any changes to actual resources. - The optional
-outparameter allows you to specify an output file for the plan. Using the-outparameter ensures that the plan you reviewed is exactly what is applied.
Apply a Terraform execution plan
Run terraform apply to apply the execution plan to your cloud infrastructure.
terraform apply main.tfplan
Key points:
- The example
terraform applycommand assumes you previously ranterraform plan -out main.tfplan. - If you specified a different filename for the
-outparameter, use that same filename in the call toterraform apply. - If you didn't use the
-outparameter, callterraform applywithout any parameters.
Cost information isn't presented during the virtual machine creation process for Terraform like it is for the Azure portal. If you want to learn more about how cost works for virtual machines, see the Cost optimization Overview page.
Verify the results
Run the following command to get the VM's public IP address and make note of it:
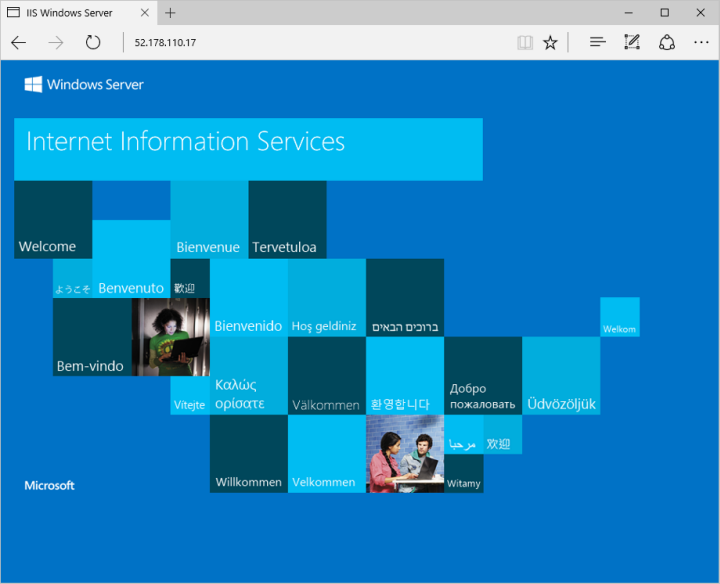
echo $(terraform output -raw public_ip_address)With IIS installed and port 80 now open on your VM from the Internet, use a web browser of your choice to view the default IIS welcome page. Use the public IP address of your VM obtained from the previous command. The following example shows the default IIS web site:
Clean up resources
When you no longer need the resources created via Terraform, do the following steps:
Run terraform plan and specify the
destroyflag.terraform plan -destroy -out main.destroy.tfplanKey points:
- The
terraform plancommand creates an execution plan, but doesn't execute it. Instead, it determines what actions are necessary to create the configuration specified in your configuration files. This pattern allows you to verify whether the execution plan matches your expectations before making any changes to actual resources. - The optional
-outparameter allows you to specify an output file for the plan. Using the-outparameter ensures that the plan you reviewed is exactly what is applied.
- The
Run terraform apply to apply the execution plan.
terraform apply main.destroy.tfplan
Troubleshoot Terraform on Azure
Troubleshoot common problems when using Terraform on Azure
Next steps
In this quickstart, you deployed a simple virtual machine using Terraform. To learn more about Azure virtual machines, continue to the tutorial for Linux VMs.