Obs!
Tilgang til denne siden krever autorisasjon. Du kan prøve å logge på eller endre kataloger.
Tilgang til denne siden krever autorisasjon. Du kan prøve å endre kataloger.
Notat
Denne artikkelen er en del av en opplæringsserie om oppretting og bruk av egendefinerte koblinger i Azure Logic Apps, Microsoft Power Automate og Microsoft Power Apps bruk av AI-aktiverte koblinger i Microsoft Copilot Studio. Pass på at du leser oversikten over den egendefinerte koblingen for å forstå prosessen. Gå til Bruk Power Platform koblinger i Copilot Studio for å finne ut hvordan du kan kalle koblingene som koblingshandlinger i agenten Microsoft Copilot .
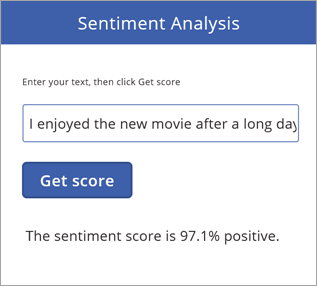
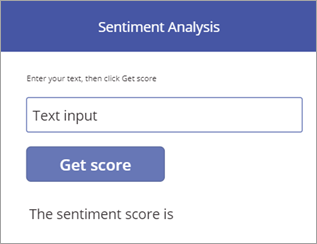
I dette emnet bygger du en grunnleggende app som bruker den egendefinerte koblingen du opprettet i et tidligere emne. Appen tar tekstinndata, og bruker deretter den egendefinerte koblingen til å kalle opp API-en for tekstanalyse for Cognitive Services. Koblingen returnerer sentimentpoengsummen (0 til 1) for teksten, og appen viser den som en prosentandel. Bildet nedenfor viser den ferdige appen:
Forutsetning
Grunnleggende erfaring med å bygge apper i Power Apps. Hvis du vil ha mer informasjon, kan du se Opprette en app fra grunnen av.
Den egendefinerte koblingen du opprettet i ett av disse emnene:
Opprett appen og legg til den egendefinerte koblingen
Det første du gjør, er å opprette en app fra tomt, og deretter koble til den egendefinerte koblingen du opprettet i et tidligere emne.
I make.powerapps.com velger du Start fra tom>
 (telefon) >Lag denne appen.
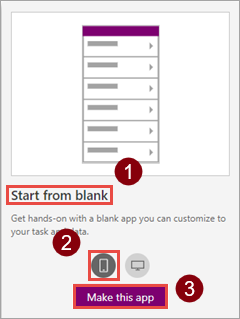
Velg Koble til data på applerretet.
I Data-panelet velger du tilkoblingen du opprettet i et tidligere emne (for eksempel «SentimentDemo»).
Lagre appen med navnet
Sentiment Analysis.
Legge til kontroller i appen
Nå bygger du ut brukergrensesnittet for appen, slik at du kan skrive inn tekst, sende inn teksten til API-en og få svar.
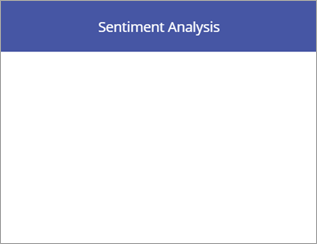
Legg til et rektangelikon som tittellinje, og legg deretter til etiketten «Sentimentanalyse».
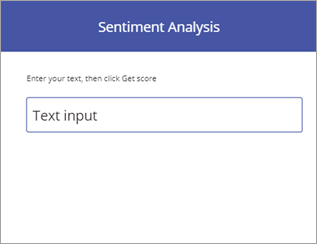
Legg til etiketten «Skriv inn teksten, og klikk deretter på Få poengsum», og legg deretter til en tekstinndatakontroll.
Legg til en knapp med teksten "Få poengsum".

Legg til etiketten «Sentimentpoengsummen er». I neste del legger du til en formel for å fullføre denne etiketten.
Legge til formler for å drive atferd
Når datatilkoblingen og brukergrensesnittet er på plass, legger du nå til Power Apps formler som styrer virkemåten til appen. Formlene kaller API-en gjennom den egendefinerte koblingen, lagrer resultatet i en samling (en tabellvariabel) og viser deretter det formaterte resultatet i appen.
Velg knappen du opprettet, og angi deretter OnSelect-egenskapen for knappen til navnet på koblingen (inkludert perioden).
SentimentDemo.Power Apps gir deg et alternativ for automatisk fullføring fordi
DetectSentimentden egendefinerte koblingen gjør dette tilgjengelig.Sett nå OnSelect-egenskapen for knappen til følgende formel.
ClearCollect(sentimentCollection, SentimentDemo.DetectSentiment(
    {id:"1", language:"en", text:TextInput1.Text}).documents.score)
Denne formelen henter sentimentpoengsummen fra API-en, og lagrer den i en samling:
Formelen kaller
DetectSentimentfunksjonen med de tre parameterne som vises av den egendefinerte koblingen:id,language, ogtext. Vi angir verdier for de to første rett i formelen, og henter verdien forTextfra tekstinndatakontrollen (du kan også hente de to første verdiene fra et annet sted i en app).Funksjonen returnerer en
scorefor hvert dokument du sender, og i eksemplene våre sender vi ett dokument om gangen. Poengsummen varierer fra 0 (negativ) til 1 (positiv).Formelen kaller
ClearCollectderetter funksjonen for å fjerne eventuelle eksisterende verdier frasentimentCollectionog legge til verdien frascore.
Velg etiketten du opprettet, og angi deretter Text-egenskapen for etiketten til følgende formel.
"The sentiment score is " & Round(First(sentimentCollection).score, 3) * 100 & "%"Denne formelen henter sentimentpoengsummen fra samlingen, formaterer og viser den:
Funksjonen
First()returnerer den første (og i dette tilfellet bare) posten isentimentCollect, og viser feltet (det eneste feltet) som erscoreknyttet til denne posten.Funksjonen
Round()runder av poengsummen til 3 plasser, resten av formelen formaterer resultatet som en prosentandel og legger til litt informasjon for kontekst.
Testing av appen
Kjør nå den ferdige appen for å sikre at den fungerer som forventet.
Velg
 øverst til høyre for å kjøre appen.
Skriv inn et uttrykk i tekstinndatakontrollen, og velg Hent poengsum. Sentimentpoengsummen skal vises i løpet av noen få sekunder.
Den ferdige appen ser ut som på følgende bilde:
Det er en enkel app, men den får kraftig funksjonalitet ved å kunne kalle Cognitive Services gjennom en egendefinert kobling.
Neste trinn
Del koblingen i organisasjonen og/eller få koblingen sertifisert slik at personer utenfor organisasjonen kan bruke den:
gi tilbakemelding
Vi setter stor pris på tilbakemeldinger om problemer med koblingsplattformen vår, eller ideer til nye funksjoner. Hvis du vil gi tilbakemelding, kan du gå til Sende inn problemer eller få hjelp med koblinger og velge tilbakemeldingstype.