Script injectors
This article covers script injectors that can be used to add scripts to online pages in Microsoft Dynamics 365 Commerce.
The Dynamics 365 Commerce module library provides two prebuilt script injector modules: external script and inline script. You can add these modules to a page or page template to inject inline or external scripts into the HTML head, body begin, or body end of a page as needed. For example, you can add a script for integration with third-party analytics, or other service scripts.
External script module
The external script module allows you to add JavaScript from external sources by providing a URL that points to a valid JavaScript file. After the module is added using Commerce site builder, the script URL can be added to the Script source property.
The external script module includes the execute script asynchronously and defer script execution configuration properties. The execute script asynchronously property specifies whether the script should be executed asynchronously. The defer script execution property specifies whether the script should be executed when the page has finished parsing configuration properties.
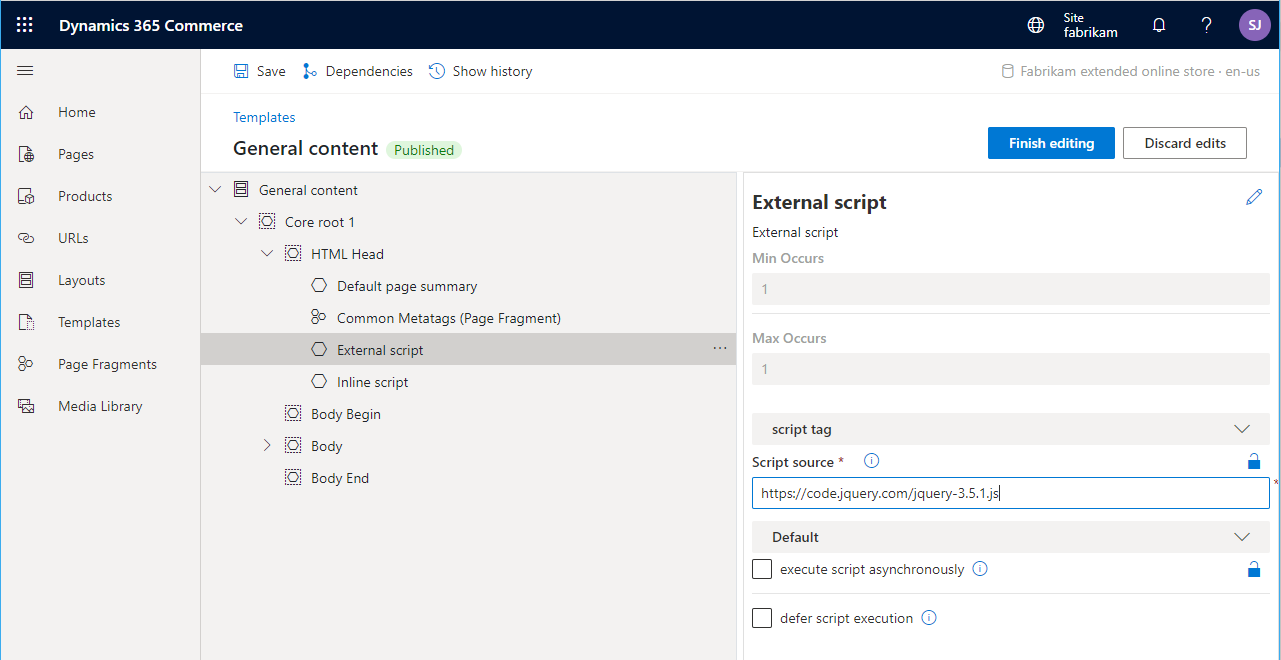
The following illustration shows an external script injector module that is being configured on a page template. The Script source property box is where you add the URL that points to the script source code that will be injected into the HTML for the rendered page.

Inline script module
The inline script module allows you to add inline JavaScript code directly to a page template or page. After the module is added using Commerce site builder, the script can be pasted into the Inline script property box, as highlighted in the following illustration.

Note
When adding script to the Inline script property box, you do not need to add the outer <script> tags, just the inline JavaScript code.
Custom script injector modules
In some cases, you might have to inject scripts into your site or site pages, but the prebuilt script injector modules from the module library aren't flexible as you require. For example, you might want additional configuration fields to be exposed in the authoring tools. In these cases, you can extend the prebuilt script injector modules into new custom script injector modules. You can put a custom script injector module on a page, in a shared template, or in a master template.
Create a custom script injector
To create a custom script injector, use the following command to create a new module.
C:\repos\MySite>yarn msdyn365 add-module my-script-injector
Next, open the my-script-injector.definition.json file and change the "$type" property to "scriptModule". After providing a friendly name and description, add the "Script" and "HTML head" categories, and "script" to the "tags" property. These categories and tags will allow the script injector to access the applicable page slots already defined inside a page template.
Script modules contain a special "attributes" section that defines where the module can be placed. The attributes include "allowInBodyBegin", "allowInBodyEnd", and "allInHead", and the attribute values can be true or false. The default values for all three attributes are false, so it's important to specify where the module can be loaded.
Configurations can also be added to allow the script to be added from within Commerce site builder.
The following example shows a configured custom script injector definition file.
{
    "$type": "scriptModule",
    "friendlyName": "My Script Injector",
    "name": "my-script-injector",
    "description": "Used to add custom script to a page.",
    "categories": [
        "Script",
        "HTML head"],
    "tags": ["script"],
    "attributes": {
        "allowInBodyBegin": true,
        "allowInBodyEnd": true,
        "allowInHead": true
    },
    "dataActions": {
    },
    "config": {
        "scriptSource": {
            "friendlyName": "Script source",
            "description": "The script source. Can be an external URL or a relative URL. Relative URLs are resolved from the public folder",
            "type": "string",
            "group": "script tag",
            "required": true
        },
        "async": {
            "friendlyName": "execute script asynchronously",
            "description": "specifies that the script is executed asynchronously",
            "type": "boolean",
            "default": false
        },
        "defer": {
            "friendlyName": "defer script execution",
            "description": "Specifies that the script is executed when the page has finished parsing",
            "type": "boolean",
            "default": false
        }
    }
}
Modify the script injector view file
You can modify the my-script-injector.tsx React file and the my-script-injector.view.tsxAnalytics.tsx view file, if needed.
To create a custom script injector you can use HtmlHeadInclude, which is a React Higher-Order Component that allows you to insert elements into the head of the page. It is simple to use, and you can add any elements you want in your view file between the <HtmlHeadInclude> tags, as shown in the following example.
import { HtmlHeadInclude } from '@msdyn365-commerce/core-internal';
import * as React from 'react';
import { IMyScriptInjectorViewProps } from './my-script-injector';

export default (props: IMyScriptInjectorViewProps) => {
    const scriptContents = `window.ga=window.ga||function(){(ga.q=ga.q||[]).push(arguments)};ga.l=+new Date;ga('create', 'UA-XXXXX-Y', 'auto');ga('send', 'pageview')`;
    return (
        <HtmlHeadInclude>
            <script data-load-point='headStart' dangerouslySetInnerHTML={{ __html: scriptContents}} />
            <script data-load-point='headStart' async src={props.config.scriptSource} />
        </HtmlHeadInclude>
    );
};
Note
Inline script content should be saved as a string and then inserted into the script using the React dangerouslySetInnerHTML attribute (to avoid escaping special characters), and the data-load-point attribute must be specified on script tags. This attribute controls where the script tag should be placed. Possible values include headStart, headEnd, bodyStart, and bodyEnd.
The HtmlHeadInclude component can also be used to insert <title>, <meta>, <link>, and <style> tags into the head of an HTML document. Unlike scripts, these elements do not need a data-load-point attribute as they will always be placed in the head.
After a custom script injector module is deployed to a Dynamics 365 Commerce environment, it will appear in site builder.