Assign Microsoft Entra roles to groups
To simplify role management, you can assign Microsoft Entra roles to a group instead of individuals. This article describes how to assign Microsoft Entra roles to role-assignable groups using the Microsoft Entra admin center, PowerShell, or Microsoft Graph API.
Prerequisites
- Microsoft Entra ID P1 license
- Privileged Role Administrator role
- Microsoft.Graph module when using Microsoft Graph PowerShell
- Azure AD PowerShell module when using Azure AD PowerShell
- Admin consent when using Graph explorer for Microsoft Graph API
For more information, see Prerequisites to use PowerShell or Graph Explorer.
Microsoft Entra admin center
Tip
Steps in this article might vary slightly based on the portal you start from.
Assigning a Microsoft Entra role to a group is similar to assigning users and service principals except that only groups that are role-assignable can be used.
Tip
These steps apply to customers that have a Microsoft Entra ID P1 license. If you have a Microsoft Entra ID P2 license in your tenant, you should instead follow steps in Assign Microsoft Entra roles in Privileged Identity Management.
Sign in to the Microsoft Entra admin center as at least a Privileged Role Administrator.
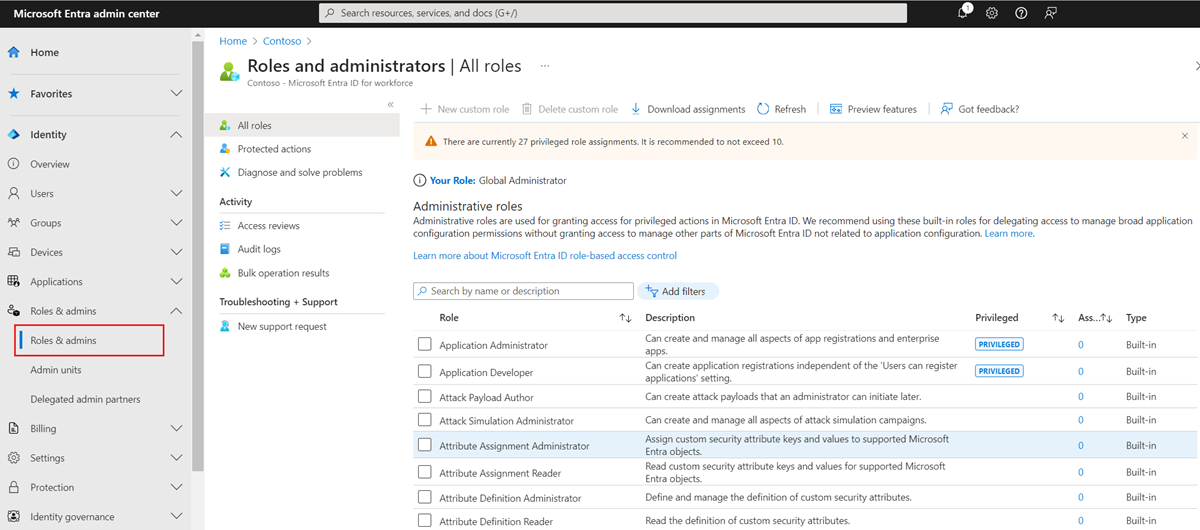
Browse to Identity > Roles & admins > Roles & admins.
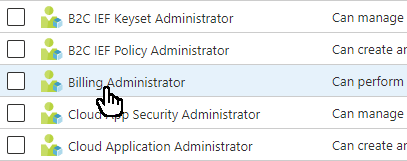
Select the role name to open the role. Don't add a check mark next to the role.
Select Add assignments.
If you see something different from the following screenshot, you might have Microsoft Entra ID P2. For more information, see Assign Microsoft Entra roles in Privileged Identity Management.
Select the group you want to assign to this role. Only role-assignable groups are displayed.
If group isn't listed, you will need to create a role-assignable group. For more information, see Create a role-assignable group in Microsoft Entra ID.
Select Add to assign the role to the group.
PowerShell
Create a role-assignable group
Use the New-MgGroup command to create a role-assignable group.
Connect-MgGraph -Scopes "Group.ReadWrite.All","RoleManagement.ReadWrite.Directory"
$group = New-MgGroup -DisplayName "Contoso_Helpdesk_Administrators" -Description "This group has Helpdesk Administrator built-in role assigned to it in Azure AD." -MailEnabled:$false -SecurityEnabled -MailNickName "contosohelpdeskadministrators" -IsAssignableToRole:$true
Get the role definition you want to assign
Use the Get-MgRoleManagementDirectoryRoleDefinition command to get a role definition.
$roleDefinition = Get-MgRoleManagementDirectoryRoleDefinition -Filter "displayName eq 'Helpdesk Administrator'"
Create a role assignment
Use the New-MgRoleManagementDirectoryRoleAssignment command to assign the role.
$roleAssignment = New-MgRoleManagementDirectoryRoleAssignment -DirectoryScopeId '/' -RoleDefinitionId $roleDefinition.Id -PrincipalId $group.Id
Microsoft Graph API
Create a role-assignable group
Use the Create group API to create a role-assignable group.
Request
POST https://graph.microsoft.com/v1.0/groups

{
    "description": "This group is assigned to Helpdesk Administrator built-in role of Azure AD.",
    "displayName": "Contoso_Helpdesk_Administrators",
    "groupTypes": [
        "Unified"
    ],
    "isAssignableToRole": true,
    "mailEnabled": true,
    "mailNickname": "contosohelpdeskadministrators",
    "securityEnabled": true
}
Response
HTTP/1.1 201 Created
Get the role definition you want to assign
Use the List unifiedRoleDefinitions API to get a role definition.
Request
GET https://graph.microsoft.com/v1.0/roleManagement/directory/roleDefinitions?$filter = displayName eq 'Helpdesk Administrator'
Response
{
    "@odata.context": "https://graph.microsoft.com/v1.0/$metadata#roleManagement/directory/roleDefinitions",
    "value": [
        {
            "id": "729827e3-9c14-49f7-bb1b-9608f156bbb8",
            "description": "Can reset passwords for non-administrators and Helpdesk Administrators.",
            "displayName": "Helpdesk Administrator",
            "isBuiltIn": true,
            "isEnabled": true,
            "resourceScopes": [
                "/"
            ],

    ...
Create the role assignment
Use the Create unifiedRoleAssignment API to assign the role.
Request
POST https://graph.microsoft.com/v1.0/roleManagement/directory/roleAssignments

{
    "@odata.type": "#microsoft.graph.unifiedRoleAssignment",
    "principalId": "<Object ID of Group>",
    "roleDefinitionId": "<ID of role definition>",
    "directoryScopeId": "/"
}
Response
HTTP/1.1 201 Created
Content-type: application/json
{
    "@odata.context": "https://graph.microsoft.com/v1.0/$metadata#roleManagement/directory/roleAssignments/$entity",
    "id": "<Role assignment ID>",
    "roleDefinitionId": "<ID of role definition>",
    "principalId": "<Object ID of Group>",
    "directoryScopeId": "/"
}


