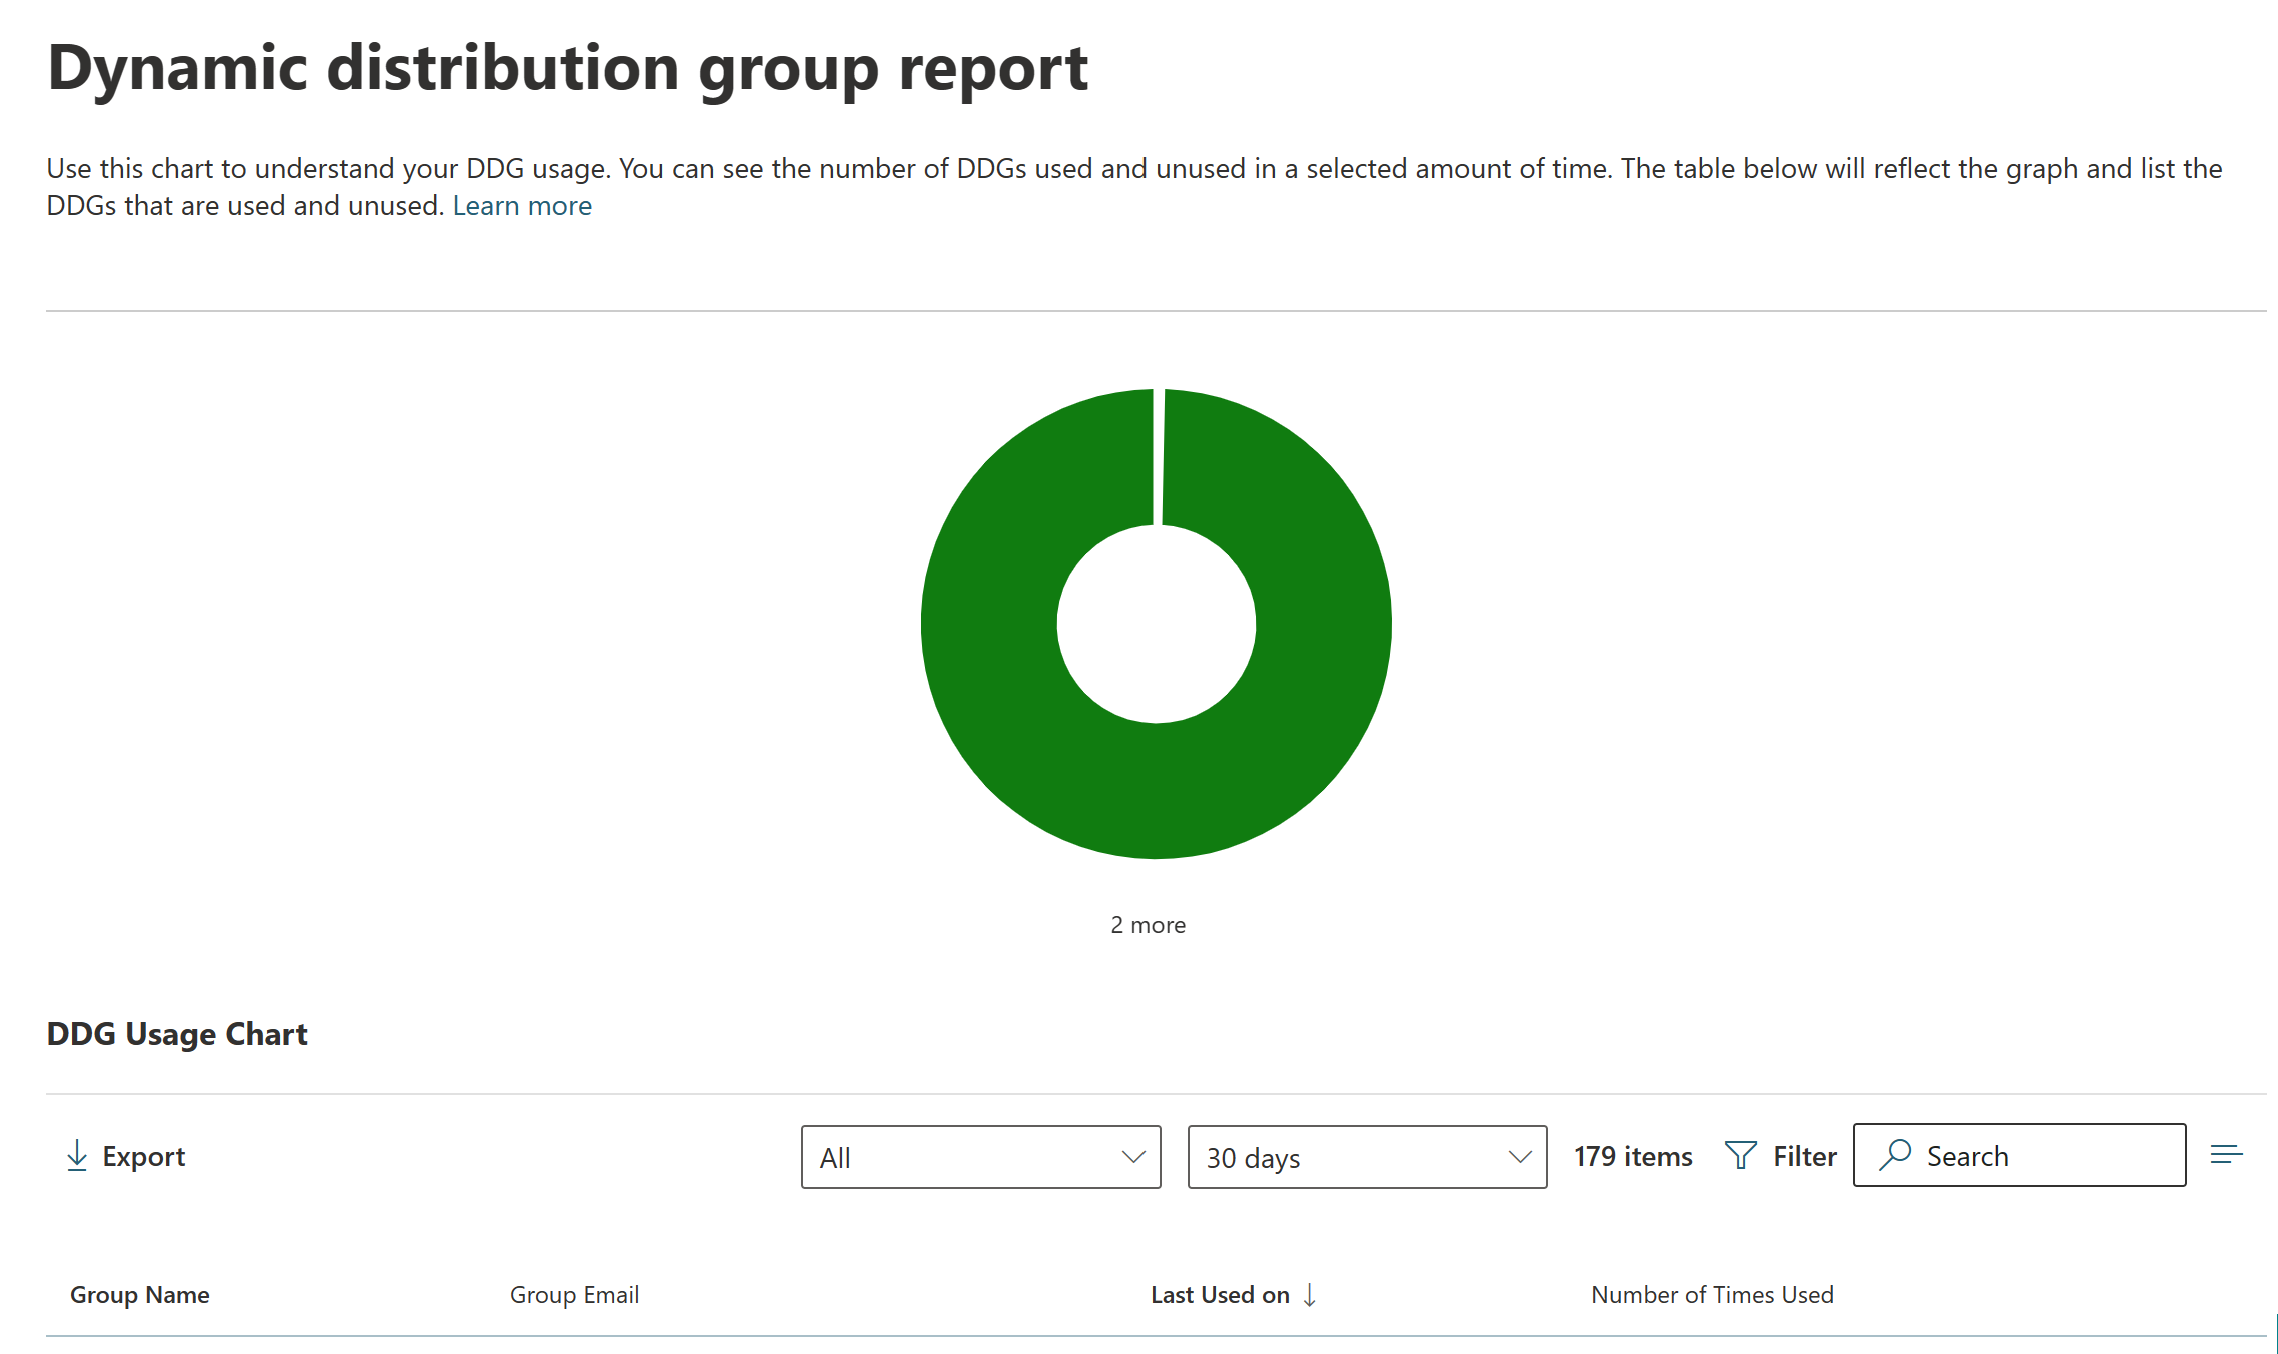
Dynamic Distribution Groups report in the new Exchange admin center in Exchange Online
The Dynamic Distribution Groups report in the new Exchange admin center provides insight into the usage of dynamic distribution groups for your organization. You can find this report at Reports > Mail Flow in the new EAC.
Note
By default, the report shows data for the last 30 days. If the report is empty, try changing the date range.
For permissions that are required to use this report, see Permissions required to view mail flow reports.
By default, the report shows data for "Used" Dynamic Distribution Groups. If the report is empty, try changing the filter to show "All" or "Unused" Dynamic Distribution Groups.
The table lists the dynamic distribution groups and the number of times it was used based on the date filter and the filter that allows you to select All, Used, or Unused. If you select All, it lists all dynamic distribution groups whether it was used or unused based on the date filter. If you select Used, it lists only the dynamic distribution groups that were used based on the date filter. If you select Unused, it lists only the dynamic distribution groups that were unused based on the date filter.
The dynamic distribution group report details section shows the following information about each dynamic distribution group:
- Group Name
- Group Email
- Last used on (date)
- Number of times used
To quickly filter the results, click Search ![]() and start typing a value.
and start typing a value.
To filter the results by date range, use the date filter. You can specify a date range up to 90 days.
For more advanced filters that you can save and use later, click Filter ![]() and select New filter. In the Custom filter flyout that appears, enter the following information:
and select New filter. In the Custom filter flyout that appears, enter the following information:
- Name your filter: Enter a unique name.
- Click Add new clause. A clause contains the following elements that you need to enter:
- Field: Select Group Name, Group Email, Last Used on, or Number of Times Used.
- Operator: Select starts with or is.
- Value: Enter the value you want to search for.
You can click Add new clause as many times as you need. Multiple clauses use AND logic (<Clause1> AND <Clause2>...).
To remove a clause, click Remove ![]() .
.
When you're finished, click Save. The new filter is automatically loaded and the results are changed based on the filter. This gives the same result as clicking Filter and selecting the customer filter from the list.
To unload an existing filter (return to the default list), click Filter ![]() and select Clear all filters.
and select Clear all filters.
Click Export to export the displayed results to a .csv file.
