Console extensions from Community hub
Applies to: Configuration Manager (current branch)
Important
Starting in March 2023, this feature of Configuration Manager is being removed. All future versions, starting with 2303 will not have the Community hub node in the admin console. The Community hub node in older versions will be redirected to deprecated features.
When you use Configuration Manager version 2103 or later, you can download console extensions from the Community hub and have it applied to all consoles connected to a hierarchy. The Console extensions node allows you to start managing the approval and installation of console extensions used in your environment. Getting an extension from community hub doesn't make it immediately available. First, an administrator has to approve the extension for the site. Then console users can install the extension to their local console.
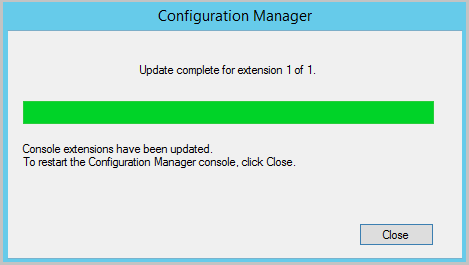
After you approve an extension, when you open the console, you'll see a console notification. From the notification, you can start the extension installer. After the installer completes, the console restarts automatically, and then you can use the extension.
Find extensions in Community hub
Extensions in Community hub are recognizable by their icon. When browsing All objects in the Community hub, you can easily notice if a new extension has been added.The following icon is used for extensions:
![]()
You can also use a search filter to find an extension in Community hub. Start with the search filter for type:extension, then add additional filters as needed. If you're not finding an extension that's known to be available, double check the displayed categories hierarchy setting for Community hub.
| Filter name | Example search | Uses a like filter |
|---|---|---|
| Type | type:report |
Yes |
| Curated | curated:false |
No |
| User | user:<GitHubUserName> |
No |
| Organization | org:<GitHubOrganizationName> |
No |
| Name | name:test_report |
Yes |
| Description | desc:description |
Yes |
When filtering Community hub items in search:
- The filtering on some items is done using
likeso you don't need to know the exact name of an item you are trying to find. For instance, usingtype:taskwould return task sequences. - You can't use the same filter twice in a search. For instance, using
type:reportandtype:extensionwould only return reports since the second filter gets ignored. - Search filtering respects the hierarchy setting for displaying Community hub content categories.
- If your hierarchy is set to Display Microsoft and curated community content, then
curated:falseis ignored. - If your hierarchy is set to Display Microsoft content, then the
curated:filter is ignored.
- If your hierarchy is set to Display Microsoft and curated community content, then
- Starting in version 2203, the console displays a list of search filters you can use in Community hub.

Download and deploy the extension
You'll download the extension from Community hub, then use the Console Extensions node to test the extension and deploy it to other Configuration Manager console users. In-depth instructions for the deployment process and managing extensions can be found in the Console Extensions article. Below is a high-level overview of the extension deployment process:
- Once you've found an extension in Community hub that you want in your environment, select Download.
- The downloaded extension will appear in the Console Extensions node.
- Change the security scope for the extension, approve it, then install and test it on a local console. For more information on this process, see Install and test an extension on a local console.
- When testing is complete, enable user notifications for installation.
Console extension installation notifications
Users are notified when console extensions are approved for installation. These notifications occur for users in the following scenarios:
- The Configuration Manager console requires a built-in extension, such as WebView2, to be installed or updated.
- Console extensions are approved and notifications are enabled from Administration > Overview > Updates and Servicing > Console Extensions.
- When notifications are enabled, users within the security scope for the extension receive the following prompts:
In the upper-right corner of the console, select the bell icon to display Configuration Manager console notifications.

The notification will say New custom console extensions are available.

Select the link Install custom console extensions to launch the install.
When the install completes, select Close to restart the console and enable the new extension.

Note
When you upgrade to Configuration Manager 2107, you will be prompted to install the WebView2 console extension again. For more information about the WebView2 installation, see the WebView2 installation section if the Community hub article.