Quickstart: Install and use a NuGet package in Visual Studio (Windows only)
A NuGet package contains reusable code that other developers have made available to you for use in your projects. You can install a NuGet package in a Microsoft Visual Studio project by using the NuGet Package Manager, the Package Manager Console, or the .NET CLI. This article demonstrates how to create a Windows Presentation Foundation (WPF) project with the popular Newtonsoft.Json package. The same process applies to any other .NET or .NET Core project.
After you install a NuGet package, you can then make a reference to it in your code with the using <namespace> statement, where <namespace> is the name of package you're using. After you've made a reference, you can then call the package through its API.
The article is for Windows users only. If you're using Visual Studio for Mac, see Install and use a package in Visual Studio for Mac.
Tip
To find a NuGet package, start with nuget.org. Browsing nuget.org is how .NET developers typically find components they can reuse in their own applications. You can do a search of nuget.org directly or find and install packages within Visual Studio as shown in this article. For more information, see Find and evaluate NuGet packages.
Prerequisites
Install Visual Studio 2022 for Windows with the .NET desktop development workload.
You can install the 2022 Community edition for free from visualstudio.microsoft.com, or use the Professional or Enterprise edition.
Create a project
You can install a NuGet package into any .NET project if that package supports the same target framework as the project. However, for this quickstart you'll create a Windows Presentation Foundation (WPF) Application project.
Follow these steps:
In Visual Studio, select File > New > Project.
In the Create a new project window, enter WPF in the search box and select C# and Windows in the dropdown lists. In the resulting list of project templates, select WPF Application, and then select Next.
In the Configure your new project window, optionally update the Project name and the Solution name, and then select Next.
In the Additional information window, select .NET 6.0 (or the latest version) for Framework, and then select Create.
Visual Studio creates the project, and it appears in Solution Explorer.
Add the Newtonsoft.Json NuGet package
To install a NuGet package in this quickstart, you can use either the NuGet Package Manager or the Package Manager Console. Depending on your project format, the installation of a NuGet package records the dependency in either your project file or a packages.config file. For more information, see Package consumption workflow.
NuGet Package Manager
To use the NuGet Package Manager to install the Newtonsoft.Json package in Visual Studio, follow these steps:
Select Project > Manage NuGet Packages.
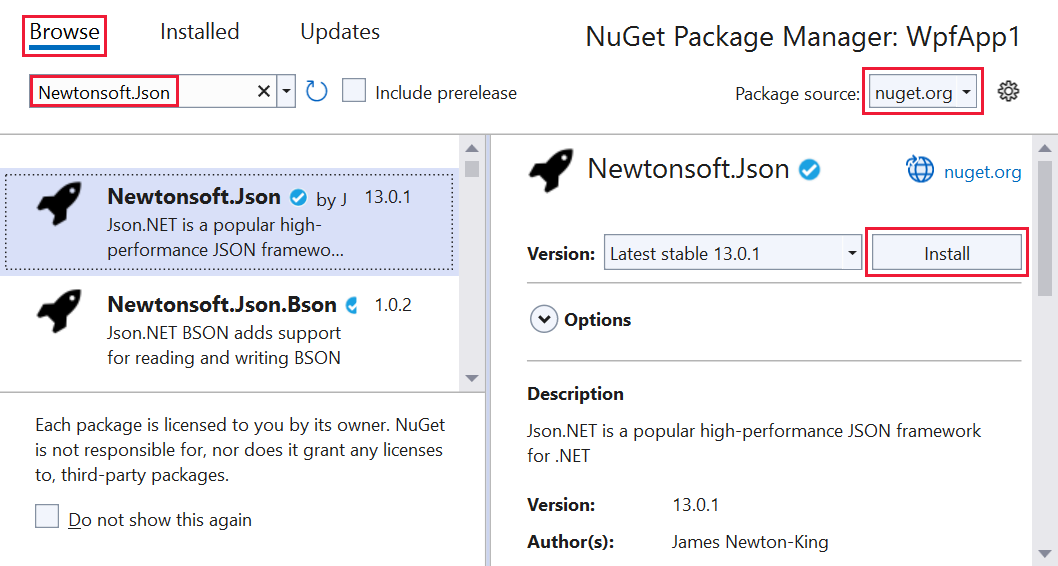
In the NuGet Package Manager page, choose nuget.org as the Package source.
From the Browse tab, search for Newtonsoft.Json, select Newtonsoft.Json in the list, and then select Install.

If you're prompted to verify the installation, select OK.
Package Manager Console
Alternatively, to use the Package Manager Console in Visual Studio to install the Newtonsoft.Json package, follow these steps:
From Visual Studio, select Tools > NuGet Package Manager > Package Manager Console.
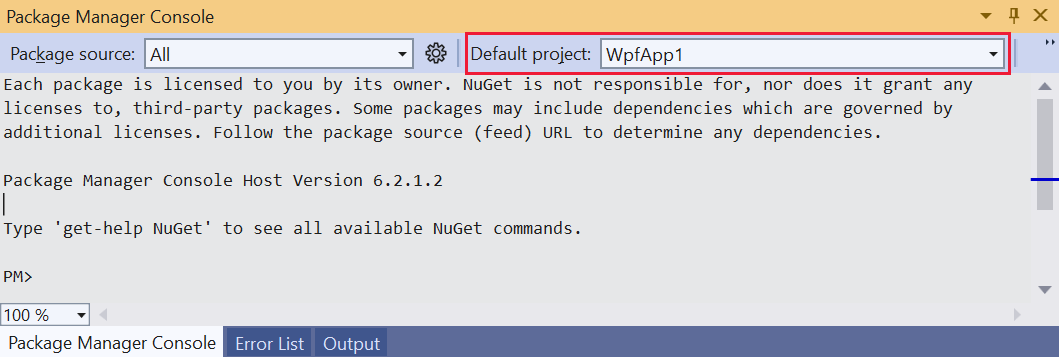
After the Package Manager Console pane opens, verify that the Default project drop-down list shows the project in which you want to install the package. If you have a single project in the solution, it's preselected.

At the console prompt, enter the command
Install-Package Newtonsoft.Json. For more information about this command, see Install-Package.The console window shows the output for the command. Errors typically indicate that the package isn't compatible with the project's target framework.
Use the Newtonsoft.Json API in the app
With the Newtonsoft.Json package in the project, call its JsonConvert.SerializeObject method to convert an object to a human-readable string:
From Solution Explorer, open MainWindow.xaml and replace the existing
<Grid>element with the following code:<Grid Background="White"> <StackPanel VerticalAlignment="Center"> <Button Click="Button_Click" Width="100px" HorizontalAlignment="Center" Content="Click Me" Margin="10"/> <TextBlock Name="TextBlock" HorizontalAlignment="Center" Text="TextBlock" Margin="10"/> </StackPanel> </Grid>Open the MainWindow.xaml.cs file under the MainWindow.xaml node, and insert the following code inside the
MainWindowclass after the constructor:public class Account { public string Name { get; set; } public string Email { get; set; } public DateTime DOB { get; set; } } private void Button_Click(object sender, RoutedEventArgs e) { Account account = new Account { Name = "John Doe", Email = "john@microsoft.com", DOB = new DateTime(1980, 2, 20, 0, 0, 0, DateTimeKind.Utc), }; string json = JsonConvert.SerializeObject(account, Newtonsoft.Json.Formatting.Indented); TextBlock.Text = json; }To avoid an error for the
JsonConvertobject in the code (a red squiggle line will appear), add the following statement at the beginning of the code file:using Newtonsoft.Json;To build and run the app, press F5 or select Debug > Start Debugging.
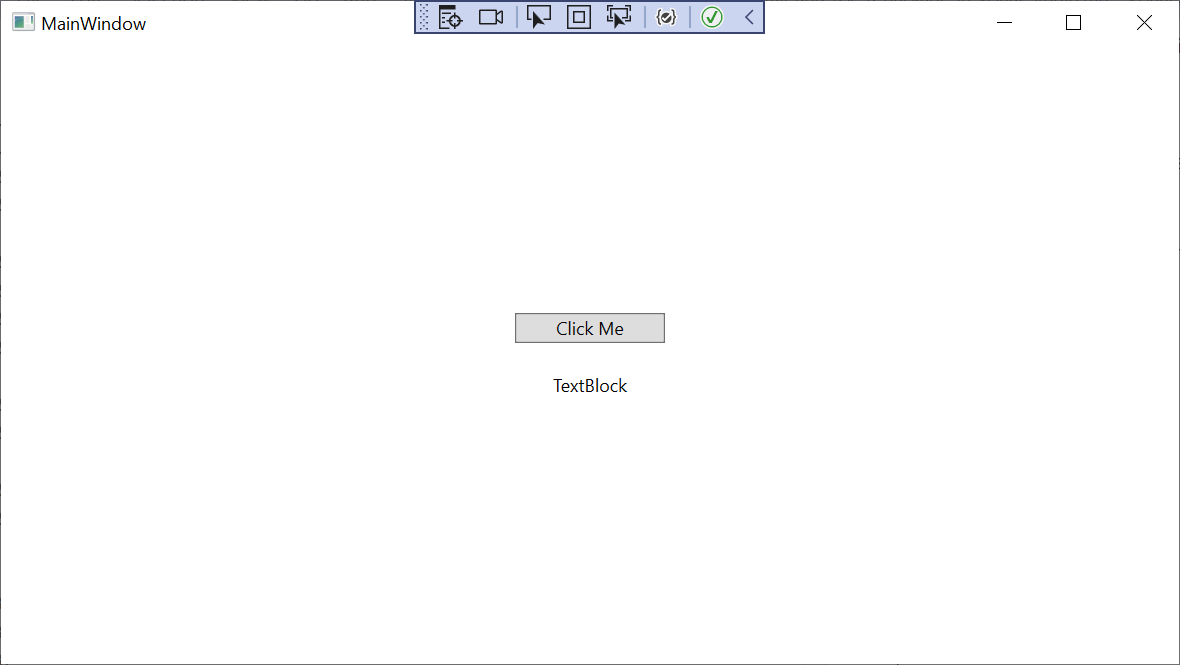
The following window appears:

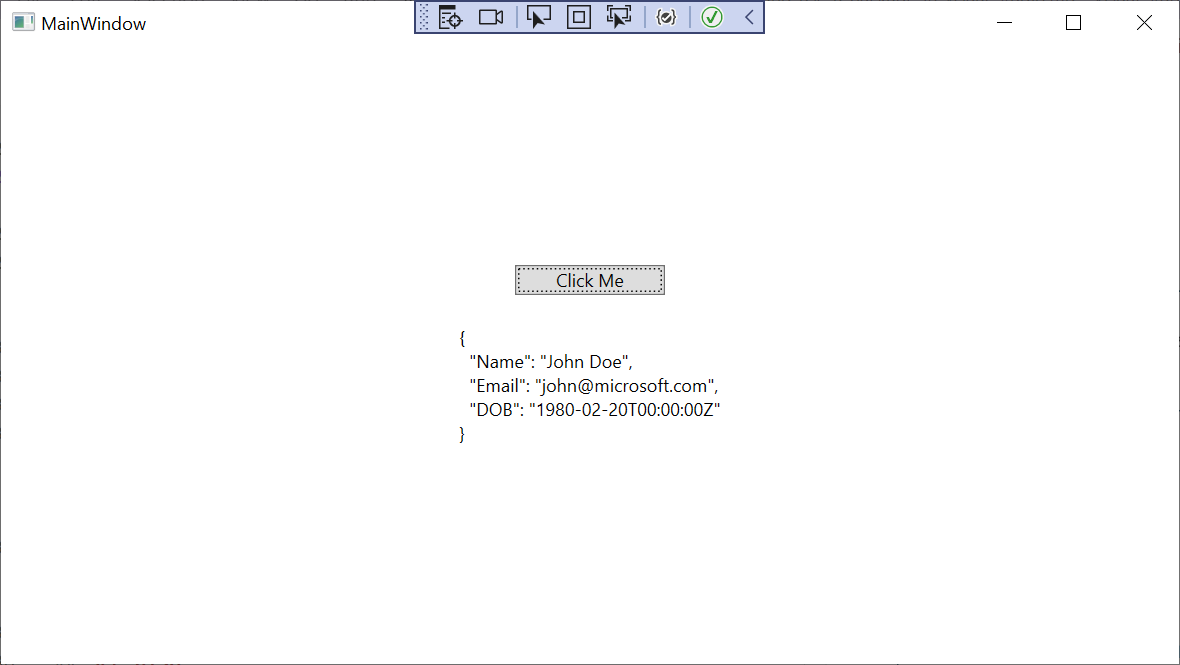
Select the Click Me button to see the contents of the
TextBlockobject replaced with JSON text.
Related video
- Install and Use a NuGet Package with Visual Studio
- Find more NuGet videos on Channel 9 and YouTube.
See also
For more information about NuGet, see the following articles:
- What is NuGet?
- Package consumption workflow
- Find and choose packages
- Package references in project files
- Install and use a package using the .NET CLI.
- Newtonsoft.Json package
Next steps
Congratulations on installing and using your first NuGet package. Advance to the next article to learn more about installing and managing NuGet packages.