Note
Access to this page requires authorization. You can try signing in or changing directories.
Access to this page requires authorization. You can try changing directories.
In Microsoft Outlook 2010, Outlook 2013, Outlook 2016, Outlook 2019 and Outlook for Microsoft 365, you can add multiple Microsoft Exchange accounts to the same profile if one of the following conditions is true:
- You have Full Access permission to the additional Exchange mailboxes.
- You have the credentials to access the additional Exchange mailboxes if you don't have Full Access permission to them.
This article describes the following two scenarios in which this feature can cause unexpected behavior, and provides alternate steps that you can use to set up the scenario.
- You add both the manager and delegate mailbox accounts to the same Outlook profile.
- You manually add another mailbox account, and the Exchange Auto Mapping feature adds it at the same time.
Scenario 1: The manager and delegate mailboxes are added to the same profile
In Outlook 2010, Outlook 2013, and Outlook 2016, Outlook 2019, and Outlook for Microsoft 365 a manager can add a delegate's account to their profile and the delegate can add the manager's account to their profile. This type of profile configuration isn't supported, however there is no warning or error message displayed when this scenario is set up.
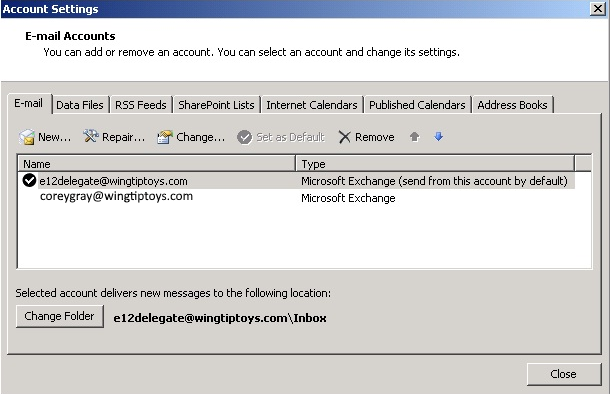
In the following example, an Outlook 2010 profile displays two Exchange accounts that have been added to it.

In this example, the manager is Corey Gray. The delegate has added Corey Gray's account to their own Outlook profile. This configuration is not supported.
To set up a configuration in which a manager and their delegate's mailboxes can be accessed from the same Outlook profile, follow these steps instead.
Remove the second Exchange account from your profile. For example, if you're a delegate, remove your manager's account from your profile.
On the File menu, select Info.
Select Account Settings, and then select Account Settings.
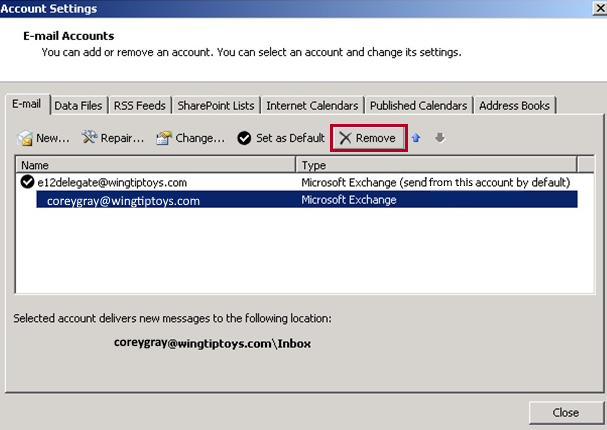
Select the account that you want to remove, and then select Remove.

Select Yes when you're prompted to confirm that you want to remove the account.
In the Account Settings dialog box, select Close.
Add the other user's mailbox as an additional mailbox. (This is not the same as adding a second account).
On the File menu, select Info.
Select Account Settings, and then select Account Settings.
Select your primary account, and then select Change.
In the Change Account dialog box, select More Settings.
On the Advanced tab, select Add.
Enter the name of the mailbox, and then select OK.
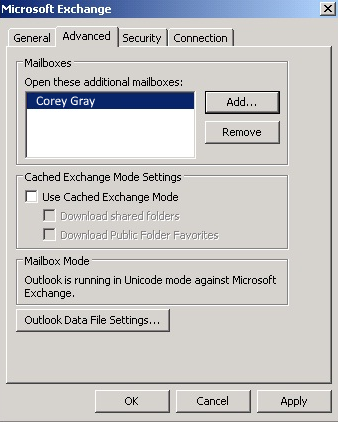
After you make this change, you'll see the additional mailbox listed on the Advanced tab in the Microsoft Exchange dialog box.

In the Microsoft Exchange dialog box, select OK.
In the Change Account dialog box, select Next.
Select Finish, and then select Close.
In this configuration, you can access any folders in the second mailbox for which you have permissions.
The following steps demonstrate two problems that may occur if manager and delegate accounts are added to the same profile. There might be other situations too in which this unsupported configuration can cause problems.
Note: The Calendar sharing improvements introduced in Outlook for Microsoft 365 that are based on the REST protocol don't prevent such problems.
In Outlook 2010, Outlook 2013, Outlook 2016, Outlook 2019 or Outlook for Microsoft 365, use a profile for a manager's mailbox to configure a delegate for the manager's mailbox with default settings.
Note: The default delegate settings don't provide the delegate access to items that are owned by the manager and marked as private.
Add an appointment to the manager's calendar, and then enable the Private option on the Tags section of the Ribbon.
Exit Outlook.
Start Outlook by using a profile for the delegate.
On the File tab, select Add Account on the Info tab.
In the Add New Account dialog box, enter the manager's account information, and then select Next.
Select Finish after the account is added successfully.
Select OK at the prompt that instructs you to restart Outlook.
Exit Outlook, and then restart it by using the delegate's profile.
Enter the delegate's credentials if prompted.
In the navigation pane, select the Calendar module.
Under My Calendars, cancel the selection of the manager's calendar.
Select Open Calendar on the Ribbon, and then select Open Shared Calendar.
Enter the name of the manager's mailbox, and then select OK.
In the manager's calendar, open the appointment created in step 2. The appointment opens and the delegate is able to view the private item. However, this should not have been possible because of the default delegate settings used to configure the delegate for the manager's mailbox.
Right-click anywhere on the manager's calendar and select New Meeting Request.
Examine the account in the From field. The account that is listed is the manager's account. However, this should have been the delegate's account, because the delegate is creating the meeting on behalf of the manager.
Scenario 2: The mailbox that you add manually is also added by Exchange Auto-Mapping
In Exchange Server 2010 Service Pack 1 (SP1) or later versions, the Auto-Mapping feature automatically adds mailboxes to the Outlook Navigation Pane if you have Full Access permission to the mailboxes. Outlook manages these additional mailboxes by using a specific permission set. If you previously configured these mailboxes as multiple Exchange accounts in the same Outlook profile, you may experience unexpected behavior when you send mail by using these mailboxes. This is because the mailboxes that are accessed by using the multiple Exchange accounts functionality in Outlook use a different permissions set from the mailboxes that are added by Exchange Auto-Mapping. Outlook tries to use both permission sets at the same time which is not a supported functionality.
To prevent this issue, disable Auto-Mapping for shared Exchange mailboxes. The administrator must use Exchange Management Shell to disable Auto-Mapping. For more information about how to disable Auto-Mapping for Exchange mailboxes, see How to remove automapping for a shared mailbox in Outlook for Microsoft 365.