Note
Access to this page requires authorization. You can try signing in or changing directories.
Access to this page requires authorization. You can try changing directories.
While you can use a form to collect data in Power Pages sites, a multistep form allows you to create a form with multiple steps. Use a multistep form when you want to collect user input through multiple forms that use different components.
Note
- Multistep forms were called advanced forms earlier.
- Some features of multistep forms still need to be configured using the Portal Management app. Learn more: Define multistep form properties.
Create new multistep form
Go to Power Pages.
Select Edit on the site you want to add a page to.
Add a section on any page.
You can use Copilot to add multistep forms to your Power Pages site (preview). For more information, go to Overview of AI-powered and Copilot features in Power Pages.
Choose Multistep form from component library.
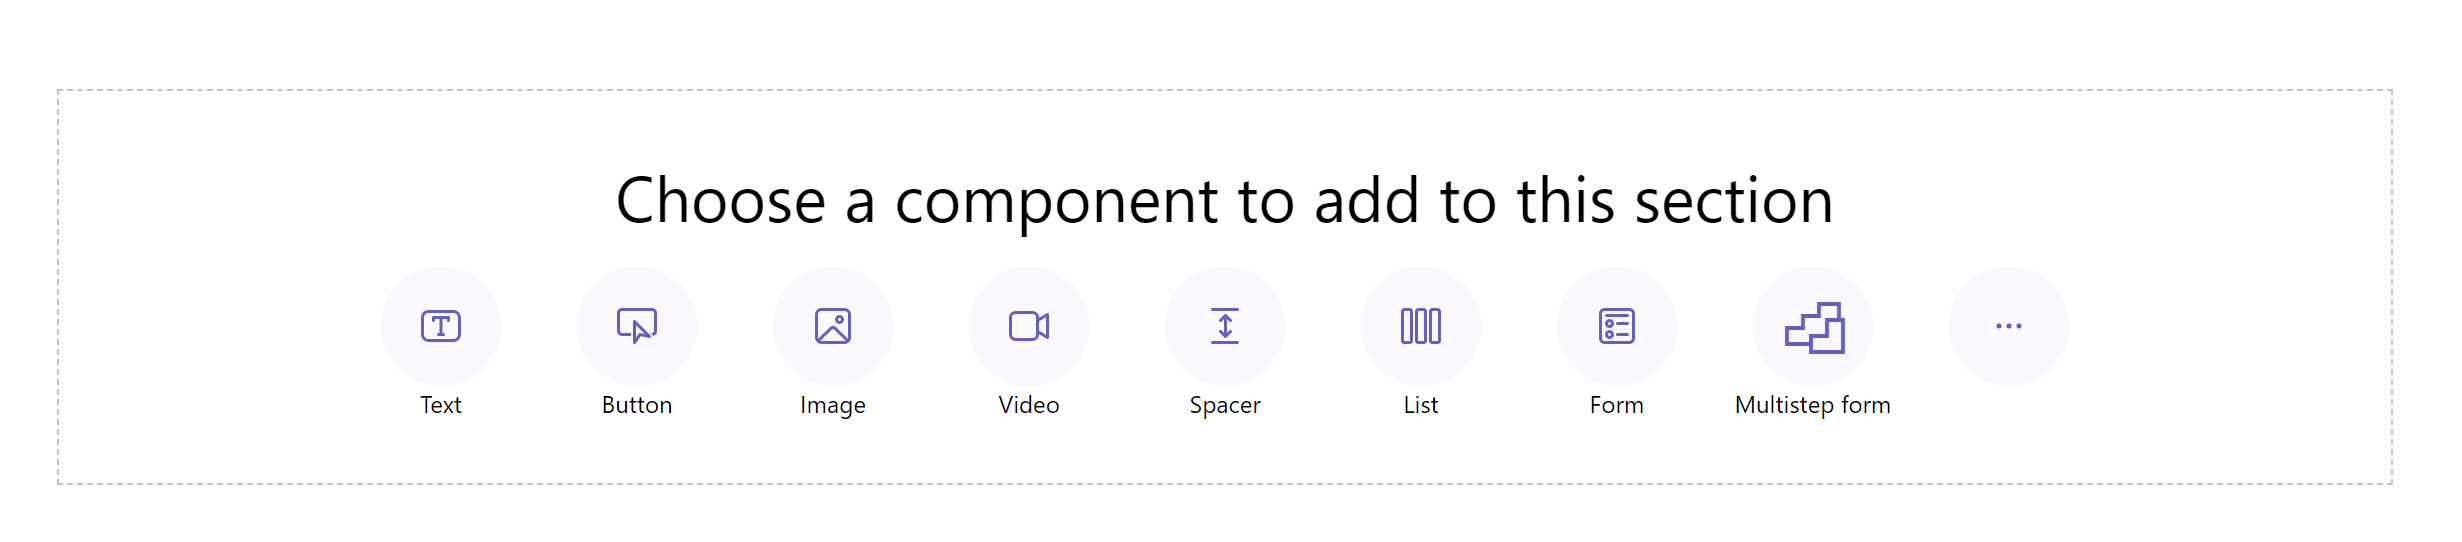
Select + New multistep form. Alternatively, you can also choose an existing multistep form (if a maker created one previously).

If necessary, edit the form name, and configure the form options with the following criteria.

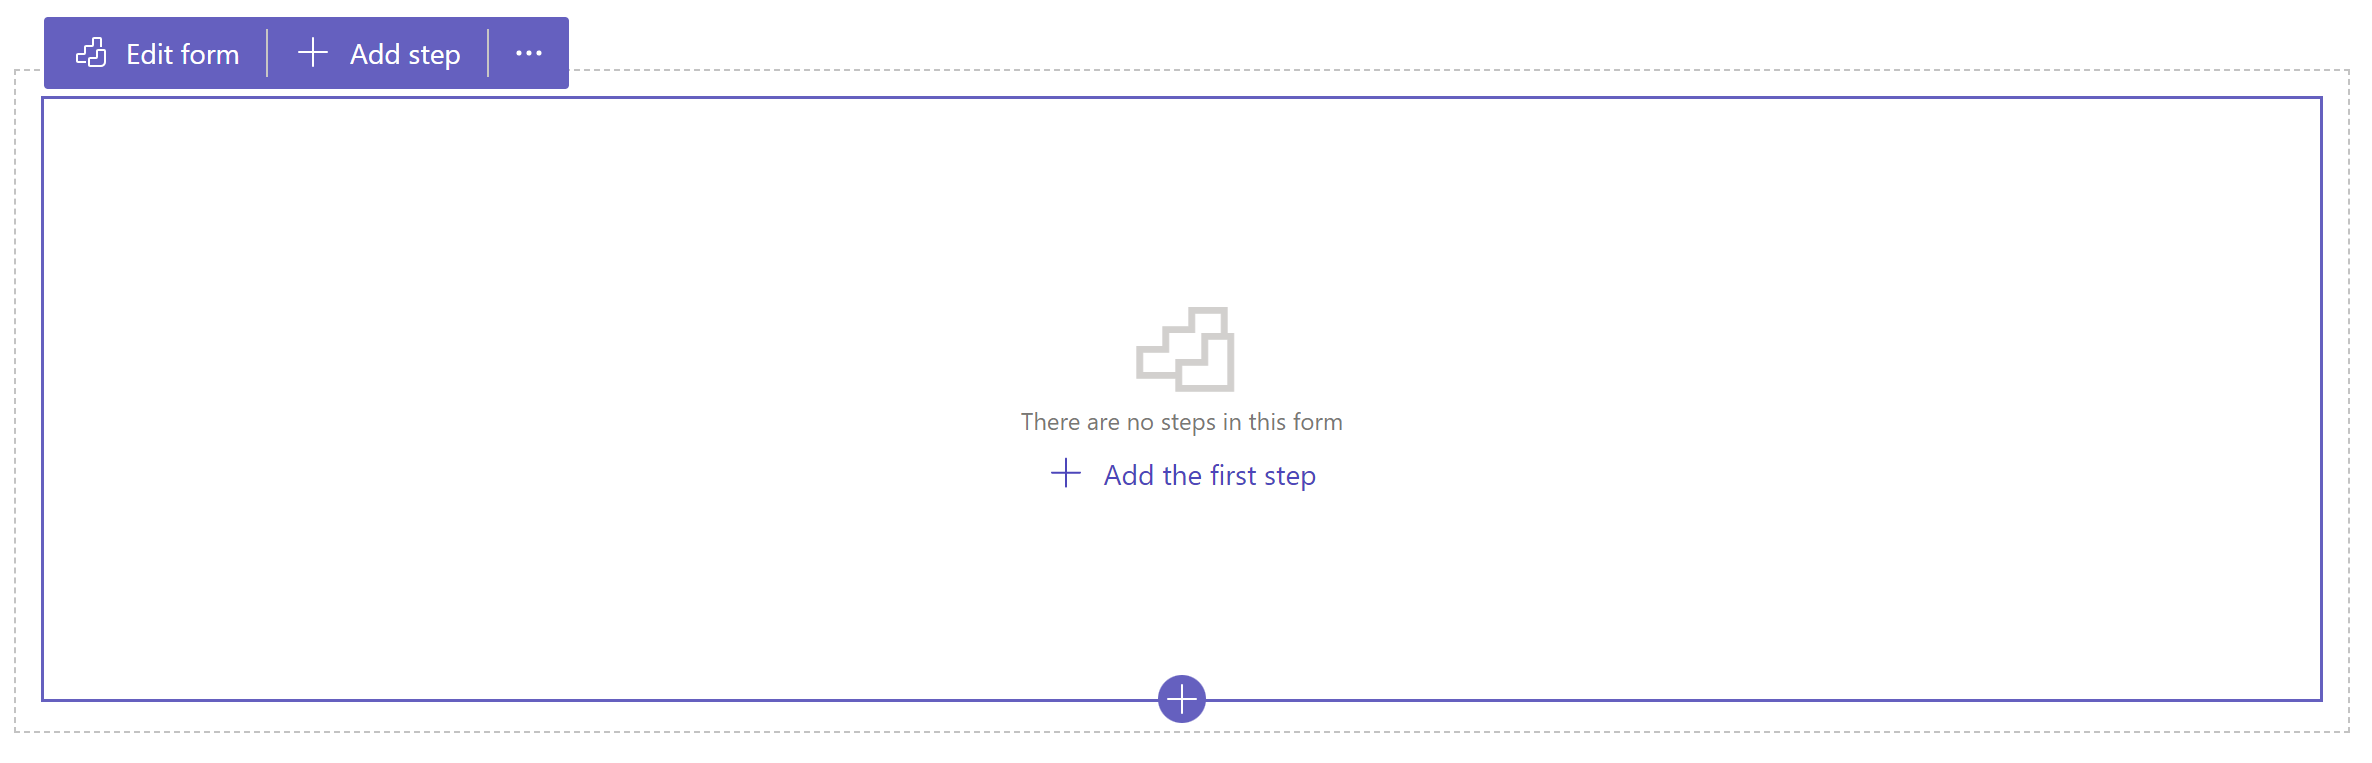
Option Description Show progress indicator Enable or disable progress indicator when submitting a multistep form. More information: Progress indicator Add multiple entries per person When enabled, allows the form to be submitted multiple times by same authenticated user. If you allow anonymous users to access the form, they can submit the form multiple times. On submit You can choose optionally to show a success message. You must enter the options to redirect to a webpage and redirect to a URL. Captcha You can choose to show a captcha to anonymous users, authenticated users, or both. More options From here, you can launch the form in Portal Management app for more settings. Select + Add the first step or + Add step.
Enter a name for the step, and then select a table and the form.
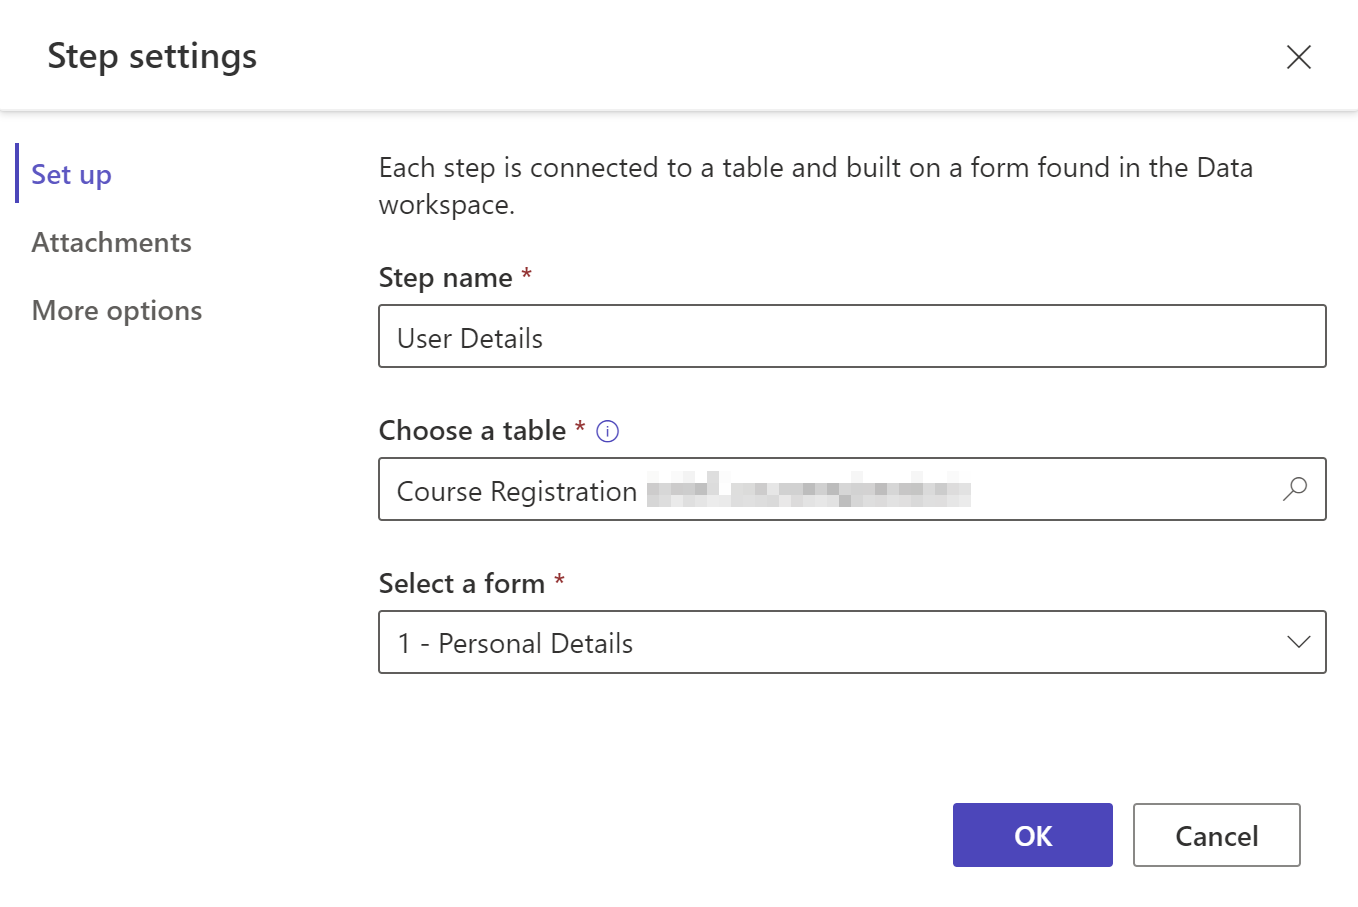
Option Description Step name Name of the step. Choose a table Select the table where the data is stored. Select a form Select one of the Dataverse forms available for the selected table. Attachments Configure attachments for the step. More information: Enable attachments More options Allows you to change step mode, enable or disable back button, and launch the Portal Management app from here for more settings. More information: Configure more options. If you want to create a new table or a new form, use Data workspace. Select Ok.
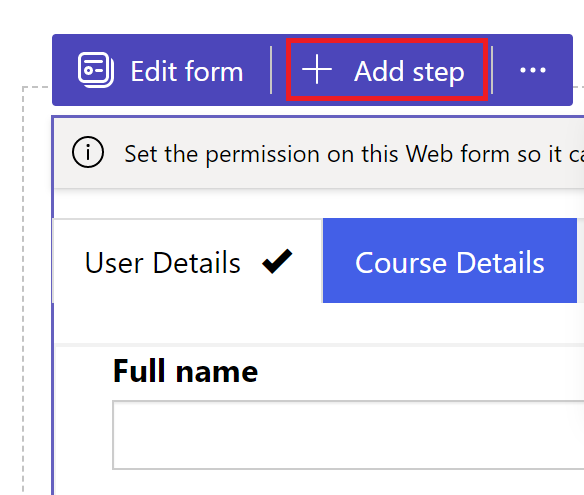
Add more steps by selecting + Add step from the toolbar.
Conditions and redirect steps aren't supported in maker studio. Go to the Portal Management app to create or view conditions and redirect steps.
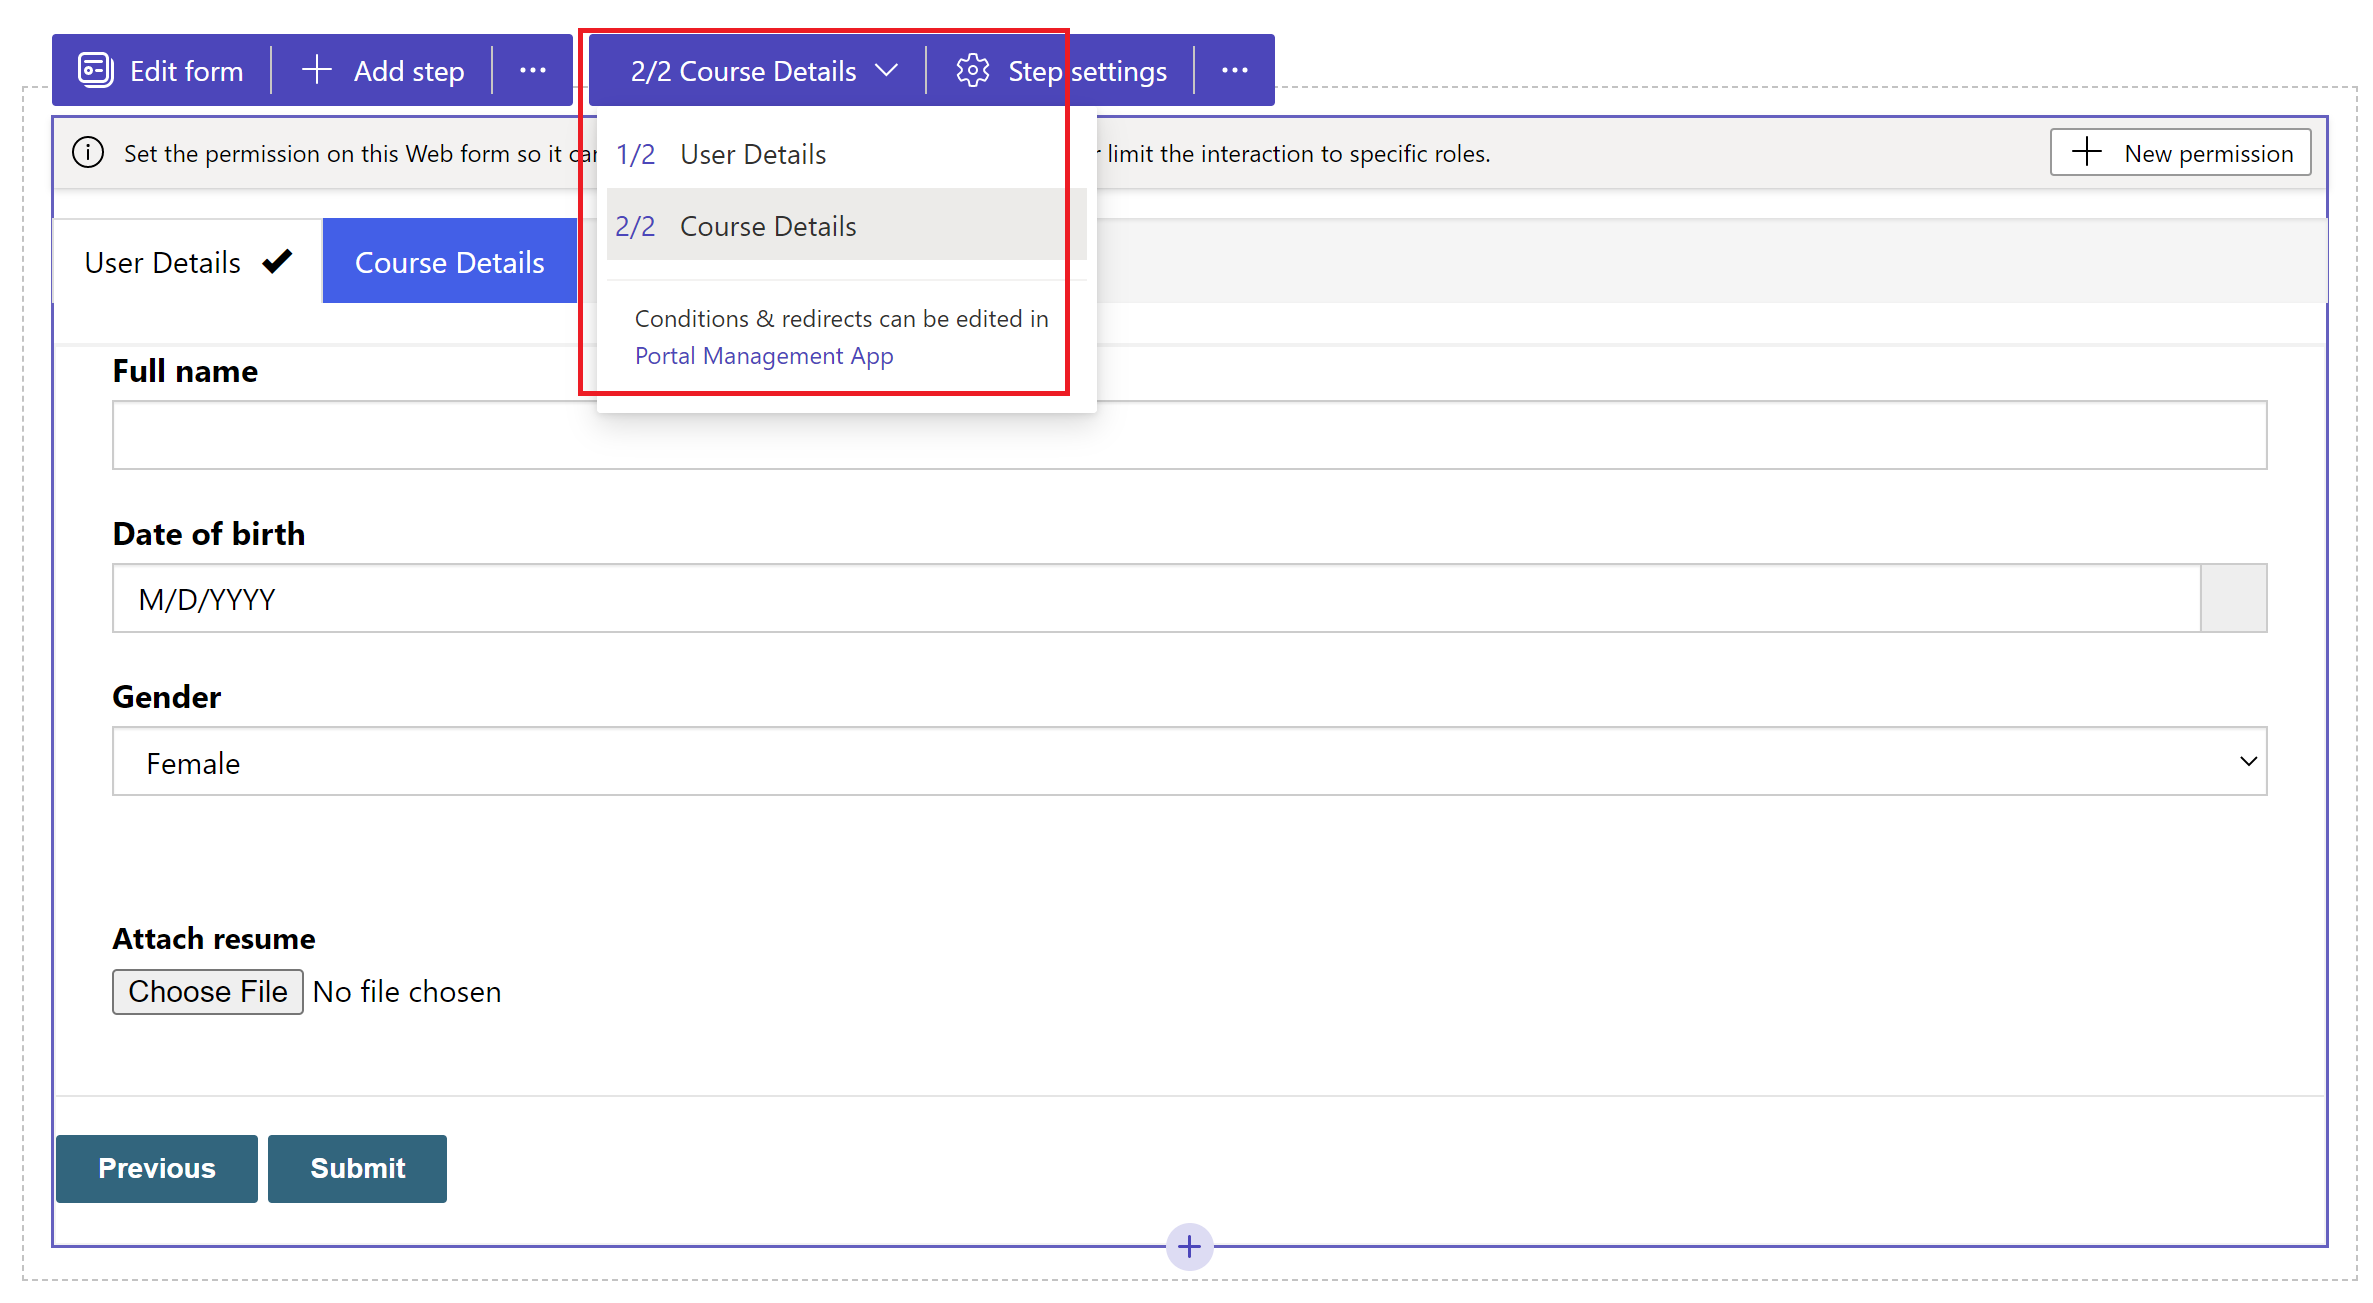
Preview steps
You can preview all steps inside the design studio by selecting the step from the step dropdown in the toolbar.
Enable attachments
You can enable notes attachment for any step. To enable notes attachment, go to Step settings > Attachments > select Enable attachments.
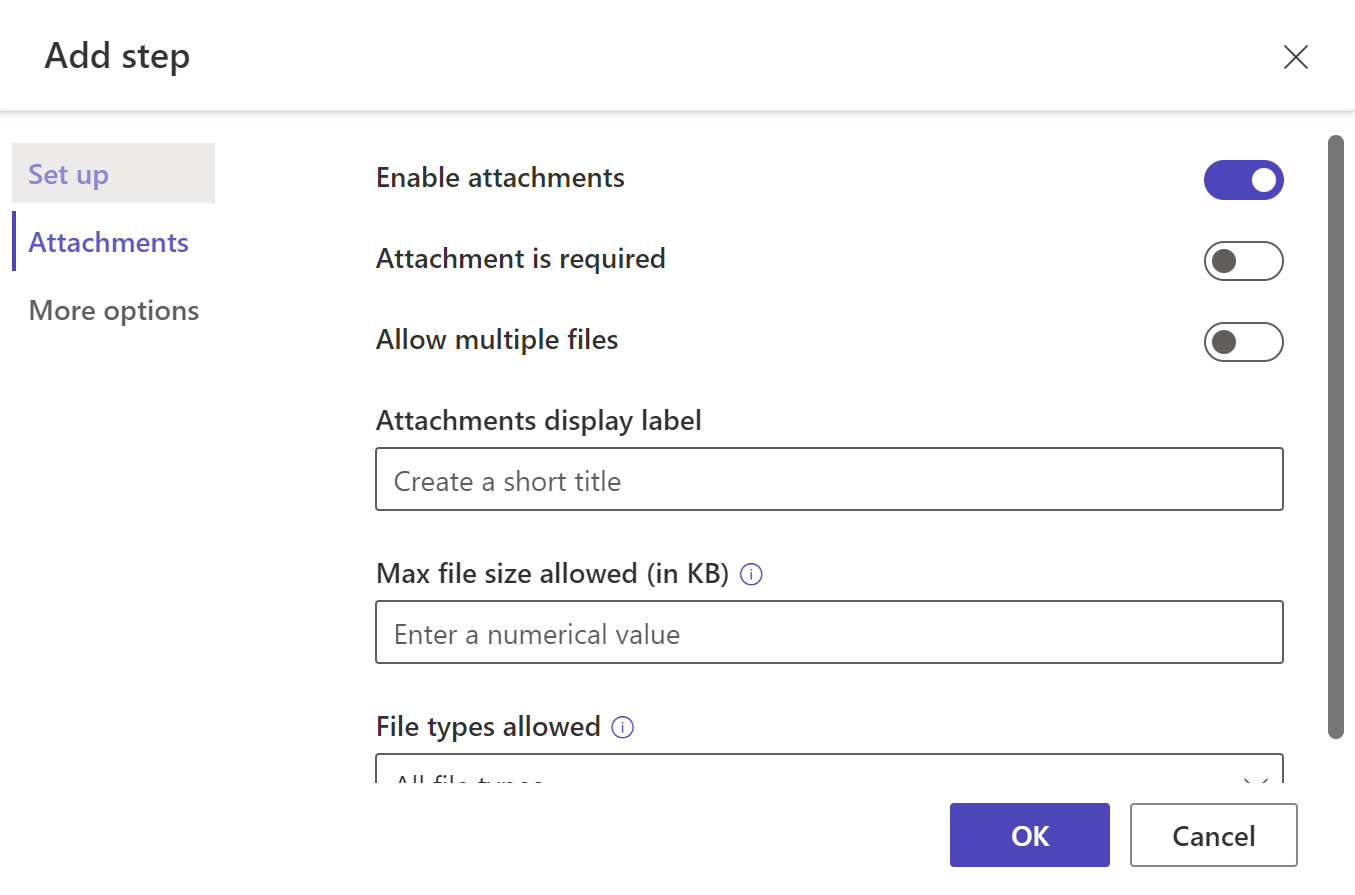
| Option | Description |
|---|---|
| Enable attachments | Enables or disables attachments on the multiform step. |
| Attachment is required | Makes attachments mandatory or optional. |
| Allow multiple files | Allow more than one file to the multistep form. |
| Attachments display label | Label that appears on the form for attachment upload. |
| Max file size allowed (in KB) | File size in KB allowed for the upload. Maximum limit depends on the value set in the Dataverse. |
| File types allowed | Select one or more file types from the available options that you want to allow for upload. |
Configure more options
You can configure form mode, back button and open the step in Portal Management app for more configuration.
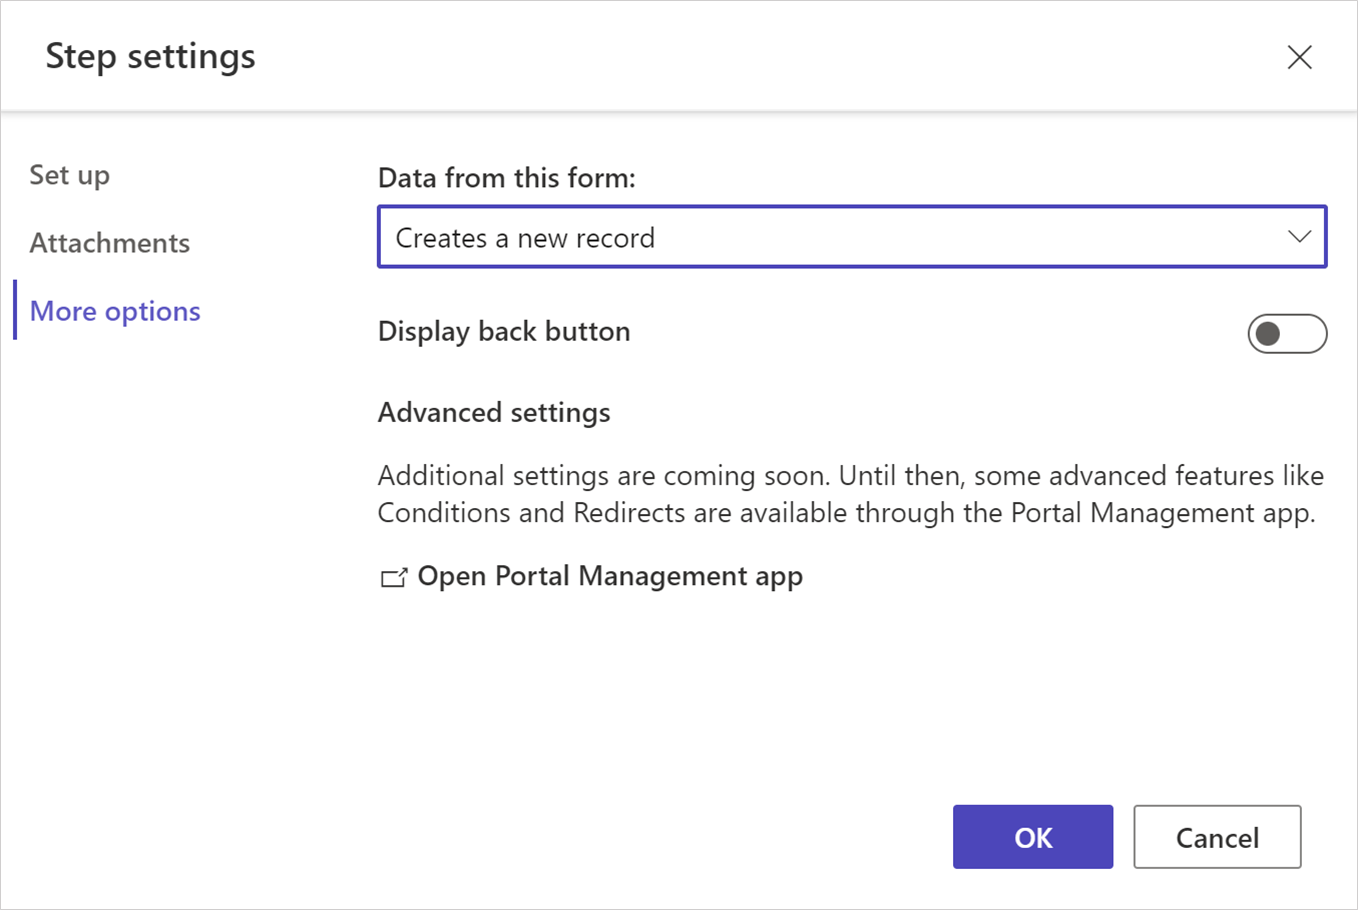
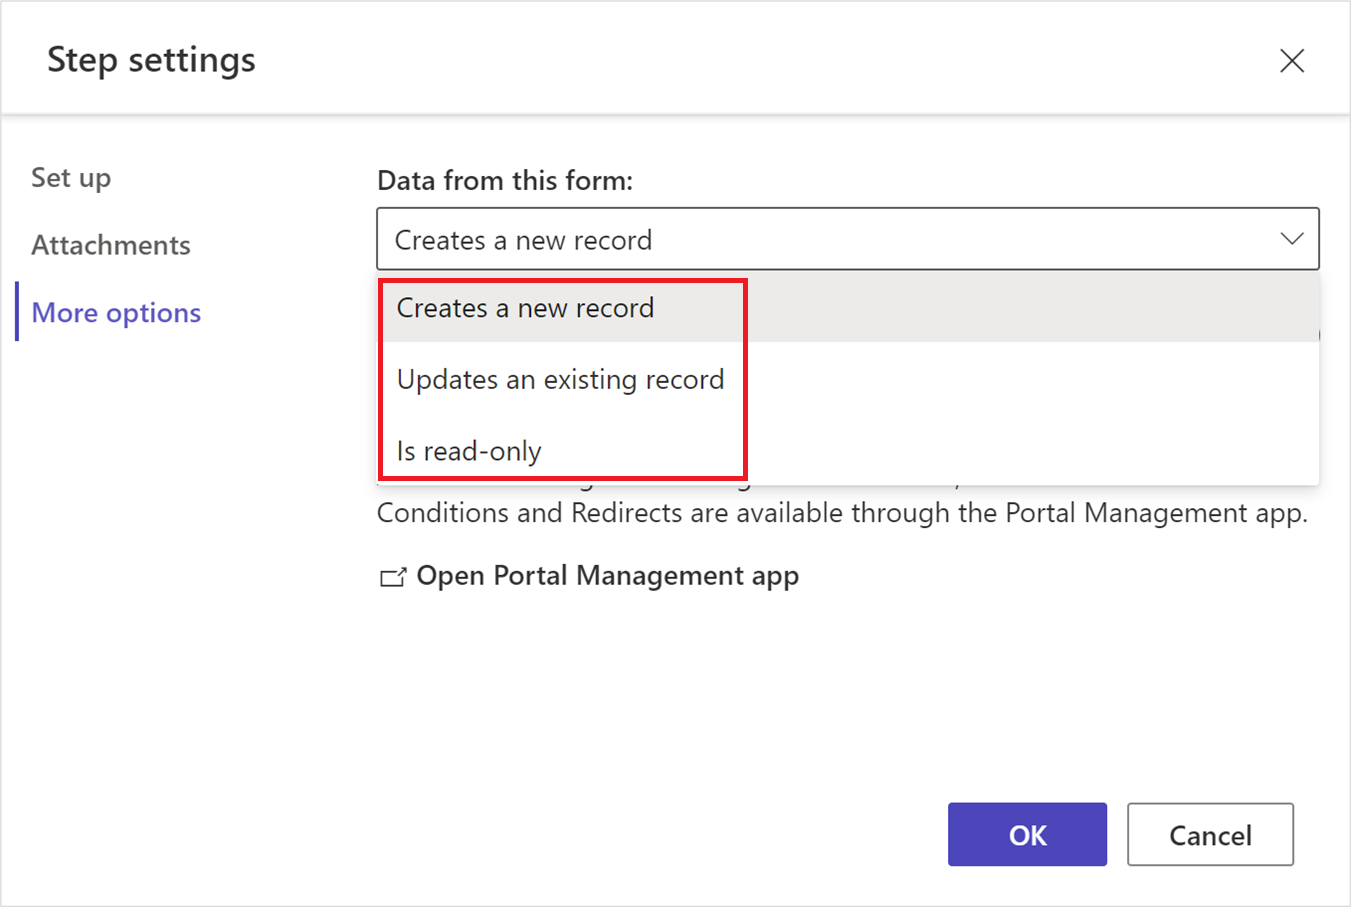
Change step mode
Form can be added to a step in create, update, or read-only mode. Step mode defines if the user can give inputs to submit a form, or edit an existing form, or open a form in read-only mode.
You can change the mode for a step when adding it, or from the Step settings > More options in the toolbar once the step is created.
Note
- By default, the first step is added in create mode and additional steps are added in edit mode.
- Different steps within a single multistep form can have different step modes.
Display back button
Enables or disables the back button when moving through different multistep form steps.
Open Portal Management app
Opens Portal Management app for more configuration.
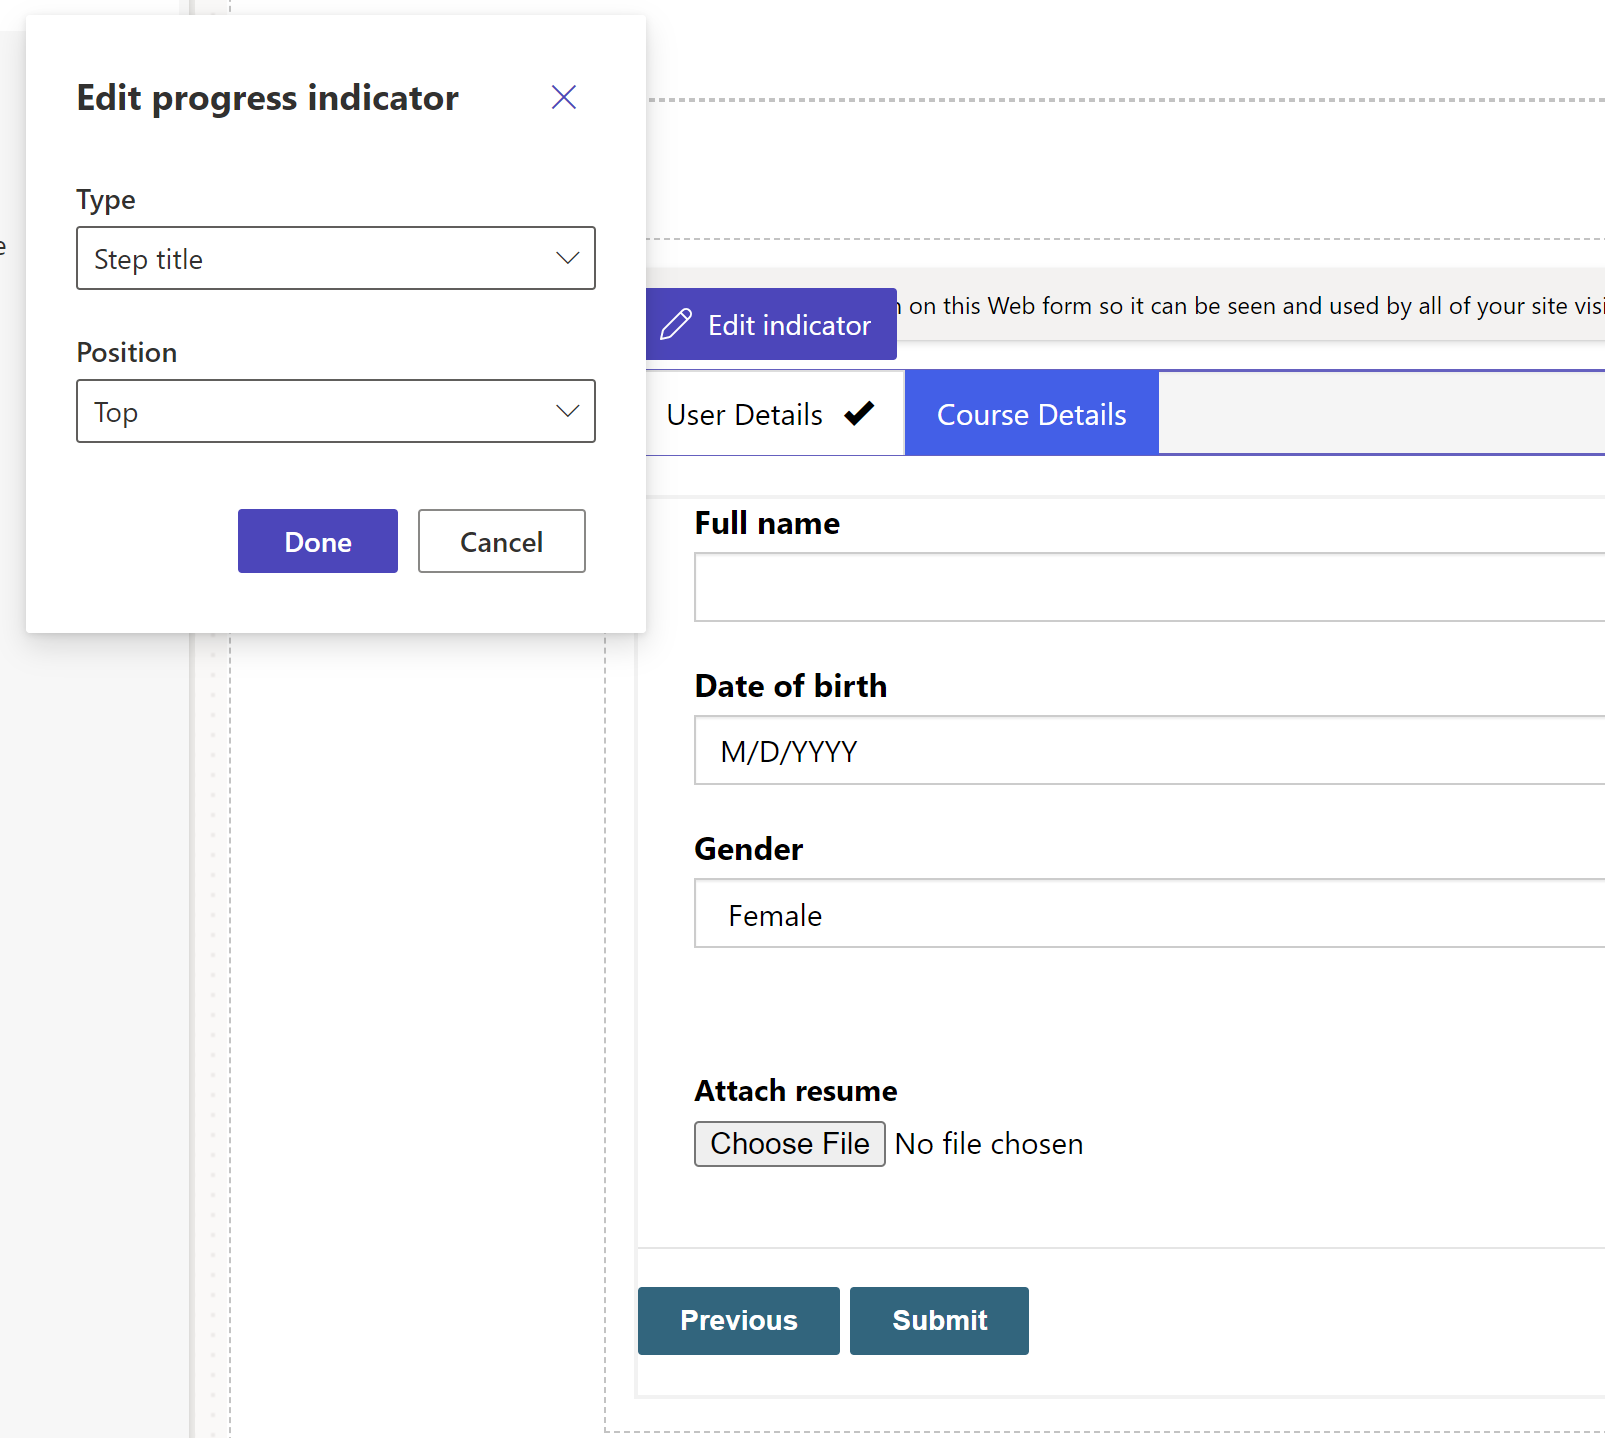
Progress indicator
A progress indicator shows you the step that you're currently on within a multistep form. You can change the progress indicator type and position.
Select Edit indicator to modify the progress indicator.
Enable table permissions
When you add a new form, you're prompted to set permission to allow users to interact with the form.
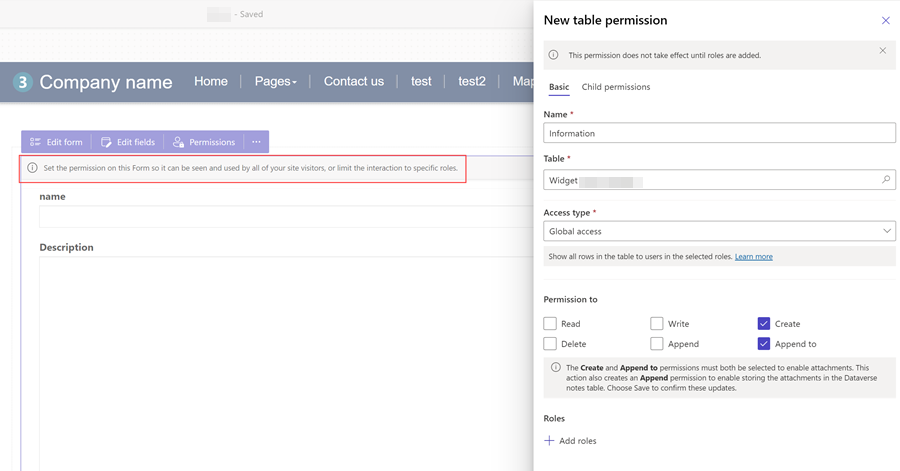
Table permissions settings default to create and append to, but you need to assign web roles and save the settings. Child table permission for the note (annotations) table, which contains the attachments, are created automatically.