Note
Access to this page requires authorization. You can try signing in or changing directories.
Access to this page requires authorization. You can try changing directories.
In this tutorial, you'll create a sample component using Power Apps component framework. Power Apps component framework empowers professional developers and app makers to create code components for model-driven and canvas aps. These code components can provide an enhanced experience for users working with data on forms, views, and dashboards. More information: Use code components in Power Pages
Note
- This tutorial is based on the existing Power Apps component framework tutorial that walks you through Power Apps grid control (preview) component on list and sub grid on blank page. You can also use any existing or new component, add it to any other web page for this tutorial. In this case, be sure to your component and web page when following the steps in this tutorial. To learn which code components are supported in portals, see Use code components in portals.
In this tutorial, you'll learn how to:
- Create a sample component using Power Apps component framework
- Package the component to a Microsoft Dataverse environment
- Configure Power Pages to add the component to a web page
- Visit your Power Pages web page to interact with the component
Prerequisites
- Portal version 9.4.9.xx or higher.
- Dataverse base portal package 9.3.2209.x or higher.
Step 1 - Create your first component
Complete the Create your first component tutorial.
Note
At the end of the Create your first component, you'll have a component named TSLinearInputComponent packaged and uploaded to your Dataverse environment.
Step 2 - Add the code component to views or subgrids in a model-driven app
To add your component to the Account table, views and subgrids, follow the steps here Convert views and subgrids into editable grids (preview)
Step 3 - Add code component to a list and subgrid in portal
In this step, you'll create a new list in the Portal Management app and then add the component to the created list. You can also use an existing list instead.
Step 3.1 - Add the code component to lists
The following steps outline how to add the control to a list component.
Open the Portals Management app.
On the left pane, under Content, select list.
Select New.
Enter Name. For example, Account list with code component.
For Table Name, select the table that you added the code component to earlier in this tutorial.
Select your portal website.
Add views under advance setting grid.

Select Use a configured code component as Yes

You can now add the list component to a page. See Add a list for details on adding a list to a webpage.
Step 3.2 - Add the code component to sub grid
The control can also be enabled on a sub-grid.
Open the Portals Management app.
On the left pane, under Content, select Basic Forms.
Select the basic form you created in the previous step.
Select Related.
Select Basic Form Metadata.
Select New Basic Form Metadata.
Select Type as Subgrid.
Select Subgrid Name.
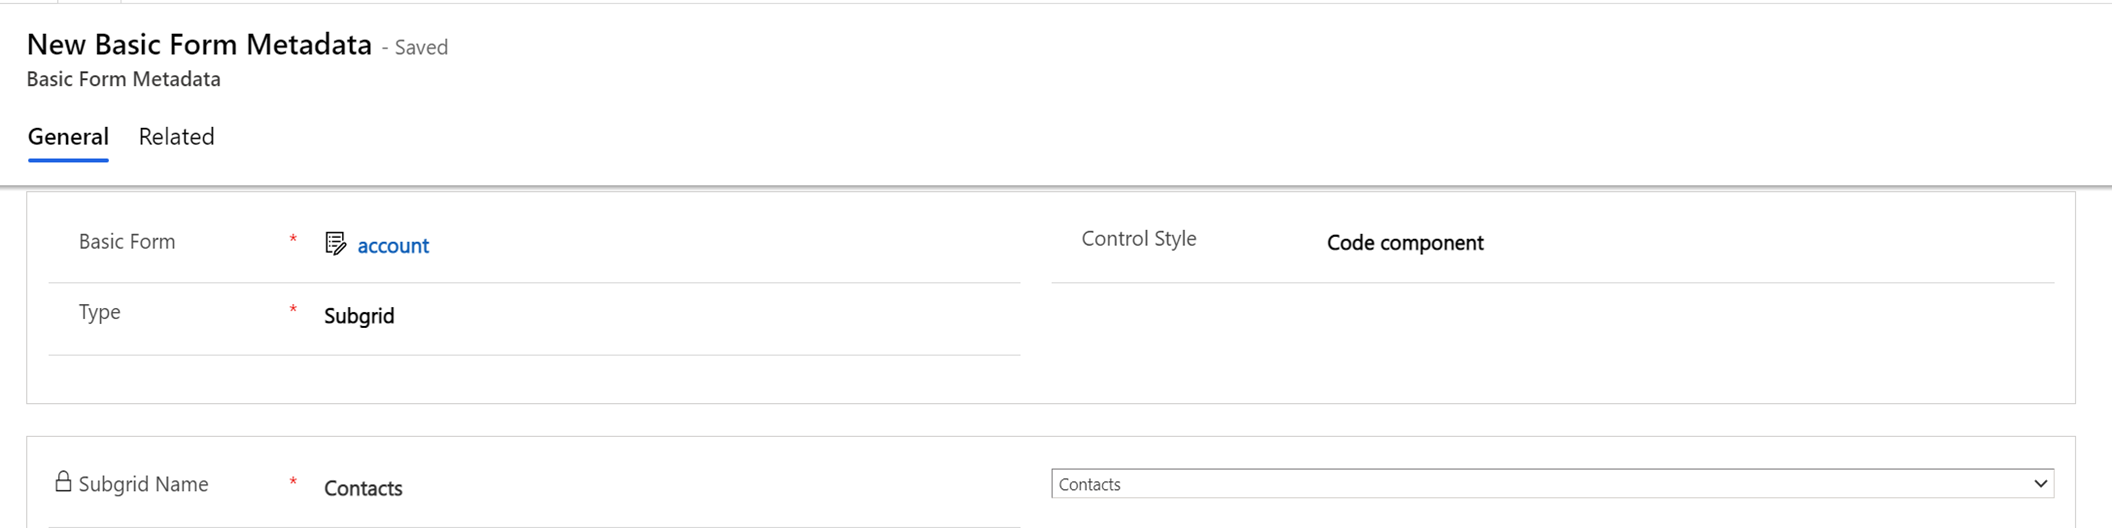
For Control Style, select Code component.

The form will need to be added to a webpage. See Add form for details on adding a form component to a webpage.
Add dataset-based code component using liquid tag
Data set based code components can be added using the codecomponent Liquid template tag. The key for denoting the code component that needs to be loaded is passed in using the name attribute. The key can be the GUID (which is the code component ID) or the name of the code component imported into Microsoft Dataverse.
See Liquid overview for details on using Liquid with Power Pages.
The values of the properties that the code component expects need to be passed in as a key/value pair separated by ":" (colon sign), where the key is the property name and the value is the JSON string value.
{% codecomponent name: <ID or name> <property1:value> <property2:value> %}
For example, to add a code component expecting an input parameter named controlValue, use the following Liquid template tag:
{% codecomponent name:abc_SampleNamespace.MapControl controlValue:'Space Needle' controlApiKey:<API Key Value>%}
For more information, see Liquid template tag for code components.
Limitations
Actions and metadata filter configuration on lists and subgrid are not supported with Power Apps grid control.