Write, deploy, and debug X++ code (preview)
[This article is pre-release documentation and is subject to change.]
The unified developer experience for finance and operation apps enables you to write code on your local development computer and run it inside a cloud service. There exists a separation of functionality between these two tiers (local and cloud).
- Development tier - contains the finance and operations metadata and any X++ source code on your local development computer
- Execution tier - cloud hosted site that stores the business data and executes X++ code
This article shows you how to:
- Write and compile a runnable X++ class
- Deploy the class to the cloud runtime
- Debug the deployed X++ code
Let's begin by developing a runnable X++ class to use as an example. The class's only task is to log a message into the Infolog. The important thing here isn't what the runnable class does, rather it's how we compile, run, and debug it. If you want to learn about the X++ language, see the programming reference.
As a prerequisite, you need to have completed setting up your local Visual Studio developer environment. More information: Install and configure development tools (preview)
Create a model
We start by creating a model in Visual Studio.
Launch Visual Studio and choose Continue without code.
Choose the menu option Extensions > Dynamics 365 > Model management > Create model.... If you don't see this menu option, you don't have the required Visual Studio extension installed.
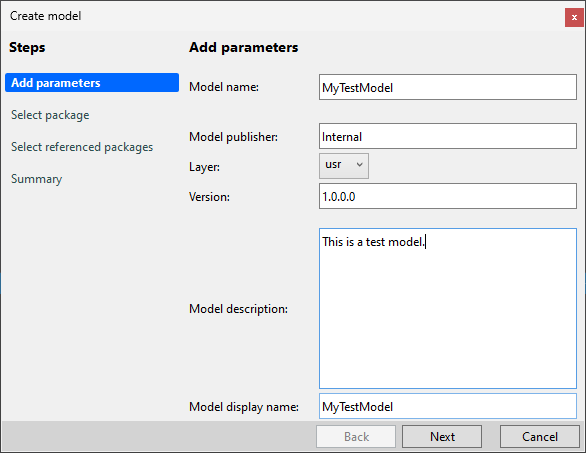
Enter a model name of "MyTestModel" when prompted by the form, providing relevant information for the rest of the required information.
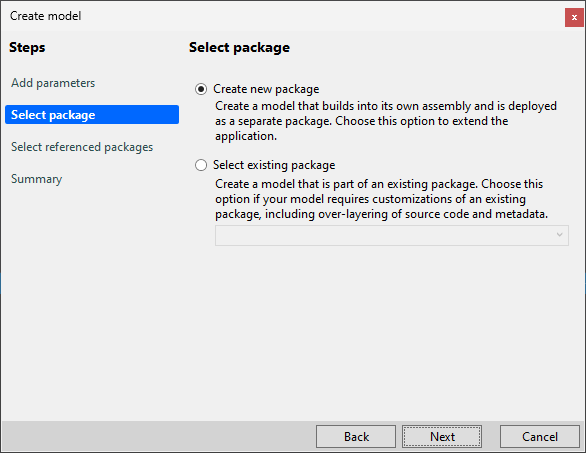
On the next step of the form, choose Create new package.
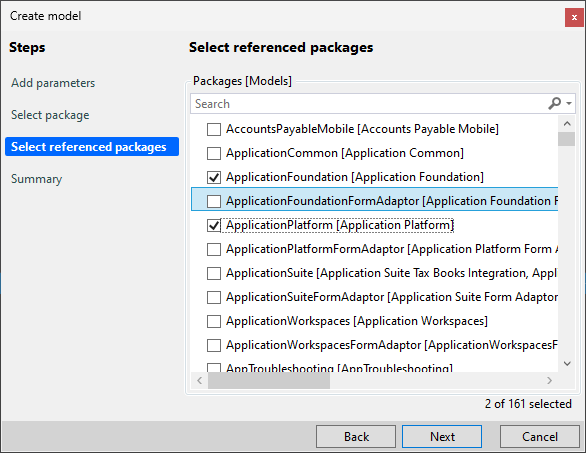
Choose all referenced models. You only need to specify dependencies on the Application Platform and Application Foundation packages in this trivial example.
Select Next multiple times until the package has been created.
Add and compile the runnable X++ class
Create a project and X++ class in Visual Studio by following these steps.
- Create a project in Visual Studio that contains the runnable class. The name of the class isn't important here. For this exercise, keep the default name that is FinanceOperations3.
- Add a runnable class to the project in Solution Explorer by right-clicking the project and choosing Add > New item.
- Select a Runnable Class in the Code menu under Dynamics 365 items, and call it "MyRunnableClass". Visual Studio opens a window with the template for a runnable class providing a static
mainmethod that is called as the runnable class runs. - Add the following X++ code to the
mainmethod. Since we're only providing a token implementation here, add a call to log a string message in the Infolog:
internal final class MyRunnableClass
{
    public static void main(Args _args)
    {
        Info('Hello World from the Server Side');
    }
}
Compile the class to make sure you didn't introduce any errors to this code. The compilation is done by selecting Build from the context menu on the project.
Deploy the class
All the work that we have done up until now has happened on the client side. The X++ compiler and the related tools are all installed locally, along with the metadata that defines the application you're developing against. In Visual Studio, you can use the Configure Metadata menu item to manage the configuration that you're working with.
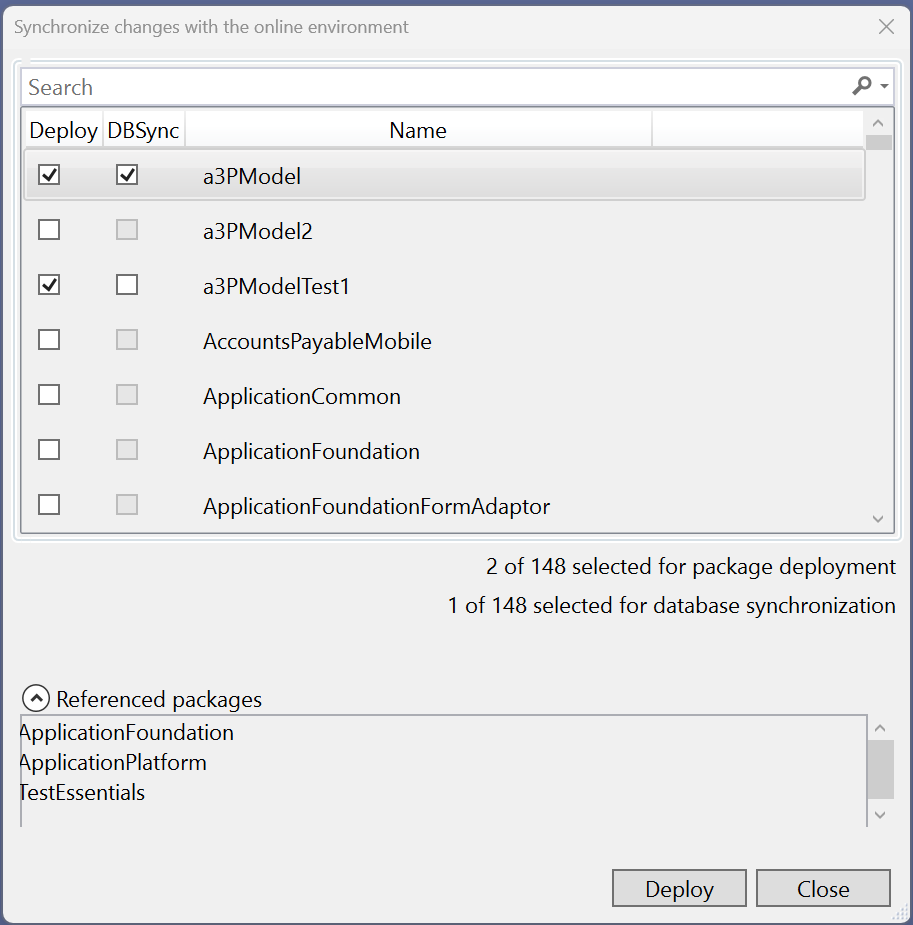
Now the time has come to execute the code, and for code execution you need to deploy the code to the server (cloud) tier. For this operation, use the Extension > Dynamics 365 > Deploy > Deploy Models to Online Environment menu item. The dialog that appears allows you to select the packages to deploy. In this case, you need to select "MyTestModel". You can easily find that model by using the search field at the top of the list of packages. At the bottom of the dialog, see the packages that are referenced. Since these packages are part of the code that Microsoft ships, you don't need to deploy them as they're already installed on the server tier.
At this point you're accessing the endpoint in the cloud, so unless you are already logged in you likely need to authenticate and connect to the environment. Use your Microsoft Dataverse credentials to connect to Dataverse and select the solution to work against. After a short wait, the authentication will complete.
Important
There are different ways to deploy your changes to the unified development environment.
Deploy the full model via the Dynamics 365 > Deploy > Deploy models ... dialog. You can choose to synchronize the database if so desired.
As part of a full build, deploy the full model. This deployment is initiated via the Dynamics 365 > Build models dialog if the option to Deploy to connected online environment is turned on. The tool will synchronize database or not based on the synchronize database setting on the same Options tab.
As part of an incremental build from Solution Explorer, setting Deploy changes to online environment to true will only deploy changes since the last successful deployment or those made as part of this build. It will honor the project settings for Synchronize database.
Right-click a project and choose to Deploy model for project .... This will only deploy changes since last successful deployment but will not synchronize the database for the module.
Synchronize the database for all models without deploying anything new via Dynamics 365 > Synchronize database....
You can follow the progress of the deployment by navigating to the "FinOps Cloud Run-time" channel in the Visual Studio output window. Once that deployment is complete, you can see log information by following the link displayed in the output window.
Debug the deployed code
After you have compiled the project code and uploaded it to the cloud endpoint, the binary is ready to be executed. To verify that all is well with the compiled class code, debug it.
In Visual Studio, set the debugging options to load the symbols for your package and also for ApplicationPlatform and ApplicationFoundation packages.
To set the options, start by opening the options from the Extensions menu, and go to the debugging tab. The Debugging page shows options for loading symbols. Make sure you indicate that you want to load the items in your solution and also the ApplicationFoundation and ApplicationPlatform packages.
Set a breakpoint in the line where we call the
Infomethod and then press the green arrow in the toolbar, or use the F5 keyboard shortcut, to start debugging.A browser window opens with a URL that designates the runnable class. After a little while the browser loads the form that shows that the class runner is active, and is executing the MyRunnableClass class. Next, the debugger loads the symbols for your project and execution stops at the breakpoint.
Press F5 to continue execution and then see that the Infolog pane in Visual Studio shows the message we entered into the Infolog using the call to the
Infomethod.Refresh the browser window, which reloads the URL.
You'll see that the breakpoint loads immediately. The debugger is still running, and the output message appears a second time in the Infolog without restarting the debugger. This technique is especially useful when running forms. You can always refresh the browser, and the form is loaded again without any delay caused by loading the symbols.
Let's now try that. Instead of tediously writing our own form all over again, use a form that already exists. Start by using the SysUserSetup form that allows you to set the colorization (theme) used to render forms. We'll change the URL to open the SysUserSetup form instead of running the class by changing the menuitem (mi) - that part that designates the menu item to start the class runner. The URL will end up with something like this:
https://<environment>?prt=initial&debug=vs&activityid=\<unchanged>&cmp=DAT&mi=SysUserSetup
You'll now see the form that allows you to set the colors in Dynamic's open.
Now let's set a breakpoint in the form.
- Open the Application Explorer from the View menu.
- Enter the string
SysUserSetup type:"form"in the search bar in the Application Explorer window. - Select the form, and select View code to open the editor with the source code for this form.
- In that form, set a breakpoint in the
selectionChangemethod in the ThemeChooser control. This code is triggered when the user selects a new color theme. - In the browser window, select one of the colored squares, let's say the red one. You'll hit the breakpoint.
- Continue the execution by pressing F5. Another colored square is hit and the breakpoint is triggered again.
Important
If you want to attach the debugger to the running AOS process in the unified environment use Dynamics 365 > Launch debugger.
To detach the debugger from the runtime without restarting the AOS, use Detach in place of Stop.
Use Application Insights to monitor and diagnose the application executing in the unified development environment. Learn more about observability: Monitoring and telemetry using Application Insights
Summary
As a recap, here's a summary and the points to take away from this exercise.
We started with using Visual Studio to create a simple runnable class. After the compilation, the package needed to be pushed to the cloud endpoint for execution. X++ code can only be executed in the cloud, so we performed a deployment operation. Once the deployment was complete, we executed the code by setting a breakpoint and running the debugger. We then started a form from the browser, and noticed that breakpoints were hit correctly as the form was used, and we did'nt have to restart the debugger for that to happen. In fact, the debugger can be started by using the Launch debugger option on the Extension menu. You can then enter a URL in the browser and the breakpoints are hit.
See also
Unit testing in the unified developer experience
Create and manage environments in the Power Platform admin center
Manage Dynamics 365 apps
Feedback
Coming soon: Throughout 2024 we will be phasing out GitHub Issues as the feedback mechanism for content and replacing it with a new feedback system. For more information see: https://aka.ms/ContentUserFeedback.
Submit and view feedback for