Note
Access to this page requires authorization. You can try signing in or changing directories.
Access to this page requires authorization. You can try changing directories.
This article describes how to install and configure required Visual Studio finance and operations tools into your local development environment. The instructions in each section should be followed in the order presented in this article.
Important
You can learn more by watching presentation and demos done for the Dynamics 365 FastTrack Tech Talk series
Unified Development Experience for Finance and Operations | Dynamics 365 FastTrack Tech Talk
Prerequisites
- As a prerequisite, you need access to a provisioned developer-focused sandbox environment.
- The user account you'll be using for development in the sandbox environment must be assigned the System Administrator role.
- The development machine should have at least 16 GB of free space on the local system drive to download the extension and metadata.
- The development machine running Microsoft Windows 10 or 11 must have Visual Studio 2022 installed with at least the .NET desktop development workload, the Modeling SDK and few other components.
- This SDK and other components can be selected and installed from the individual components pane in the Visual Studio installer. Refer to required Visual Studio components.
- Microsoft SQL Server Express LocalDB is installed by default with Visual Studio 2022, and you should validate that you can connect to it with windows authentication.
Install the Power Platform extension for Visual Studio
Follow the instructions in this article to install the extension from the marketplace: What is Power Platform Tools for Visual Studio. You don't need to install the plug-in profiler as directed in that article.
Connect to your online environment
After installing the Power Platform Tools extension for Visual Studio, follow these instructions to connect Visual Studio to your unified developer-focused environment.
Launch Visual Studio if not already running.
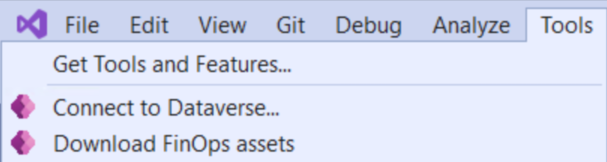
In the Tools menu, select Connect to Dataverse or Download Dynamics 365 FinOps assets.
- Connect to Dataverse only downloads assets if not downloaded earlier.
- Download Dynamics 365 FinOps assets always downloads.
Select the desired options in the dialog and select Login.
If you need to use another account or a different online environment, don't choose to use the signed-in user. Enter the credentials for your developer user account with access to the online environment.
Select an available solution in the dialog, and then choose Done.
Find the sandbox environment created for online development in the list of Dataverse environments and connect to it.
Note
If you have only one online development environment, the organization list dialog may not be shown as you would automatically connect to the environment.
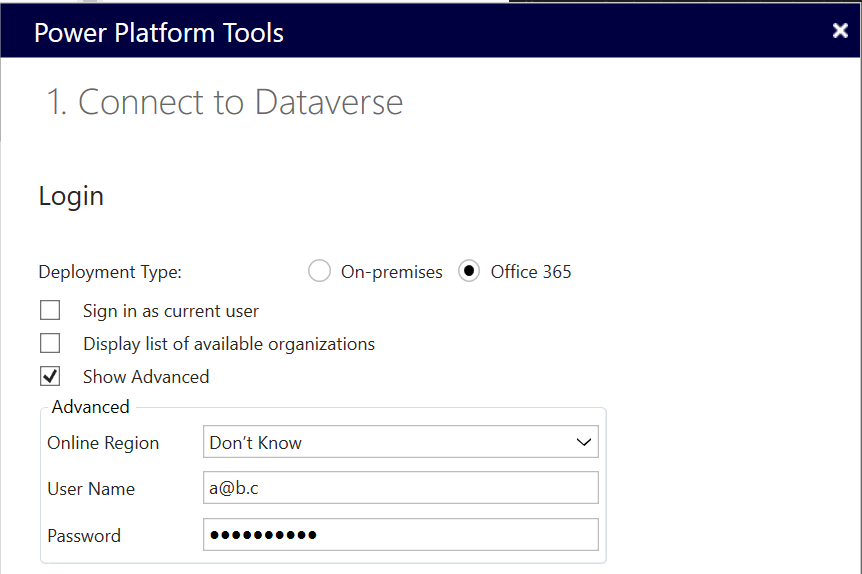
If your account requires multi factor authentication, uncheck all checkboxes on login screen.
If you are logging in to an online development environment in a tenant different from your own, where your user principal name (UPN) is added as a guest, update Visual Studio > Tools > Options > Power Platform Tools and select Skip Discovery when connecting to Dataverse and uncheck all the boxes on the login pane. You will be prompted to provide the Dataverse uri.


Download and install the finance and operations extension and metadata
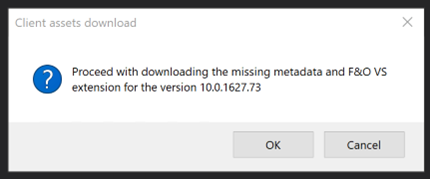
After installing the Power Platform Tools extension and connecting to the unified developer environment, you'll be presented with a dialog to download the finance and operations Visual Studio extension and metadata.
Important
You can configure settings using the Visual Studio setting Tools > Options > Power Platform Tools.
The option Auto setup for Dynamics 365... is enabled by default. This ensures you do not have to manually extract system metadata or create the metadata configuration. The tool will do this for you. Do look into the Visual Studio output pane for any user action needed.
Consider selecting the option Do not display Power Platform Explorer... to speed up connecting to your environment and Download logs... to get logs for deployment and DBSync operations.
Consider deselecting the option Auto setup for Dynamics 365 if using Unified environment to only download the assets and do the setup manually.
You need at least 16 GB of free space on the local system drive to download the extension and metadata.
Choose OK in the dialog to start the download. Visual Studio keeps you updated on the progress in the Visual Studio output pane.
Extract system metadata
Note
This is not required when auto setup is enabled
Downloaded assets can be found in the following location:
C:\Users\<User>\AppData\Local\Microsoft\Dynamics365\<ApplicationVersion>
The following files are downloaded:
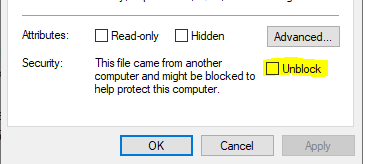
DYNAMICSXREFDB.bakis a backup of the cross reference database.Microsoft.Dynamics.FinOps.ToolsVS2022.vsixis the Finance and operations extension.PackagesLocalDirectory.zipis the System metadata.TraceParser.msiLearn more about Trace Parser.
Unblock any of the three files that need unblocking.
Unpack the PackagesLocalDirectory.zip file as PackagesLocalDirectory. We recommend using the 7zip utility to speed up extraction.
Install the finance and operations extension
Note
This is only required when the Visual Studio output pane indicates it is.
Using Windows File Explorer, from the folder C:\Users\<User>\AppData\Local\Microsoft\Dynamics365\<ApplicationVersion>, open the Microsoft.Dynamics.FinOps.ToolsVS2022.vsix file to install the extension.
On first start of Visual Studio after updating/installing the Microsoft.Dynamics.FinOps.ToolsVS2022 VS extension, you will be prompted for elevated permissions for the extension to register the URLProtocoloHandler, setup build targets, to extract compiler files, etc.
Configure the finance and operations extension
Note
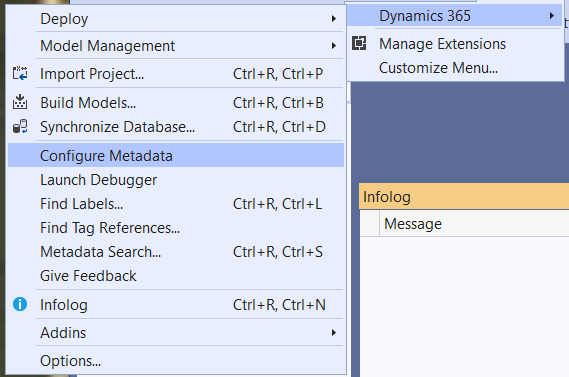
This is not required when auto setup is enabled. If you don't see the Configure Metadata option, open Extensions > Dynamics 365 > Infolog and retry.
To configure the extension, follow these instructions.
Start Visual Studio, and then select Continue without code from the dialog.
Navigate to Extensions > Dynamics 365 > Configure Metadata for the first time.
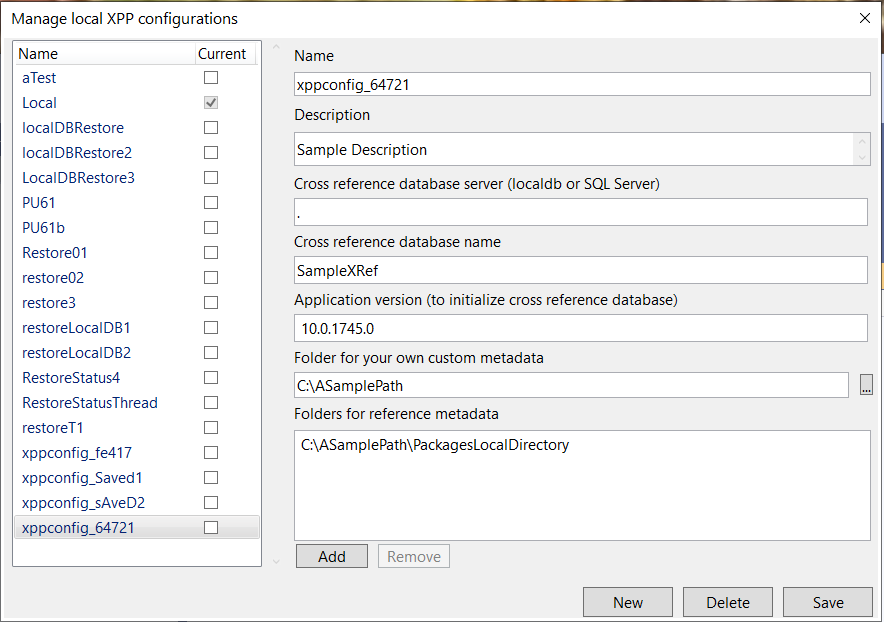
On the configuration form, select New and then create a new configuration. Refer to the field descriptions provided in the Configuration form field descriptions table that follows this procedure.
Select Save.
You can similarly edit a configuration. A common field to update is the folder for your own custom metadata.
You might also want to move your cross reference database from SQL server local db to SQL server and update the configuration
You can delete stale configurations.
Note that only one configuration can be current or active at any given time.
Configuration form field descriptions
| Form field | Description |
|---|---|
| Name | Name of the configuration you're creating now. |
| Description | Description of the configuration you're creating now. |
| Cross reference database server | Set to (localdb)\. if you're using LocalDB, or localhost if you're using Microsoft SQL Server. |
| Cross reference database name | The name for the cross reference database. The Visual Studio extension creates one if it doesn't exist. |
| Application version to restore cross reference database from | Select this. It's populated from the assets downloaded when you connected to the unified developer environment. |
| Folder for your own custom metadata | Folder where your own X++ modules are (or will be). |
| Folders for reference metadata | Should contain at least the path where you have the extracted the PackagesLocalDirectory folder mentioned in Extract system metadata. Also where you would add folders containing other reference modules; for example those received from ISVs. |
Troubleshooting configuration
If the Save button is still grayed out after filling in all the fields, you'll see error messages with a red border in tooltips on fields with invalid values.
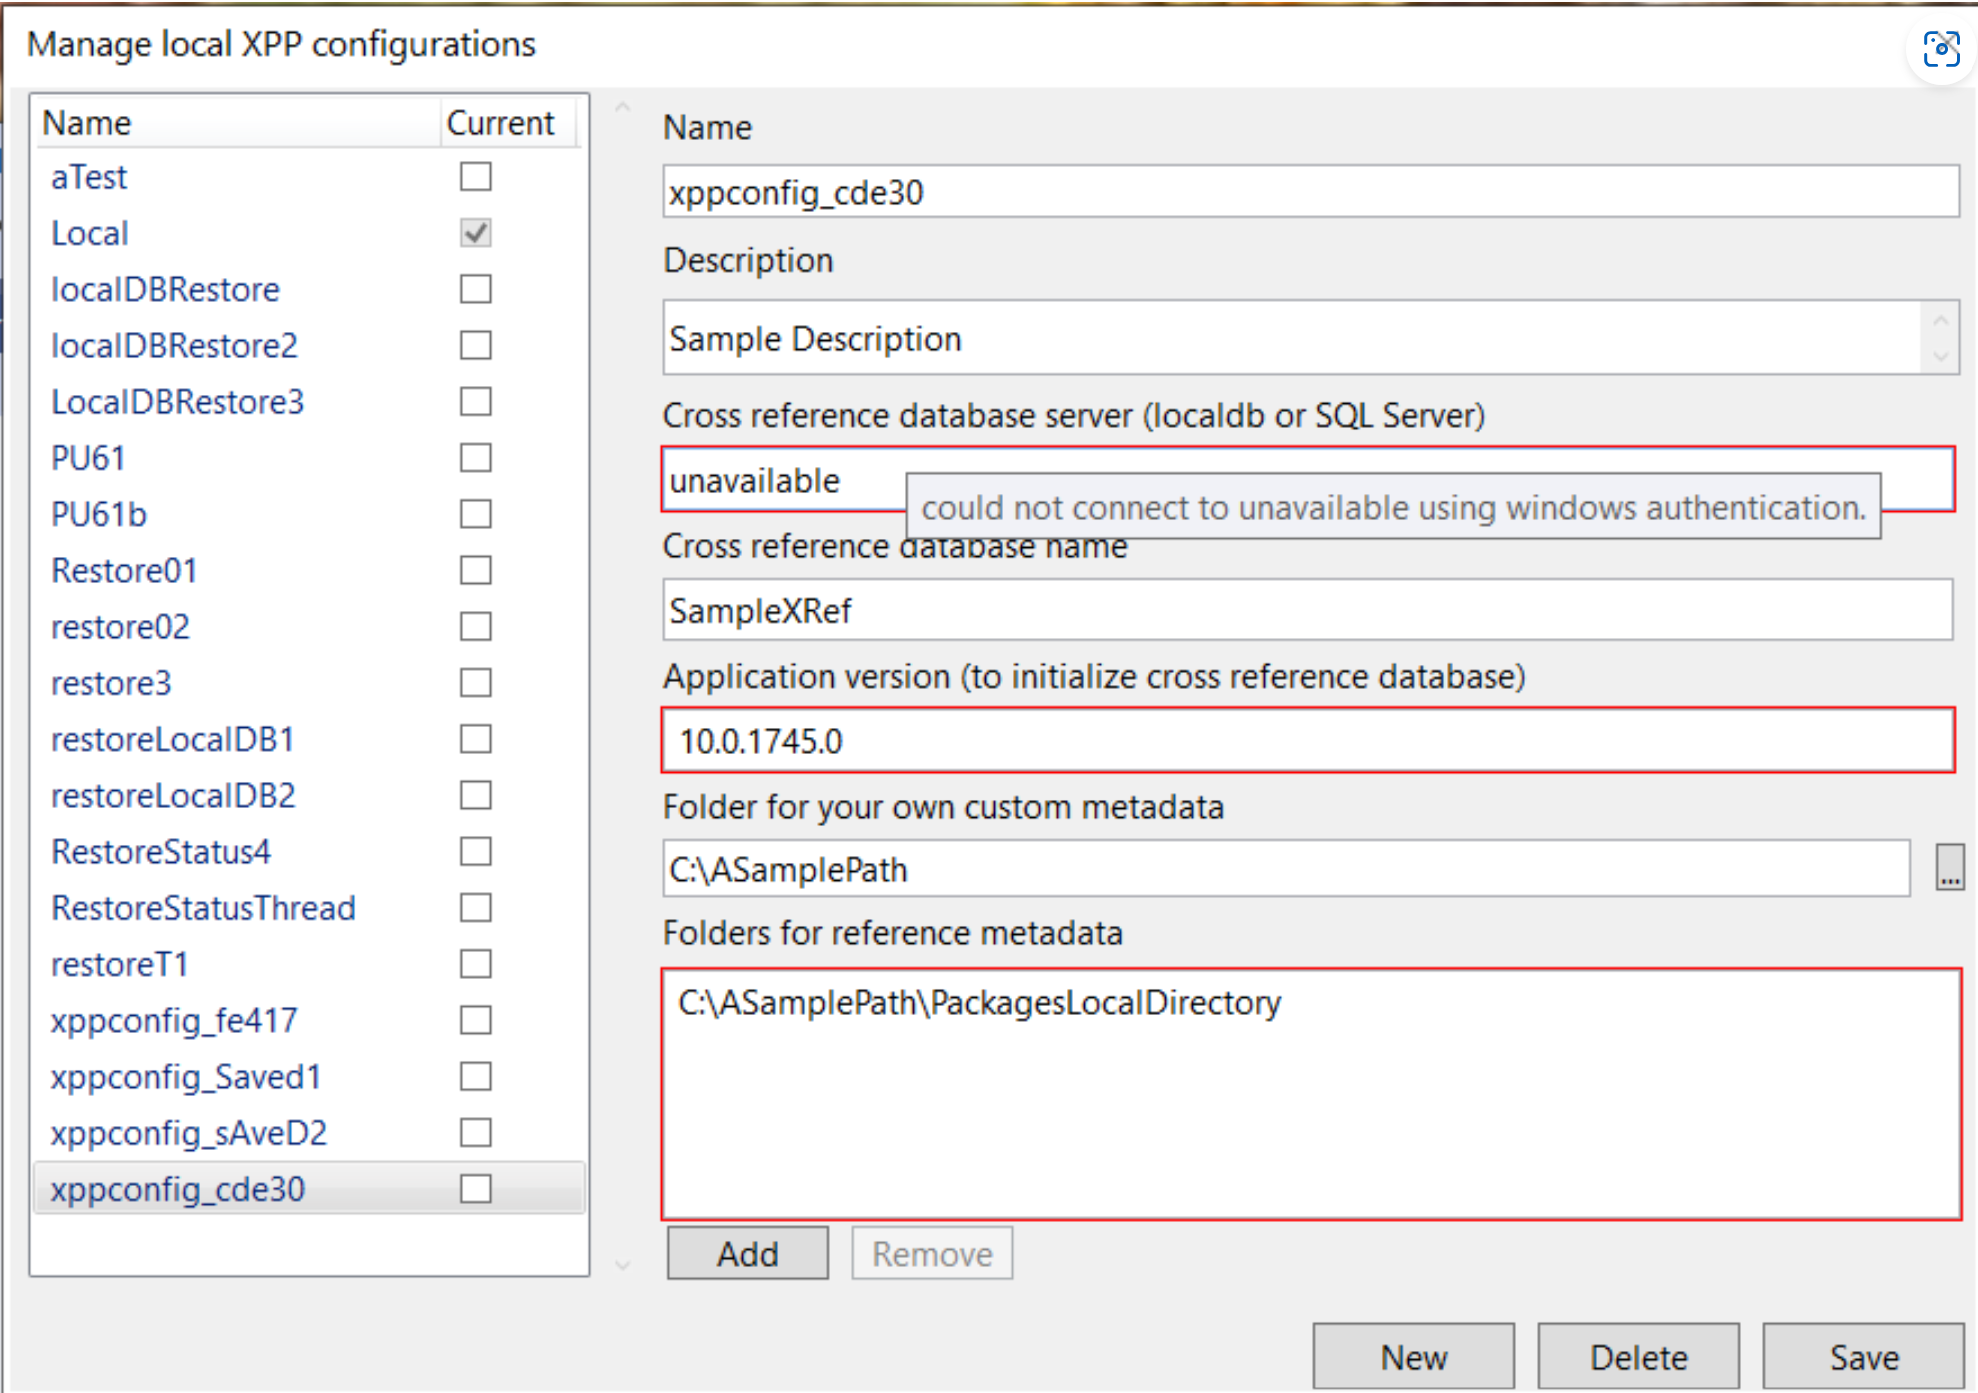
Ensure that you entered the correct values for fields with errors. For example, use (localdb)\. if you're using LocalDB.
Also, if you're using LocalDB, you might need to first configure and test it. Consider issuing the following command from a Command prompt:
sqllocaldb create MSSQLLocalDB -s.
More information: SQL Server Express LocalDB.
Note
If the cross reference database does not already exist, the tool will restore the database from the backup downloaded to C:\Users\<User>\AppData\Local\Microsoft\Dynamics365\<ApplicationVersion>. You'll see notifications in the Visual Studio Output pane. If you need to restore it again by yourself you can do so after downloading with auto setup disabled. For instructions to do a database restore refer to Restore to SQL Server.
Completing configuration
After the configuration is created after a fresh installation of the extension, you might get a prompt for elevation as administrator to register the protocol handler and to extract compiler files. Go ahead and accept these prompts.
Once the configuration completes, navigate to View > Application Explorer . You should see the Application Explorer window open. You might have to restart Visual Studio first.

You can create several configurations, but must select one to be current. The chosen configuration takes effect on new instances of Visual Studio.
Summary
Congratulations! You're now ready to build, deploy, debug, and test your X++ modules working with the Power Platform online development environment. Explore the possibilities with the power of finance and operations integrated with Power Platform.
Next steps
Start writing code, deploy, and debug.
See also
Unified developer experience for finance and operations apps