Note
Access to this page requires authorization. You can try signing in or changing directories.
Access to this page requires authorization. You can try changing directories.
This article explains how to implement continuous integration and deployment (CI/CD) of Power Platform unified developer experience assets using Azure Pipelines. Specifically, how to:
- Get the latest Dynamics 365 Finance and Operations Tools and Power Platform Build Tools
- Create a build pipeline to generate a package in Power Platform unified package format
- Upload your solution and relevant artifacts, and link the generated package to your deploy pipeline
Install or update the latest build tools
- Sign into the Power Platform admin center and select the environment you want to work in. In the Organization Settings > Extensions menu, locate and install the “Dynamics 365 Finance and Operations Tools” shared extension.
- Add a Create Deployable Package task in your build pipeline, and ensure it contains task version 1. Ensure Add Licenses to Deployable Package has task version 1.
- Locate and install the Power Platform Build Tools extension from Organization Settings > Extensions > Browse Marketplace.
- Download the X++ NuGet packages with the required version and add them to your artifact feed. For details on this step refer to Build automation that uses Microsoft-hosted agents and Azure Pipelines - Finance & Operations.
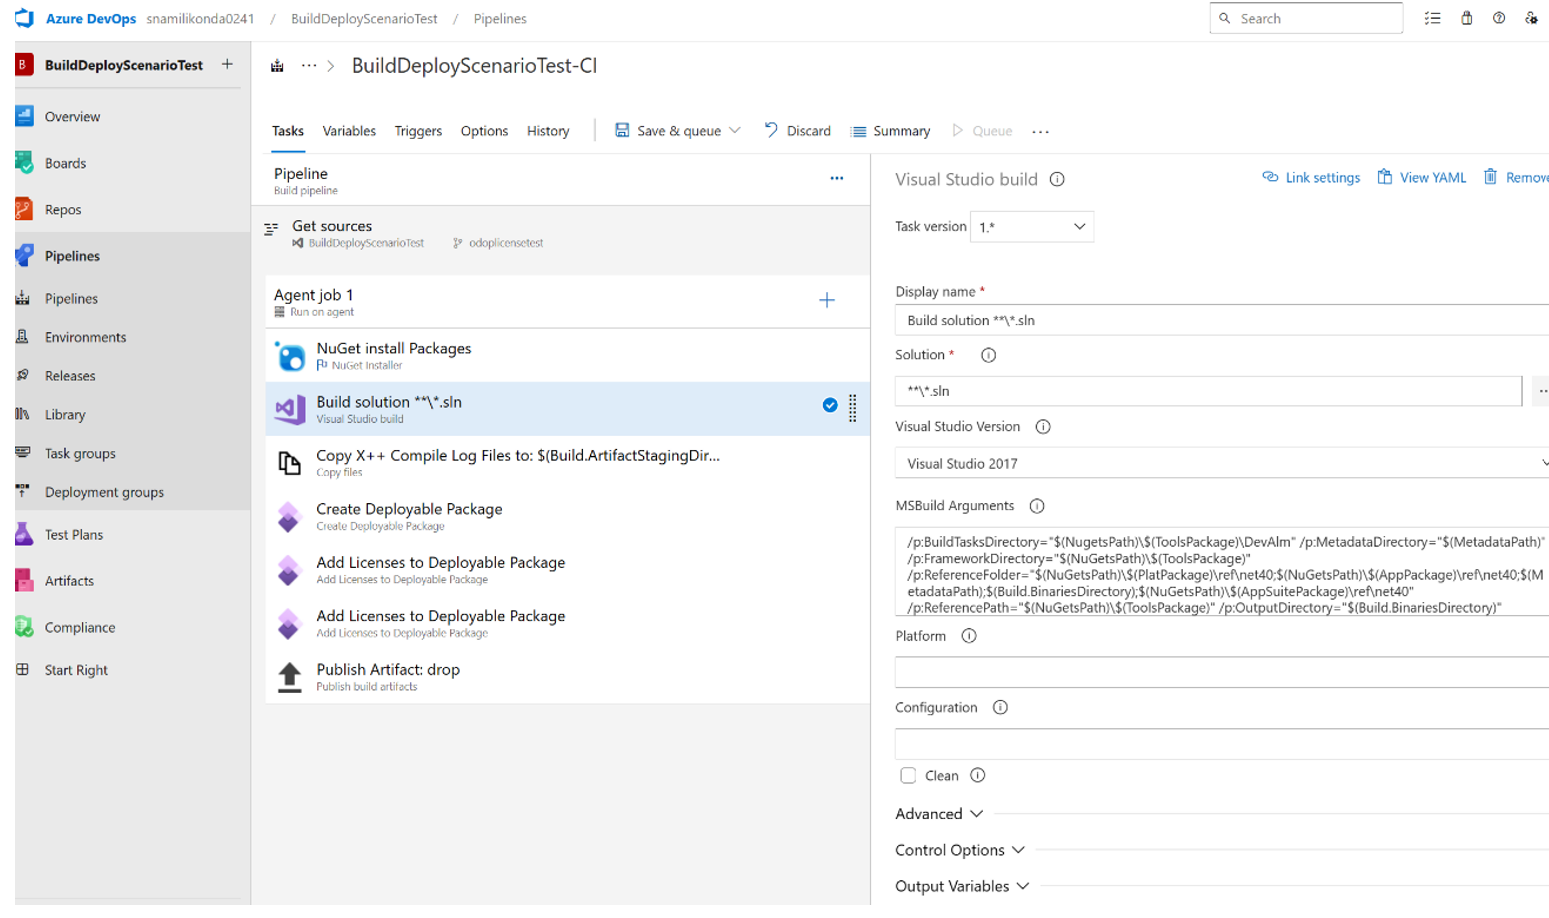
Create a pipeline to generate a Power Platform unified format package
The process for building your solution remains same, and can be based on preexisting build pipelines. Follow the instructions that begin below this next image.
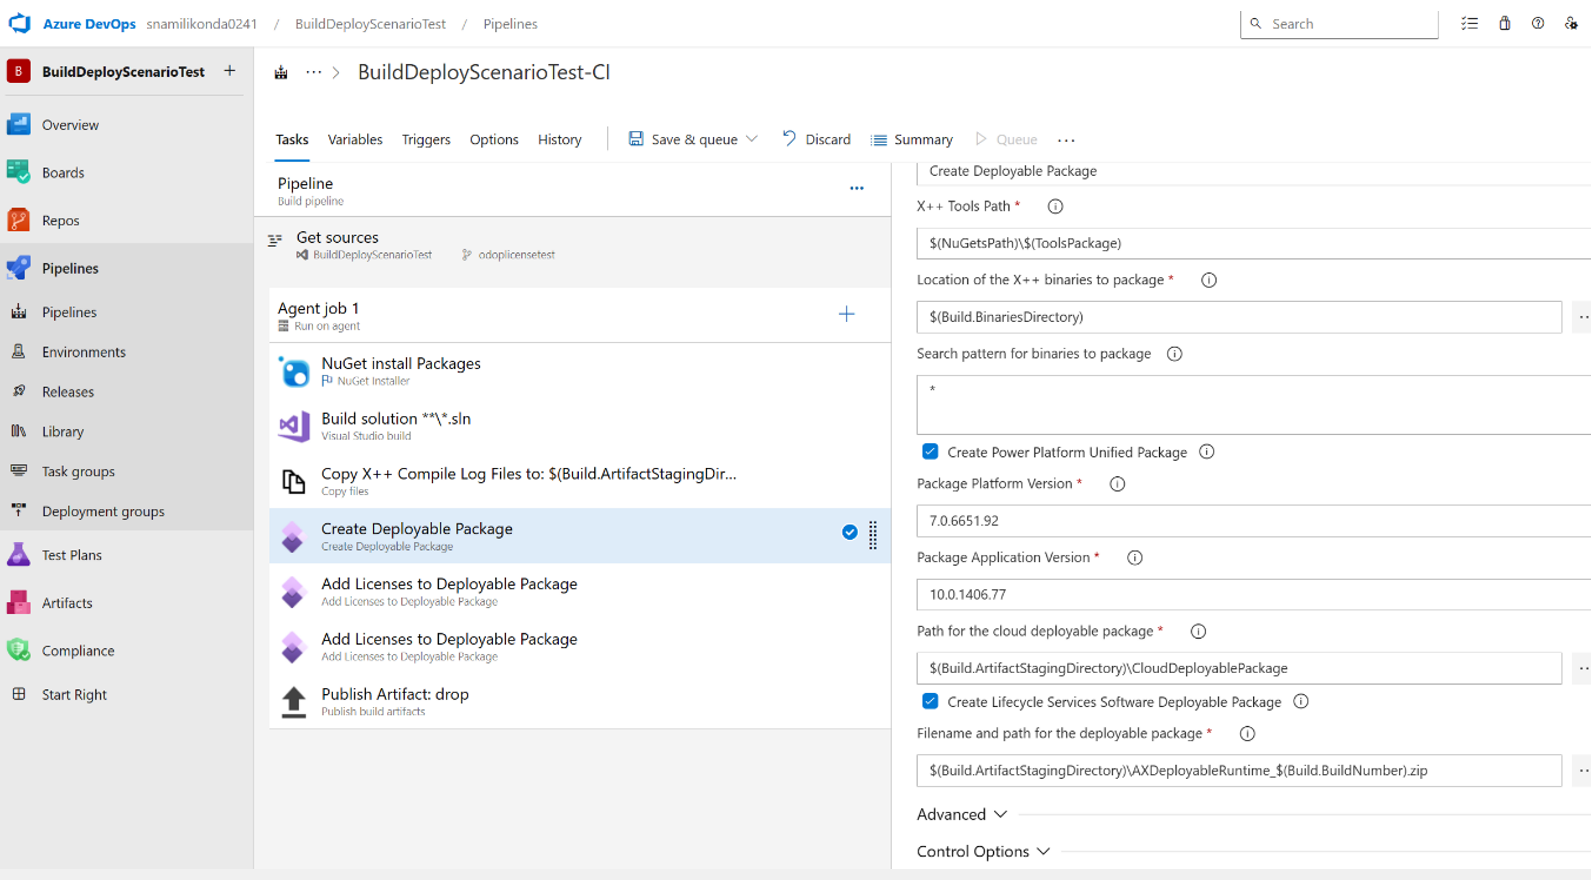
To generate a Power Platform unified package, add your version 1 task to Create Deployable Package. Check the box for Create Power Platform Unified Package. Add the package platform and application versions used to build the solution, and provide the path for the deployable package location. Optionally, you can choose to generate a separate Lifecycle Services format package.
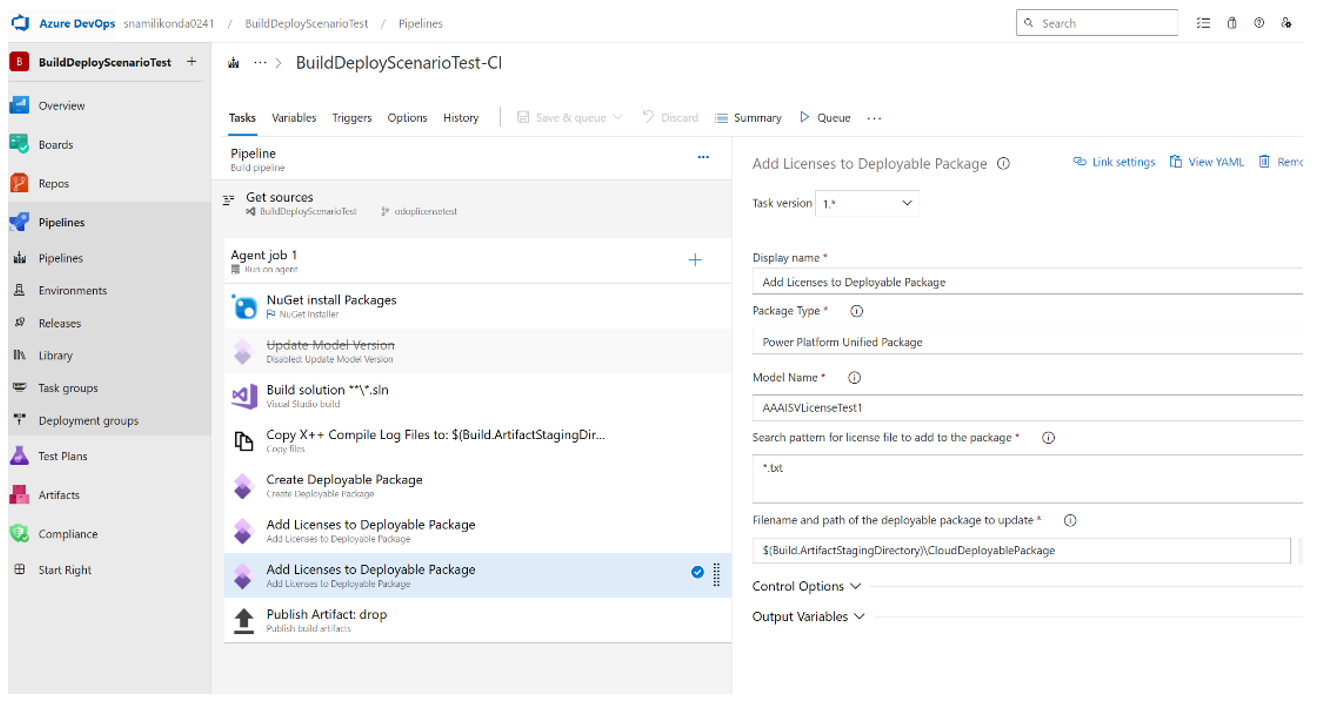
If licensing is required, select the Add Licenses to Deployable Packages for your version 1 task and choose Power Platform Unified Package from the drop down menu. Provide the Model Name to include a license. Add a task for each model that the license is needed. Modify the path to the deployable package created in previous step. If the package folder created in the previous step is not provided as input to this step correctly you may see the error 'fnomoduledefinition.json file not found'.
Once the pipeline is built, locate the published artifacts under Related in the Summary tab.

Note
If you see this error:
'An item with the specified name <initial drive path>\3c5d3d3b-4428-4901-9357-4559d510e2a8<model> already exists.'
please ensure that you do not have duplicate modules as only 1 version per module is accepted.
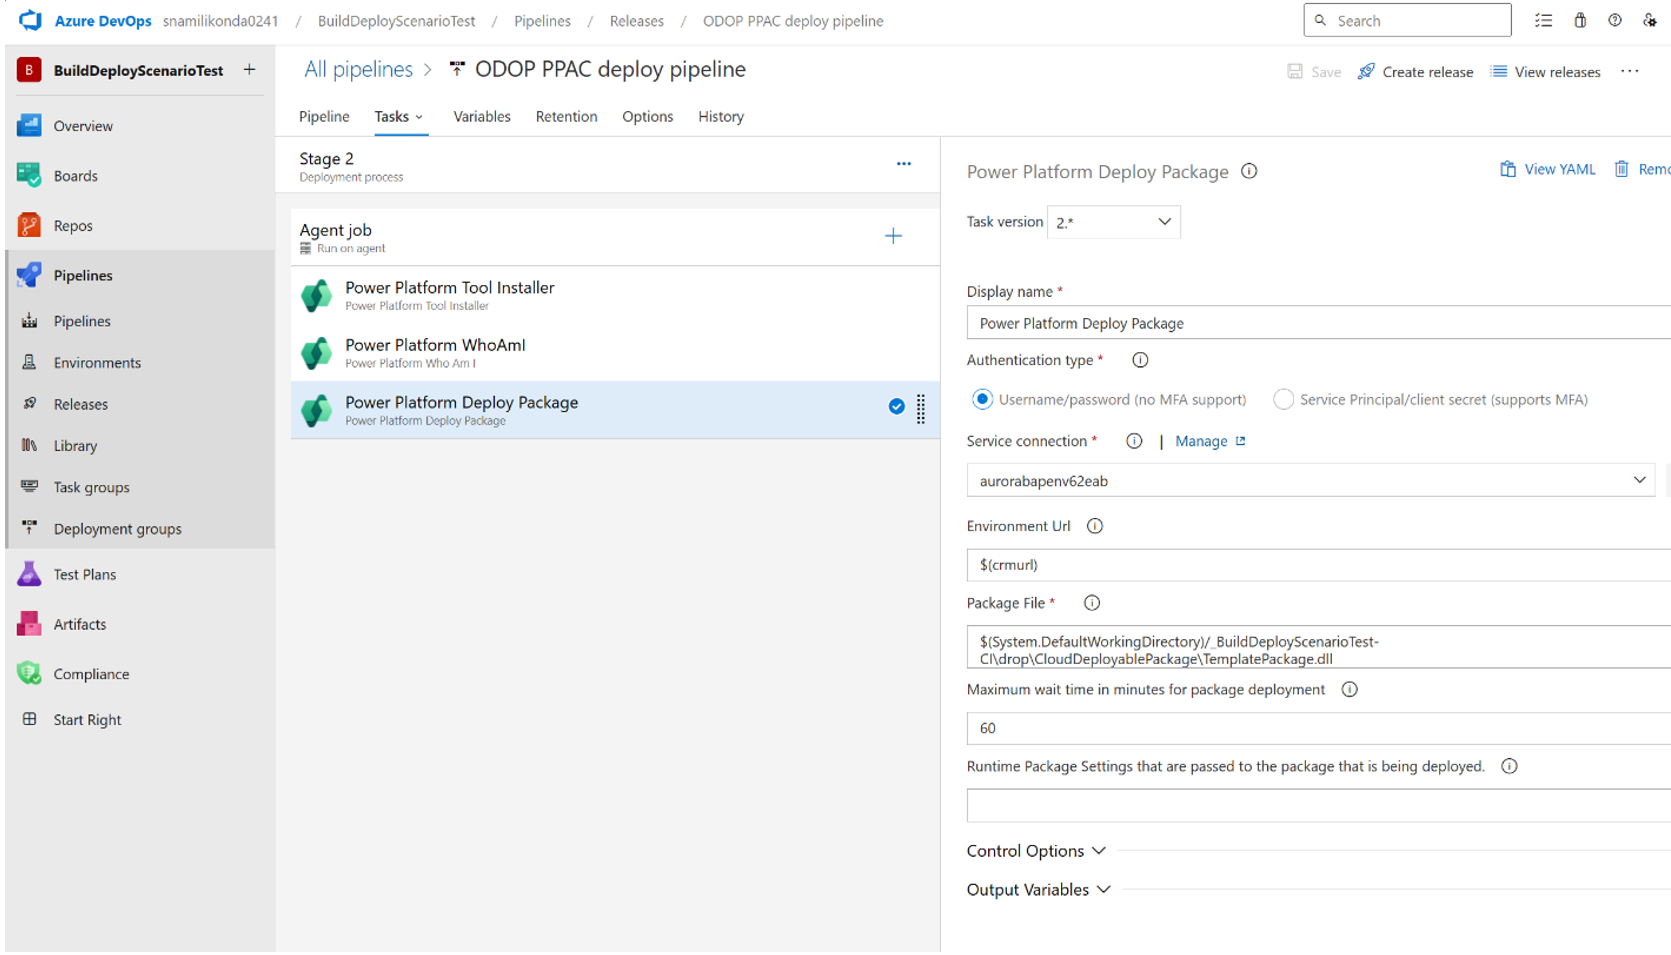
Link to your deploy pipeline
Follow these next instructions to link to your deployment pipeline.
Create a release pipeline, choosing the build pipeline from the preceding section.
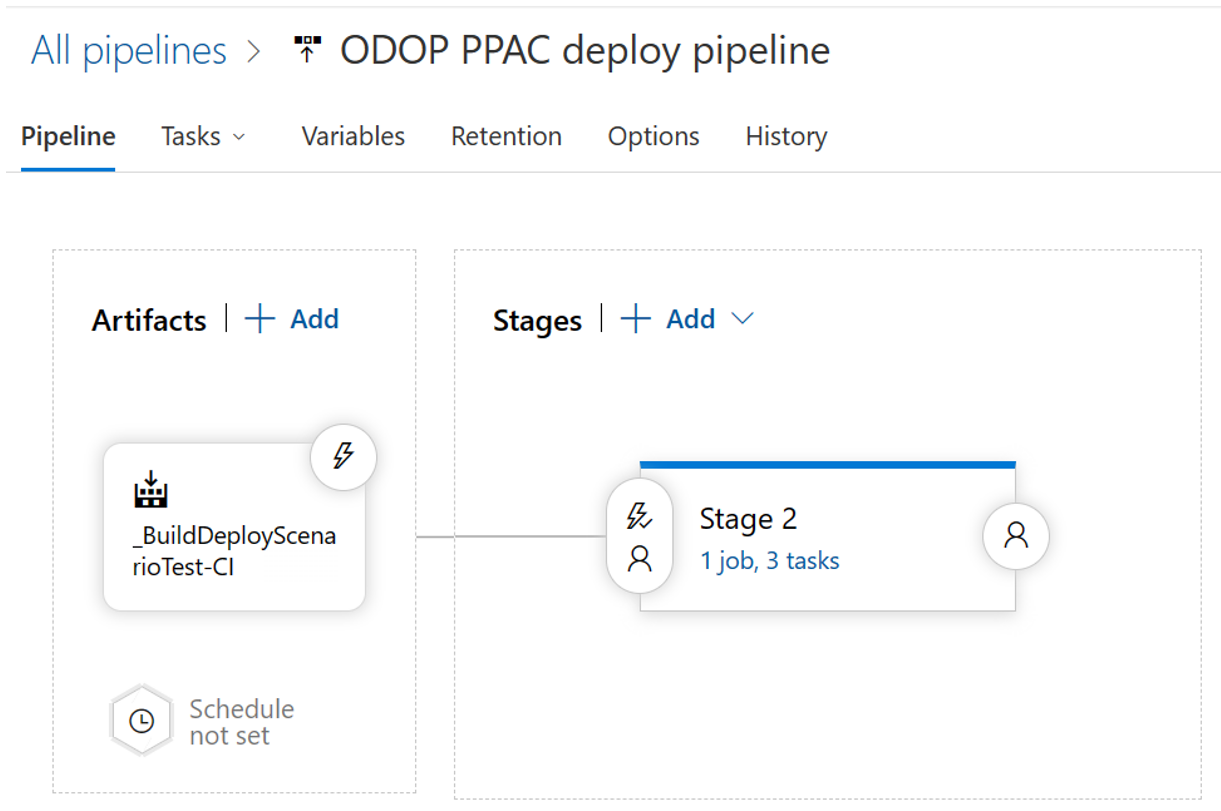
Add the following tasks to stage 2 as shown in the following image.
- Power Platform Tool Installer
- Power Platform WhoAmI
- Power Platform Deploy Package
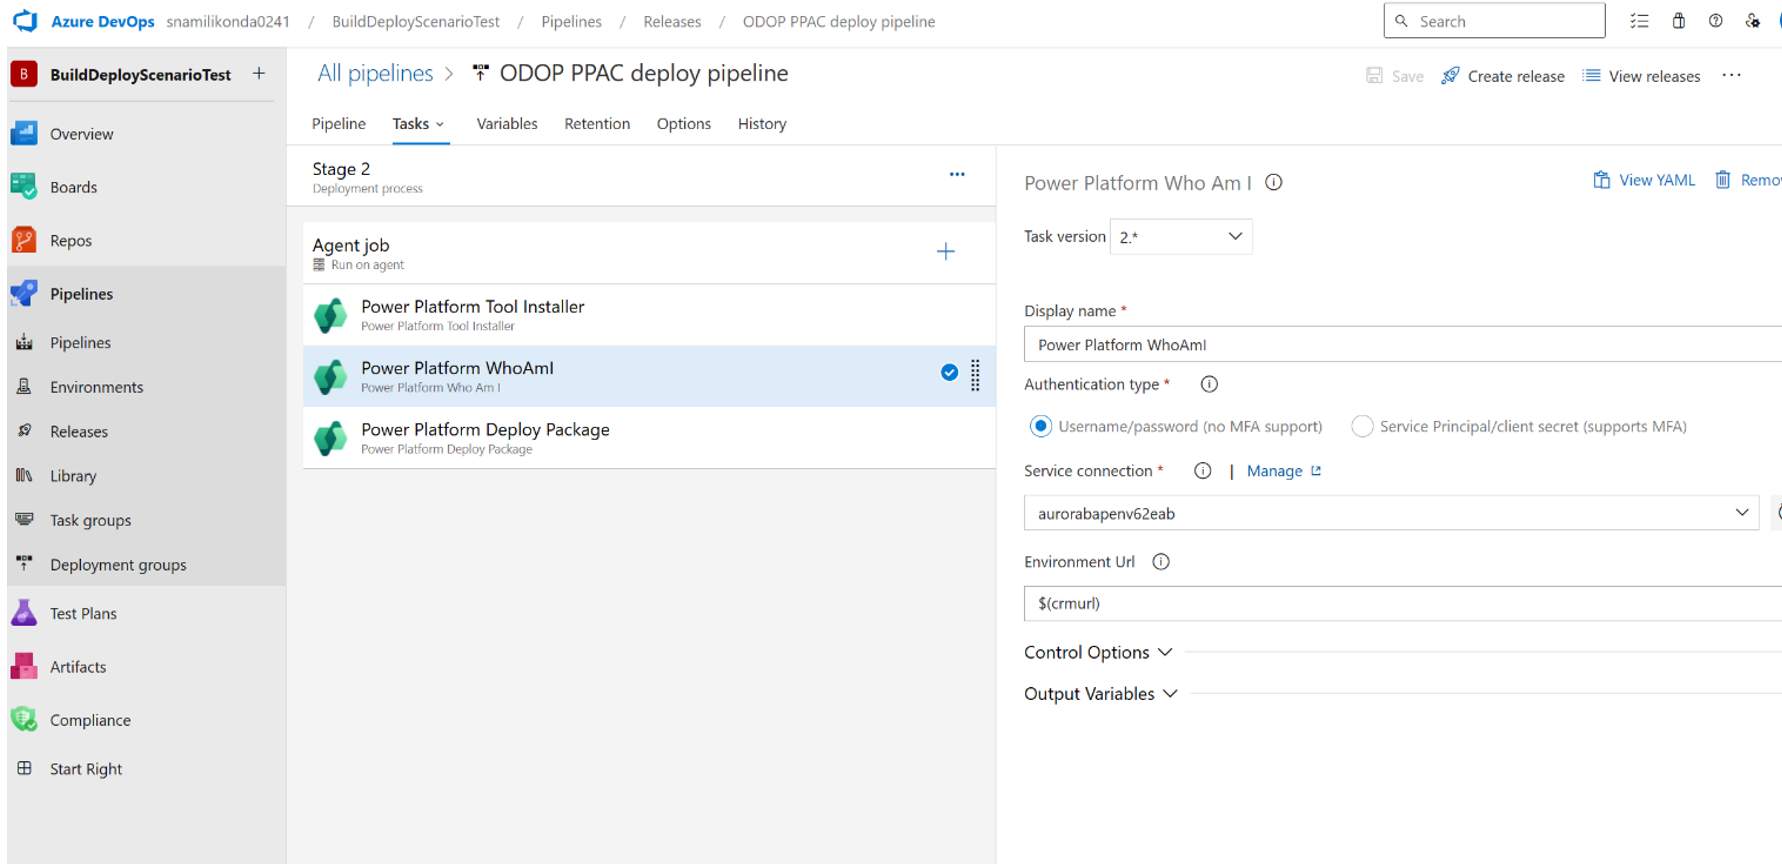
For the WhoAmI task, add a generic service connection for your environment. You can get the connection details from the Your Organization > Details.
To deploy the task, provide the path of the generated package from the build pipeline.