Using the Power Query SDK
This article focuses on the experience available for the Power Query SDK found in Visual Studio Code. You can learn more on how to install the Power Query SDK for Visual Studio from the article on Installing the SDK.
Create a new project
Tip
Before creating an extension project, we recommend that you create a new folder where you'll store your extension project. During the creation of a new project, if no folder is selected, the Power Query SDK will help you locate or create a new folder before creating your extension project.
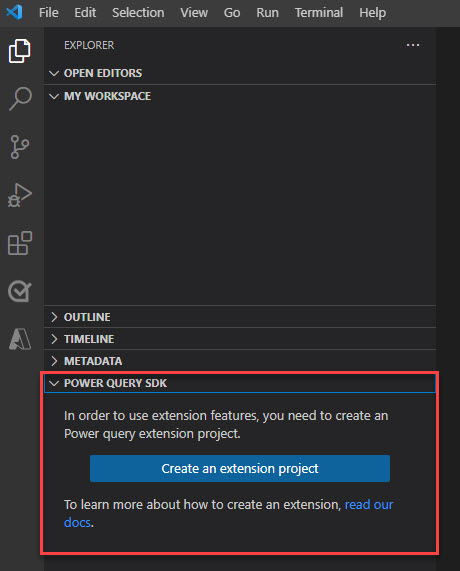
Once in Visual Studio Code, in the main Explorer pane of Visual Studio Code there's a section with the name Power Query SDK. This section has only one button that reads Create an extension project. Select this button.
This button opens an input field at the top of the Visual Studio Code interface. Enter the name of your new extension project, and then select Enter.

After a few seconds, your Visual Studio Code window opens the main *.pq file for your extension project that contains your connector logic. The Power Query SDK automatically runs some necessary tasks to complete the set up of your workspace. You can check these tasks in the output console in Visual Studio Code.
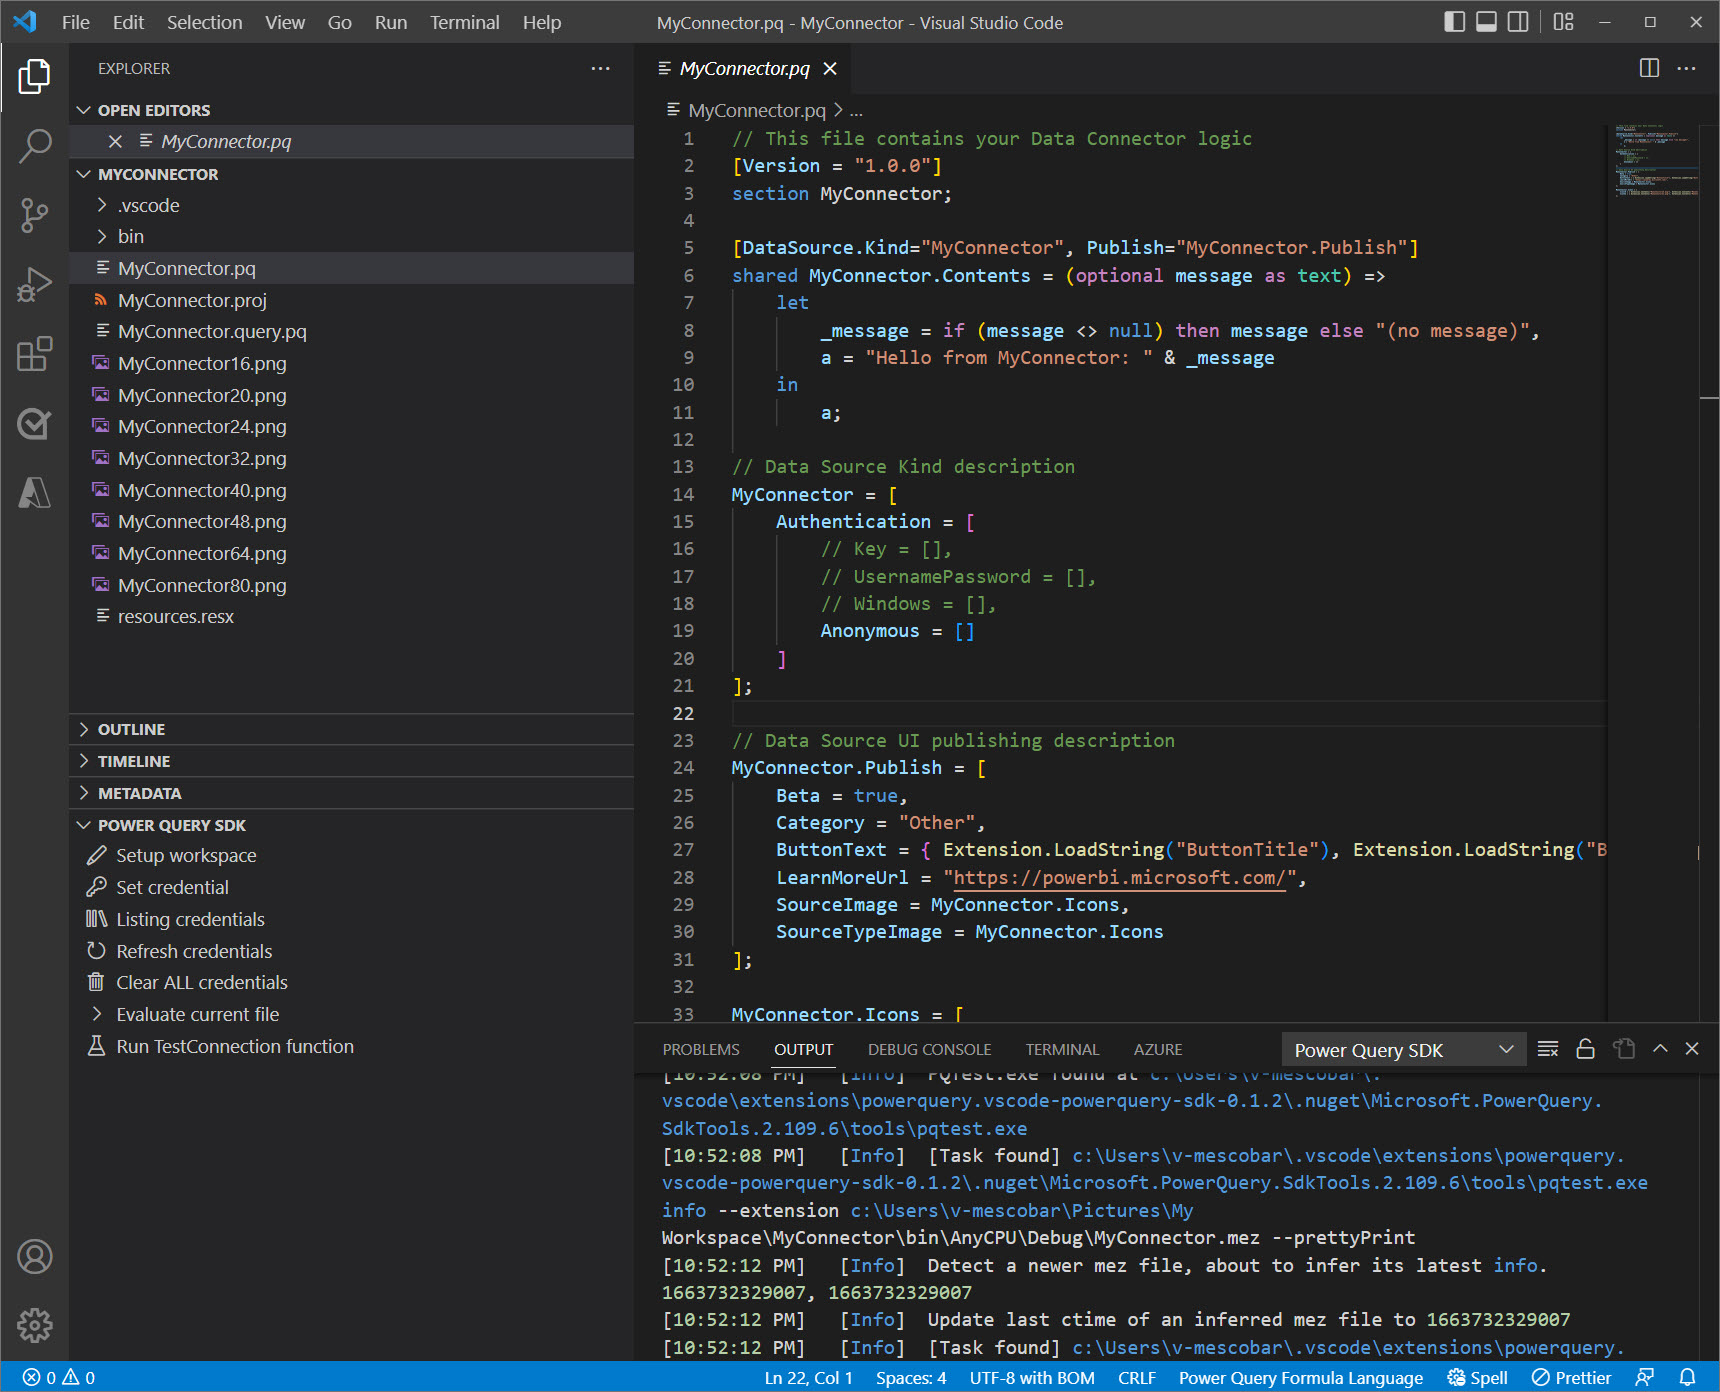
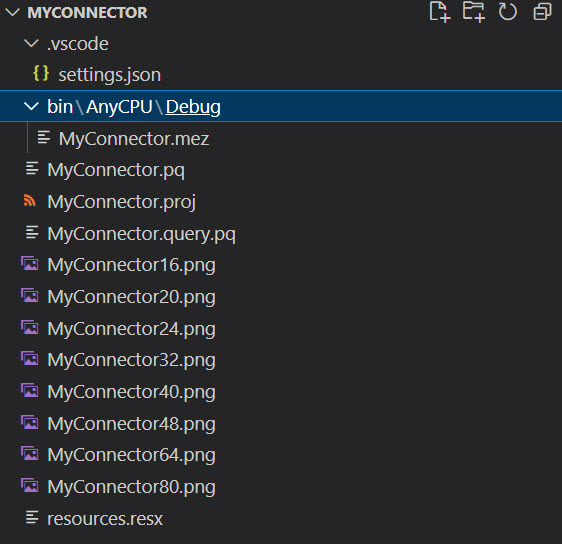
The Power Query SDK automatically creates the following set of files:
- A settings.json file that dictates specific settings to work with at your workspace level.
- It builds the extension as a .mez file and stores it in a new bin\AnyCPU\Debug folder.
- A set of connector icons as .png files.
- A resources.resx file that serves as the main storage for strings that are used in the extension.
- A .pq file that holds the main logic of your extension or connector.
- A .query.pq file whose main purpose is to be used as a way to create test queries that you can later evaluate.
- A .proj file that holds information about the extension project.
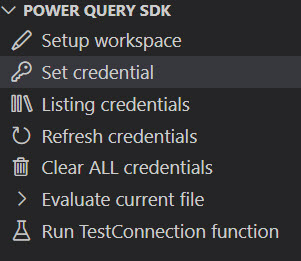
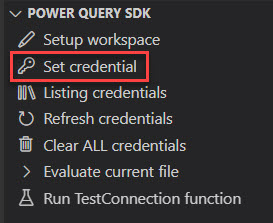
Once an extension project is recognized by Visual Studio Code, the section for the Power Query SDK changes its appearance, and now displays a list of tasks you can run against your new extension project.
Credentials
Important
Before you can evaluate any of your data connector's queries, a set of credentials must first be created for the extension project.
The Power Query SDK offers multiple tasks through its user interface to allow you to set, list, and delete credentials from your extension project.
Set credential
The Power Query SDK is primarily driven by tasks that can be triggered through multiple entry points. Setting a credential can be done in two ways (the other credential tasks can be done in the same way).
Through the entry in the Power Query SDK section in the explorer pane.
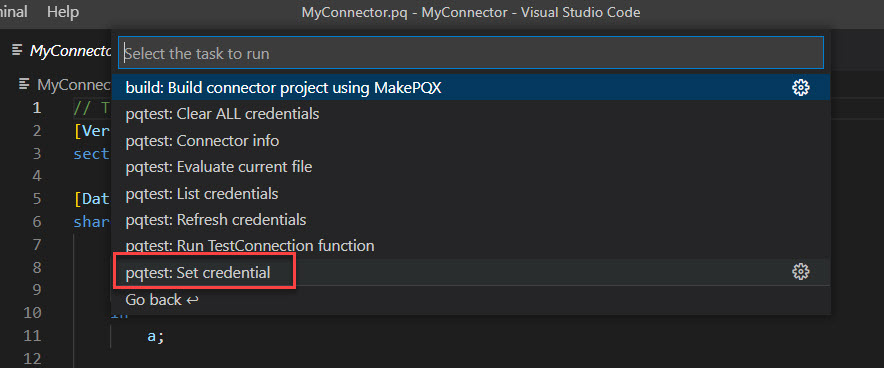
Through the Terminal by selecting the Run Task option and then selecting the Set credential task.
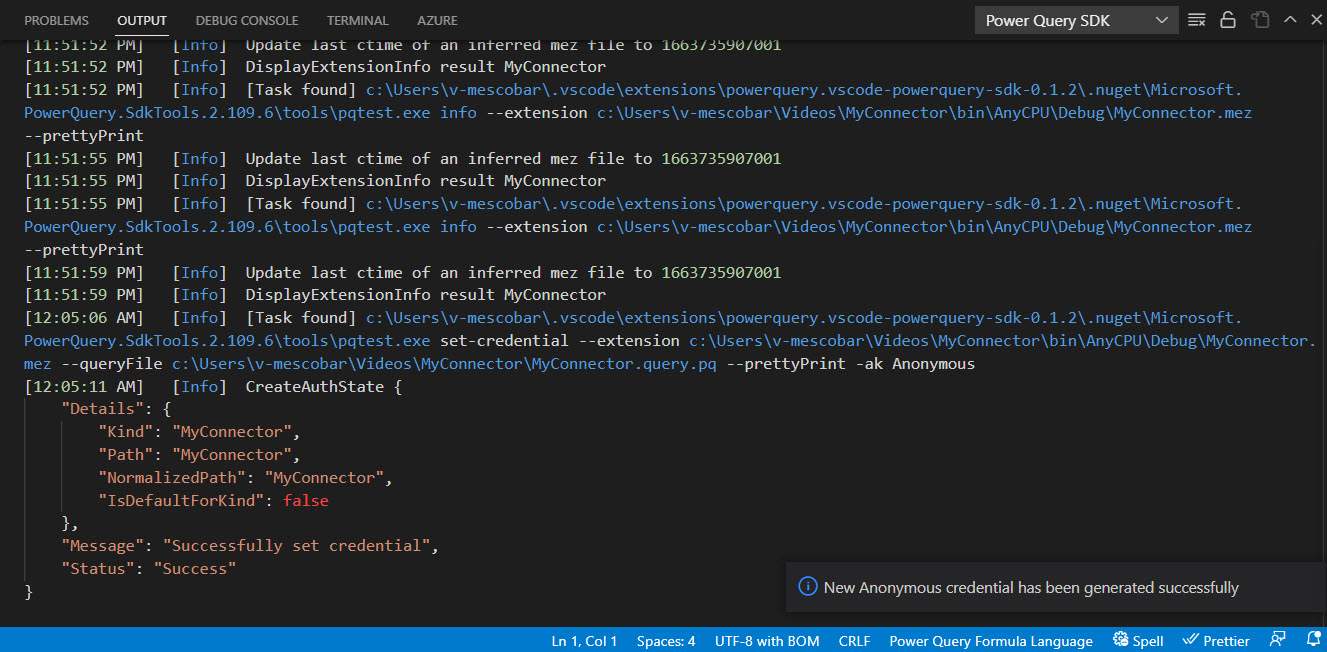
When you run this task, Visual Studio Code will guide you through a series of prompts to allow you to set the credential. These series of prompts are predictable and always consist of the same stages:
- Choose the data source kind.
- Choose the connector file.
- Choose the authentication method.
For the existing extension project, the authentication method available is anonymous. Once the authentication is set, a message that confirms a credential has been generated successfully is displayed at the bottom right corner of the window.
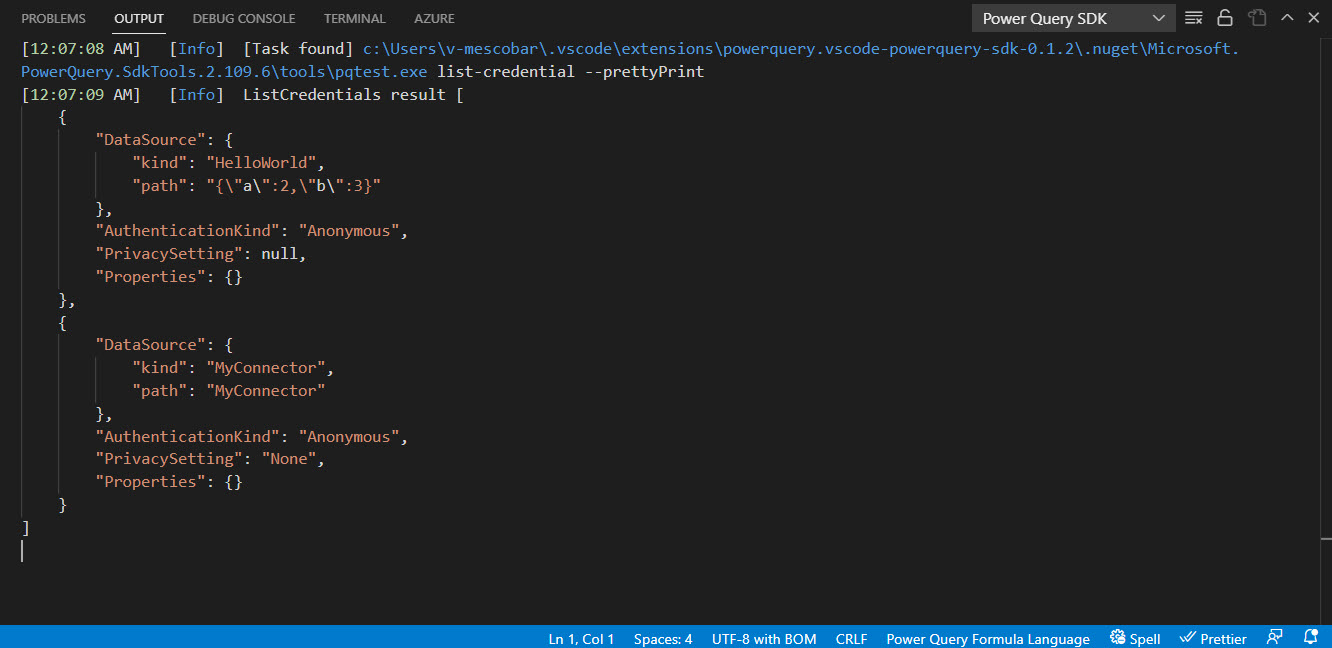
List credentials
Similar to setting a credential, the task to list credentials has two entry points in the same places: the Power Query SDK section in the Explorer pane and inside the Terminal menu.
When this task is executed, it showcases the available credentials inside the output terminal.
Clear ALL credentials
Similar to the previous two tasks, the task to clear all credentials has two entry points in the same places: the Power Query SDK section in the Explorer pane and inside the Terminal menu.
This task serves as a way to clear all credentials from your current session when you need to set a new credential to evaluate your queries.
The informational messages for this task are also shown in the output console.

Evaluate a query and the results panel
Before you can evaluate any test queries, a credential must be set. Using the connector that was created in the previous section, you can open the *.query.pq file that serves as your test query file.
For this specific connector where the project name was MyConnector, the code looks as follows:
// Use this file to write queries to test your data connector
let
    result = MyConnector.Contents()
in
    result
Before evaluating the query, let's change the code as follows:
// Use this file to write queries to test your data connector
let
    result = MyConnector.Contents("Hello World")
in
    result
Make sure to save the file after changing its code.
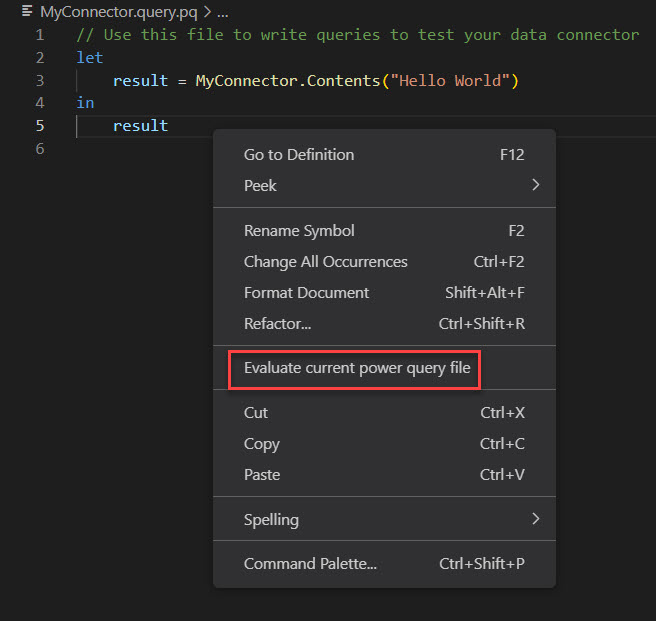
To evaluate this query, you have three options:
- Right select the file that's in use and select the Evaluate current power query file option.
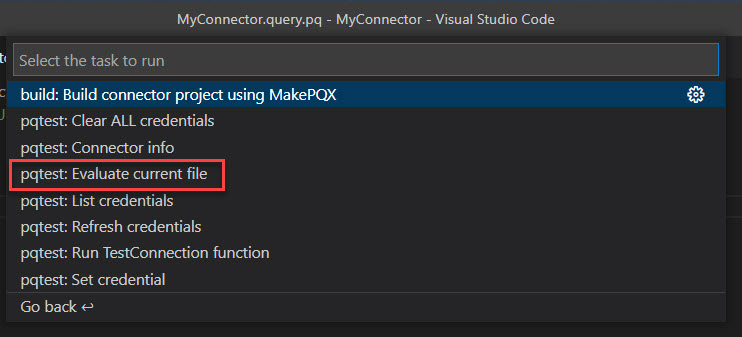
- Go through the Terminal menu and select the Evaluate current file task.
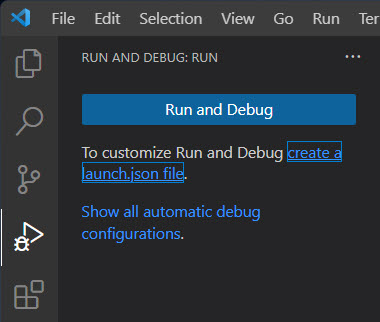
- Use the native Run and Debug option from Visual Studio Code, select the hyperlink to create a launch.json file, and then evaluate the file.
After evaluating the query, the results are displayed in the console at the bottom of the window and in a new panel called the result panel on the right.
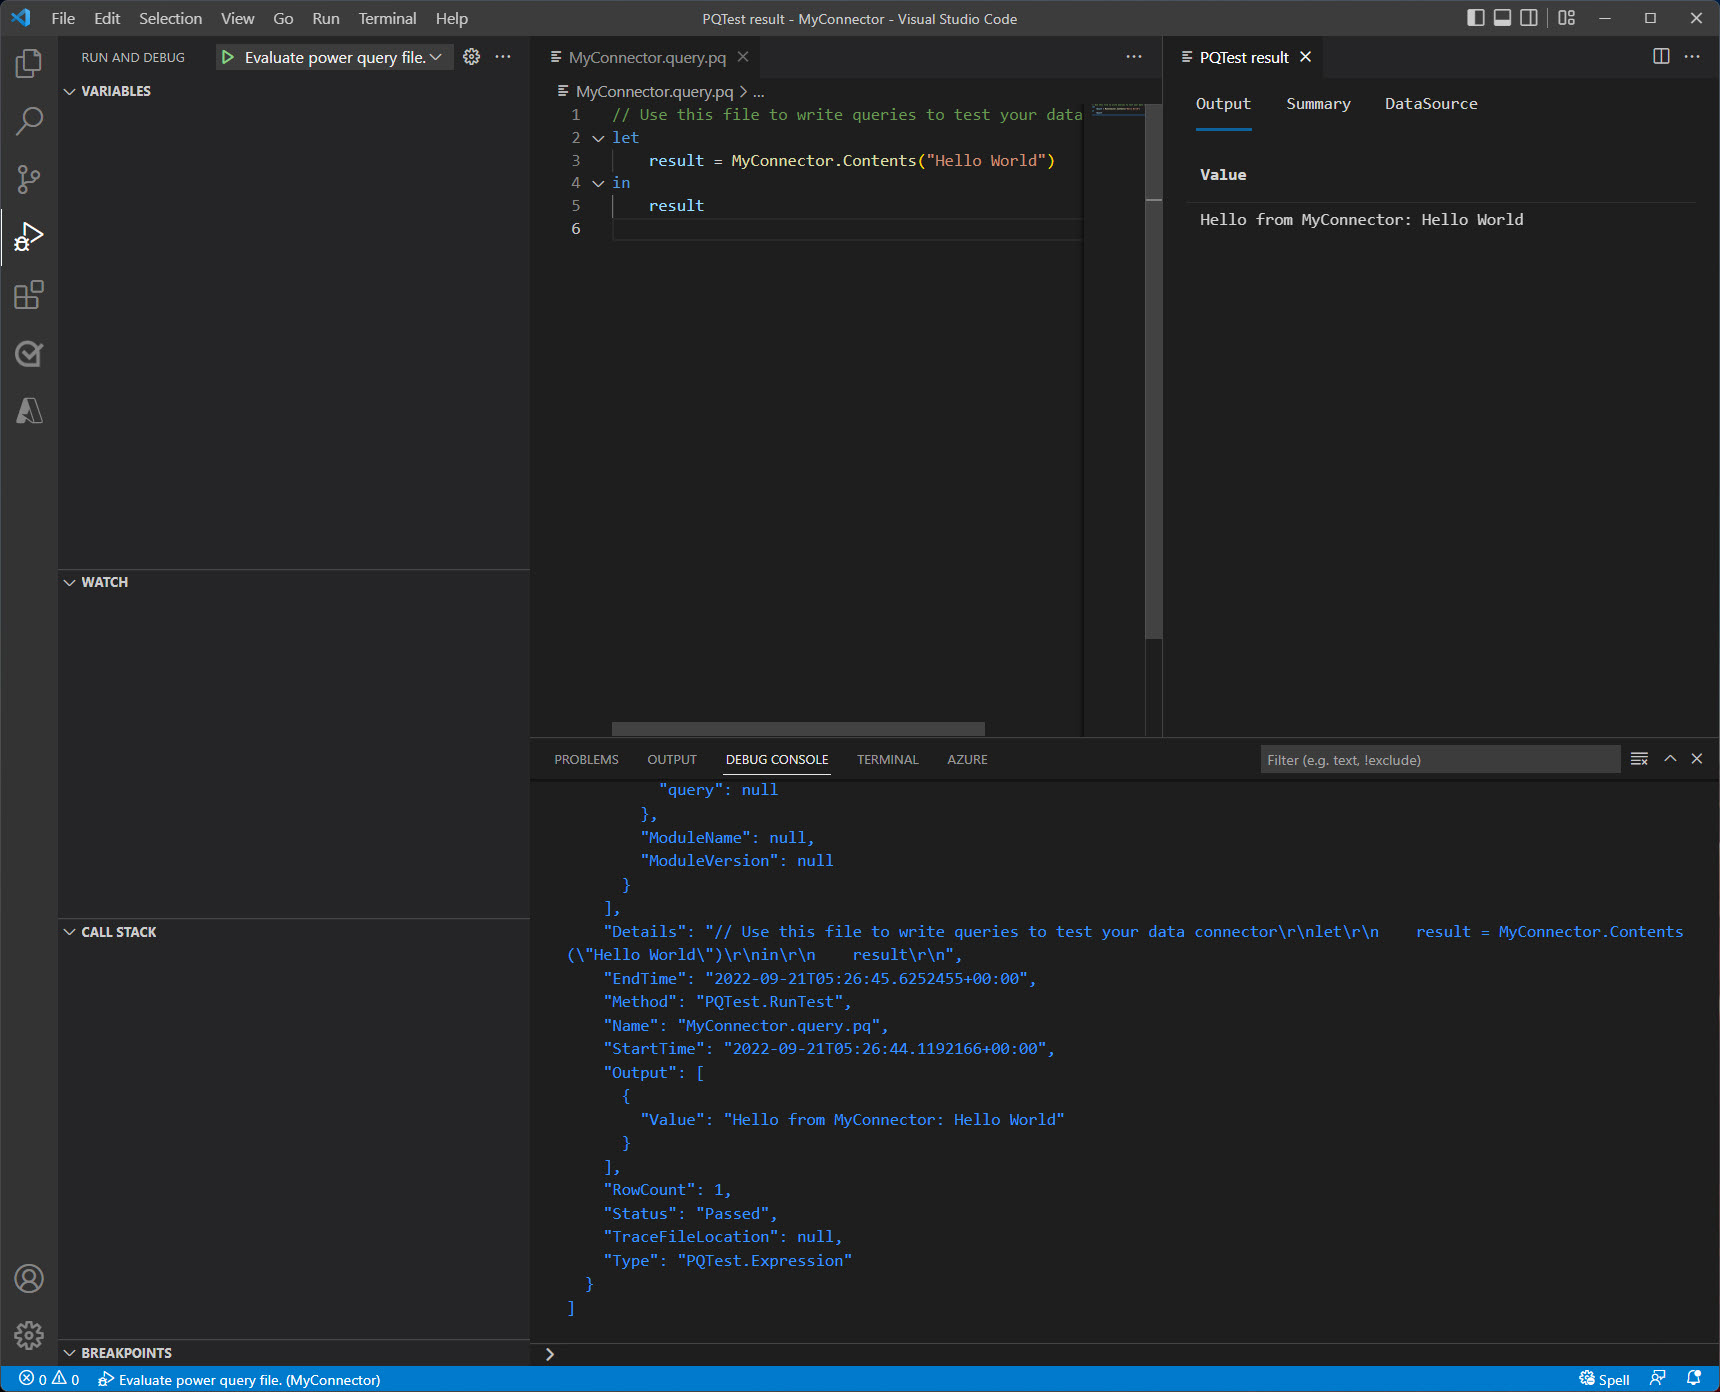
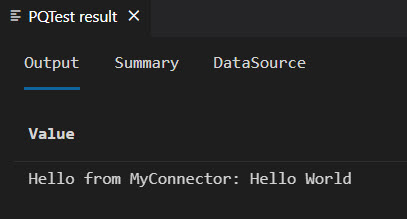
The result panel contains three tabs:
Output tab: Displays a data preview of the query evaluated. If the data is a table, it's displayed as grid.
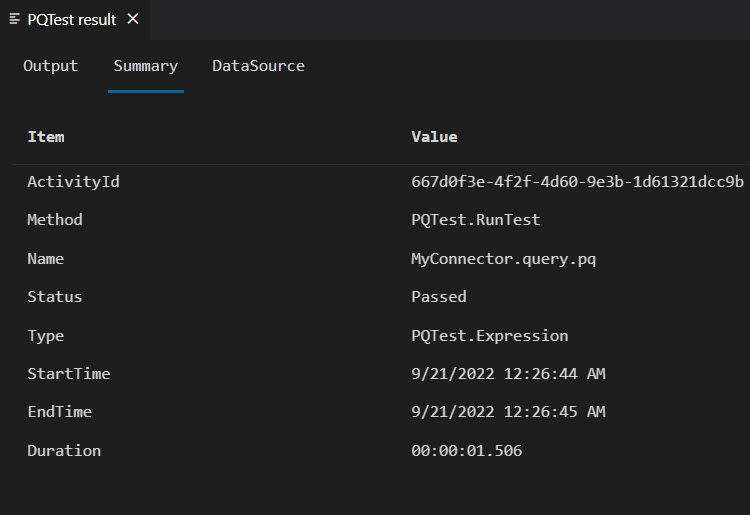
Summary: Displays a summary of the activity that ran the evaluations, along with the statistics associated with that activity.
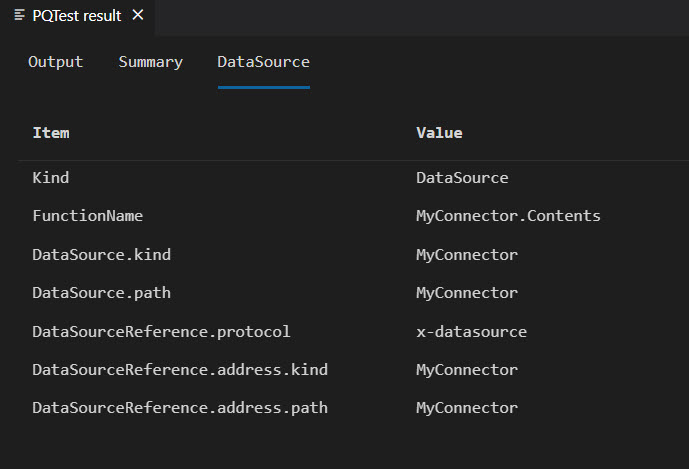
DataSource: Displays general information about the data source used for the evaluation.
To evaluate a different query, you just modify the *.query.pq file, save it, and then run the evaluation task again with any of the three methods.
Note
The Power Query SDK doesn't manage any kind of caching mechanism for the evaluations.
Bring a legacy extension project to the new SDK
This section helps connector developers who have extension projects that were created with the legacy Visual Studio based Power Query SDK.
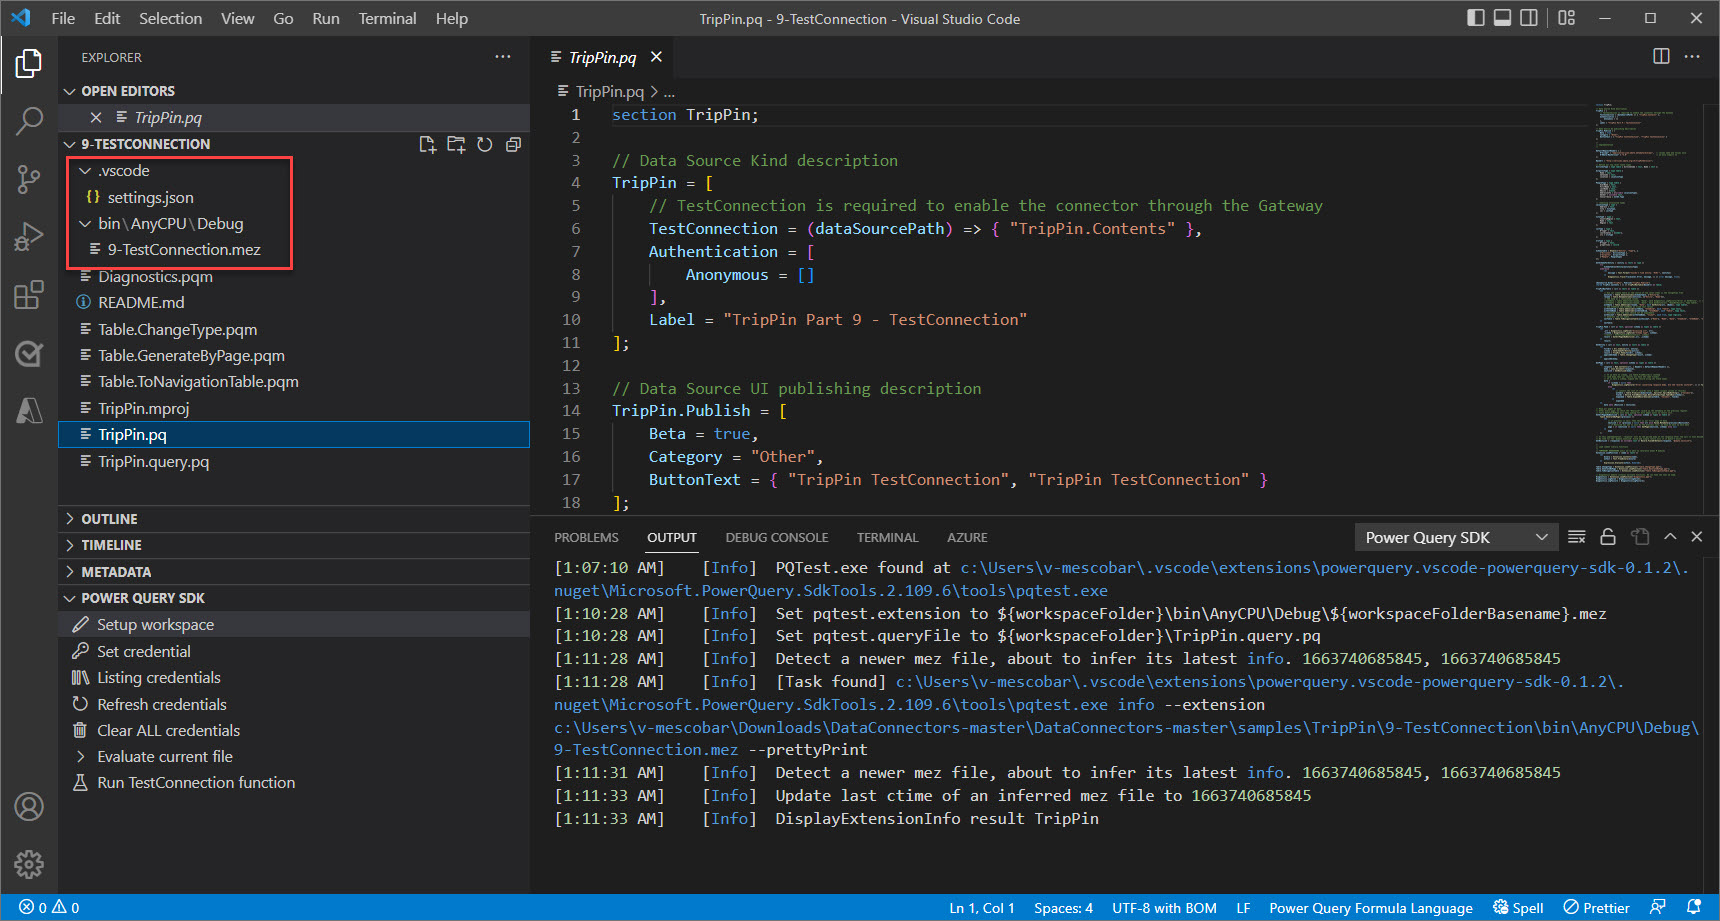
To follow along, we recommend downloading the connector projects available from our DataConnectors repository for the TripPin sample, specifically the sample 9-TestConnection.
To bring the legacy extension project to the new SDK, follow these steps:
In Visual Studio code, select File > Open folder, then navigate to the folder where your extension project is located.
Set up a workspace using the existing folder and its contents using one of the following two methods:
The Power Query SDK has a mechanism to recognize the contents of your folder and suggests that you enable the conversion to a new Power Query SDK workspace.

Run the Setup workspace and the Build Task from the terminal menu. These will effectively create the .mez file and the settings.json files needed for the workspace.
The addition of two new folders and files is what transforms the current workspace into a new Power Query SDK workspace.
Set up workspace
What the Set up workspace task does is effectively create a settings.json file for your workspace that dictates some variables that will be used for your workspace when it comes to evaluations and general settings.
Build an extension file
The build task allows you to create the .mez file for your extension on demand.
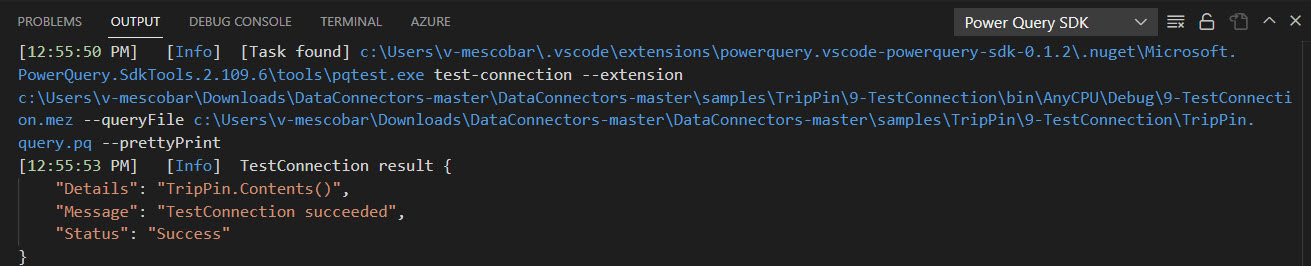
Run TestConnection function
TestConnection is a function that enables your connector to be refreshed in the Microsoft Cloud through services such as Power BI. It's a record implemented inside of your connector data source record. You can learn more about the implementation of the TestConnection handler from the sample available for Test connection.
The task to run TestConnection enables you to test the handler inside the Power Query SDK without having to manually try this handler in the Microsoft Cloud.
To run this task, first set a credential for your connector and then run the task either from the Power Query SDK section in the Explorer or through the list of tasks inside the terminal menu.
The result of this task is displayed in the output terminal at the bottom of the window.
Feedback and bugs
Do you have any feedback, suggestions, or bugs that you'd like to report? Visit our official public repository on GitHub.
You can use the Power BI Community forum to post general questions around Power Query, the M language, and custom connector development.
Feedback
Coming soon: Throughout 2024 we will be phasing out GitHub Issues as the feedback mechanism for content and replacing it with a new feedback system. For more information see: https://aka.ms/ContentUserFeedback.
Submit and view feedback for