Tutorial: Use a Windows VM system-assigned managed identity to access Azure Storage
Managed identities for Azure resources is a feature of Microsoft Entra ID. Each of the Azure services that support managed identities for Azure resources are subject to their own timeline. Make sure you review the availability status of managed identities for your resource and known issues before you begin.
This tutorial shows you how to use a system-assigned managed identity for a Windows virtual machine (VM) to access Azure Storage. You learn how to:
- Create a blob container in a storage account
- Grant your Windows VM's system-assigned managed identity access to a storage account
- Get an access and use it to call Azure Storage
Note
Microsoft Entra authentication for Azure Storage is in public preview.
Prerequisites
- If you're not familiar with the managed identities for Azure resources feature, see this overview.
- If you don't have an Azure account, sign up for a free account before you continue.
- To perform the required resource creation and role management, your account needs "Owner" permissions at the appropriate scope (your subscription or resource group). If you need assistance with role assignment, see Assign Azure roles to manage access to your Azure subscription resources.
Enable
Enabling a system-assigned managed identity is a one-click experience. You can either enable it during the creation of a VM or in the properties of an existing VM.

To enable a system-assigned managed identity on a new VM:
Grant access
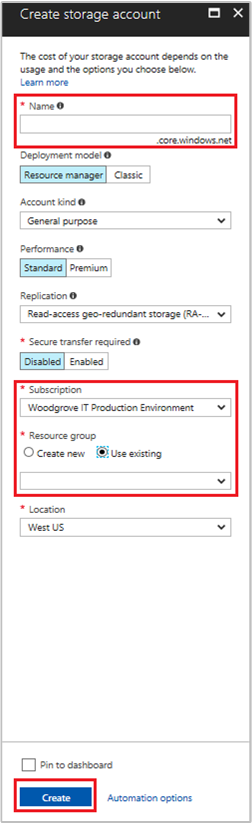
Create storage account
In this section, you create a storage account.
Select the + Create a resource button found on the upper left-hand corner of the Azure portal.
Select Storage, then Storage account - blob, file, table, queue.
Under Name, enter a name for the storage account.
Deployment model and Account kind should be set to Resource manager and Storage (general purpose v1).
Ensure the Subscription and Resource Group match the ones you specified when you created your VM in the previous step.
Select Create.
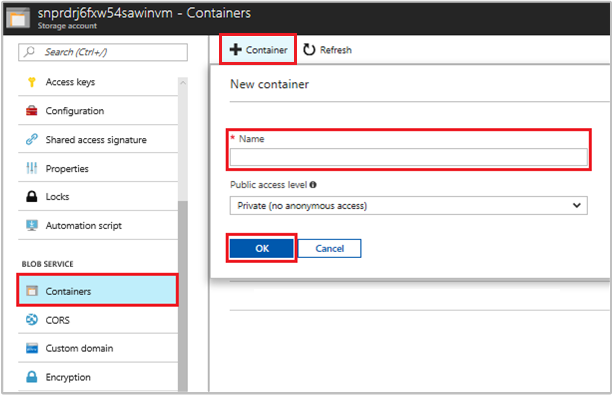
Create a blob container and upload a file to the storage account
Files require blob storage so you need to create a blob container in which to store the file. You then upload a file to the blob container in the new storage account.
Navigate back to your newly created storage account.
Under Blob Service, select Containers.
Select + Container on the top of the page.
Under New container, enter a name for the container and under Public access level keep the default value.
Using an editor of your choice, create a file titled hello world.txt on your local machine. Open the file and add the text (without the quotes) "Hello world! :)" and then save it.
Upload the file to the newly created container by clicking on the container name, then Upload
In the Upload blob pane, under Files, select the folder icon and browse to the file hello_world.txt on your local machine, select the file, then select Upload.

Grant access
This section shows how to grant your VM access to an Azure Storage container. You can use the VM's system-assigned managed identity to retrieve the data in the Azure storage blob.
Navigate back to your newly created storage account.
Select Access control (IAM).
Select Add > Add role assignment to open the Add role assignment page.
Assign the following role. For detailed steps, see Assign Azure roles using the Azure portal.
Setting Value Role Storage Blob Data Reader Assign access to Managed identity System-assigned Virtual Machine Select <your virtual machine> 
Access data
Azure Storage natively supports Microsoft Entra authentication, so it can directly accept access tokens obtained using a managed identity. This approach uses Azure Storage's integration with Microsoft Entra ID, and is different from supplying credentials on the connection string.
Here's a .NET code example of opening a connection to Azure Storage. The example uses an access token and then reads the contents of the file you created earlier. This code must run on the VM to be able to access the VM's managed identity endpoint. .NET Framework 4.6 or higher is required to use the access token method. Replace the value of <URI to blob file> accordingly. You can obtain this value by navigating to file you created and uploaded to blob storage and copying the URL under Properties the Overview page.
using System;
using System.Collections.Generic;
using System.Linq;
using System.Text;
using System.Threading.Tasks;
using System.IO;
using System.Net;
using System.Web.Script.Serialization;
using Microsoft.WindowsAzure.Storage.Auth;
using Microsoft.WindowsAzure.Storage.Blob;

namespace StorageOAuthToken
{
    class Program
    {
        static void Main(string[] args)
        {
            //get token
            string accessToken = GetMSIToken("https://storage.azure.com/");

            //create token credential
            TokenCredential tokenCredential = new TokenCredential(accessToken);

            //create storage credentials
            StorageCredentials storageCredentials = new StorageCredentials(tokenCredential);

            Uri blobAddress = new Uri("<URI to blob file>");

            //create block blob using storage credentials
            CloudBlockBlob blob = new CloudBlockBlob(blobAddress, storageCredentials);

            //retrieve blob contents
            Console.WriteLine(blob.DownloadText());
            Console.ReadLine();
        }

        static string GetMSIToken(string resourceID)
        {
            string accessToken = string.Empty;
            // Build request to acquire MSI token
            HttpWebRequest request = (HttpWebRequest)WebRequest.Create("http://169.254.169.254/metadata/identity/oauth2/token?api-version=2018-02-01&resource=" + resourceID);
            request.Headers["Metadata"] = "true";
            request.Method = "GET";

            try
            {
                // Call /token endpoint
                HttpWebResponse response = (HttpWebResponse)request.GetResponse();

                // Pipe response Stream to a StreamReader, and extract access token
                StreamReader streamResponse = new StreamReader(response.GetResponseStream());
                string stringResponse = streamResponse.ReadToEnd();
                JavaScriptSerializer j = new JavaScriptSerializer();
                Dictionary<string, string> list = (Dictionary<string, string>)j.Deserialize(stringResponse, typeof(Dictionary<string, string>));
                accessToken = list["access_token"];
                return accessToken;
            }
            catch (Exception e)
            {
                string errorText = String.Format("{0} \n\n{1}", e.Message, e.InnerException != null ? e.InnerException.Message : "Acquire token failed");
                return accessToken;
            }
        }
    }
}
The response contains the contents of the file:
Hello world! :)
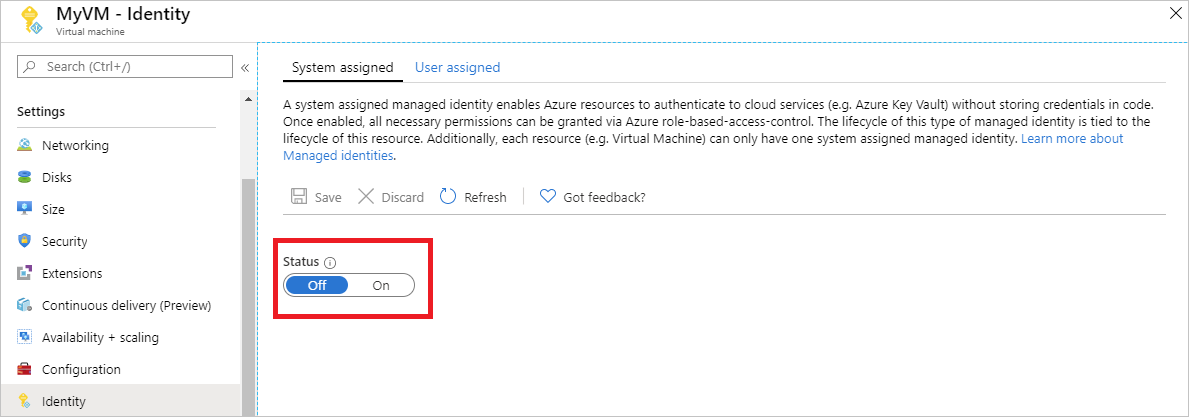
Disable
To disable the system-assigned identity on your VM, set the status of the system-assigned identity to Off.
Next steps
In this tutorial, you learned how enable a Windows VM's system-assigned identity to access Azure Storage. To learn more about Azure Storage, see:
Feedback
În curând: Pe parcursul anului 2024, vom elimina treptat Probleme legate de GitHub ca mecanism de feedback pentru conținut și îl vom înlocui cu un nou sistem de feedback. Pentru mai multe informații, consultați: https://aka.ms/ContentUserFeedback.
Trimiteți și vizualizați feedback pentru