Notă
Accesul la această pagină necesită autorizare. Puteți încerca să vă conectați sau să modificați directoarele.
Accesul la această pagină necesită autorizare. Puteți încerca să modificați directoarele.
Applies to: Azure Logic Apps (Consumption + Standard)
This guide shows how to access an on-premises file share from a workflow in Azure Logic Apps by using the File System connector. You can then create automated workflows that run when triggered by events in your file share or in other systems, and run actions to manage your files. The connector provides the following capabilities:
- Create, get, append, update, and delete files.
- List files in folders or root folders.
- Get file content and metadata.
In this how-to guide, the example scenarios demonstrate the following tasks:
- Trigger a workflow when a file is created or added to a file share, and then send an email.
- Trigger a workflow when copying a file from a Dropbox account to a file share, and then send an email.
Limitations and known issues
- The File System connector currently supports only Windows file systems on Windows operating systems.
- Mapped network drives aren't supported.
- For the built-in connector, the root folder must be a top-level file share. The connector doesn't support nested root folder paths. Instead, specify subfolders by using relative paths in connector operations.
- A Standard logic app supports up to 20 built-in File System connections.
- The connector doesn't support multiple built-in connections that use the same root folder with different credentials.
Connector technical reference
The File System connector has different versions, based on logic app type and host environment.
| Logic app | Environment | Connector version |
|---|---|---|
| Consumption | Multitenant Azure Logic Apps | Managed connector, which appears in the connector gallery under Shared. For more information, review the following documentation: - File System managed connector reference - Managed connectors in Azure Logic Apps |
| Standard | Single-tenant Azure Logic Apps in a Workflow Service Plan or App Service Environment v3 (Windows plans only) | Managed connector, which appears in the connector gallery under Shared, and built-in connector, which appears in the connector gallery under Built-In and is service provider-based. The built-in connector can connect directly to a file share and access Azure virtual networks without an on-premises data gateway. For more information, see: - File System managed connector reference - File System built-in connector reference - Built-in connectors in Azure Logic Apps |
Prerequisites
An Azure account and subscription. Get a free Azure account.
To connect to your file share, different requirements apply, based on your logic app and the hosting environment:
Consumption logic app workflows:
In multitenant Azure Logic Apps, you need to meet the following requirements, if you haven't already:
Install an on-premises data gateway on a local computer.
The File System managed connector requires that your gateway installation and file system server must exist in the same Windows domain.
In the File System operation that you added, select the data gateway resource that you previously created.
Standard logic app workflows:
You can use the File System built-in connector or managed connector.
To use the File System managed connector, follow the same requirements as a Consumption logic app workflow in multitenant Azure Logic Apps.
To use the File System built-in connector, your Standard logic app workflow must run in a Windows-based Workflow Service Plan or App Service Environment v3, but doesn't require the data gateway resource.
To route file share traffic through an integrated virtual network, set the
WEBSITE_CONTENTOVERVNETapp setting to1, or enable thevnetContentShareEnabledsite property. Make sure the virtual network can resolve the file server's fully qualified domain name (FQDN) and allows outbound SMB traffic on port 445.
Access to the computer that has the file system you want to use. For example, if you install the data gateway on the same computer as your file system, you need the account credentials for that computer.
To follow the example scenario in this guide, you need an email account from a provider that's supported by Azure Logic Apps, such as Office 365 Outlook, Outlook.com, or Gmail. For other providers, review other supported email connectors. This example uses the Office 365 Outlook connector with a work or school account. If you use another email account, the overall steps are the same, but your UI might slightly differ.
Important
To use the Gmail connector, only G-Suite business accounts can use this connector without restriction in logic apps.
If you have a Gmail consumer account, you can use this connector only with specific Google-approved services, or you can create a Google client app to use for authentication with your Gmail connector.
For more information, see Data security and privacy policies for Google connectors in Azure Logic Apps.
For the example File System action scenario, you need a Dropbox account. You can sign up for free.
The logic app resource with the workflow where you want to access your file share.
To start your workflow with a File System trigger, you need to have a blank workflow.
To use a File System action, your workflow can start with any trigger that best fits your scenario.
If you don't have a logic app resource and workflow, see the following articles:
Add a File System trigger
In the Azure portal, open your Consumption logic app resource. In the designer, open your blank workflow.
Add the File System trigger for your scenario by following the general steps to add a trigger for your workflow.
For more information, see File System triggers. This example continues with the trigger named When a file is created.
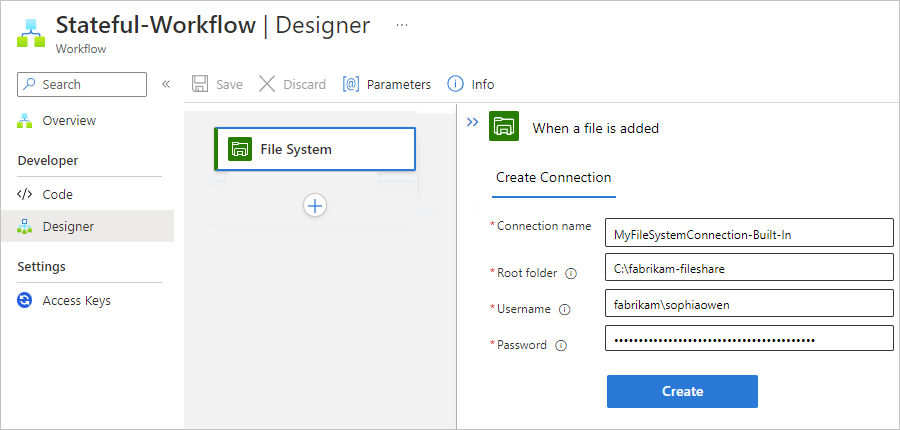
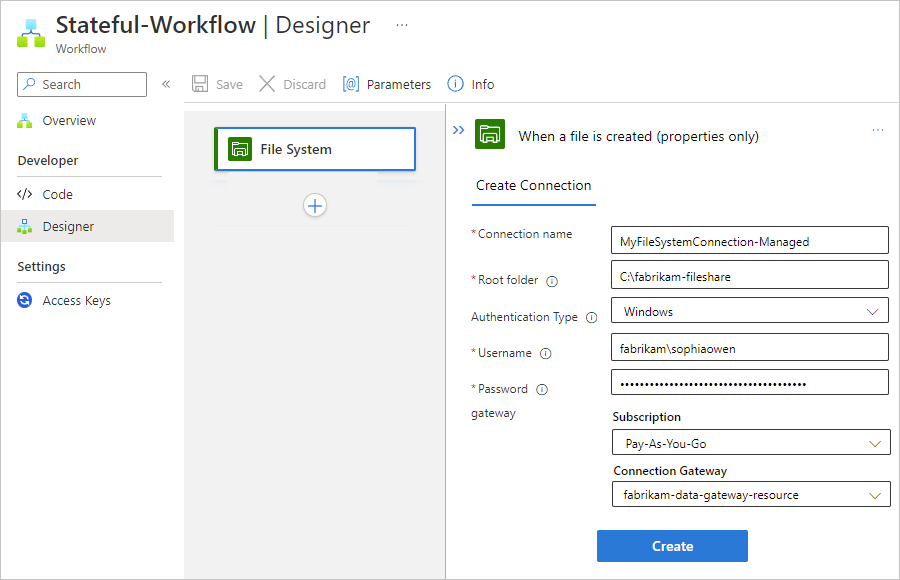
In the connection information box, provide the following information as required:
Property Required Value Description Connection name Yes <connection-name> The name to use for your connection Root folder Yes <root-folder-name> The root folder for your file system, which is usually the main parent folder and is the folder used for the relative paths with all triggers that work on files.
For example, if you installed the on-premises data gateway, use the local folder on the computer with the data gateway installation. Or, use the folder for the network share where the computer can access that folder, for example,\PublicShare\MyFileSystem.Authentication Type No <auth-type> The type of authentication that your file system server uses, which is Windows Username Yes <domain-and-username> The domain and username for the computer where you have your file system.
For the managed File System connector, use one of the following values with the backslash (\):
- <domain>\<username>
- <local-computer>\<username>
For example, if your file system folder is on the same computer as the on-premises data gateway installation, you can use <local-computer>\<username>.Password Yes <password> The password for the computer where you have your file system Gateway No - <Azure-subscription>
- <gateway-resource-name>This section applies only to the managed File System connector:
- Subscription: The Azure subscription associated with the data gateway resource
- Connection Gateway: The data gateway resourceThe following example shows the connection information for the File System managed connector trigger:
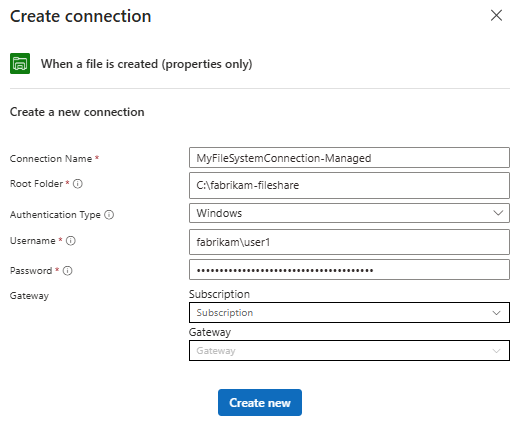
When you're done, select Create new.
Azure Logic Apps creates and tests your connection, making sure that the connection works properly. If the connection is set up correctly, the setup options appear for your selected trigger.
Continue building your workflow.
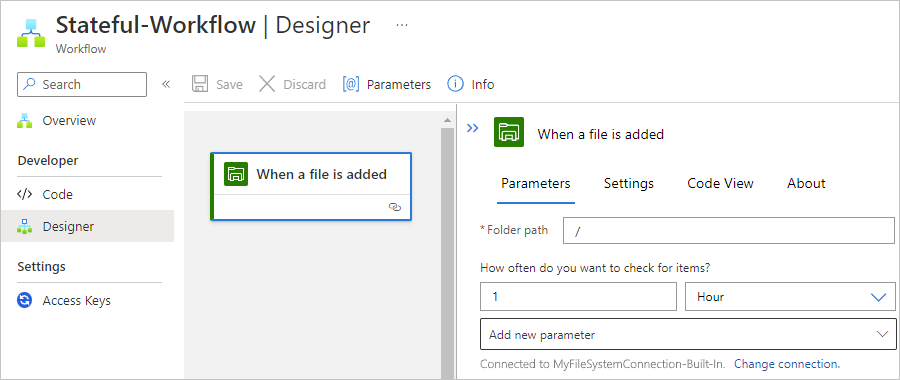
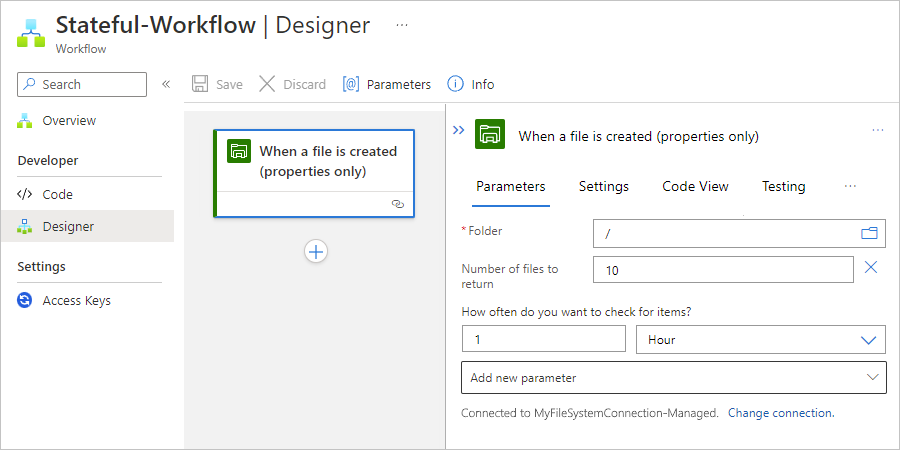
Provide the required information for your trigger.
For this example, select the folder path on your file system server to check for a newly created file. Specify the number of files to return and how often you want to check.
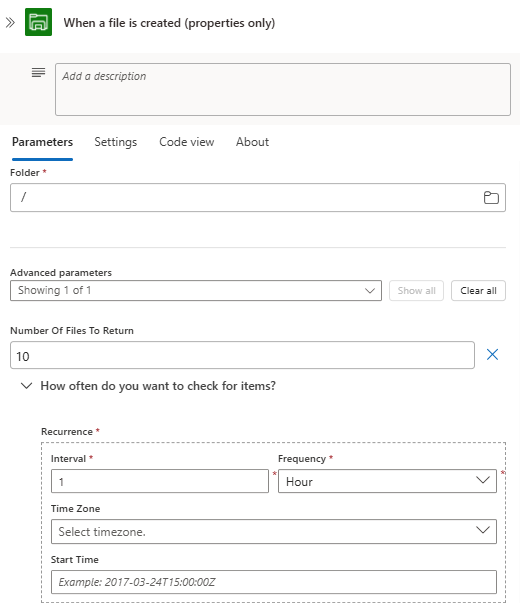
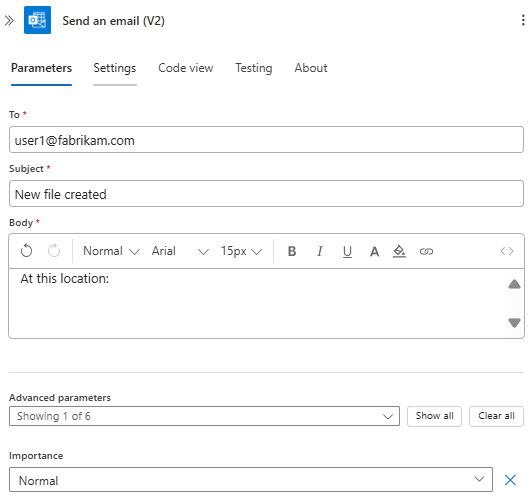
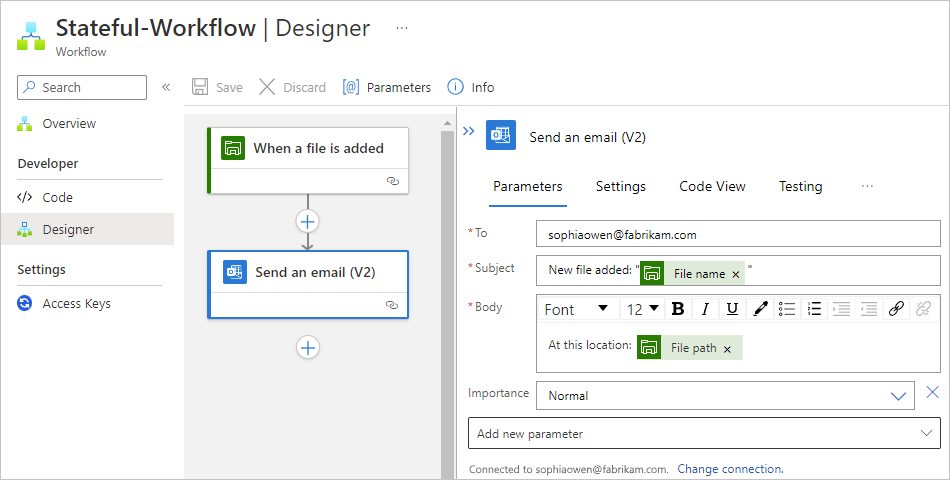
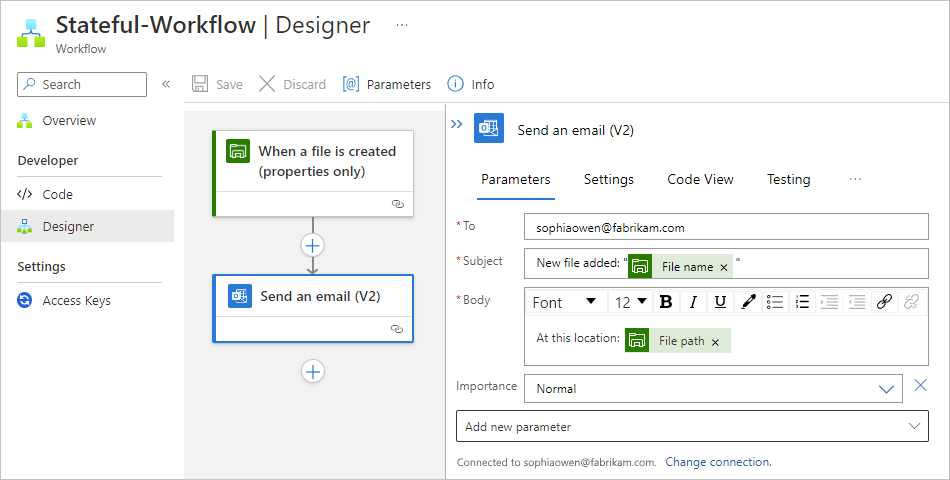
To test your workflow, add an Outlook connector action that sends you an email when a file is created on the file system in specified folder. Enter the email recipients, subject, and body. For testing, you can use your own email address.
Tip
To add outputs from previous steps in the workflow, select inside the trigger's edit boxes. When the dynamic content list appears, select from the available outputs.
When you're done, save your workflow.
To test your workflow, upload a file, which triggers the workflow.
If successful, your workflow sends an email about the new file.
Add a File System action
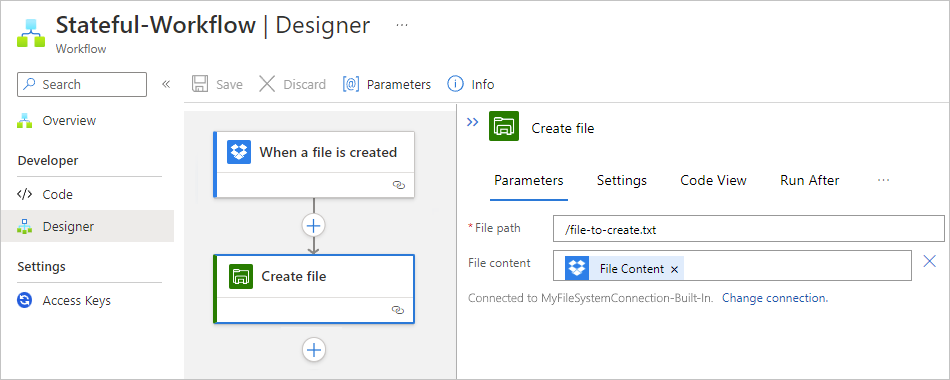
The example logic app workflow starts with the Dropbox trigger, but you can use any trigger that you want.
In the Azure portal, open your Consumption logic app resource. In the designer, open your workflow.
Add the File System action for your scenario by following the general steps to add an action for your workflow.
For more information, see File System triggers. This example continues with the action named Create file.
If prompted, provide your connection information. For more information, see the table in the previous section.
Continue building your workflow.
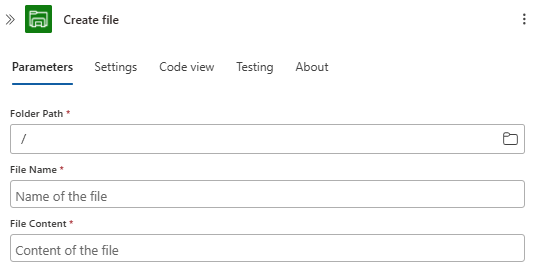
Provide the required information for your action.
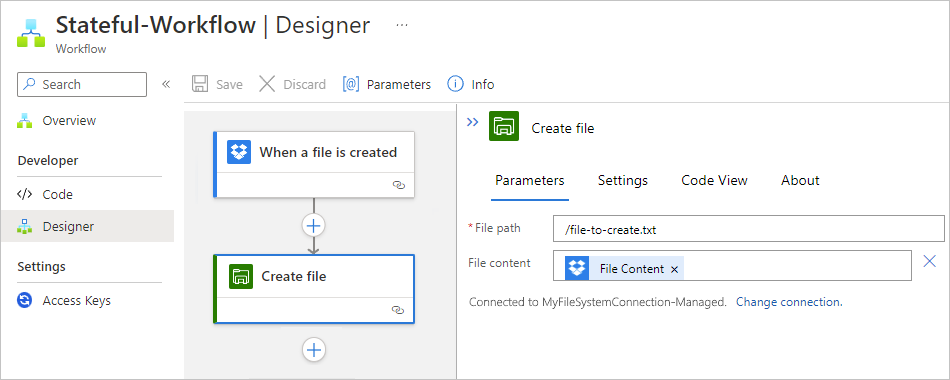
For this example, select the folder path on your file system server to use, which is the root folder here. Enter the file name and content, based on the file uploaded to Dropbox.
Tip
To add outputs from previous steps in the workflow, select inside the action's edit boxes. When the dynamic content list appears, select from the available outputs.
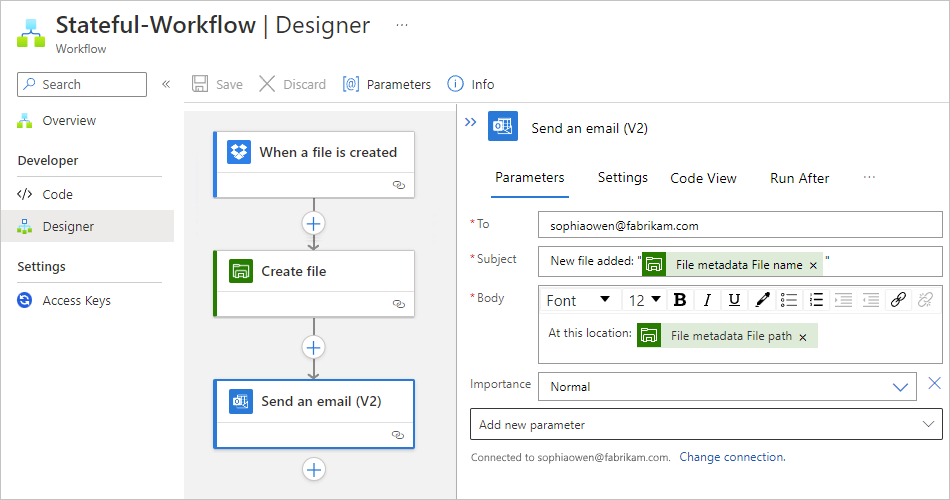
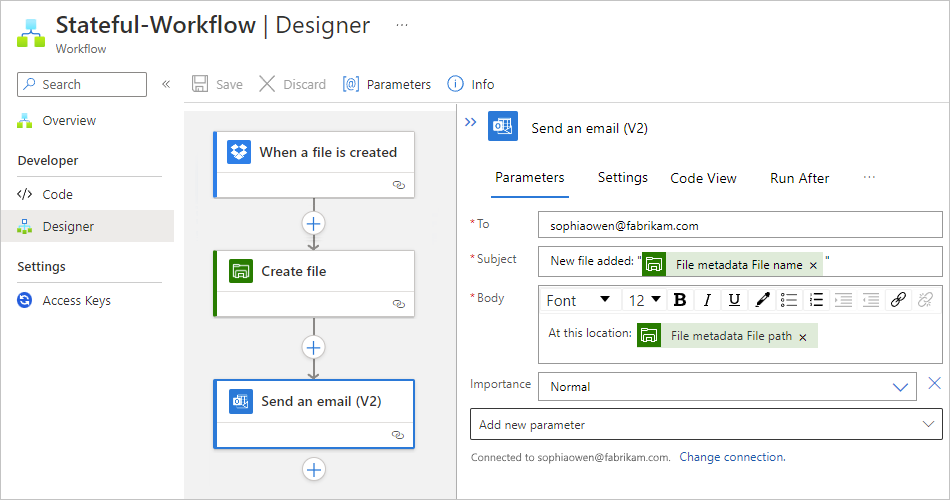
To test your workflow, add an Outlook action that sends you an email when the File System action creates a file. Enter the email recipients, subject, and body. For testing, you can use your own email address.
When you're done, save your workflow.
To test your workflow, upload a file, which triggers the workflow.
If successful, your workflow creates a file on your file system server, based on the uploaded file in DropBox, and sends an email about the created file.
Troubleshoot the built-in File System connector
If an operation fails with the InvalidServiceProviderConnection error and reports that a mount path such as C:\mounts\FileSystem doesn't exist, the logic app can't mount or access the file share.
Check the following items:
- Confirm that the root folder uses a full UNC path with the file server's FQDN or IP address and a top-level share name, for example,
\\file-server.contoso.com\MyShare. Don't use only the machine name or include nested folders. - Confirm that virtual network route tables and network security groups allow SMB traffic from the logic app to the file server on port 445.
- From the logic app's Kudu console, run
nslookup <FQDN>to confirm that the file server name resolves, and check whether the expected path exists underC:\mounts. - If traffic must use the integrated virtual network, confirm that
WEBSITE_CONTENTOVERVNETis set to1or that thevnetContentShareEnabledsite property is enabled. - Confirm that the account has permission to access the top-level share. If the account can access only a nested folder, expose that folder as a separate share and use the new top-level share as the root folder.