Tutorial: Deploy a Java app to a virtual machine scale set
Azure DevOps Services
A virtual machine scale set lets you deploy and manage identical, autoscaling virtual machines.
VMs are created as needed in a scale set. You define rules to control how and when VMs are added or removed from the scale set. These rules can be triggered based on metrics such as CPU load, memory usage, or network traffic.
In this tutorial, you build a Java app and deploy it to a virtual machine scale set. You learn how to:
- Create a virtual machine scale set
- Build a machine image
- Deploy a custom image to a virtual machine scale set
Prerequisites
Before you begin, you need:
- An Azure account with an active subscription. Create an account for free.
- An active Azure DevOps organization. Sign up for Azure Pipelines.
- The Azure VM Image Builder DevOps task installed for your DevOps organization.
- A forked GitHub repo with the example project. Fork the pipelines-vmss repository.
Set up your Java pipeline
Sign in to your Azure DevOps organization and go to your project.
Go to Pipelines, and then select New pipeline or Create pipeline if creating your first pipeline.
Do the steps of the wizard by first selecting GitHub as the location of your source code.
You might be redirected to GitHub to sign in. If so, enter your GitHub credentials.
When you see the list of repositories, select your repository.
You might be redirected to GitHub to install the Azure Pipelines app. If so, select Approve & install.
When the Configure tab appears, select Maven.
Customize the pipeline
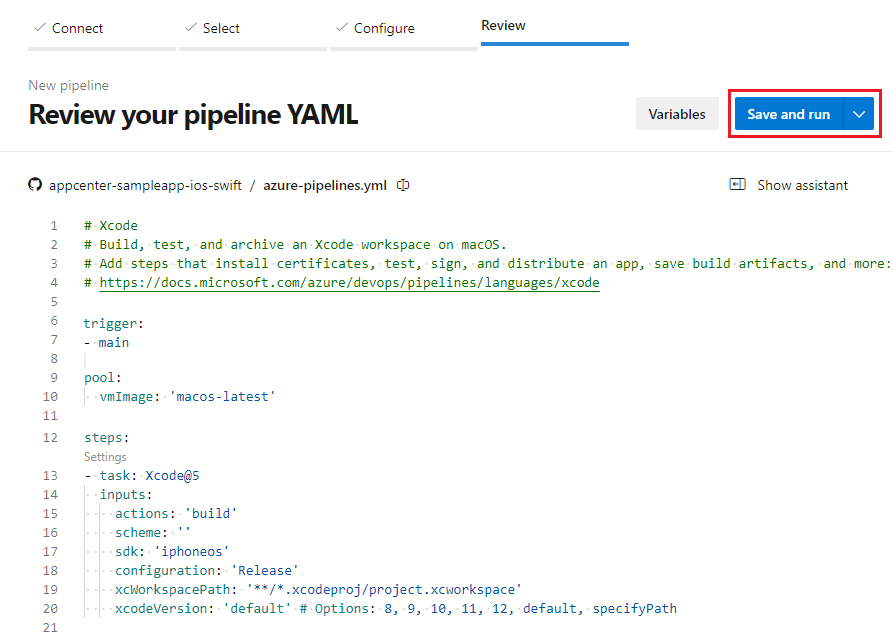
When your new pipeline appears, take a look at the YAML to see what it does. When you're ready, select Save and run.

You are prompted to commit a new azure-pipelines.yml file to your repository. After you're happy with the message, select Save and run again.
If you want to watch your pipeline in action, select the build job.
You just created and ran a pipeline that we automatically created for you, because your code appeared to be a good match for the Maven template.
You now have a working YAML pipeline (
azure-pipelines.yml) in your repository that's ready for you to customize!When you're ready to make changes to your pipeline, select it in the Pipelines page, and then Edit the
azure-pipelines.ymlfile.
Add the Copy Files and Publish Build Artifact tasks
Update your pipeline to include the
CopyFiles@2task. This will create an artifact that you can deploy to your virtual machine scale set.trigger: none pool: vmImage: 'ubuntu-latest' steps: - task: Maven@4 inputs: mavenPomFile: 'pom.xml' mavenOptions: '-Xmx3072m' javaHomeOption: 'JDKVersion' jdkVersionOption: '1.8' jdkArchitectureOption: 'x64' publishJUnitResults: true testResultsFiles: '**/surefire-reports/TEST-*.xml' goals: 'package' - task: CopyFiles@2 displayName: 'Copy File to: $(TargetFolder)' inputs: SourceFolder: '$(Build.SourcesDirectory)' Contents: | **/*.sh **/*.war **/*jar-with-dependencies.jar TargetFolder: '$(System.DefaultWorkingDirectory)/pipeline-artifacts/' flattenFolders: true
Create a custom image and upload it to Azure
You'll need a resource group, storage account, and shared image gallery for your custom image.
Create a resource group with az group create. This example creates a resource group named myVMSSResourceGroup in the eastus2 location:
az group create --name myVMSSResourceGroup --location eastus2Create a new storage account. This example creates a storage account,
vmssstorageaccount.az storage account create \ --name vmssstorageaccount \ --resource-group myVMSSResourceGroup \ --location eastus2 \ --sku Standard_LRSCreate a shared image gallery.
az sig create --resource-group myVMSSResourceGroup --gallery-name myVMSSGalleryCreate a new image gallery in the
myVMSSGalleryresource. See Create an Azure Shared Image Gallery using the portal to learn more about working with image galleries.az sig create --resource-group myVMSSResourceGroup --gallery-name myVMSSGalleryCreate an image definition. Copy the
idof the new image that looks like/subscriptions/<SUBSCRIPTION ID>/resourceGroups/<RESOURCE GROUP>/providers/Microsoft.Compute/galleries/myVMSSGallery/images/MyImage.az sig image-definition create -g myVMSSResourceGroup --gallery-name myVMSSGallery --gallery-image-definition MyImage --publisher GreatPublisher --offer GreatOffer --sku GreatSku --os-type linux
Create a managed identity
Create a managed identity in your resources group.
az identity create -g myVMSSResourceGroup -n myVMSSIdentityFrom the output, copy the
id. Theidwill look like/subscriptions/<SUBSCRIPTION ID>/resourcegroups/<RESOURCE GROUP>/providers/Microsoft.ManagedIdentity/userAssignedIdentities/<USER ASSIGNED IDENTITY NAME>.Open your image gallery in the gallery and assign
myVMSSIdentitythe Contributor role. Follow these steps to add a role assignment.
Create the custom image
To create a custom image, you can use the Azure VM Image Builder DevOps Task.
Add the
AzureImageBuilderTask@1task to your YAML file. Replace the values for<SUBSCRIPTION ID>,<RESOURCE GROUP>,<USER ASSIGNED IDENTITY NAME>with your own. Make sure to verify that thegalleryImageId,managedIdentityandstorageAccountNamevalues are accurate.- task: AzureImageBuilderTask@1 displayName: 'Azure VM Image Builder Task' inputs: managedIdentity: '/subscriptions/<SUBSCRIPTION ID>/resourcegroups/<RESOURCE GROUP>/providers/Microsoft.ManagedIdentity/userAssignedIdentities/<USER ASSIGNED IDENTITY NAME>' imageSource: 'marketplace' packagePath: '$(System.DefaultWorkingDirectory)/pipeline-artifacts' inlineScript: | sudo mkdir /lib/buildArtifacts sudo cp "/tmp/pipeline-artifacts.tar.gz" /lib/buildArtifacts/. cd /lib/buildArtifacts/. sudo tar -zxvf pipeline-artifacts.tar.gz sudo sh install.sh storageAccountName: 'vmssstorageaccount2' distributeType: 'sig' galleryImageId: '/subscriptions/<SUBSCRIPTION ID>/resourceGroups/<RESOURCE GROUP>/providers/Microsoft.Compute/galleries/myVMSSGallery/images/MyImage/versions/0.0.$(Build.BuildId)' replicationRegions: 'eastus2' ibSubscription: '<SUBSCRIPTION ID>' ibAzureResourceGroup: 'myVMSSResourceGroup' ibLocation: 'eastus2'Run the pipeline to generate your first image. You may need to authorize resources during the pipeline run.
Go to the new image in the Azure portal and open Overview. Select Create VMSS to create a new virtual machine scale set from the new image. Set Virtual machine scale set name to
vmssScaleSet. See Create a virtual machine scale set in the Azure portal to learn more about creating virtual machine scale sets in the Azure portal.
Deploy updates to the virtual machine scale set
Add an Azure CLI task to your pipeline to deploy updates to the scale set. Add the task at the end of the pipeline. Replace <SUBSCRIPTION ID> with your subscription ID.
- task: AzureCLI@2
  inputs:
    azureSubscription: '`YOUR_SUBSCRIPTION_ID`' #Authorize and in the task editor
    ScriptType: 'pscore'
    scriptLocation: 'inlineScript'
    Inline: 'az vmss update --resource-group myVMSSResourceGroup --name vmssScaleSet --set virtualMachineProfile.storageProfile.imageReference.id=/subscriptions/<SUBSCRIPTION ID>/resourceGroups/myVMSSResourceGroup/providers/Microsoft.Compute/galleries/myVMSSGallery/images/MyImage/versions/0.0.$(Build.BuildId)'
Clean up resources
Go to the Azure portal and delete your resource group, myVMSSResourceGroup.