Using the BizTalk Project System
You can use the BizTalk project system to create, organize, and configure BizTalk solutions in the Microsoft Visual Studio environment. The topics and procedures in this section describe how to perform various tasks by using the BizTalk project system.
The BizTalk Server project system uses the same project management principles and procedures that you use with other Microsoft Build Engine (MSBuild) projects in Visual Studio. This section details common procedures that you might use when creating an application that runs on Microsoft BizTalk Server.
For more information about MSBuild, see the MSBuild reference section in the Visual Studio Combined Collection at https://go.microsoft.com/fwlink/?LinkId=193567.
For more information about using the Visual Studio environment, see "Managing Solutions, Projects, and Files" in the Visual Studio Combined Collection at https://msdn.microsoft.com/library/wbzbtw81.aspx.
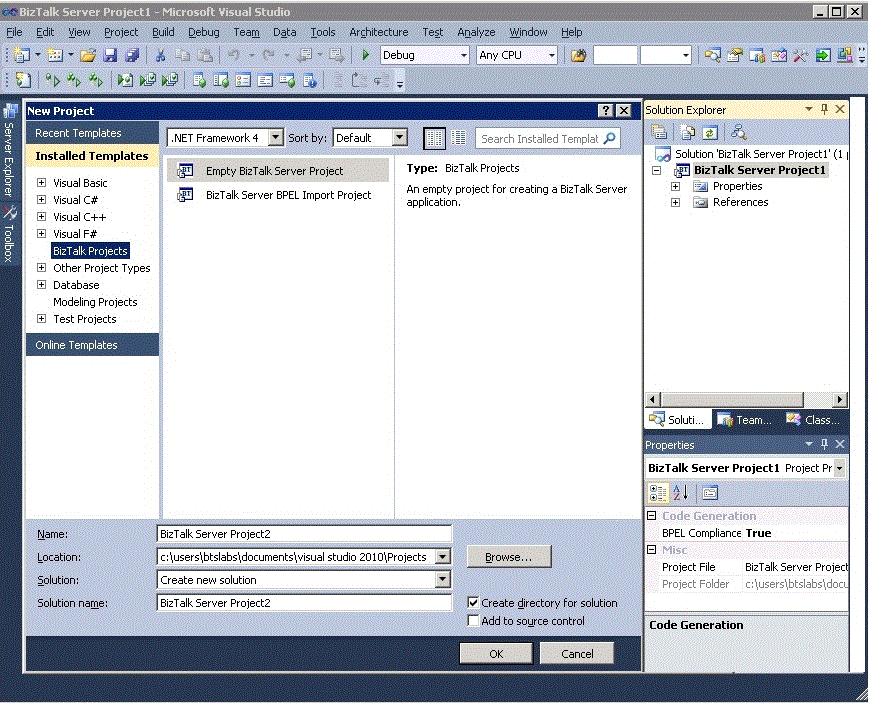
The following figure shows the BizTalk project system design environment with the New Project dialog box open.
 Depicts the Project System Design Environment
To open BizTalk Editor
In Solution Explorer, click a schema.
Note
To open BizTalk Editor, you must first create a schema or open a previously created schema. For information about creating a schema, see How to Create Schemas for XML Messages. Also see Adding Project Items.
On the View menu, click Open.
—Or—
Right-click the schema, and then click Open.
—Or—
Double-click the schema.
The selected schema opens in BizTalk Editor.
Note
To create a schema, you must have a project open. For information about how to create a project, see How to Create BizTalk Projects. For information about adding items to a project, see How to Create Schemas for XML Messages. Also see Adding Project Items.
To open BizTalk Mapper
In Solution Explorer, click a map.
Note
To open BizTalk Mapper, you must first create a map or open a previously created map. For information about creating a map, see How to Create New Maps. Also see Adding Project Items.
On the View menu, click Open.
—Or—
Right-click the map, and then click Open.
—Or—
Double-click a map.
The selected map opens in BizTalk Mapper.
Note
To create a map, you must have a project open. For information about how to create a project, see How to Create BizTalk Projects. For information about adding items to a project, see Adding Project Items. Also see How to Create New Maps.
To open Orchestration Designer
In Solution Explorer, click an orchestration (.odx).
Note
To open Orchestration Designer, you must first create an orchestration or open a previously created orchestration. For information about how to create an orchestration, see Working in Orchestration Designer.
On the View menu, click Open.
—Or—
Right-click the orchestration, and then click Open.
—Or—
Double-click the orchestration.
Orchestration Designer opens.
Note
To create an orchestration, you must have a project open. For information about how to create a project, see How to Create BizTalk Projects. For information about adding items to a project, see Adding Project Items. Also see Working in Orchestration Designer.
To open Pipeline Designer
In Solution Explorer, click a pipeline.
Note
To open Pipeline Designer, you must first create a pipeline or open a previously created pipeline. For information about how to create a pipeline, see How to Create a New Pipeline.
On the View menu, click Open.
—Or—
Right-click the pipeline, and then click Open.
—Or—
Double-click the pipeline.
Pipeline Designer opens.
Note
To create a pipeline, you must have a project open. For information about how to create a project, see How to Create BizTalk Projects. For information about adding items to a project, see Adding Project Items. Also see Working in Orchestration Designer.
See Also
Creating Orchestrations Using Orchestration Designer Using Pipeline Designer Windows of the Business Rule Composer Using BizTalk Editor Using BizTalk Mapper Developer Tools