Sign in to the Power BI service
APPLIES TO: ![]() Power BI service for business users
Power BI service for business users ![]() Power BI service for designers & developers
Power BI service for designers & developers ![]() Power BI Desktop
Power BI Desktop ![]() Requires Pro or Premium license
Requires Pro or Premium license
This article is for Power BI business users who are signing in to the Power BI service for the first time. A business user is someone who uses the data and visualizations in reports that are created by their colleagues. A business user relies on this data to make data-driven business intelligence decisions.
Power BI accounts
Before you can sign in to the Power BI service, you need an account and a license. There are several ways to get an account and license. This article describes a common scenario where employees at a corporation use their work email to sign in to their Power BI account. And, the employees use licenses that were purchased and allocated for their employees.
Sign in for the first time
Use your work email to log in to the Power BI service for the first time. Follow the steps here for general guidance. The exact screens may vary from what you see here, depending on your version of Microsoft software, browser version, and how your admin set up your license and environment.
Step 1: Open the Power BI service
The Power BI service runs in a browser. There are several ways to get started.
If you receive an email from a colleague, with a link to a dashboard or report, select the link to Open this report or Open this dashboard.

Sometimes, your administrator assigns you a Power BI license and sends you an email with this information. Look in your inbox for a welcome email and follow the instructions to sign in for the first time. Use this same email account for your sign-in.
Otherwise, open your favorite browser and type app.powerbi.com.

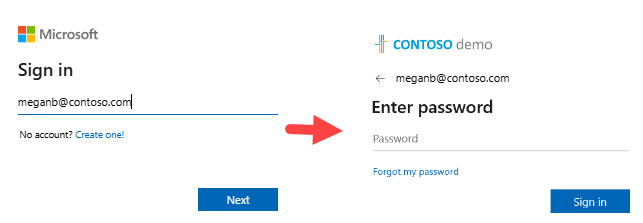
Step 2: Type your email address
The first time you sign in, Microsoft checks to see if you already have a Microsoft account. Enter your work or school email address.
Enter your Microsoft account password. It's the same email and password that you use for other Microsoft products, like Outlook and Office. Depending on how your account is set up, you might be prompted to enter a code sent to your email or mobile device.
Step 3: Review your Home landing page
On your first visit, Power BI opens your Home landing page. If Home doesn't open, select it from the navigation pane.

On Home, you see all the content that you have permission to use. There might not be much content at first, but that changes as you continue to use Power BI with your colleagues. If your colleagues have already shared content with you, you find it under Recent on Home.
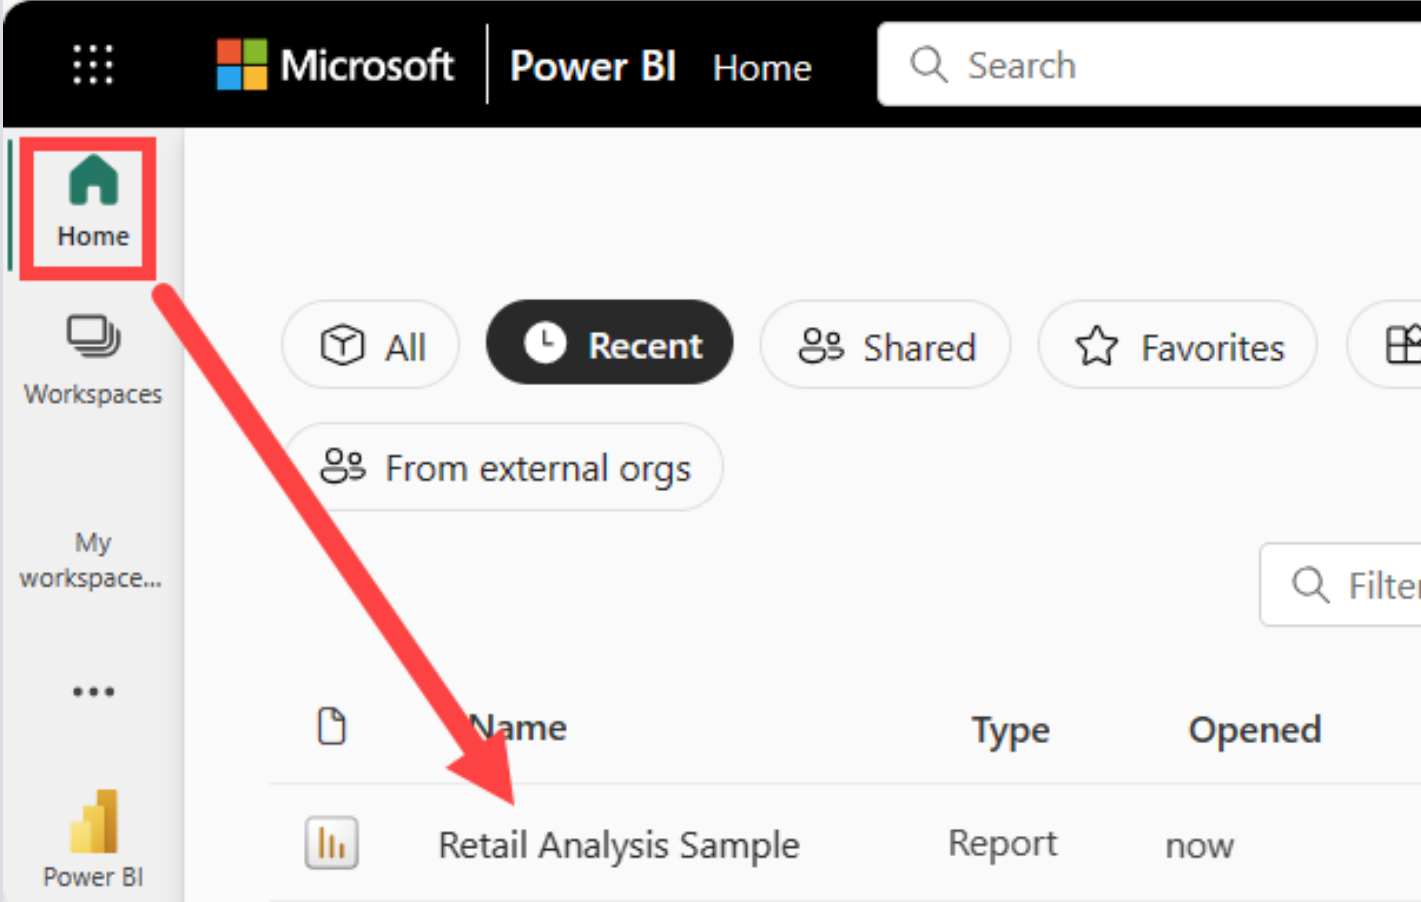
Reports shared with you are also stored under Shared with me on the Browse page.
Safely interact with content
As a business user, others share content with you and you interact with that content to view data and make business decisions. As you filter, slice, subscribe, export, and resize, your changes don't impact the underlying semantic model or the original shared content. Power BI is a safe space where you can explore and experiment.
That doesn't mean that you can't save your changes. You can, but those changes only affect your view of the content. And you can always reset your changes back to the default view by selecting Reset.

Sign out of the Power BI service
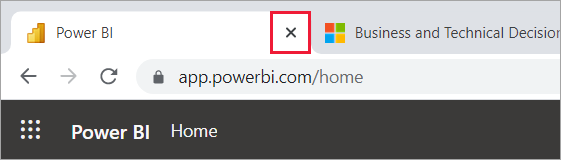
When you close or sign out of the Power BI service, your changes are saved. You can pick up where you left off.
To close Power BI, close the browser tab where you're working.
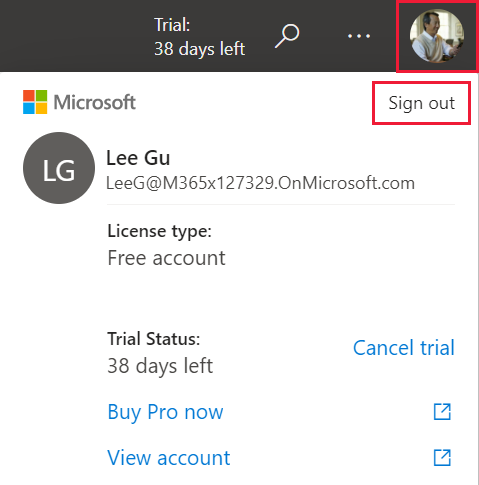
If you share a computer, we recommend signing out each time you close Power BI. In the upper right corner, select your profile picture, and then choose Sign out.
Considerations and limitations
If you don't have a work or school account, you can still sign up for Power BI with a Microsoft 365 trial.
If you signed up for Power BI as an individual, sign in with the email address that you used to sign up.
Some people use more than one Power BI account. If you do, you're prompted to select an account from a list when signing in.
If sign up is disabled, use this article to get help.