Delegated Password Reset With FIM/MIM
With this post I’d like to spend some time discussing a common scenario I run into often. Though geared more toward education, I think this solution could also be adapted for a business role. Here’s the scenario: you have FIM (or MIM) in your environment doing, at a minimum, user management. Maybe you have SSPR, maybe you don’t. Either way, there’s a computer lab full of students and one of them has an issue: “I forgot my password”. Now, if you’re using SSPR and they’ve registered, they can reset it themselves. Maybe. (This assumes they remember the answers to their security questions.) Either way, wouldn’t it be nice if there were a way for a staff member (we’ll call them Technology Coordinators) to reset that student password without elevated privileges, or, better still, without even touching AD? Say no more. Thanks to this handy-dandy solution (courtesy of the Z-Man himself, Mr. Glenn Zuckerman), such capability is possible in FIM.
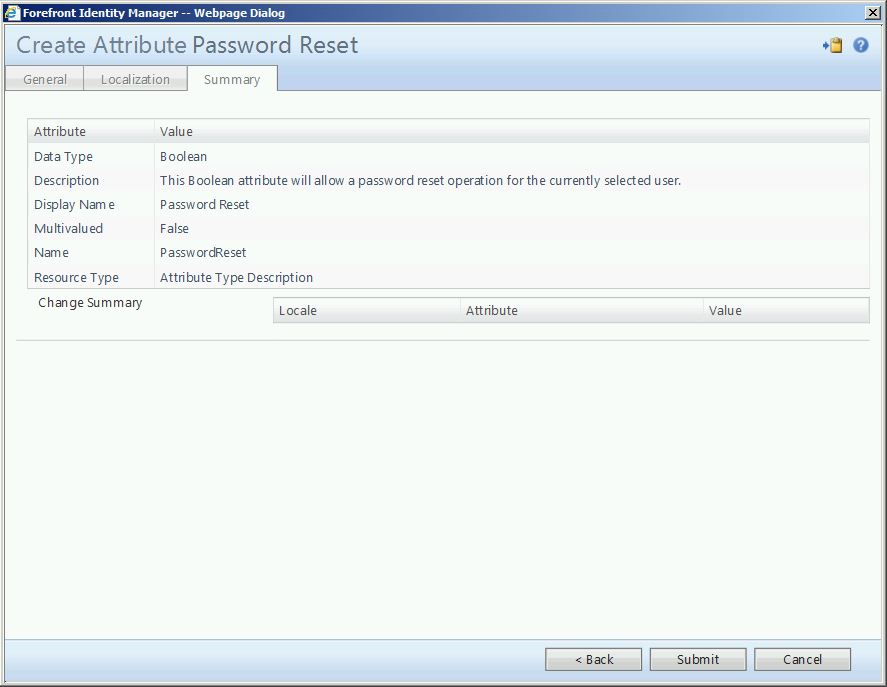
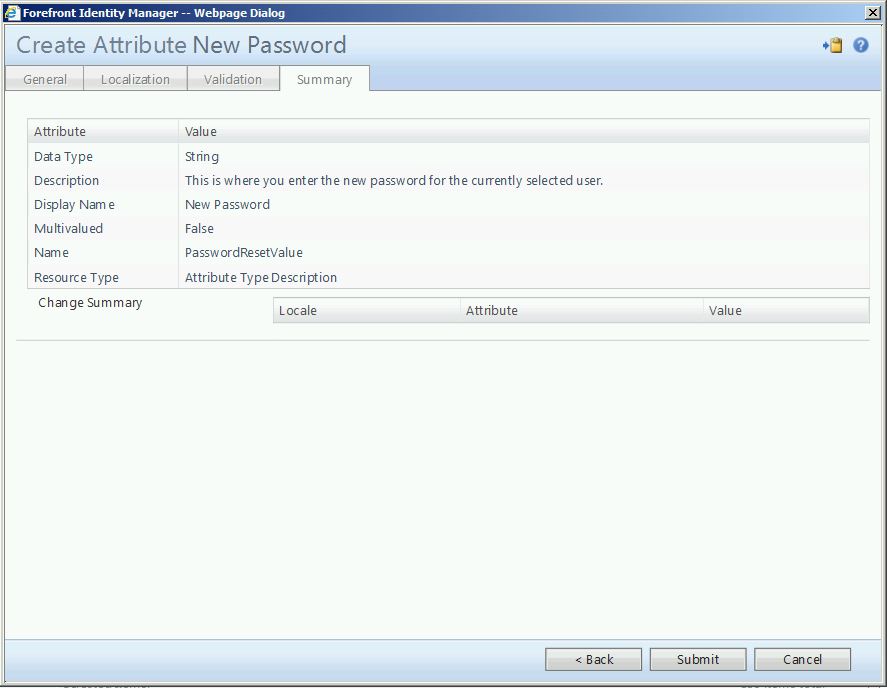
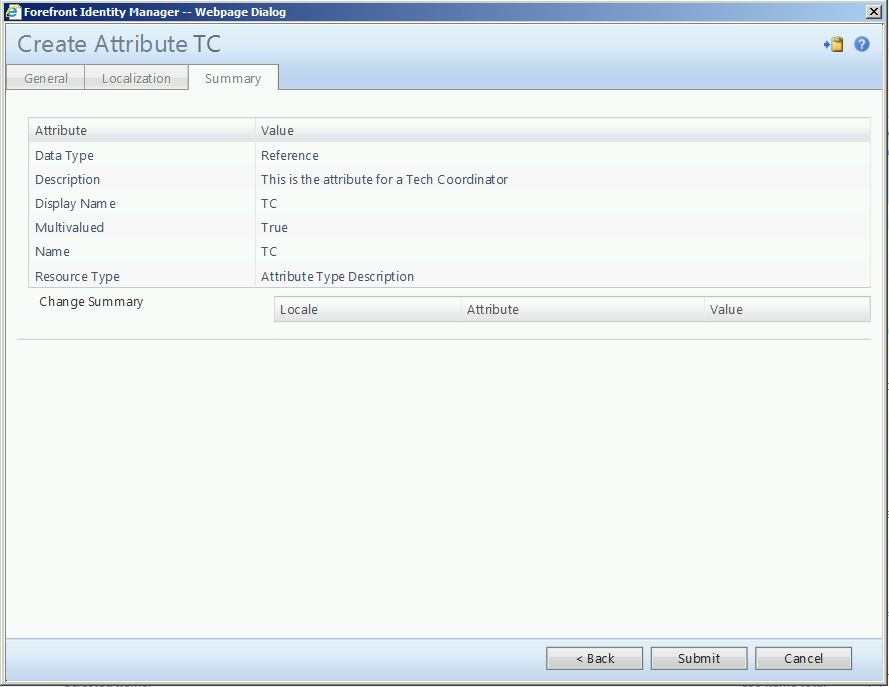
Now, time for the nitty gritty. To build this out, there are a few things you’re going to need. I’ll list everything out here and then we’ll discuss each bit in detail later on. First, we need three new attributes (and bindings): a Boolean, an indexed string and a multivalued reference. These only need to exist in the FIM Portal (no metaverse attributes required). There’s some standard housekeeping type work that has to happen (update filter permissions, update the user sync MPR, etc.). We create one new set, one new workflow and two new management policy rules (one permission granting and one set transition). Finally, we update the user edit RCDC.
To begin, we’ll need to create three new portal attributes. Detailed instructions for creating the attributes and binding them can be found here.
Here are snaps of the “Summary” screens for each attribute:
Next, you’ll need to update the Filter Permissions. While I generally do this anyway (as a method of future proofing), in this scenario it is actually required (as we will be using a custom attribute as a filter criteria on a set).
To begin, navigate to the FIM Portal home screen:

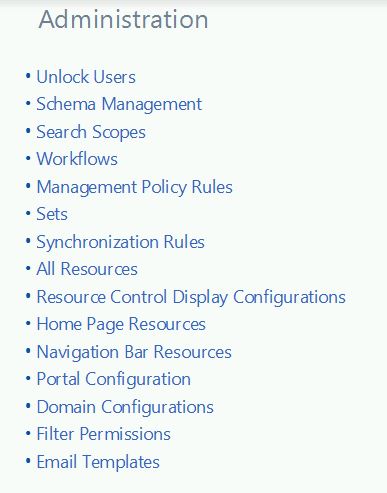
In the bottom left-hand corner, select “Administration”
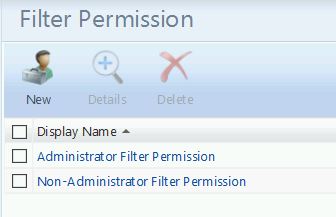
This will open the Administration screen. Near the bottom, select “Filter Permissions”
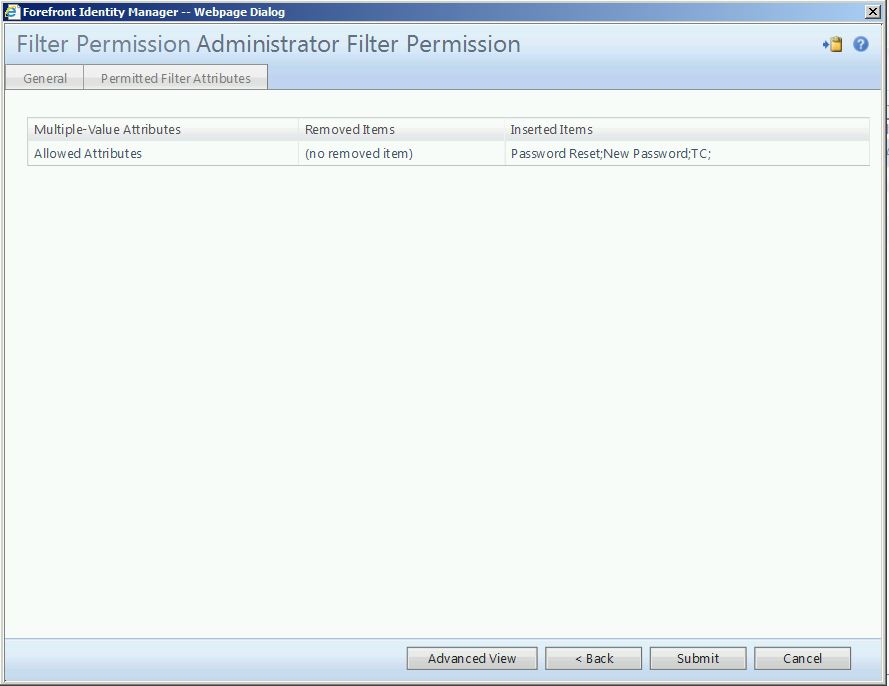
This will display the Filter Permission screen. Click on “Administrator Filter Permission” to open it.
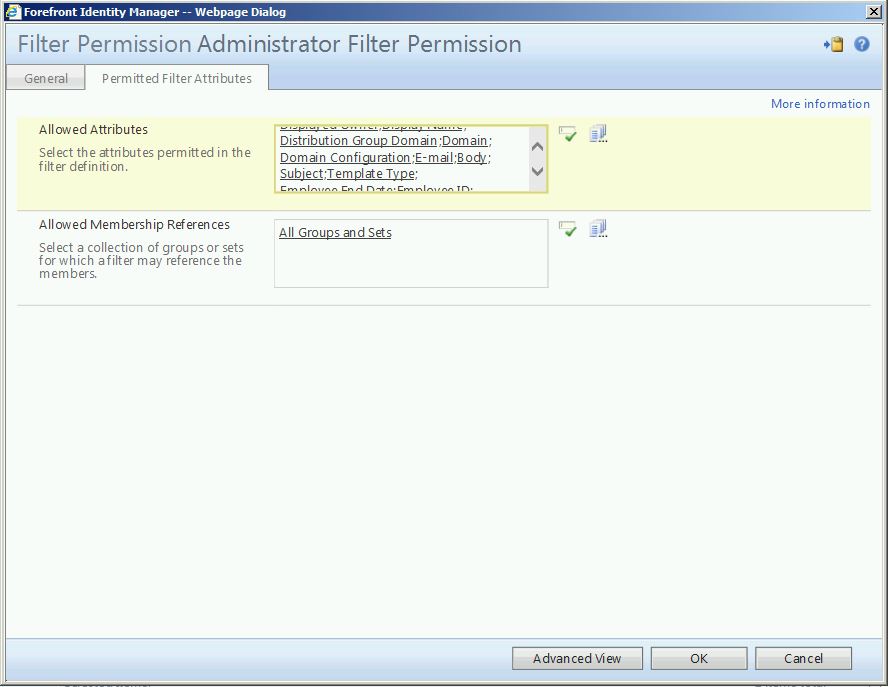
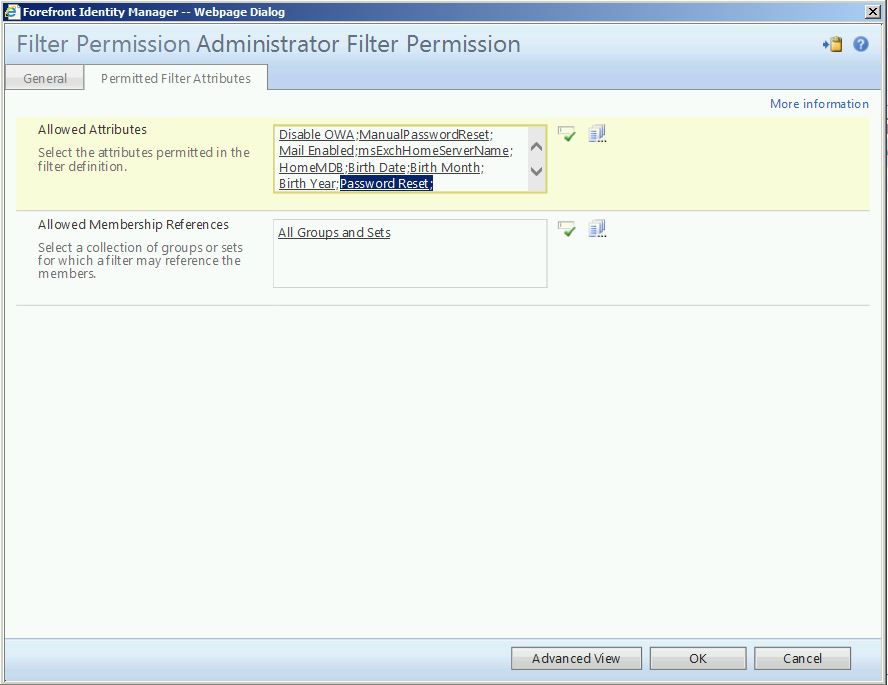
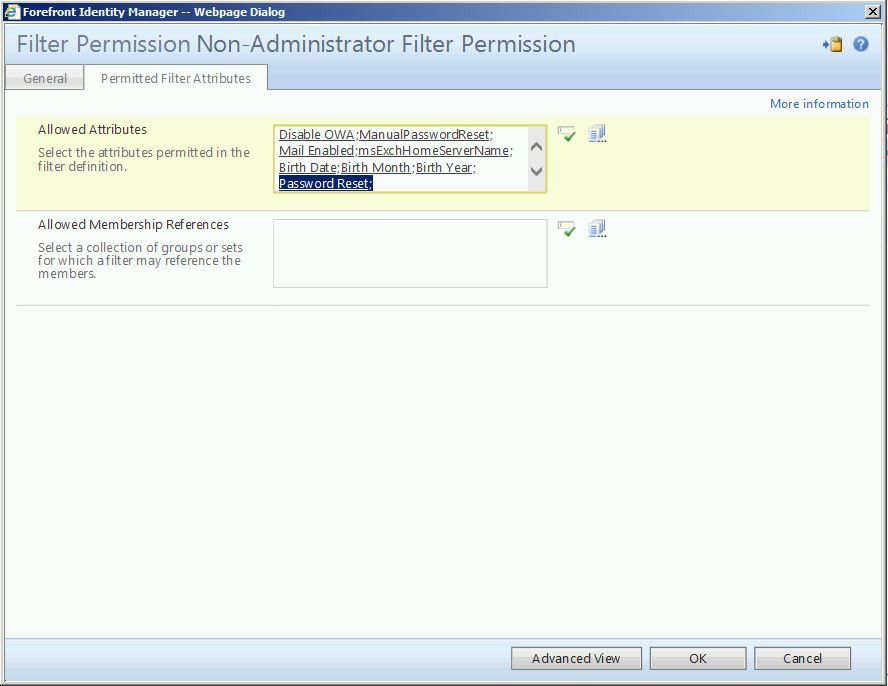
Select the “Permitted Filter Attributes” tab. Under “Allowed Attributes”, enter the three attributes you just created, then click the green check to resolve them. Please note, you may also Browse here using the icon to the right of the green check. After entering the new attributes, click “OK” to continue.
Click “Submit” to finish.
Click “Submit” to finish.
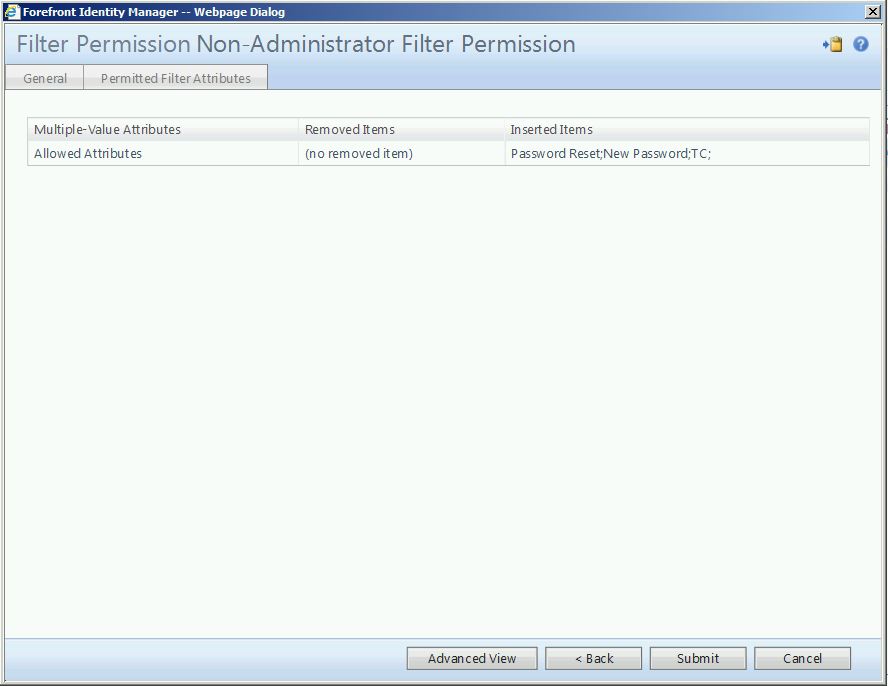
Likewise, perform the same steps for the Non-Administrator Filter Permission.
Next, you’ll need to modify the sync MPR to include the three new attributes. The name of the MPR is:
“Synchronization: Synchronization account controls users it synchronizes”
For a detailed look at, and explanation of, management policy rules, click here.
Here’s a screenshot of the MPR summary screen:

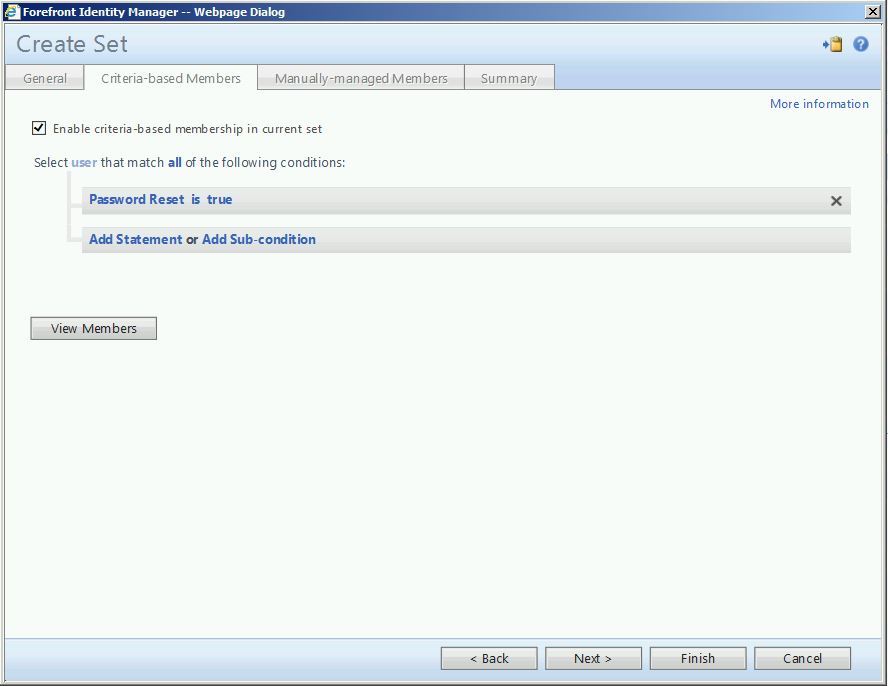
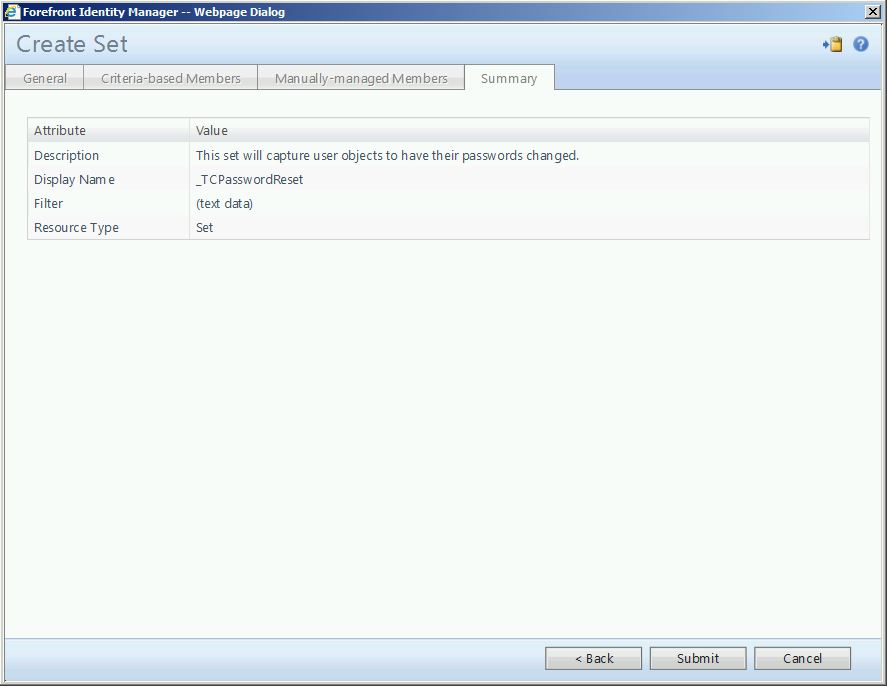
Now it’s time for a set. For detailed instructions on set building, please see this document.
Remember, this set is keyed from a Boolean attribute. Here are the important screens:
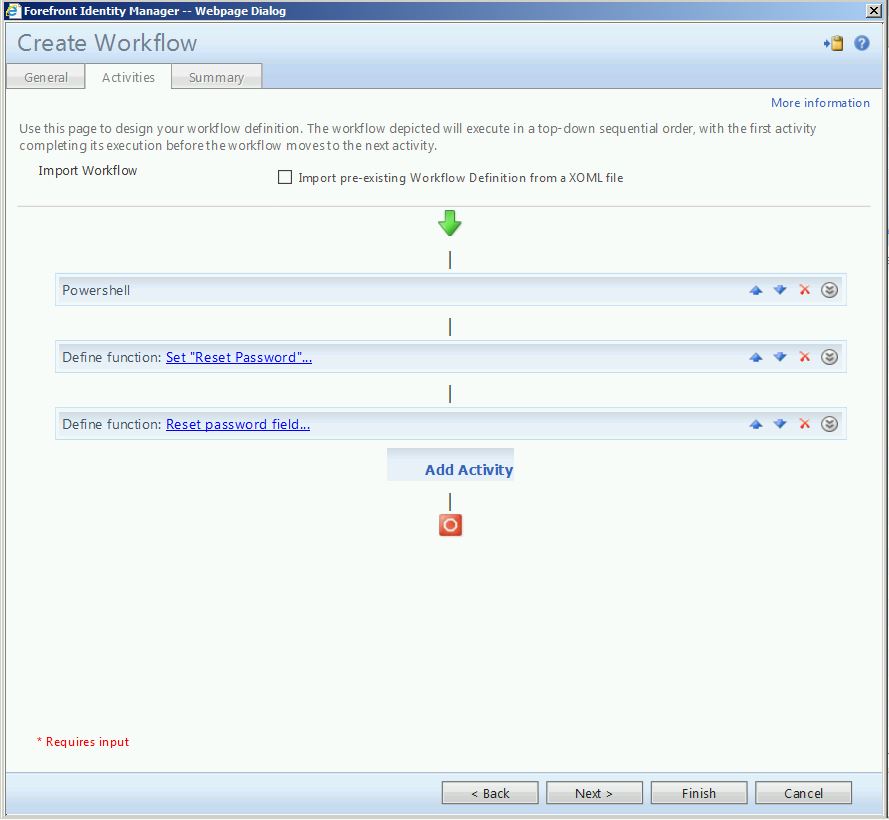
Now it’s time for the real “meat and potatoes”: the workflow. The workflow in use here is made up of three separate activities. It is worth noting that this workflow relies on a custom workflow activity, as provided by the Workflow Activity Library (WAL). The WAL can be downloaded here. Not going to lay out the step-by-step instructions for creating the workflows. For a detailed explanation of the different types or workflows, please see this post. For workflow building examples, please see here.
The first activity in the action workflow is a PowerShell activity:
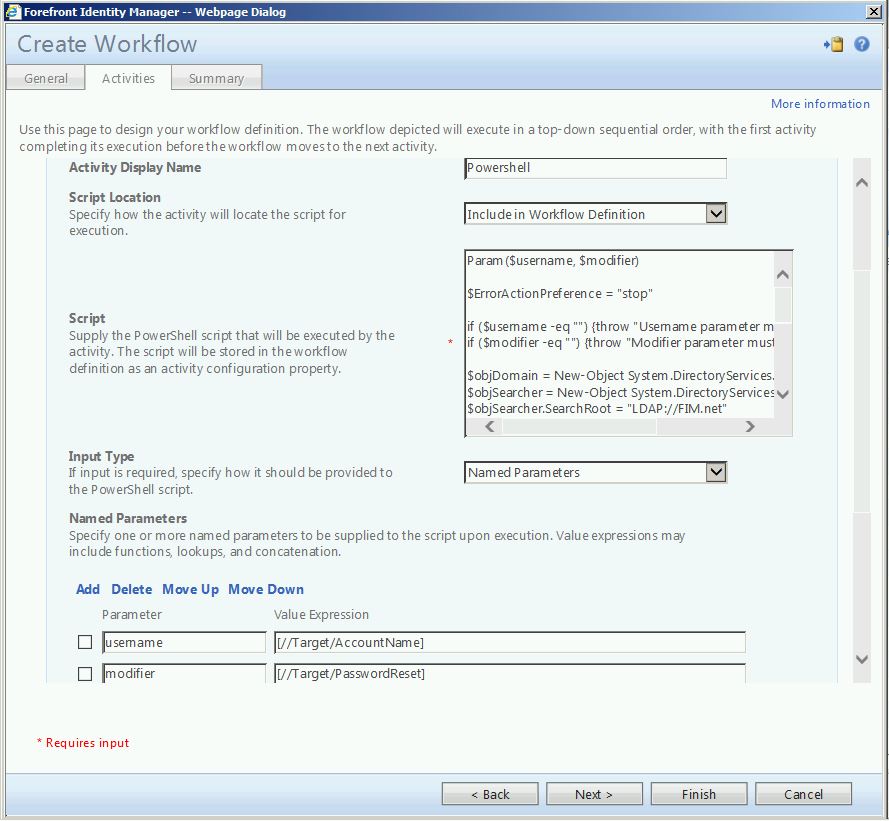
For “Script Location”, select “Include in Workflow Definition”. Paste the PowerShell code into the “Script” box, being sure to modify the the section below that is highlighted below in green. For “Input Type”, select “Named Parameters”. Click “Add” to add a second named parameter.
Paramater: Value Expression:
Userame [//Target/AccountName]
Modifier [//Target/ <Boolean attribute you created>]
PowerShell Script:
Param($username, $modifier)
$ErrorActionPreference = "stop"
if ($username -eq "") {throw "Username parameter must be provided."}
if ($modifier -eq "") {throw "Modifier parameter must be provided."}
$objDomain = New-Object System.DirectoryServices.DirectoryEntry
$objSearcher = New-Object System.DirectoryServices.DirectorySearcher
$objSearcher.SearchRoot = "LDAP://FIM.net"
$objSearcher.PageSize = 1000
$objSearcher.Filter = "(&(objectClass=user)(sAMAccountName= $username))"
$objSearcher.SearchScope = "Subtree"
$user = $objSearcher.findone()
if ($user.count -eq 0)
{throw "No user found with username=" + $username}
$userDN = $user.path
$user = [ADSI]$userDN
$user.psbase.invoke("SetPassword",$modifier)
#$user.Put("extensionAttribute1",$modifier)
$user.SetInfo()
The second activity is a simple function evaluator:
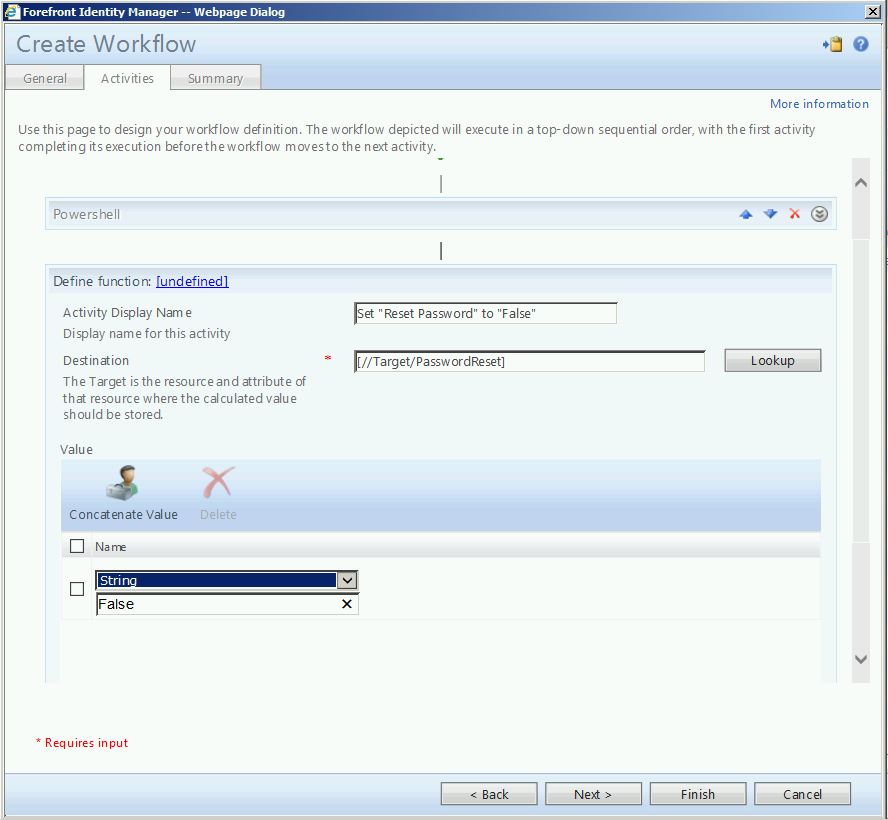
And so is the third:
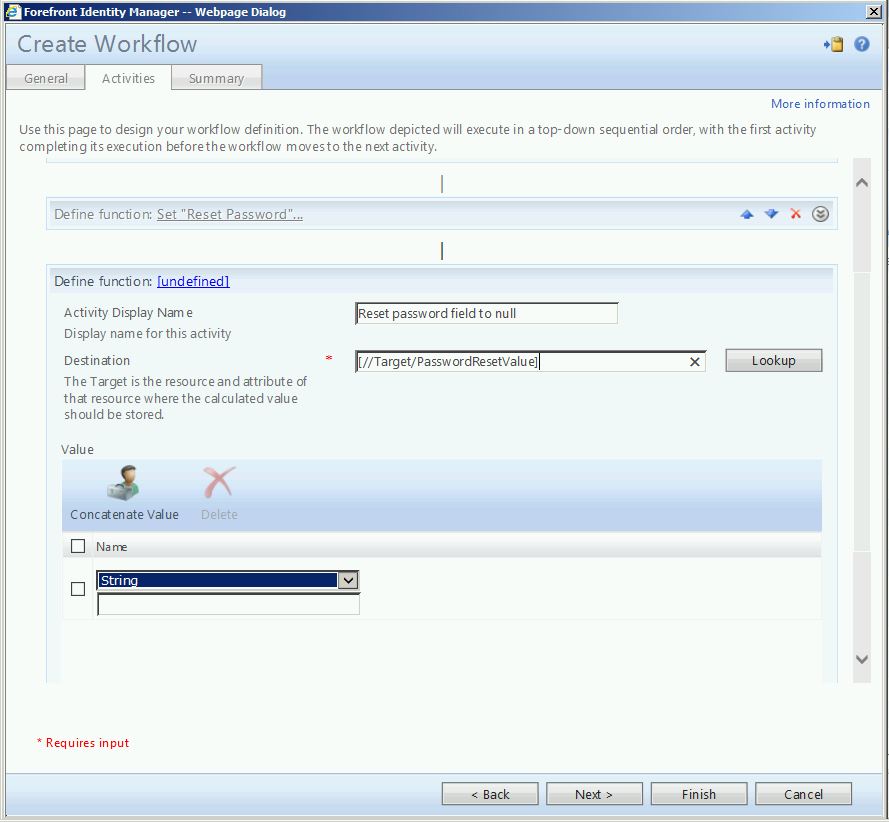
At the end, you should have something like this:
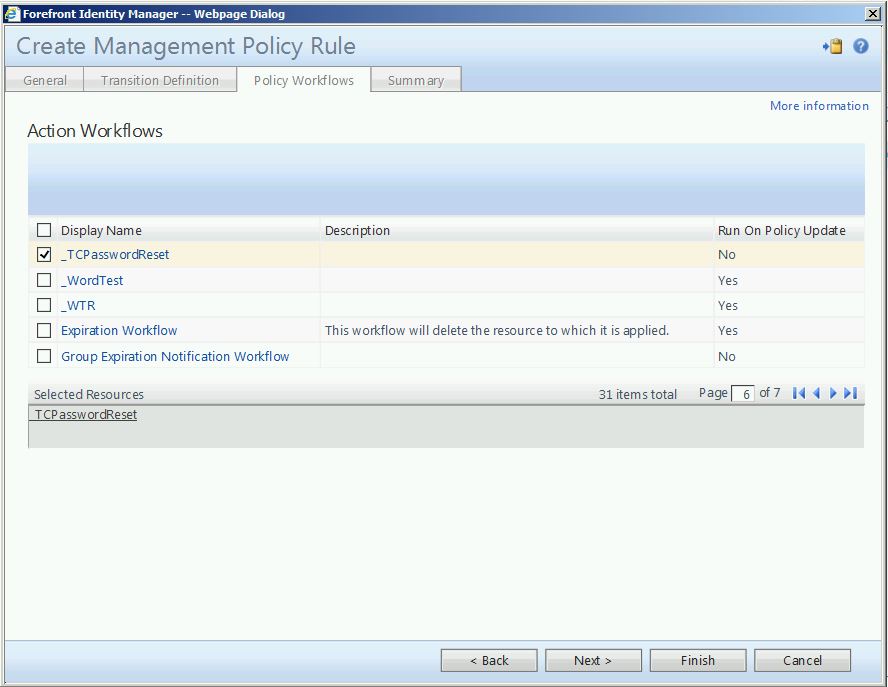
The last piece of the activity is the creation of two new MPRs, one request based and one set transition. Again, for a run-down of management policy rules, please go here.
The first MPR will be request based and permission granting:

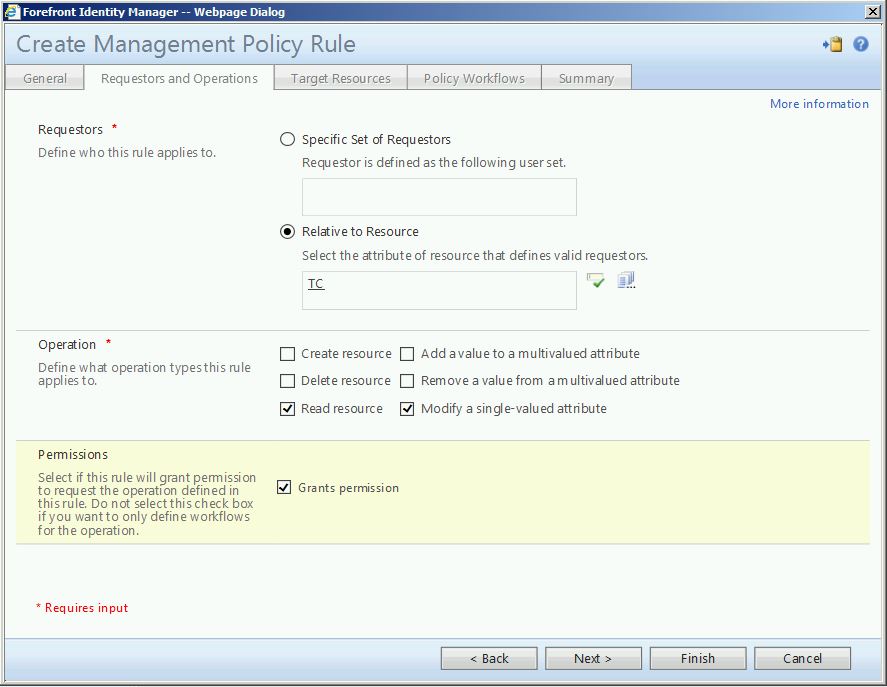
And will apply to whatever group of users you want this activity to be applicable for (i.e., “All Students”).
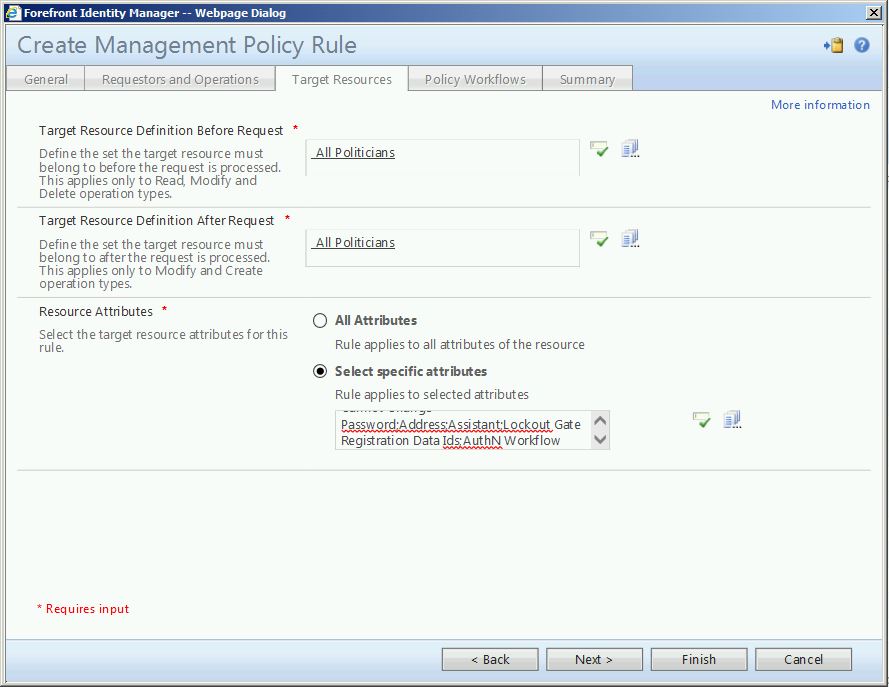
Though I have populated a specific (and lengthy) list of attributes, the only real requirement here is that you populate, at a minimum, the three you created earlier.
The second MPR is a set transition.

Using the set you created earlier. The type is transition in.
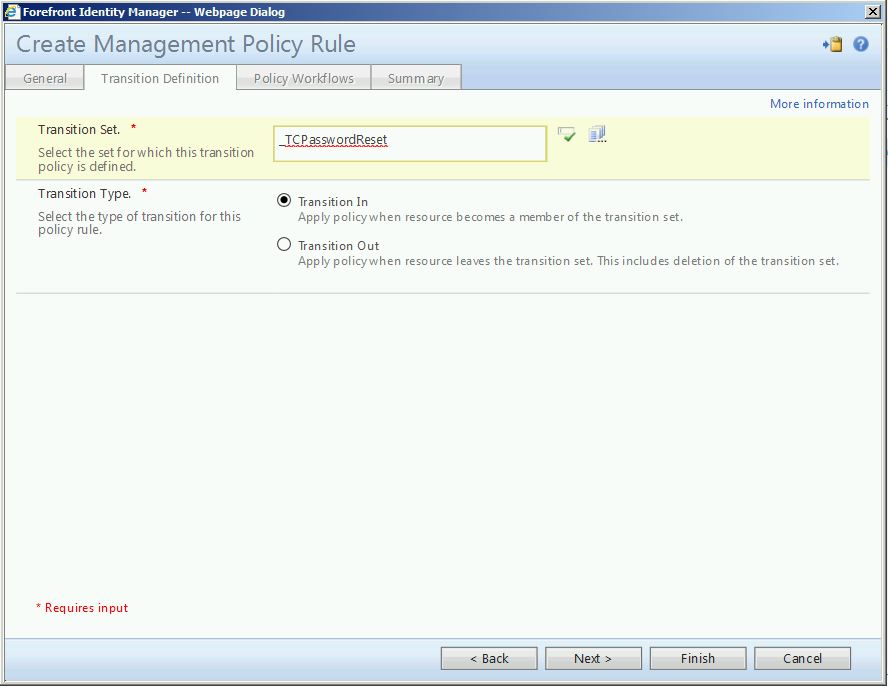
Where the request MPR above called no workflow, this set transition MPR calls the action workflow you previously created:
The very last thing you need to do is update the user view RCDC. For an explanation of RCDCs, please go here and here. Once you have determined the desired placement, simply paste the below code block into the RCDC. Please note that the values highlighted in green represent the Boolean attribute you created, and values highlighted in yellow represent the indexed string attribute you created.
<my:Grouping my:Name="ResPass" my:Caption="Reset Password" my:Enabled="true" my:Visible="{Binding Source=rights, Path=TC}">
<my:Control my:Name="ResetPassword" my:TypeName="UocCheckBox" my:Caption="Reset Password" my:Description="" my:AutoPostback="true" my:RightsLevel="{Binding Source=rights, Path=UnlockAccount}">
<my:Properties>
<my:Property my:Name="Text" my:Value="Reset Password for user in AD"/>
<my:Property my:Name="Checked" my:Value="{Binding Source=object, Path=UnlockAccount, Mode=TwoWay}"/>
</my:Properties>
</my:Control>
<my:Control my:Name="PasswordValue" my:TypeName="UocTextBox" my:Caption="{Binding Source=schema, Path=ResetPassword.DisplayName}" my:Description="{Binding Source=schema, Path=ResetPassword.Description}" my:RightsLevel="{Binding Source=rights, Path=ResetPassword}">
<my:Properties>
<my:Property my:Name="Required" my:Value="{Binding Source=schema, Path=ResetPassword.Required}"/>
<my:Property my:Name="Text" my:Value="{Binding Source=object, Path=ResetPassword, Mode=TwoWay}"/>
<my:Property my:Name="RegularExpression" my:Value="^.{4,}$"/>
</my:Properties>
</my:Control>
</my:Grouping
After performing the required IISReset, you should be able to test functionality.
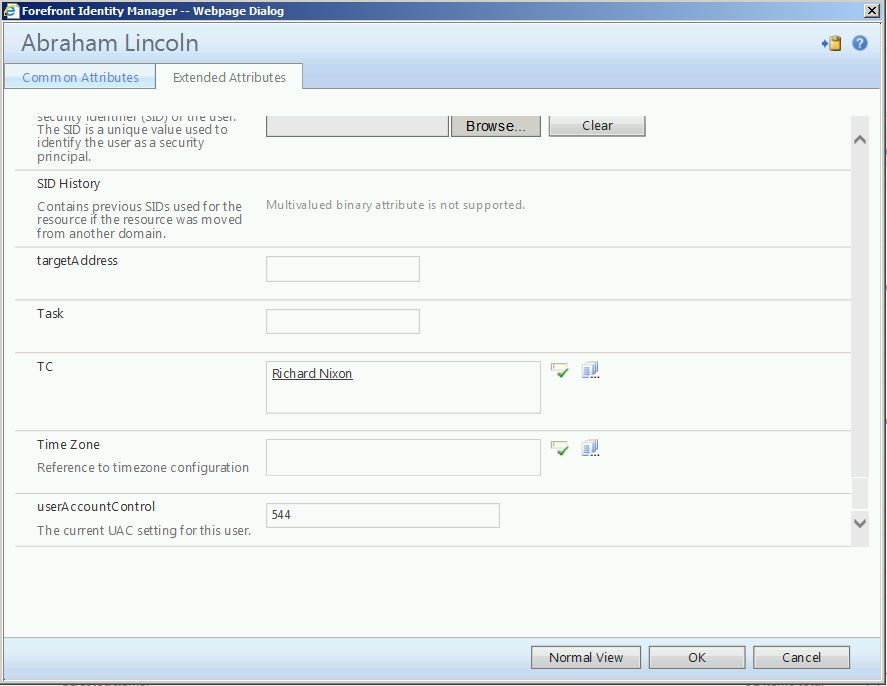
Here’s how the process works: as a portal admin, you can open a user to be managed (i.e., a student) by anther user (i.e., a Technology Coordinator). Under their extended attributes (you can expose this, too, with the RCDC if you like), you will see a resource picker for the newly created multivalued reference attribute. Using this resource picker, select the user who will manage this object.
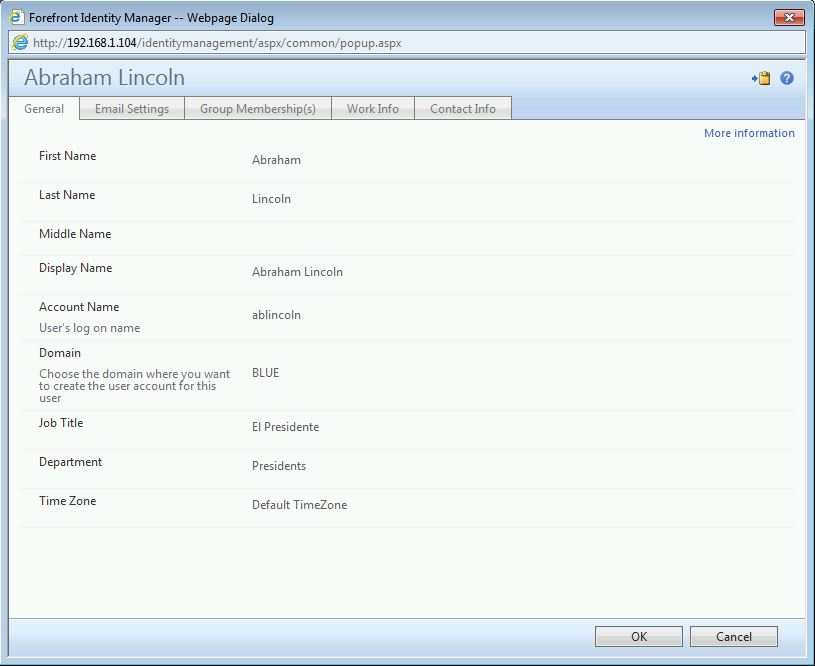
In this example, Richard Nixon (Technology Coordinator) will be able to perform password resets on Abraham Lincoln (student).
This is where it gets cool. At this point, Richard Nixon is able to perform password rests only on Abraham Lincoln. When Nixon logs into the portal and opens up ‘Ole Honest Abe, he now sees:
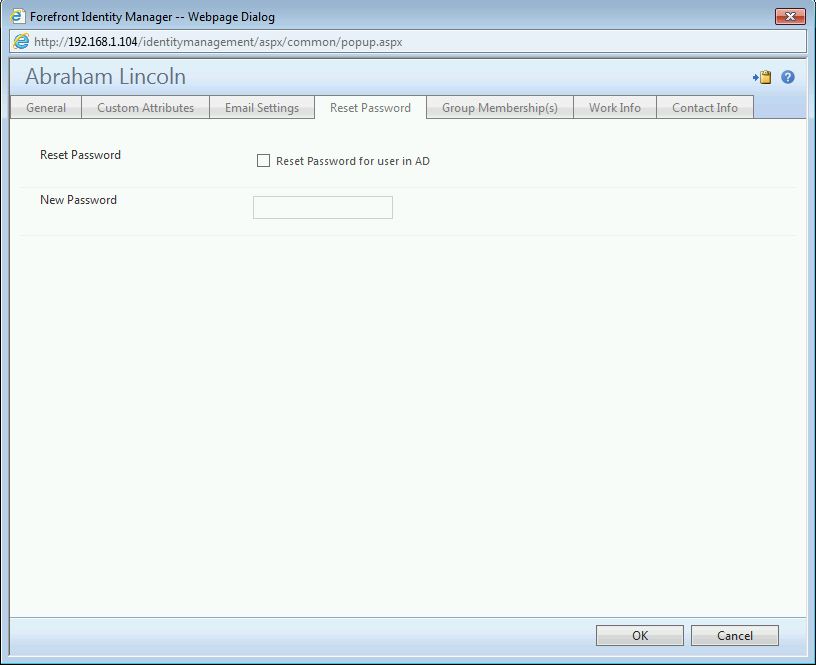
He could now check the box, enter the value for a new password and wait. Abe joins the set, triggering the set transition MP which fires the workflow. Workflow uses PowerShell to go to AD and perform the password reset, then the workflow unchecks the box and clears the string attribute.
Remember, Nixon has only been delegated this ability for Abe, so what happens if he views another user?
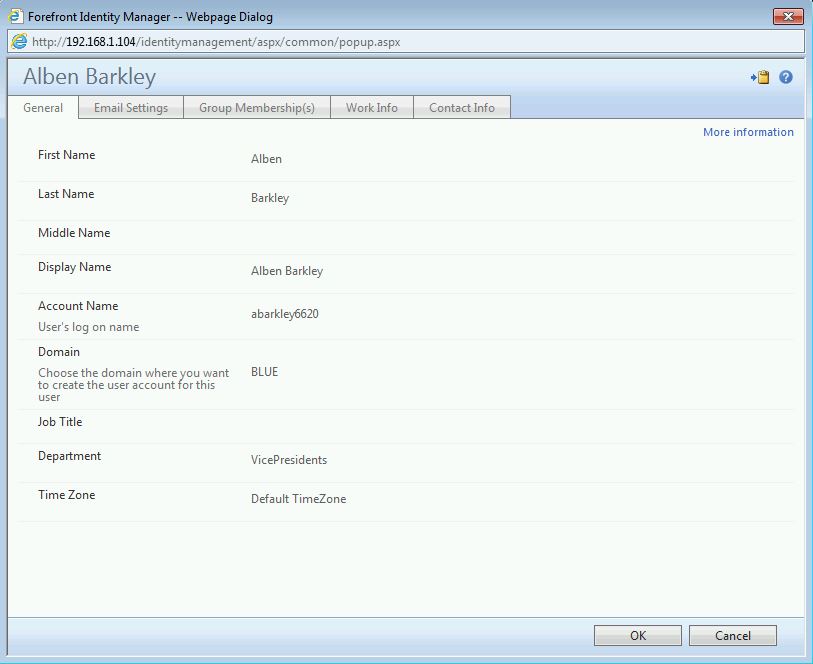
His special password reset tab disappears. Likewise, if any other user (in case of the below image, Andrew Jackson) views a user object, they, too, will not see the tab:
So, end result: specific users (Tech Coordinators, Help Desk, etc.) can effect real-time password changes against AD user objects without ever touching (or having elevated permissions in) AD. And did I mention all of this gets logged, right in FIM (search requests)?

How cool is that?
Questions? Comments? Love FIM so much you can't even stand it?
EMAIL US>WE WANT TO HEAR FROM YOU!<
## https://blogs.msdn.com/connector_space # #
Comments
Anonymous
January 28, 2016
Awesome. Let's set this up!Anonymous
February 07, 2016
Fantastic Post! This is requested often. To save time for anyone looking for more complex password requirements, here's a regex for 6 characters, upper, lower, and number or symbol. ^(?:(?=.[a-z])(?:(?=.[A-Z])(?=.*[dW])|(?=.*W)(?=.*d))|(?=.W)(?=.[A-Z])(?=.*d)).{6,}$Anonymous
February 23, 2016
So how do you clear the password you just set from FIM search request (FIM History)? It will sit there in clear text until history clears itself maybe in a couple of days.Anonymous
February 24, 2016
@Bob While it is true these values may persist in the search requests (depending on the number your environment generates and the retention policy for them), only FIM portal admins should be able to see these. At the end of the day, if I can't trust my portal admins to see this, I have to ask myself, why are they admins? Additionally, if this were really an issue, a search scope could be configured to further limit who can view search requests to a smaller subset of individuals.Anonymous
July 08, 2016
do we need to update the rcdc xml file highlighted attributes with the same name of the attributes as created earlier in the document.Anonymous
July 08, 2016
The comment has been removedAnonymous
October 13, 2016
This information helped out alot and we are able to get it successfully working from a user to a user, however, we would like a "group of users" to be able to add to the TC field, is there a way to set this up for groups and/or sets and not just an individual?