Migrate Existing ASP.NET Website to Azure Cloud Services
This blog post explains how to get an existing ASP.NET application into an Azure Cloud Service without having to create a new Visual Studio project. Here's the outline:
Do you have an existing ASP.NET website that you'd like to deploy on Azure and get the benefits of Azure's Platform as a Service capabilities? The easiest and quickest option is to use Azure Web Apps. Azure Web Apps gives you create flexibility but it does not allow you to customize the underlying operating system that much. For instance, if your existing ASP.NET website has a dependency on applications being installed into the web server, Web Apps may not be the best option. In this case you have a few options:
- Rewrite the application to not require the dependency on installed applications.
- Use Infrastructure as a Service (IaaS) to deploy a Windows IIS Web Server.
- Use Azure Cloud Services with Startup Tasks to install the required applications.
Rewriting the application is often not a choice and using IaaS means you do not get the benefits of PaaS. This article is about using Cloud Services. Cloud Services is one of the earliest services on the Azure platform. There is already a ton of great content out there on Cloud Services. However, there is not much content about porting your existing ASP.NET app to Cloud Services, so I am going to lay out some simple steps.
SETUP
For this walk-through, I have a simple ASP.NET website targeting .NET 4.0. I want to deploy it on Azure with a custom startup task that will run when the Cloud Service instance(s) are deployed.
CREATE CLOUD SERVICE FILES
Make sure you have Azure Powershell installed. Choose a directory to work in.
Run Powershell as administrator.
Execute
PS C:\projects\CloudServices> New-AzureServiceProject -ServiceName ExistingAppDemo
This will create a folder with the Service Name and move into that folder:
PS C:\projects\CloudServices\ExistingAppDemo>
Inside you will find the following metadata files that Azure needs to create a cloud service:
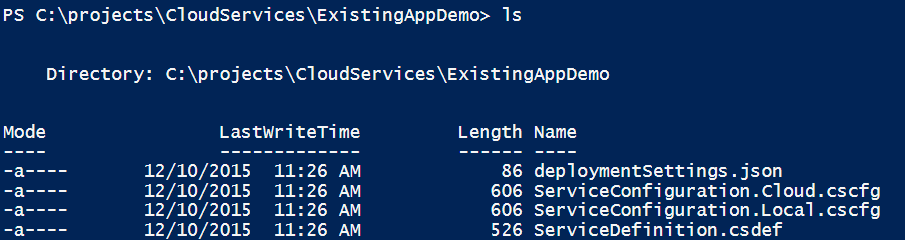
- deploymentSettings.json - required by PowerShell for deploying Cloud Services
- ServiceConfiguration.Cloud.cscfg - this is the cloud service configuration file Azure will use. We won't touch this file for this walkthrough.
- ServiceConfiguration.Local.cscfg - this is the cloud service configuration file that your local emulator will use. We won't touch this file for this walkthrough.
- ServiceDefinition.csdef - this is the service definition file. We will be making changes to this file.
Now that you have these metadata files, you need to run your website inside of a Web Role.
CREATE WEB ROLE
To create a web role, remain in your current directory and type:
PS C:\projects\CloudServices\ExistingAppDemo> Add-AzureWebRole
This does a few of things:
- It updates your Service Configuration files. It adds a Role element with some configuration. We will leave the defaults.
- It updates your Service Definition file. It adds a WebRole element and includes some child elements including Startup tasks.
We're going to edit the ServiceDefinition.csdef file:
Change the vmsize attribute on the WebRole element to "ExtraLarge" - the default ExtraSmall VM size takes a while to spin up and configure so to get going faster we'll use ExtraLarge. This can always be changed later when you're ready to deploy your site for production use.
There are 2 Startup tasks. Remove the first task (the one that calls "setup_web.cmd"). It's not necessary for this walkthrough. So, completely remove this block of code:
<Task commandLine="setup_web.cmd > log.txt" executionContext="elevated">
<Environment>
<Variable name="EMULATED">
<RoleInstanceValue xpath="/RoleEnvironment/Deployment/@emulated" />
</Variable>
<Variable name="RUNTIMEID" value="" />
<Variable name="RUNTIMEURL" value="" />
</Environment>
</Task>
That's it.
Adding the WebRole also creates a new directory called WebRole1. Inside WebRole1 are a few items. You are going to delete most of them:

Delete the bin folder
Delete the Web.cloud.config file
Delete the Web.cloud.config file
KEEP the startup.cmd file. Notice that in your Service Defintion file, there is a task that calls startup.cmd:
<Startup>
<Task commandLine="..\startup.cmd > startup_log.txt" executionContext="elevated" />
</Startup>
That is the same startup.cmd file that is in this folder. This where you can put in your own custom startup tasks (silent installs of your required installed apps). If your start up tasks require executables or MSIs, you can include them in the bin folder and reference them in the startup.cmd file. Does your Existing ASP.NET require a version of .NET newer than 4.0? You can install a newer version of the .NET framework as a startup task! See https://azure.microsoft.com/en-us/documentation/articles/cloud-services-dotnet-install-dotnet/. This is a great example of how to use startup tasks.
COPY EXISTING WEB APPLICATION
Find the files for your existing ASP.NET application.
Here's my test app:

Here's the magic: We are going to move (or copy and paste) the TestApp into the WebRole1 directory we just created in C:\projects\CloudServices\ExistingAppDemo\WebRole1. The end result should look like this:

It should look EXACTLY the same except for the remaining startup.cmd.
Almost done!
DEPLOY CLOUD SERVICE
You've got your Cloud Service ready. You've got a WebRole defined and populated with your existing ASP.NET website's code.
Go back up to the Cloud Service directory:
PS C:\projects\CloudServices\ExistingAppDemo>
and type:
PS C:\projects\CloudServices\ExistingAppDemo> Publish-AzureServiceProject -ServiceName ExistingAppDemo
This will package up your cloud service and deploy it a service named "ExistingAppDemo." If you've chosen a service name that already exists, you'll get an error - just run the command name with a different service name.
It will take a few minutes to deploy your app, you should see the following messages:
 WARNING: Publishing ExistingAppDemo to Microsoft Azure. This may take several minutes...
WARNING: 2:05:13 PM - Preparing runtime deployment for service 'ExistingAppDemo'
WARNING: 2:05:13 PM - Verifying storage account 'existingappdemo'...
WARNING: 2:05:46 PM - Preparing deployment for ExistingAppDemo with Subscription ID: b59a9b75-a297-41fc-8773-4f3713391c19...
WARNING: 2:05:55 PM - Connecting...
WARNING: 2:05:56 PM - Creating...
WARNING: 2:05:59 PM - Created hosted service 'ExistingAppDemo'.
WARNING: 2:05:59 PM - Uploading Package to storage service existingappdemo...
WARNING: 2:06:01 PM - Starting...

Everything should have been successful and you'll see the unique URL for your new web app in an Azure cloud service! Your cloud service is available in the Azure portal:

Obviously this is just the beginning. You'll need to manage the Cloud Service, scale it, secure it, add your custom domain, etc.
With your cloud service, you've now got your existing ASP.NET webapp in Azure, utilizing Azure's Platform as a Service even though your app has installed dependencies!
More information:
- Azure Cloud Services: https://azure.microsoft.com/en-us/documentation/services/cloud-services/
- Silent /Unattended Installs: https://unattended.sourceforge.net/installers.php