Руководство. Вход пользователей и вызов API Microsoft Graph в классическом приложении Electron
В этом руководстве описано, как создать классическое приложение Electron, которое поддерживает вход пользователей и вызовы Microsoft Graph с использованием потока кода авторизации с PKCE. Создаваемое классическое приложение использует библиотеку проверки подлинности Майкрософт (MSAL) для Node.js.
Выполните шаги из этого руководства, чтобы:
- регистрация приложения на портале Azure;
- создать проект классического приложения Electron;
- Добавление логики аутентификации в приложение
- добавить метод для вызова веб-API;
- Добавление сведений о регистрации приложения
- Тестирование приложения
Необходимые компоненты
- Node.js
- Электрон
- Visual Studio Code или любой другой редактор кода.
Регистрация приложения
Сначала выполните действия, описанные в статье Краткое руководство. Регистрация приложения с помощью платформы удостоверений Майкрософт, чтобы зарегистрировать приложение.
Используйте следующие параметры для регистрации приложения:
- Имя:
ElectronDesktopApp(рекомендуется). - Поддерживаемые типы учетных записей: учетные записи только в каталоге организации (только один клиент)
- Тип платформы: мобильные и классические приложения
- URI перенаправления:
http://localhost.
Создание проекта
Создайте папку для размещения приложения, например ElectronDesktopApp.
Сначала перейдите в окне терминала в каталог проекта, а затем выполните следующие команды
npm:npm init -y npm install --save @azure/msal-node @microsoft/microsoft-graph-client isomorphic-fetch bootstrap jquery popper.js npm install --save-dev electron@20.0.0Затем создайте папку с именем App. В этой папке создайте файл с именем index.html, который будет использоваться в качестве пользовательского интерфейса. Добавьте в него следующий код:
<!DOCTYPE html>
<html lang="en">

<head>
    <meta charset="UTF-8">
    <meta name="viewport" content="width=device-width, initial-scale=1.0, shrink-to-fit=no">
    <meta http-equiv="Content-Security-Policy" content="script-src 'self'" />
    <title>MSAL Node Electron Sample App</title>

    <!-- adding Bootstrap 4 for UI components  -->
    <link rel="stylesheet" href="../node_modules/bootstrap/dist/css/bootstrap.min.css">
</head>

<body>
    <nav class="navbar navbar-expand-lg navbar-dark bg-primary">
        <a class="navbar-brand">Microsoft identity platform</a>
        <div class="btn-group ml-auto dropleft">
            <button type="button" id="signIn" class="btn btn-secondary" aria-expanded="false">
                Sign in
            </button>
            <button type="button" id="signOut" class="btn btn-success" hidden aria-expanded="false">
                Sign out
            </button>
        </div>
    </nav>
    <br>
    <h5 class="card-header text-center">Electron sample app calling MS Graph API using MSAL Node</h5>
    <br>
    <div class="row" style="margin:auto">
        <div id="cardDiv" class="col-md-6" style="display:none; margin:auto">
            <div class="card text-center">
                <div class="card-body">
                    <h5 class="card-title" id="WelcomeMessage">Please sign-in to see your profile and read your mails
                    </h5>
                    <div id="profileDiv"></div>
                    <br>
                    <br>
                    <button class="btn btn-primary" id="seeProfile">See Profile</button>
                </div>
            </div>
        </div>
    </div>

    <!-- importing bootstrap.js and supporting js libraries -->
    <script src="../node_modules/jquery/dist/jquery.js"></script>
    <script src="../node_modules/popper.js/dist/umd/popper.js"></script>
    <script src="../node_modules/bootstrap/dist/js/bootstrap.js"></script>

    <!-- importing app scripts | load order is important -->
    <script src="./renderer.js"></script>

</body>

</html>
Затем создайте файл с именем main.js и добавьте в него следующий код:
/*
 * Copyright (c) Microsoft Corporation. All rights reserved.
 * Licensed under the MIT License.
 */

const path = require("path");
const { app, ipcMain, BrowserWindow } = require("electron");

const AuthProvider = require("./AuthProvider");
const { IPC_MESSAGES } = require("./constants");
const { protectedResources, msalConfig } = require("./authConfig");
const getGraphClient = require("./graph");

let authProvider;
let mainWindow;

function createWindow() {
    mainWindow = new BrowserWindow({
        width: 800,
        height: 600,
        webPreferences: { preload: path.join(__dirname, "preload.js") },
    });

    authProvider = new AuthProvider(msalConfig);
}

app.on("ready", () => {
    createWindow();
    mainWindow.loadFile(path.join(__dirname, "./index.html"));
});

app.on("window-all-closed", () => {
    app.quit();
});

app.on('activate', () => {
    // On OS X it's common to re-create a window in the app when the
    // dock icon is clicked and there are no other windows open.
    if (BrowserWindow.getAllWindows().length === 0) {
        createWindow();
    }
});


// Event handlers
ipcMain.on(IPC_MESSAGES.LOGIN, async () => {
    const account = await authProvider.login();

    await mainWindow.loadFile(path.join(__dirname, "./index.html"));

    mainWindow.webContents.send(IPC_MESSAGES.SHOW_WELCOME_MESSAGE, account);
});

ipcMain.on(IPC_MESSAGES.LOGOUT, async () => {
    await authProvider.logout();

    await mainWindow.loadFile(path.join(__dirname, "./index.html"));
});

ipcMain.on(IPC_MESSAGES.GET_PROFILE, async () => {
    const tokenRequest = {
        scopes: protectedResources.graphMe.scopes
    };

    const tokenResponse = await authProvider.getToken(tokenRequest);
    const account = authProvider.account;

    await mainWindow.loadFile(path.join(__dirname, "./index.html"));

    const graphResponse = await getGraphClient(tokenResponse.accessToken)
        .api(protectedResources.graphMe.endpoint).get();

    mainWindow.webContents.send(IPC_MESSAGES.SHOW_WELCOME_MESSAGE, account);
    mainWindow.webContents.send(IPC_MESSAGES.SET_PROFILE, graphResponse);
});
В приведенном выше фрагменте кода мы инициализируем объект основного окна Electron и создаем некоторые обработчики событий для взаимодействия с окном Electron. Мы также импортируем параметры конфигурации, создаем экземпляр класса authProvider для обработки входа, выхода и получения маркера, а также вызываем API Microsoft Graph.
В той же папке (App) создайте файл с именем renderer.js и добавьте следующий код:
// Copyright (c) Microsoft Corporation. All rights reserved.
// Licensed under the MIT License

/**
 * The renderer API is exposed by the preload script found in the preload.ts
 * file in order to give the renderer access to the Node API in a secure and
 * controlled way
 */
const welcomeDiv = document.getElementById('WelcomeMessage');
const signInButton = document.getElementById('signIn');
const signOutButton = document.getElementById('signOut');
const seeProfileButton = document.getElementById('seeProfile');
const cardDiv = document.getElementById('cardDiv');
const profileDiv = document.getElementById('profileDiv');

window.renderer.showWelcomeMessage((event, account) => {
    if (!account) return;

    cardDiv.style.display = 'initial';
    welcomeDiv.innerHTML = `Welcome ${account.name}`;
    signInButton.hidden = true;
    signOutButton.hidden = false;
});

window.renderer.handleProfileData((event, graphResponse) => {
    if (!graphResponse) return;

    console.log(`Graph API responded at: ${new Date().toString()}`);
    setProfile(graphResponse);
});

// UI event handlers
signInButton.addEventListener('click', () => {
    window.renderer.sendLoginMessage();
});

signOutButton.addEventListener('click', () => {
    window.renderer.sendSignoutMessage();
});

seeProfileButton.addEventListener('click', () => {
    window.renderer.sendSeeProfileMessage();
});

const setProfile = (data) => {
    if (!data) return;

    profileDiv.innerHTML = '';

    const title = document.createElement('p');
    const email = document.createElement('p');
    const phone = document.createElement('p');
    const address = document.createElement('p');

    title.innerHTML = '<strong>Title: </strong>' + data.jobTitle;
    email.innerHTML = '<strong>Mail: </strong>' + data.mail;
    phone.innerHTML = '<strong>Phone: </strong>' + data.businessPhones[0];
    address.innerHTML = '<strong>Location: </strong>' + data.officeLocation;

    profileDiv.appendChild(title);
    profileDiv.appendChild(email);
    profileDiv.appendChild(phone);
    profileDiv.appendChild(address);
}
Методы отрисовщика предоставляются скриптом предварительной загрузки из файла preload.js, чтобы дать отрисовщику безопасный и контролируемый доступ к Node API.
Затем создайте новый файл preload.js и добавьте в него следующий код:
// Copyright (c) Microsoft Corporation. All rights reserved.
// Licensed under the MIT License

const { contextBridge, ipcRenderer } = require('electron');

/**
 * This preload script exposes a "renderer" API to give
 * the Renderer process controlled access to some Node APIs
 * by leveraging IPC channels that have been configured for
 * communication between the Main and Renderer processes.
 */
contextBridge.exposeInMainWorld('renderer', {
    sendLoginMessage: () => {
        ipcRenderer.send('LOGIN');
    },
    sendSignoutMessage: () => {
        ipcRenderer.send('LOGOUT');
    },
    sendSeeProfileMessage: () => {
        ipcRenderer.send('GET_PROFILE');
    },
    handleProfileData: (func) => {
        ipcRenderer.on('SET_PROFILE', (event, ...args) => func(event, ...args));
    },
    showWelcomeMessage: (func) => {
        ipcRenderer.on('SHOW_WELCOME_MESSAGE', (event, ...args) => func(event, ...args));
    },
});
Этот скрипт предварительной загрузки предоставляет API отрисовщика для предоставления управляемому процессу отрисовщика доступа к некоторым Node APIs путем применения каналов IPC, настроенных для взаимодействия между основными и отрисовщиками.
Наконец, создайте файл с именем constants.js, в котором будут храниться строковые константы для описания событий приложения:
/*
 * Copyright (c) Microsoft Corporation. All rights reserved.
 * Licensed under the MIT License.
 */

const IPC_MESSAGES = {
    SHOW_WELCOME_MESSAGE: 'SHOW_WELCOME_MESSAGE',
    LOGIN: 'LOGIN',
    LOGOUT: 'LOGOUT',
    GET_PROFILE: 'GET_PROFILE',
    SET_PROFILE: 'SET_PROFILE',
}

module.exports = {
    IPC_MESSAGES: IPC_MESSAGES,
}
Вы реализовали простой графический пользовательский интерфейс и взаимодействия для вашего приложения Electron. После выполнения остальных инструкций в этом учебнике файл и структура папок проекта должны выглядеть следующим образом:
ElectronDesktopApp/
├── App
│   ├── AuthProvider.js
│   ├── constants.js
│   ├── graph.js
│   ├── index.html
|   ├── main.js
|   ├── preload.js
|   ├── renderer.js
│   ├── authConfig.js
├── package.json
Добавление логики аутентификации в приложение
В папке App создайте файл с именем AuthProvider.js. Файл AuthProvider.js будет содержать класс поставщика проверки подлинности, который будет обрабатывать операции входа, выхода, получения маркера, выбора учетной записи и связанных задач проверки подлинности с помощью MSAL Node. Добавьте в него следующий код:
/*
 * Copyright (c) Microsoft Corporation. All rights reserved.
 * Licensed under the MIT License.
 */

const { PublicClientApplication, InteractionRequiredAuthError } = require('@azure/msal-node');
const { shell } = require('electron');

class AuthProvider {
    msalConfig
    clientApplication;
    account;
    cache;

    constructor(msalConfig) {
        /**
         * Initialize a public client application. For more information, visit:
         * https://github.com/AzureAD/microsoft-authentication-library-for-js/blob/dev/lib/msal-node/docs/initialize-public-client-application.md
         */
        this.msalConfig = msalConfig;
        this.clientApplication = new PublicClientApplication(this.msalConfig);
        this.cache = this.clientApplication.getTokenCache();
        this.account = null;
    }

    async login() {
        const authResponse = await this.getToken({
            // If there are scopes that you would like users to consent up front, add them below
            // by default, MSAL will add the OIDC scopes to every token request, so we omit those here
            scopes: [],
        });

        return this.handleResponse(authResponse);
    }

    async logout() {
        if (!this.account) return;

        try {
            /**
             * If you would like to end the session with AAD, use the logout endpoint. You'll need to enable
             * the optional token claim 'login_hint' for this to work as expected. For more information, visit:
             * https://learn.microsoft.com/azure/active-directory/develop/v2-protocols-oidc#send-a-sign-out-request
             */
            if (this.account.idTokenClaims.hasOwnProperty('login_hint')) {
                await shell.openExternal(`${this.msalConfig.auth.authority}/oauth2/v2.0/logout?logout_hint=${encodeURIComponent(this.account.idTokenClaims.login_hint)}`);
            }

            await this.cache.removeAccount(this.account);
            this.account = null;
        } catch (error) {
            console.log(error);
        }
    }

    async getToken(tokenRequest) {
        let authResponse;
        const account = this.account || (await this.getAccount());

        if (account) {
            tokenRequest.account = account;
            authResponse = await this.getTokenSilent(tokenRequest);
        } else {
            authResponse = await this.getTokenInteractive(tokenRequest);
        }

        return authResponse || null;
    }

    async getTokenSilent(tokenRequest) {
        try {
            return await this.clientApplication.acquireTokenSilent(tokenRequest);
        } catch (error) {
            if (error instanceof InteractionRequiredAuthError) {
                console.log('Silent token acquisition failed, acquiring token interactive');
                return await this.getTokenInteractive(tokenRequest);
            }

            console.log(error);
        }
    }

    async getTokenInteractive(tokenRequest) {
        try {
            const openBrowser = async (url) => {
                await shell.openExternal(url);
            };

            const authResponse = await this.clientApplication.acquireTokenInteractive({
                ...tokenRequest,
                openBrowser,
                successTemplate: '<h1>Successfully signed in!</h1> <p>You can close this window now.</p>',
                errorTemplate: '<h1>Oops! Something went wrong</h1> <p>Check the console for more information.</p>',
            });

            return authResponse;
        } catch (error) {
            throw error;
        }
    }

    /**
     * Handles the response from a popup or redirect. If response is null, will check if we have any accounts and attempt to sign in.
     * @param response
     */
    async handleResponse(response) {
        if (response !== null) {
            this.account = response.account;
        } else {
            this.account = await this.getAccount();
        }

        return this.account;
    }

    /**
     * Calls getAllAccounts and determines the correct account to sign into, currently defaults to first account found in cache.
     * https://github.com/AzureAD/microsoft-authentication-library-for-js/blob/dev/lib/msal-common/docs/Accounts.md
     */
    async getAccount() {
        const currentAccounts = await this.cache.getAllAccounts();

        if (!currentAccounts) {
            console.log('No accounts detected');
            return null;
        }

        if (currentAccounts.length > 1) {
            // Add choose account code here
            console.log('Multiple accounts detected, need to add choose account code.');
            return currentAccounts[0];
        } else if (currentAccounts.length === 1) {
            return currentAccounts[0];
        } else {
            return null;
        }
    }
}

module.exports = AuthProvider;
В приведенном выше фрагменте кода мы сначала инициализировали класс PublicClientApplication MSAL Node, передав объект конфигурации (msalConfig). Затем мы предоставили методы login, logout и getToken для вызова модулем main (main.js). В login и getToken, мы получаем маркеры идентификатора и доступа с помощью общедоступного API MSAL Node acquireTokenInteractive .
Добавление пакета SDK Для Microsoft Graph
Создайте файл с именем graph.js. Файл graph.js будет содержать экземпляр клиента пакета SDK Microsoft Graph для упрощения доступа к данным в API Microsoft Graph с помощью маркера доступа, полученного MSAL Node:
const { Client } = require('@microsoft/microsoft-graph-client');
require('isomorphic-fetch');

/**
 * Creating a Graph client instance via options method. For more information, visit:
 * https://github.com/microsoftgraph/msgraph-sdk-javascript/blob/dev/docs/CreatingClientInstance.md#2-create-with-options
 * @param {String} accessToken
 * @returns
 */
const getGraphClient = (accessToken) => {
    // Initialize Graph client
    const graphClient = Client.init({
        // Use the provided access token to authenticate requests
        authProvider: (done) => {
            done(null, accessToken);
        },
    });

    return graphClient;
};

module.exports = getGraphClient;
Добавление сведений о регистрации приложения
Создайте файл среды для хранения сведений о регистрации приложения, которые будут использоваться при получении маркеров. Для этого создайте файл authConfig.js в корневой папке примера (ElectronDesktopApp) и добавьте следующий код:
/*
 * Copyright (c) Microsoft Corporation. All rights reserved.
 * Licensed under the MIT License.
 */

const { LogLevel } = require("@azure/msal-node");

/**
 * Configuration object to be passed to MSAL instance on creation.
 * For a full list of MSAL.js configuration parameters, visit:
 * https://github.com/AzureAD/microsoft-authentication-library-for-js/blob/dev/lib/msal-node/docs/configuration.md
 */
const AAD_ENDPOINT_HOST = "Enter_the_Cloud_Instance_Id_Here"; // include the trailing slash

const msalConfig = {
    auth: {
        clientId: "Enter_the_Application_Id_Here",
        authority: `${AAD_ENDPOINT_HOST}Enter_the_Tenant_Info_Here`,
    },
    system: {
        loggerOptions: {
            loggerCallback(loglevel, message, containsPii) {
                console.log(message);
            },
            piiLoggingEnabled: false,
            logLevel: LogLevel.Verbose,
        },
    },
};

/**
 * Add here the endpoints and scopes when obtaining an access token for protected web APIs. For more information, see:
 * https://github.com/AzureAD/microsoft-authentication-library-for-js/blob/dev/lib/msal-browser/docs/resources-and-scopes.md
 */
const GRAPH_ENDPOINT_HOST = "Enter_the_Graph_Endpoint_Here"; // include the trailing slash

const protectedResources = {
    graphMe: {
        endpoint: `${GRAPH_ENDPOINT_HOST}v1.0/me`,
        scopes: ["User.Read"],
    }
};


module.exports = {
    msalConfig: msalConfig,
    protectedResources: protectedResources,
};
Приведите следующие сведения, указав значения, которые вы получили на портале регистрации приложений Azure:
Enter_the_Tenant_Id_hereдолжно быть одним из следующих вариантов:- Если приложение поддерживает учетные записи только в этом каталоге организации, замените это значение идентификатором клиента или именем клиента. Например,
contoso.microsoft.com. - Если приложение поддерживает учетные записи в любом каталоге организации, замените это значение на
organizations. - Если приложение поддерживает учетные записи в любом каталоге организации и личные учетные записи Майкрософт, замените это значение на
common. - Чтобы ограничить поддержку только личными учетными записями Microsoft, замените это значение на
consumers.
- Если приложение поддерживает учетные записи только в этом каталоге организации, замените это значение идентификатором клиента или именем клиента. Например,
Enter_the_Application_Id_Here: идентификатор приложения (клиента), которое вы зарегистрировали.Enter_the_Cloud_Instance_Id_Here: облачный экземпляр Azure, в котором зарегистрировано приложение.- Для основного (или глобального) облака Azure введите
https://login.microsoftonline.com/. - Для национальных облаков (например, китайского) соответствующие значения см. в статье Национальные облака.
- Для основного (или глобального) облака Azure введите
Enter_the_Graph_Endpoint_Hereэкземпляр API Microsoft Graph, с которым должно взаимодействовать приложение.- Для глобальной конечной точки API Microsoft Graph замените оба экземпляра этой строки на
https://graph.microsoft.com/. - Дополнительные сведения о конечных точках в национальных облачных развертываниях см. в статье Национальные облачные развертывания в документации по Microsoft Graph.
- Для глобальной конечной точки API Microsoft Graph замените оба экземпляра этой строки на
Тестирование приложения
Вы завершили создание приложения и теперь готовы запустить классическое приложение Electron и протестировать его функциональность.
- Запустите приложение, выполнив следующую команду из корневой папки проекта:
electron App/main.js
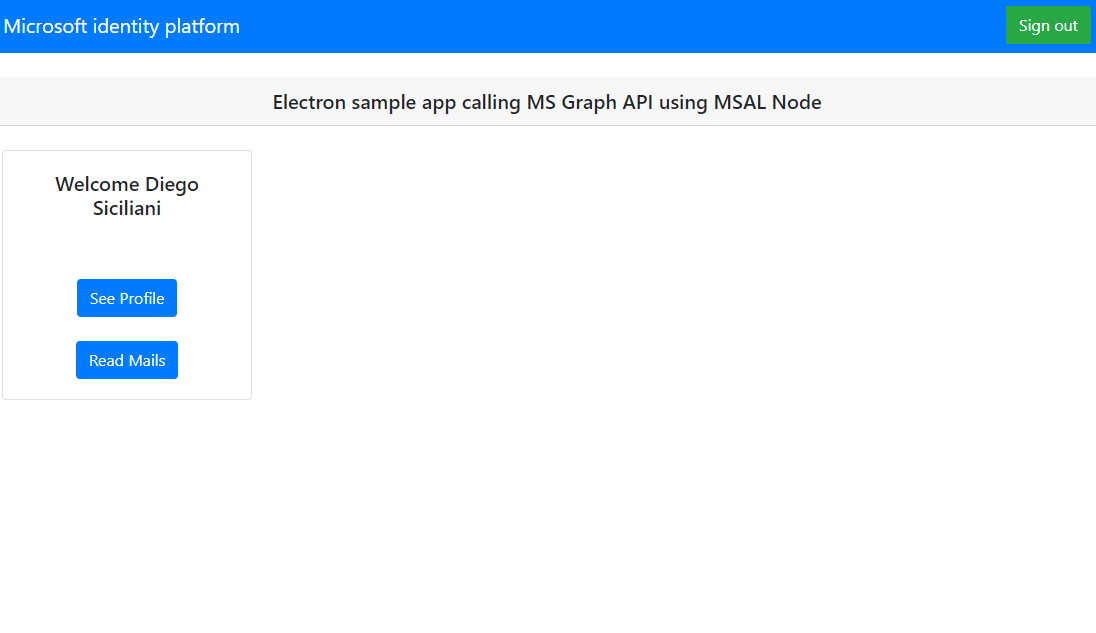
- В главном окне приложения отобразится содержимое файла index.html и кнопка Sign In (Войти).
Проверка входа и выхода
После загрузки файла index.html выберите Sign In (Войти). Вам будет предложено войти с помощью платформы удостоверений Майкрософт:
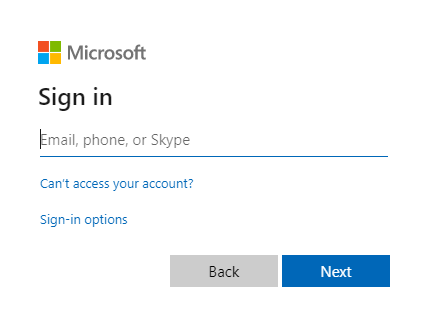
Если вы согласны предоставить запрошенные разрешения, веб-приложения выводят имя пользователя, что означает успешный вход.
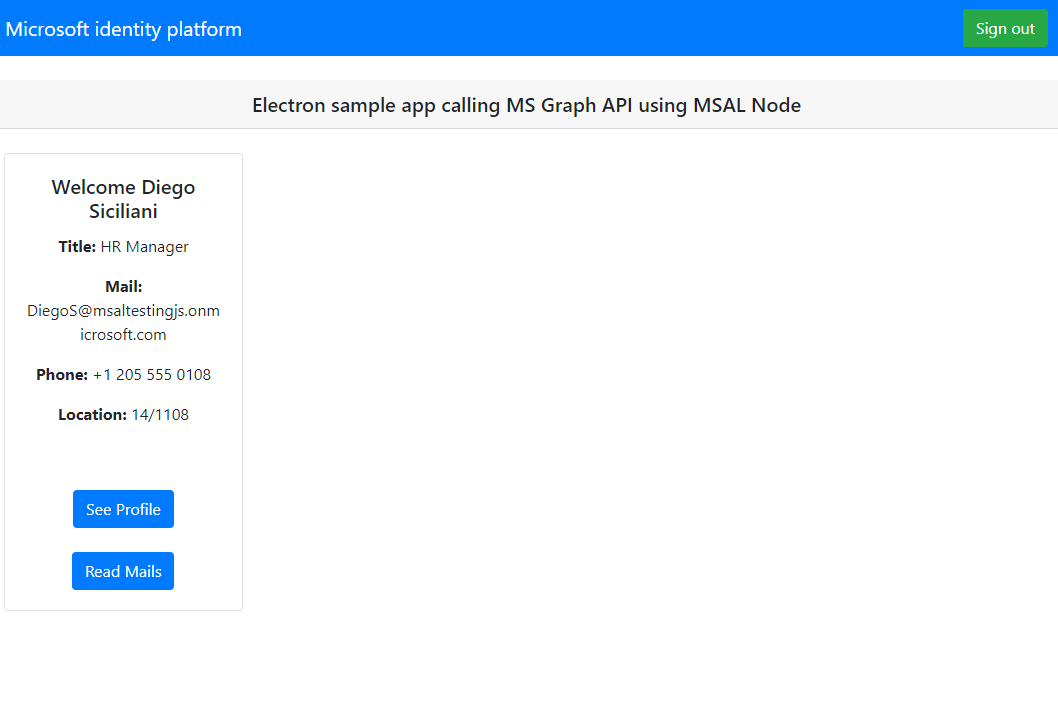
Проверка вызова веб-API
После входа выберите "Просмотреть профиль" , чтобы просмотреть сведения профиля пользователя, возвращенные в ответе на вызов API Microsoft Graph. После согласия вы увидите сведения о профиле, возвращенные в ответе:
Принцип работы приложения
Когда пользователь впервые выбирает кнопку входа , acquireTokenInteractive метод MSAL Node. Этот метод перенаправляет пользователя на вход с помощью конечной точки платформа удостоверений Майкрософт и проверяет учетные данные пользователя, получает код авторизации, а затем обменивается этим кодом для маркера идентификатора, маркера доступа и маркера обновления. Узел MSAL также кэширует эти маркеры для дальнейшего использования.
Маркер идентификатора содержит основные сведения о пользователе, например отображаемое имя. Срок действия маркера доступа ограничен и истекает через 24 часа. Если вы планируете использовать эти маркеры для доступа к защищенному ресурсу, внутренний сервер должен его проверить и подтвердить, что маркер выдан допустимому пользователю для вашего приложения.
Классическое приложение, созданное при работе с этим руководством, выполняет вызов REST к API Microsoft Graph, используя маркер доступа в качестве маркера носителя в заголовке запроса (RFC 6750).
Для чтения профиля пользователя API Microsoft Graph требуется область user.read. По умолчанию эта область автоматически добавляется в каждое приложение, зарегистрированное на портале Azure. Для других API Microsoft Graph, а также для пользовательских API вашего внутреннего сервера могут потребоваться дополнительные области. Например, для отображения сообщений электронной почты пользователя API Microsoft Graph требуется область Mail.Read.
При добавлении областей приложение может запросить у пользователей дополнительное согласие на использование таких добавленных областей.
Справка и поддержка
Если вам нужна помощь, если вы хотите сообщить о проблеме или узнать о доступных вариантах поддержки, воспользуйтесь статьей Возможности получения поддержки и справки для разработчиков.
Следующие шаги
Если вы хотите узнать больше о Node.js и разработке классических приложений Electron на платформе удостоверений Майкрософт, см. серию статей: