Примечание
Для доступа к этой странице требуется авторизация. Вы можете попробовать войти или изменить каталоги.
Для доступа к этой странице требуется авторизация. Вы можете попробовать изменить каталоги.
В этой статье описывается, как присоединиться к вызову в комнате с помощью SDK для веб-звонков или звонков на мобильных устройствах.
Предварительные условия
- Учетная запись Azure с активной подпиской. Создайте учетную запись бесплатно .
- Активный ресурс Служб коммуникации и строка подключения. Создайте ресурс Служб коммуникации.
- Два или более идентификаторов пользователя коммуникаций. Создание и управление токенами доступа или быстрое создание удостоверений для тестирования.
- Создана комната, и к ней добавлен участник. Создание комнат и управление ими
Получение токена доступа пользователя
Если вы уже создали пользователей и добавили их в качестве участников в комнате после раздела "Настройка участников комнаты" на этой странице, вы можете напрямую использовать эти пользователи для присоединения к комнате.
В противном случае необходимо создать маркер доступа пользователя для каждого участника вызова. Узнайте, как создать маркер доступа пользователя и обеспечить управление им. Вы также можете использовать Azure CLI и выполнить приведенную ниже команду с помощью строки подключения для создания пользователя и токена доступа. После создания пользователей необходимо добавить их в комнату в качестве участников, прежде чем они смогут присоединиться к комнате.
az communication identity token issue --scope voip --connection-string "yourConnectionString"
Дополнительные сведения см. в статье "Создание маркеров доступа и управление ими" с помощью Azure CLI.
Примечание.
Доступ к комнатам можно получить с помощью библиотеки пользовательского интерфейса Служб коммуникации Azure. Библиотека пользовательского интерфейса позволяет разработчикам добавлять в свое приложение клиент вызова с поддержкой Rooms, используя всего несколько строк кода.
Реализация примера приложения
Чтобы реализовать код, необходимый для присоединения участников к групповым вызовам, скачайте из GitHub приложение-пример для вызовов в комнате.
Предварительные требования для веба
- Вам нужно иметь Node.js 18. Для его установки можно использовать установщик Майкрософт (MSI).
Настройка проекта
Создание нового приложения Node.js
Откройте терминал или командное окно, создайте каталог для своего приложения и перейдите к нему.
mkdir calling-rooms-quickstart && cd calling-rooms-quickstart
Воспользуйтесь командой npm init -y, чтобы создать файл package.json с параметрами по умолчанию.
npm init -y
Установка пакета
Используйте команду npm install, чтобы установить пакет SDK Служб коммуникации Azure для реализации вызовов на JavaScript.
Внимание
В этом быстром старте используется версия SDK пакета для вызовов в Службе коммуникации Azure 1.14.1. Возможность присоединиться к комнатному разговору и отображать роли участников вызова доступна в JavaScript SDK пакете для веб-браузеров версии 1.13.1 и более поздних версий.
npm install @azure/communication-common --save
npm install @azure/communication-calling@1.14.1 --save
Настройка платформы приложения
В этой статье используется webpack для упаковки ресурсов приложения. Выполните следующую команду, чтобы установить npm пакеты webpack, webpack-cli, и webpack-dev-server и перечислить их как зависимости для разработки в вашем package.json.
npm install copy-webpack-plugin@^11.0.0 webpack@^5.88.2 webpack-cli@^5.1.4 webpack-dev-server@^4.15.1 --save-dev
Вот этот код:
index.html Создайте файл в корневом каталоге проекта. Используйте этот файл для настройки базового макета, который позволяет пользователю присоединяться к вызову комнат.
<!-- index.html-->
<!DOCTYPE html>
<html>
    <head>
        <title>Azure Communication Services - Rooms Call Sample</title>
        <link rel="stylesheet" type="text/css" href="styles.css"/>
    </head>
    <body>
        <h4>Azure Communication Services - Rooms Call Sample</h4>
        <input id="user-access-token"
            type="text"
            placeholder="User access token"
            style="margin-bottom:1em; width: 500px;"/>
        <button id="initialize-call-agent" type="button">Initialize Call Agent</button>
        <br>
        <br>
        <input id="acs-room-id"
            type="text"
            placeholder="Enter Room Id"
            style="margin-bottom:1em; width: 500px; display: block;"/>
        <button id="join-room-call-button" type="button" disabled="true">Join Room Call</button>
        <button id="hangup-call-button" type="button" disabled="true">Hang up Call</button>
        <button id="start-video-button" type="button" disabled="true">Start Video</button>
        <button id="stop-video-button" type="button" disabled="true">Stop Video</button>
        <br>
        <br>
        <div id="connectedLabel" style="color: #13bb13;" hidden>Room Call is connected!</div>
        <br>
        <div id="remoteVideosGallery" style="width: 40%;" hidden>Remote participants' video streams:</div>
        <br>
        <div id="localVideoContainer" style="width: 30%;" hidden>Local video stream:</div>
        <!-- points to the bundle generated from client.js -->
        <script src="./main.js"></script>
    </body>
</html>
Создайте файл в корневом каталоге вашего проекта под названием index.js, предназначенный для логики приложения. Добавьте следующий код в index.js:
// Make sure to install the necessary dependencies
const { CallClient, VideoStreamRenderer, LocalVideoStream } = require('@azure/communication-calling');
const { AzureCommunicationTokenCredential } = require('@azure/communication-common');
const { AzureLogger, setLogLevel } = require("@azure/logger");
// Set the log level and output
setLogLevel('verbose');
AzureLogger.log = (...args) => {
    console.log(...args);
};

// Calling web sdk objects
let callAgent;
let deviceManager;
let call;
let localVideoStream;
let localVideoStreamRenderer;

// UI widgets
let userAccessToken = document.getElementById('user-access-token');
let acsRoomId = document.getElementById('acs-room-id');
let initializeCallAgentButton = document.getElementById('initialize-call-agent');
let startCallButton = document.getElementById('join-room-call-button');
let hangUpCallButton = document.getElementById('hangup-call-button');
let startVideoButton = document.getElementById('start-video-button');
let stopVideoButton = document.getElementById('stop-video-button');
let connectedLabel = document.getElementById('connectedLabel');
let remoteVideosGallery = document.getElementById('remoteVideosGallery');
let localVideoContainer = document.getElementById('localVideoContainer');

/**
 * Using the CallClient, initialize a CallAgent instance with a CommunicationUserCredential which enable us to join a rooms call.
 */
initializeCallAgentButton.onclick = async () => {
    try {
        const callClient = new CallClient();
        tokenCredential = new AzureCommunicationTokenCredential(userAccessToken.value.trim());
        callAgent = await callClient.createCallAgent(tokenCredential)
        // Set up a camera device to use.
        deviceManager = await callClient.getDeviceManager();
        await deviceManager.askDevicePermission({ video: true });
        await deviceManager.askDevicePermission({ audio: true });

        startCallButton.disabled = false;
        initializeCallAgentButton.disabled = true;
    } catch(error) {
        console.error(error);
    }
}

startCallButton.onclick = async () => {
    try {
        const localVideoStream = await createLocalVideoStream();
        const videoOptions = localVideoStream ? { localVideoStreams: [localVideoStream] } : undefined;

        const roomCallLocator = { roomId: acsRoomId.value.trim() };
        call = callAgent.join(roomCallLocator, { videoOptions });

        // Subscribe to the call's properties and events.
        subscribeToCall(call);
    } catch (error) {
        console.error(error);
    }
}

/**
 * Subscribe to a call obj.
 * Listen for property changes and collection updates.
 */
subscribeToCall = (call) => {
    try {
        // Inspect the initial call.id value.
        console.log(`Call Id: ${call.id}`);
        //Subscribe to call's 'idChanged' event for value changes.
        call.on('idChanged', () => {
            console.log(`Call Id changed: ${call.id}`);
        });

        // Inspect the initial call.state value.
        console.log(`Call state: ${call.state}`);
        // Subscribe to call's 'stateChanged' event for value changes.
        call.on('stateChanged', async () => {
            console.log(`Call state changed: ${call.state}`);
            if(call.state === 'Connected') {
                connectedLabel.hidden = false;
                startCallButton.disabled = true;
                hangUpCallButton.disabled = false;
                startVideoButton.disabled = false;
                stopVideoButton.disabled = false;
                remoteVideosGallery.hidden = false;
            } else if (call.state === 'Disconnected') {
                connectedLabel.hidden = true;
                startCallButton.disabled = false;
                hangUpCallButton.disabled = true;
                startVideoButton.disabled = true;
                stopVideoButton.disabled = true;
                remoteVideosGallery.hidden = true;
                console.log(`Call ended, call end reason={code=${call.callEndReason.code}, subCode=${call.callEndReason.subCode}}`);
            }
        });
        call.on('isLocalVideoStartedChanged', () => {
            console.log(`isLocalVideoStarted changed: ${call.isLocalVideoStarted}`);
        });
        console.log(`isLocalVideoStarted: ${call.isLocalVideoStarted}`);
        call.localVideoStreams.forEach(async (lvs) => {
            localVideoStream = lvs;
            await displayLocalVideoStream();
        });
        call.on('localVideoStreamsUpdated', e => {
            e.added.forEach(async (lvs) => {
                localVideoStream = lvs;
                await displayLocalVideoStream();
            });
            e.removed.forEach(lvs => {
               removeLocalVideoStream();
            });
        });

        // Inspect the call's current remote participants and subscribe to them.
        call.remoteParticipants.forEach(remoteParticipant => {
            subscribeToRemoteParticipant(remoteParticipant);
        });
        // Subscribe to the call's 'remoteParticipantsUpdated' event to be
        // notified when new participants are added to the call or removed from the call.
        call.on('remoteParticipantsUpdated', e => {
            // Subscribe to new remote participants that are added to the call.
            e.added.forEach(remoteParticipant => {
                subscribeToRemoteParticipant(remoteParticipant)
            });
            // Unsubscribe from participants that are removed from the call
            e.removed.forEach(remoteParticipant => {
                console.log('Remote participant removed from the call.');
            });
        });
    } catch (error) {
        console.error(error);
    }
}

/**
 * Subscribe to a remote participant obj.
 * Listen for property changes and collection updates.
 */
subscribeToRemoteParticipant = (remoteParticipant) => {
    try {
        // Inspect the initial remoteParticipant.state value.
        console.log(`Remote participant state: ${remoteParticipant.state}`);
        // Subscribe to remoteParticipant's 'stateChanged' event for value changes.
        remoteParticipant.on('stateChanged', () => {
            console.log(`Remote participant state changed: ${remoteParticipant.state}`);
        });

        // Inspect the remoteParticipants's current videoStreams and subscribe to them.
        remoteParticipant.videoStreams.forEach(remoteVideoStream => {
            subscribeToRemoteVideoStream(remoteVideoStream)
        });
        // Subscribe to the remoteParticipant's 'videoStreamsUpdated' event to be
        // notified when the remoteParticipant adds new videoStreams and removes video streams.
        remoteParticipant.on('videoStreamsUpdated', e => {
            // Subscribe to new remote participant's video streams that were added.
            e.added.forEach(remoteVideoStream => {
                subscribeToRemoteVideoStream(remoteVideoStream)
            });
            // Unsubscribe from remote participant's video streams that were removed.
            e.removed.forEach(remoteVideoStream => {
                console.log('Remote participant video stream was removed.');
            })
        });
    } catch (error) {
        console.error(error);
    }
}

/**
 * Subscribe to a remote participant's remote video stream obj.
 * You have to subscribe to the 'isAvailableChanged' event to render the remoteVideoStream. If the 'isAvailable' property
 * changes to 'true', a remote participant is sending a stream. Whenever availability of a remote stream changes
 * you can choose to destroy the whole 'Renderer', a specific 'RendererView' or keep them, but this will result in displaying blank video frame.
 */
subscribeToRemoteVideoStream = async (remoteVideoStream) => {
    let renderer = new VideoStreamRenderer(remoteVideoStream);
    let view;
    let remoteVideoContainer = document.createElement('div');
    remoteVideoContainer.className = 'remote-video-container';

    const createView = async () => {
        // Create a renderer view for the remote video stream.
        view = await renderer.createView();
        // Attach the renderer view to the UI.
        remoteVideoContainer.appendChild(view.target);
        remoteVideosGallery.appendChild(remoteVideoContainer);
    }

    // Remote participant has switched video on/off
    remoteVideoStream.on('isAvailableChanged', async () => {
        try {
            if (remoteVideoStream.isAvailable) {
                await createView();
            } else {
                view.dispose();
                remoteVideosGallery.removeChild(remoteVideoContainer);
            }
        } catch (e) {
            console.error(e);
        }
    });

    // Remote participant has video on initially.
    if (remoteVideoStream.isAvailable) {
        try {
            await createView();
        } catch (e) {
            console.error(e);
        }
    }
}

/**
 * Start your local video stream.
 * This will send your local video stream to remote participants so they can view it.
 */
startVideoButton.onclick = async () => {
    try {
        const localVideoStream = await createLocalVideoStream();
        await call.startVideo(localVideoStream);
    } catch (error) {
        console.error(error);
    }
}

/**
 * Stop your local video stream.
 * This will stop your local video stream from being sent to remote participants.
 */
stopVideoButton.onclick = async () => {
    try {
        await call.stopVideo(localVideoStream);
    } catch (error) {
        console.error(error);
    }
}

/**
 * To render a LocalVideoStream, you need to create a new instance of VideoStreamRenderer, and then
 * create a new VideoStreamRendererView instance using the asynchronous createView() method.
 * You may then attach view.target to any UI element.
 */
createLocalVideoStream = async () => {
    const camera = (await deviceManager.getCameras())[0];
    if (camera) {
        return new LocalVideoStream(camera);
    } else {
        console.error(`No camera device found on the system`);
    }
}

/**
 * Display your local video stream preview in your UI
 */
displayLocalVideoStream = async () => {
    try {
        localVideoStreamRenderer = new VideoStreamRenderer(localVideoStream);
        const view = await localVideoStreamRenderer.createView();
        localVideoContainer.hidden = false;
        localVideoContainer.appendChild(view.target);
    } catch (error) {
        console.error(error);
    }
}

/**
 * Remove your local video stream preview from your UI
 */
removeLocalVideoStream = async() => {
    try {
        localVideoStreamRenderer.dispose();
        localVideoContainer.hidden = true;
    } catch (error) {
        console.error(error);
    }
}

/**
 * End current room call
 */
hangUpCallButton.addEventListener("click", async () => {
    await call.hangUp();
});
Добавление кода локального сервера webpack
Создайте файл в корневом каталоге вашего проекта с именем webpack.config.js, где будет содержаться логика локального сервера для этого быстрого начала. Добавьте следующий код в webpack.config.js:
const path = require('path');
const CopyPlugin = require("copy-webpack-plugin");

module.exports = {
    mode: 'development',
    entry: './index.js',
    output: {
        filename: 'main.js',
        path: path.resolve(__dirname, 'dist'),
    },
    devServer: {
        static: {
            directory: path.join(__dirname, './')
        },
    },
    plugins: [
        new CopyPlugin({
            patterns: [
                './index.html'
            ]
        }),
    ]
};
Выполнение кода
Чтобы создать и запустить приложение, используйте webpack-dev-server. Выполните следующую команду, чтобы создать пакет узла приложения на локальном веб-сервере.
`npx webpack serve --config webpack.config.js`
- Откройте браузер, перейдите в раздел http://localhost:8080/.
- В первом поле ввода введите допустимый маркер доступа пользователя.
- Щелкните "Инициализируйте контроллер вызова" и введите ID комнаты.
- Нажмите кнопку "Присоединиться к номеру звонка".
Вы успешно присоединились к вызову в Rooms!
Присоединение к комнатному вызову
Весь код, добавленный в пример приложения, позволил успешно запустить и подключиться к комнатному звонку. Вот дополнительная информация о доступных методах и обработчиках, которые вы можете использовать для комнат, чтобы расширить функциональность в вашем приложении.
Чтобы отобразить роль участников локального или удаленного вызова, подпишитесь на обработчик следующим образом.
// Subscribe to changes for your role in a call
 const callRoleChangedHandler = () => {
 	console.log(call.role);
 };

 call.on('roleChanged', callRoleChangedHandler);

// Subscribe to role changes for remote participants
 const subscribeToRemoteParticipant = (remoteParticipant) => {
 	remoteParticipant.on('roleChanged', () => {
 	    console.log(remoteParticipant.role);
 	});
 }
Для получения дополнительной информации о ролях участников конференц-звонков в комнате, см. API комнат для структурированных собраний.
Реализация примера приложения
Чтобы реализовать код, необходимый для присоединения участников к групповым вызовам, скачайте из GitHub приложение-пример для вызовов в комнате.
Настройка проекта
Создание проекта Xcode
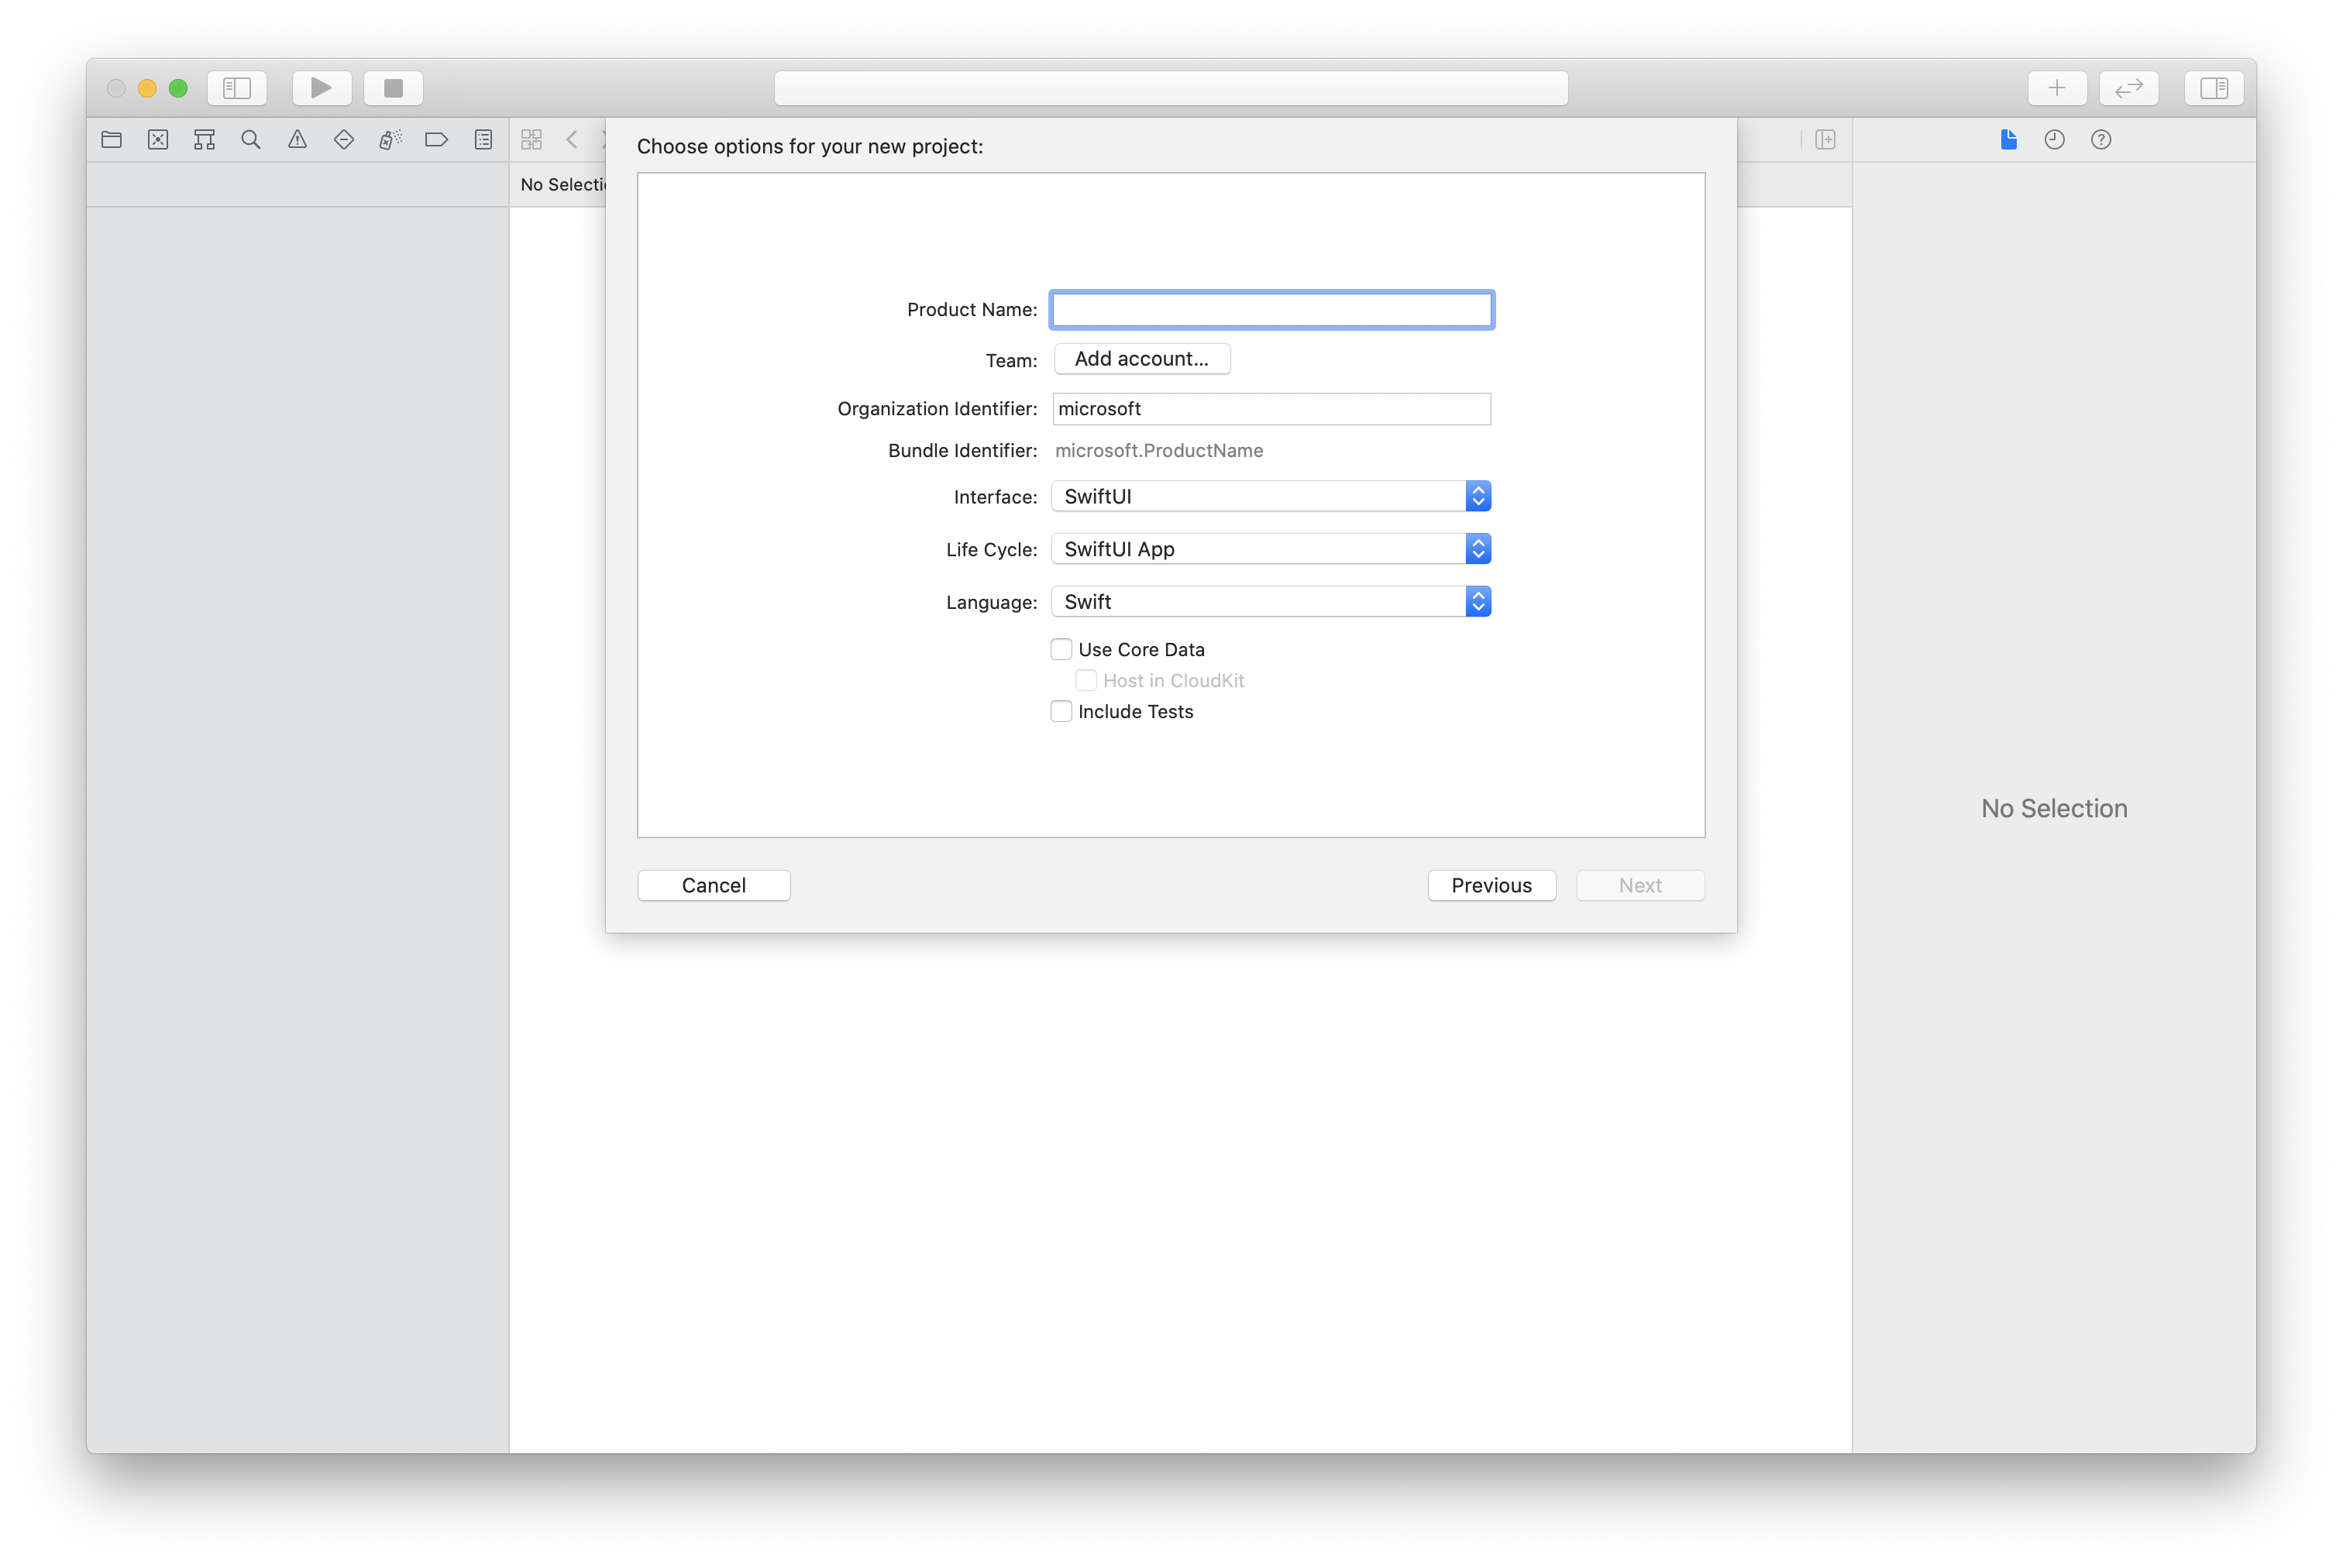
В Xcode создайте новый проект iOS и выберите шаблон Single View App (Приложение с одним представлением). В этом руководстве используется платформа SwiftUI, поэтому для параметра Language (Язык) нужно задать значение Swift, а для параметра User Interface (Пользовательский интерфейс) — значение SwiftUI.
Установка CocoaPods
Используйте это руководство для установки CocoaPods на компьютере Mac.
Установка пакета и его зависимостей с помощью CocoaPods
Чтобы создать Podfile для приложения, откройте терминал и перейдите в папку проекта и запустите pod init.
Добавьте в Podfile следующий код и сохраните файл.
platform :ios, '13.0'
use_frameworks!

target 'roomsquickstart' do
 pod 'AzureCommunicationCalling', '~> 2.5.0'
end
Выполните команду pod install.
.xcworkspaceОткройте файл с помощью Xcode.
Запрос доступа к микрофону и камере
Чтобы получить доступ к микрофону и камере устройства, необходимо обновить список свойств приложения с помощью NSMicrophoneUsageDescription и NSCameraUsageDescription. Задайте связанное значение строке для включения в диалоговое окно, которое система использует для запроса доступа от пользователя.
Щелкните правой кнопкой мыши Info.plist запись дерева проекта и выберите "Открыть как > исходный код". Добавьте в раздел верхнего уровня <dict> следующие строки, а затем сохраните файл.
<key>NSMicrophoneUsageDescription</key>
<string>Need microphone access for VOIP calling.</string>
<key>NSCameraUsageDescription</key>
<string>Need camera access for video calling</string>
Настройка платформы приложения
Откройте файл ContentView.swift вашего проекта. В верхнем файле добавьте объявление импорта для импорта библиотеки AzureCommunicationCalling и AVFoundation. Используйте AVFoundation для получения разрешения на запись аудио из кода.
import AzureCommunicationCalling
import AVFoundation
Объектная модель
Следующие классы и интерфейсы реализуют некоторые основные функции пакета SDK Служб коммуникации Azure для iOS.
| Имя | Описание |
|---|---|
| CallClient | CallClient — это основная точка входа в пакет SDK для вызовов. |
| Агент вызова | CallAgent используется для инициирования вызовов и управления ими. |
| CommunicationTokenCredential | CommunicationTokenCredential используется в качестве учетных данных токена для инициализации экземпляра CallAgent. |
| Идентификатор связи | CommunicationIdentifier используется для представления удостоверения пользователя и может иметь одно из следующих значений: CommunicationUserIdentifier/PhoneNumberIdentifier/CallingApplication. |
| RoomCallLocator | RoomCallLocator используется CallAgent для присоединения к звонку в Room. |
Создание агента вызова
Замените реализацию структуры ContentView простыми элементами управления пользовательского интерфейса, которые позволяют начать и завершить вызов. В этом примере мы присоединяем бизнес-логику к этим элементам управления.
struct ContentView: View {
 @State var roomId: String = ""
 @State var callObserver:CallObserver?
 @State var previewRenderer: VideoStreamRenderer? = nil
 @State var previewView: RendererView? = nil
 @State var sendingLocalVideo: Bool = false
 @State var speakerEnabled: Bool = false
 @State var muted: Bool = false
 @State var callClient: CallClient?
 @State var call: Call?
 @State var callHandler: CallHandler?
 @State var callAgent: CallAgent?
 @State var deviceManager: DeviceManager?
 @State var localVideoStreams: [LocalVideoStream]?
 @State var callState: String = "Unknown"
 @State var showAlert: Bool = false
 @State var alertMessage: String = ""
 @State var participants: [[Participant]] = [[]]

 var body: some View {
 NavigationView {
 ZStack {
 if (call == nil) {
 Form {
 Section {
 TextField("Room ID", text: $roomId)
 Button(action: joinRoomCall) {
 Text("Join Room Call")
 }
 }
 }
 .navigationBarTitle("Rooms Quickstart")
 } else {
 ZStack {
 VStack {
 ForEach(participants, id:\.self) { array in
 HStack {
 ForEach(array, id:\.self) { participant in
 ParticipantView(self, participant)
 }
 }
 .frame(maxWidth: .infinity, maxHeight: 200, alignment: .topLeading)
 }
 }
 .background(Color.black)
 .frame(maxWidth: .infinity, maxHeight: .infinity, alignment: .topLeading)
 VStack {
 if (sendingLocalVideo) {
 HStack {
 RenderInboundVideoView(view: $previewView)
 .frame(width:90, height:160)
 .padding(10)
 .background(Color.green)
 }
 .frame(maxWidth: .infinity, alignment: .trailing)
 }
 HStack {
 Button(action: toggleMute) {
 HStack {
 Text(muted ? "Unmute" : "Mute")
 }
 .frame(width:80)
 .padding(.vertical, 10)
 .background(Color(.lightGray))
 }
 Button(action: toggleLocalVideo) {
 HStack {
 Text(sendingLocalVideo ? "Video-Off" : "Video-On")
 }
 .frame(width:80)
 .padding(.vertical, 10)
 .background(Color(.lightGray))
 }
 }
 .frame(maxWidth: .infinity, alignment: .leading)
 .padding(.horizontal, 10)
 .padding(.vertical, 5)
 HStack {
 Button(action: leaveRoomCall) {
 HStack {
 Text("Leave Room Call")
 }
 .frame(width:80)
 .padding(.vertical, 10)
 .background(Color(.red))
 }
 }
 .frame(maxWidth: .infinity, alignment: .leading)
 .padding(.horizontal, 10)
 .padding(.vertical, 5)
 HStack {
 Text("Status:")
 Text(callState)
 }
 .padding(.vertical, 10)
 }
 .frame(maxWidth: .infinity, maxHeight: .infinity, alignment: .bottomLeading)
 }
 }
 }
 }
 .onAppear{
 // Authenticate the client
 // Initialize the CallAgent and access Device Manager
 // Ask for permissions
 }
 }
}

//Functions and Observers

struct HomePageView_Previews: PreviewProvider {
 static var previews: some View {
 HomePageView()
 }
}
аутентификация клиента;
Чтобы инициализировать экземпляр CallAgent, нам нужен пользовательский токен доступа, позволяющий участникам присоединяться к комнатным звонкам.
После получения токена добавьте следующий код в обратный вызов onAppearContentView.swift. Необходимо заменить <USER ACCESS TOKEN> допустимым маркером доступа пользователя для ресурса:
var userCredential: CommunicationTokenCredential?
do {
 userCredential = try CommunicationTokenCredential(token: "<USER ACCESS TOKEN>")
} catch {
 print("ERROR: It was not possible to create user credential.")
 return
}
Инициализируйте CallAgent и получите доступ к диспетчеру устройств
Чтобы создать экземпляр CallAgent из CallClient, используйте метод callClient.createCallAgent, который асинхронно возвращает объект CallAgent после инициализации. DeviceManager позволяет перечислить локальные устройства, которые можно использовать в вызове для передачи аудио-и видеопотоков. Он также позволяет запрашивать разрешение от пользователя на доступ к микрофону или камере.
self.callClient = CallClient()
self.callClient?.createCallAgent(userCredential: userCredential!) { (agent, error) in
 if error != nil {
 print("ERROR: It was not possible to create a call agent.")
 return
 } else {
 self.callAgent = agent
 print("Call agent successfully created.")
 self.callAgent!.delegate = callHandler
 self.callClient?.getDeviceManager { (deviceManager, error) in
 if (error == nil) {
 print("Got device manager instance")
 self.deviceManager = deviceManager
 } else {
 print("Failed to get device manager instance")
 }
 }
 }
}
Запрос разрешений
Чтобы запросить разрешения для аудио и видео, необходимо добавить в обратный вызов onAppear следующий код.
AVAudioSession.sharedInstance().requestRecordPermission { (granted) in
 if granted {
 AVCaptureDevice.requestAccess(for: .video) { (videoGranted) in
 /* NO OPERATION */
 }
 }
}
Присоединение к звонку в комнате
Настройте метод joinRoomCall в качестве действия, выполняемого при нажатии кнопки «Присоединиться к вызову в комнате». В этом примере по умолчанию вызовы бывают только аудио, но могут содержать видео, если участник присоединяется к комнате.
func joinRoomCall() {
 if self.callAgent == nil {
 print("CallAgent not initialized")
 return
 }

 if (self.roomId.isEmpty) {
 print("Room ID not set")
 return
 }

 // Join a call with a Room ID
 let options = JoinCallOptions()
 let audioOptions = AudioOptions()
 audioOptions.muted = self.muted

 options.audioOptions = audioOptions

 let roomCallLocator = RoomCallLocator(roomId: roomId)
 self.callAgent!.join(with: roomCallLocator, joinCallOptions: options) { (call, error) in
 self.setCallAndObserver(call: call, error: error)
 }
}
CallObserver используется для управления событиями среднего вызова и удаленными участниками. В функции setCallAndObserver мы устанавливаем наблюдателей.
func setCallAndObserver(call:Call!, error:Error?) {
 if (error == nil) {
 self.call = call
 self.callObserver = CallObserver(view:self)

 self.call!.delegate = self.callObserver

 if (self.call!.state == CallState.connected) {
 self.callObserver!.handleInitialCallState(call: call)
 }
 } else {
 print("Failed to get call object")
 }
}
Выход из номера
Метод leaveRoomCall задается как действие, выполняемое при нажатии кнопки Покинуть разговор в комнате. Метод обрабатывает завершение вызова и очищает любые созданные ресурсы.
private func leaveRoomCall() {
 if (self.sendingLocalVideo) {
 self.call!.stopVideo(stream: self.localVideoStreams!.first!) { (error) in
 if (error != nil) {
 print("Failed to stop video")
 } else {
 self.sendingLocalVideo = false
 self.previewView = nil
 self.previewRenderer?.dispose()
 self.previewRenderer = nil
 }
 }
 }
 self.call?.hangUp(options: nil) { (error) in }
 self.participants.removeAll()
 self.call?.delegate = nil
 self.call = nil
}
Трансляция видео
Во время комнатного вызова используйте startVideo или stopVideo, чтобы начать или остановить отправку LocalVideoStream удаленным участникам.
func toggleLocalVideo() {
 if (self.sendingLocalVideo) {
 self.call!.stopVideo(stream: self.localVideoStreams!.first!) { (error) in
 if (error != nil) {
 print("Cannot stop video")
 } else {
 self.sendingLocalVideo = false
 self.previewView = nil
 self.previewRenderer!.dispose()
 self.previewRenderer = nil
 }
 }
 } else {
 let availableCameras = self.deviceManager!.cameras
 let scalingMode:ScalingMode = .crop
 if (self.localVideoStreams == nil) {
 self.localVideoStreams = [LocalVideoStream]()
 }
 self.localVideoStreams!.append(LocalVideoStream(camera: availableCameras.first!))
 self.previewRenderer = try! VideoStreamRenderer(localVideoStream: self.localVideoStreams!.first!)
 self.previewView = try! previewRenderer!.createView(withOptions: CreateViewOptions(scalingMode:scalingMode))
 self.call!.startVideo(stream: self.localVideoStreams!.first!) { (error) in
 if (error != nil) {
 print("Cannot start video")
 }
 else {
 self.sendingLocalVideo = true
 }
 }
 }
}
Отключение локального звука
Во время звонка в комнате можно использовать mute или unMute чтобы включить или выключить микрофон.
func toggleMute() {
 if (self.muted) {
 call!.unmuteOutgoingAudio(completionHandler: { (error) in
 if error == nil {
 self.muted = false
 }
 })
 } else {
 call!.muteOutgoingAudio(completionHandler: { (error) in
 if error == nil {
 self.muted = true
 }
 })
 }
}
Обработка обновлений вызовов
Чтобы работать с обновлениями вызовов, реализуйте CallHandler для обработки событий обновлений. Добавьте следующую реализацию в CallHandler.swift.
final class CallHandler: NSObject, CallAgentDelegate {
 public var owner: ContentView?

 private static var instance: CallHandler?
 static func getOrCreateInstance() -> CallHandler {
 if let c = instance {
 return c
 }
 instance = CallHandler()
 return instance!
 }

 private override init() {}

 public func callAgent(_ callAgent: CallAgent, didUpdateCalls args: CallsUpdatedEventArgs) {
 if let removedCall = args.removedCalls.first {
 owner?.call = nil
 }
 }
}
Необходимо создать экземпляр CallHandler, добавив следующий код в колбэк onAppear в ContentView.swift.
self.callHandler = CallHandler.getOrCreateInstance()
self.callHandler.owner = self
Задайте делегата для CallAgent после его успешного создания.
self.callAgent!.delegate = callHandler
Удаленное управление участниками
Все удаленные участники имеют RemoteParticipant тип и доступны через remoteParticipants коллекцию в экземпляре вызова. Мы можем реализовать Participant класс для управления обновлениями в удаленных видеопотоках удаленных участников, помимо прочего.
class Participant: NSObject, RemoteParticipantDelegate, ObservableObject {
 private var videoStreamCount = 0
 private let innerParticipant:RemoteParticipant
 private let call:Call
 private var renderedRemoteVideoStream:RemoteVideoStream?

 @Published var state:ParticipantState = ParticipantState.disconnected
 @Published var isMuted:Bool = false
 @Published var isSpeaking:Bool = false
 @Published var hasVideo:Bool = false
 @Published var displayName:String = ""
 @Published var videoOn:Bool = true
 @Published var renderer:VideoStreamRenderer? = nil
 @Published var rendererView:RendererView? = nil
 @Published var scalingMode: ScalingMode = .fit

 init(_ call: Call, _ innerParticipant: RemoteParticipant) {
 self.call = call
 self.innerParticipant = innerParticipant
 self.displayName = innerParticipant.displayName

 super.init()

 self.innerParticipant.delegate = self

 self.state = innerParticipant.state
 self.isMuted = innerParticipant.isMuted
 self.isSpeaking = innerParticipant.isSpeaking
 self.hasVideo = innerParticipant.videoStreams.count > 0
 if(self.hasVideo) {
 handleInitialRemoteVideo()
 }
 }

 deinit {
 self.innerParticipant.delegate = nil
 }

 func getMri() -> String {
 Utilities.toMri(innerParticipant.identifier)
 }

 func set(scalingMode: ScalingMode) {
 if self.rendererView != nil {
 self.rendererView!.update(scalingMode: scalingMode)
 }
 self.scalingMode = scalingMode
 }

 func handleInitialRemoteVideo() {
 renderedRemoteVideoStream = innerParticipant.videoStreams[0]
 renderer = try! VideoStreamRenderer(remoteVideoStream: renderedRemoteVideoStream!)
 rendererView = try! renderer!.createView()
 }

 func toggleVideo() {
 if videoOn {
 rendererView = nil
 renderer?.dispose()
 videoOn = false
 }
 else {
 renderer = try! VideoStreamRenderer(remoteVideoStream: innerParticipant.videoStreams[0])
 rendererView = try! renderer!.createView()
 videoOn = true
 }
 }

 func remoteParticipant(_ remoteParticipant: RemoteParticipant, didUpdateVideoStreams args: RemoteVideoStreamsEventArgs) {
 let hadVideo = hasVideo
 hasVideo = innerParticipant.videoStreams.count > 0
 if videoOn {
 if hadVideo && !hasVideo {
 // Remote user stopped sharing
 rendererView = nil
 renderer?.dispose()
 } else if hasVideo && !hadVideo {
 // remote user started sharing
 renderedRemoteVideoStream = innerParticipant.videoStreams[0]
 renderer = try! VideoStreamRenderer(remoteVideoStream: renderedRemoteVideoStream!)
 rendererView = try! renderer!.createView()
 } else if hadVideo && hasVideo {
 if args.addedRemoteVideoStreams.count > 0 {
 if renderedRemoteVideoStream?.id == args.addedRemoteVideoStreams[0].id {
 return
 }

 // remote user added a second video, so switch to the latest one
 guard let rendererTemp = renderer else {
 return
 }
 rendererTemp.dispose()
 renderedRemoteVideoStream = args.addedRemoteVideoStreams[0]
 renderer = try! VideoStreamRenderer(remoteVideoStream: renderedRemoteVideoStream!)
 rendererView = try! renderer!.createView()
 } else if args.removedRemoteVideoStreams.count > 0 {
 if args.removedRemoteVideoStreams[0].id == renderedRemoteVideoStream!.id {
 // remote user stopped sharing video that we were rendering but is sharing
 // another video that we can render
 renderer!.dispose()

 renderedRemoteVideoStream = innerParticipant.videoStreams[0]
 renderer = try! VideoStreamRenderer(remoteVideoStream: renderedRemoteVideoStream!)
 rendererView = try! renderer!.createView()
 }
 }
 }
 }
 }

 func remoteParticipant(_ remoteParticipant: RemoteParticipant, didChangeDisplayName args: PropertyChangedEventArgs) {
 self.displayName = innerParticipant.displayName
 }
}

class Utilities {
 @available(*, unavailable) private init() {}

 public static func toMri(_ id: CommunicationIdentifier?) -> String {

 if id is CommunicationUserIdentifier {
 let communicationUserIdentifier = id as! CommunicationUserIdentifier
 return communicationUserIdentifier.identifier
 } else {
 return "<nil>"
 }
 }
}
Видеопотоки удаленных участников
Мы можем создать ParticipantView для обработки визуализации видеопотоков удаленных участников. Поместите реализацию в ParticipantView.swift
struct ParticipantView : View, Hashable {
 static func == (lhs: ParticipantView, rhs: ParticipantView) -> Bool {
 return lhs.participant.getMri() == rhs.participant.getMri()
 }

 private let owner: HomePageView

 @State var showPopUp: Bool = false
 @State var videoHeight = CGFloat(200)
 @ObservedObject private var participant:Participant

 var body: some View {
 ZStack {
 if (participant.rendererView != nil) {
 HStack {
 RenderInboundVideoView(view: $participant.rendererView)
 }
 .background(Color(.black))
 .frame(height: videoHeight)
 .animation(Animation.default)
 } else {
 HStack {
 Text("No incoming video")
 }
 .background(Color(.red))
 .frame(height: videoHeight)
 }
 }
 }

 func hash(into hasher: inout Hasher) {
 hasher.combine(participant.getMri())
 }

 init(_ owner: HomePageView, _ participant: Participant) {
 self.owner = owner
 self.participant = participant
 }

 func resizeVideo() {
 videoHeight = videoHeight == 200 ? 150 : 200
 }

 func showAlert(_ title: String, _ message: String) {
 DispatchQueue.main.asyncAfter(deadline: .now() + 0.1) {
 self.owner.alertMessage = message
 self.owner.showAlert = true
 }
 }
}

struct RenderInboundVideoView: UIViewRepresentable {
 @Binding var view:RendererView!

 func makeUIView(context: Context) -> UIView {
 return UIView()
 }

 func updateUIView(_ uiView: UIView, context: Context) {
 for view in uiView.subviews {
 view.removeFromSuperview()
 }
 if (view != nil) {
 uiView.addSubview(view)
 }
 }
}
Оформление подписки на события
Чтобы получать уведомления, когда значения, такие как CallObserver, изменяются во время вызова, можно реализовать класс remoteParticipants для подписки на коллекцию событий.
public class CallObserver : NSObject, CallDelegate
{
 private var owner: ContentView
 private var firstTimeCallConnected: Bool = true

 init(view: ContentView) {
 owner = view
 super.init()
 }

 public func call(_ call: Call, didChangeState args: PropertyChangedEventArgs) {
 let state = CallObserver.callStateToString(state:call.state)
 owner.callState = state
 if (call.state == CallState.disconnected) {
 owner.leaveRoomCall()
 }
 else if (call.state == CallState.connected) {
 if(self.firstTimeCallConnected) {
 self.handleInitialCallState(call: call);
 }
 self.firstTimeCallConnected = false;
 }
 }

 public func handleInitialCallState(call: Call) {
 // We want to build a matrix with max 2 columns

 owner.callState = CallObserver.callStateToString(state:call.state)
 var participants = [Participant]()

 // Add older/existing participants
 owner.participants.forEach { (existingParticipants: [Participant]) in
 participants.append(contentsOf: existingParticipants)
 }
 owner.participants.removeAll()

 // Add new participants to the collection
 for remoteParticipant in call.remoteParticipants {
 let mri = Utilities.toMri(remoteParticipant.identifier)
 let found = participants.contains { (participant) -> Bool in
 participant.getMri() == mri
 }

 if !found {
 let participant = Participant(call, remoteParticipant)
 participants.append(participant)
 }
 }

 // Convert 1-D array into a 2-D array with 2 columns
 var indexOfParticipant = 0
 while indexOfParticipant < participants.count {
 var newParticipants = [Participant]()
 newParticipants.append(participants[indexOfParticipant])
 indexOfParticipant += 1
 if (indexOfParticipant < participants.count) {
 newParticipants.append(participants[indexOfParticipant])
 indexOfParticipant += 1
 }
 owner.participants.append(newParticipants)
 }
 }

 public func call(_ call: Call, didUpdateRemoteParticipant args: ParticipantsUpdatedEventArgs) {
 var participants = [Participant]()
 // Add older/existing participants
 owner.participants.forEach { (existingParticipants: [Participant]) in
 participants.append(contentsOf: existingParticipants)
 }
 owner.participants.removeAll()

 // Remove deleted participants from the collection
 args.removedParticipants.forEach { p in
 let mri = Utilities.toMri(p.identifier)
 participants.removeAll { (participant) -> Bool in
 participant.getMri() == mri
 }
 }

 // Add new participants to the collection
 for remoteParticipant in args.addedParticipants {
 let mri = Utilities.toMri(remoteParticipant.identifier)
 let found = participants.contains { (view) -> Bool in
 view.getMri() == mri
 }

 if !found {
 let participant = Participant(call, remoteParticipant)
 participants.append(participant)
 }
 }

 // Convert 1-D array into a 2-D array with 2 columns
 var indexOfParticipant = 0
 while indexOfParticipant < participants.count {
 var array = [Participant]()
 array.append(participants[indexOfParticipant])
 indexOfParticipant += 1
 if (indexOfParticipant < participants.count) {
 array.append(participants[indexOfParticipant])
 indexOfParticipant += 1
 }
 owner.participants.append(array)
 }
 }

 private static func callStateToString(state:CallState) -> String {
 switch state {
 case .connected: return "Connected"
 case .connecting: return "Connecting"
 case .disconnected: return "Disconnected"
 case .disconnecting: return "Disconnecting"
 case .none: return "None"
 default: return "Unknown"
 }
 }
}
Выполнение кода
Вы можете создать и запустить приложение в симуляторе iOS, выбрав Продукт>Запуск или с помощью сочетания клавиш ⌘-R.
Возможность присоединиться к номерному вызову и отображать роли участников звонков доступна в пакете SDK для мобильных звонков iOS версии 2.5.0 и выше.
Для получения дополнительной информации о ролях участников конференц-звонков в комнате, см. API комнат для структурированных собраний.
Реализация примера приложения
Чтобы реализовать код, необходимый для присоединения участников к групповым вызовам, скачайте из GitHub приложение-пример для вызовов в комнате.
Настройка проекта
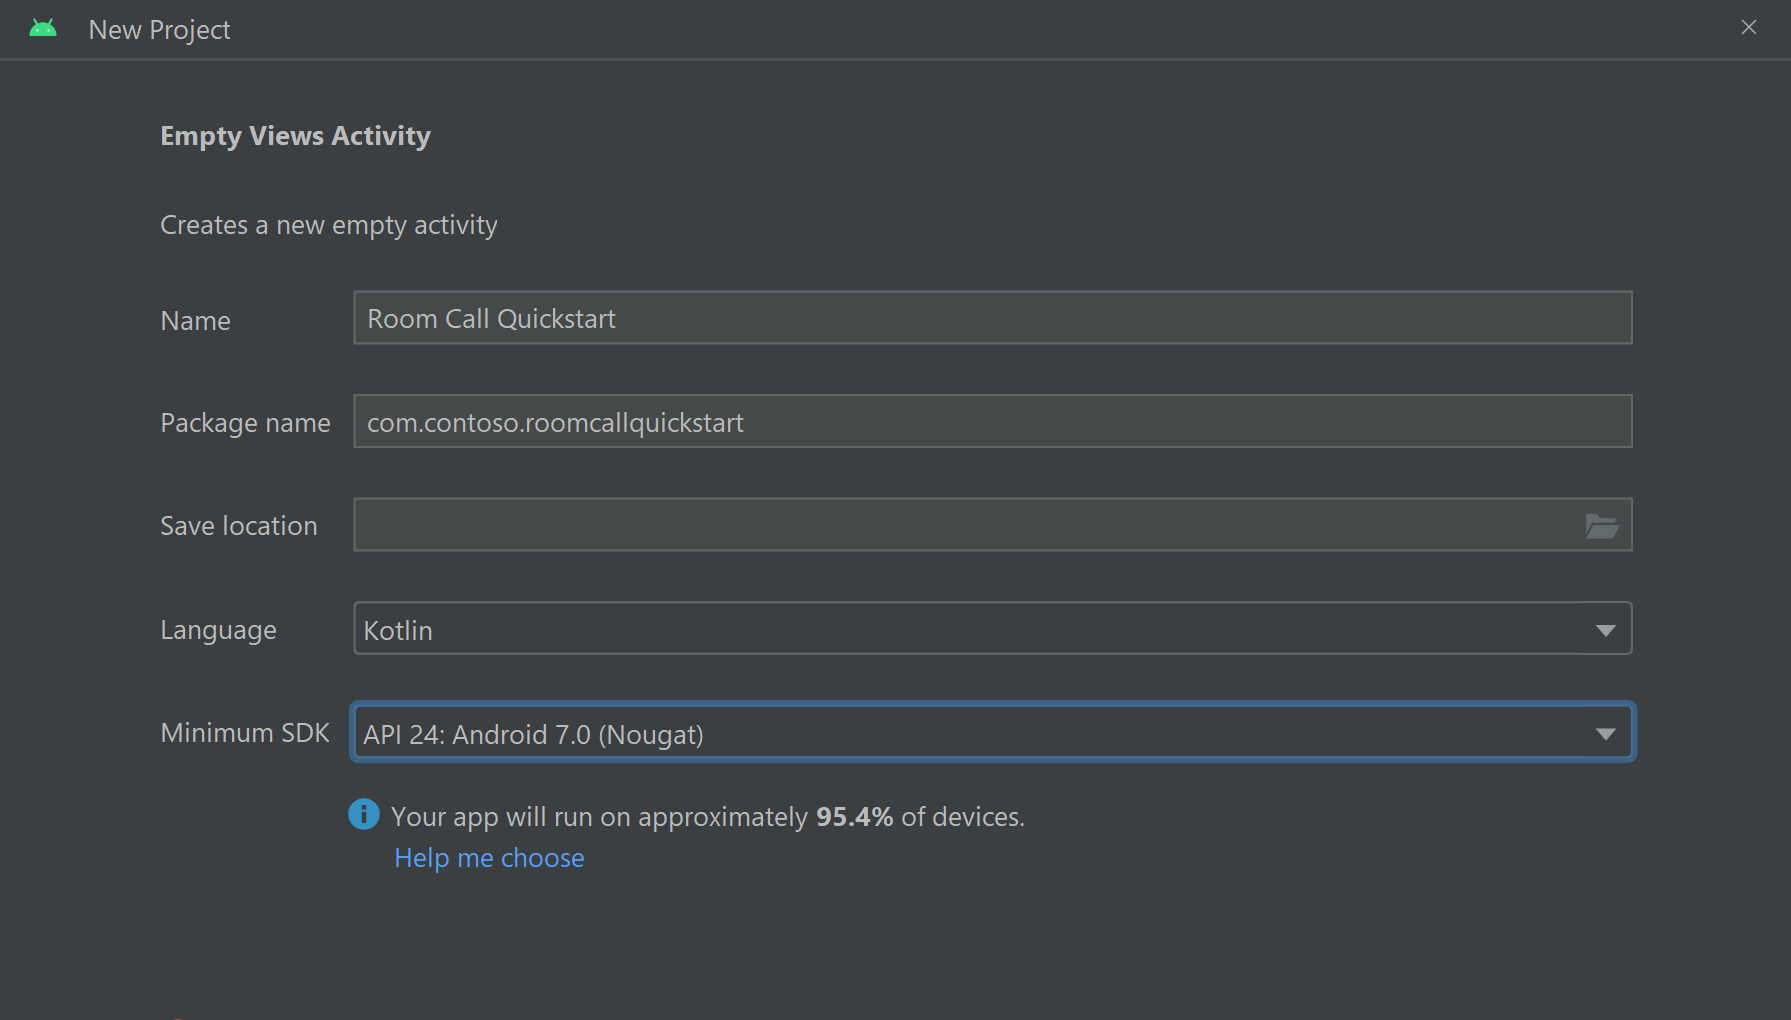
Создание приложения Android с пустым действием
В Android Studio создайте проект:
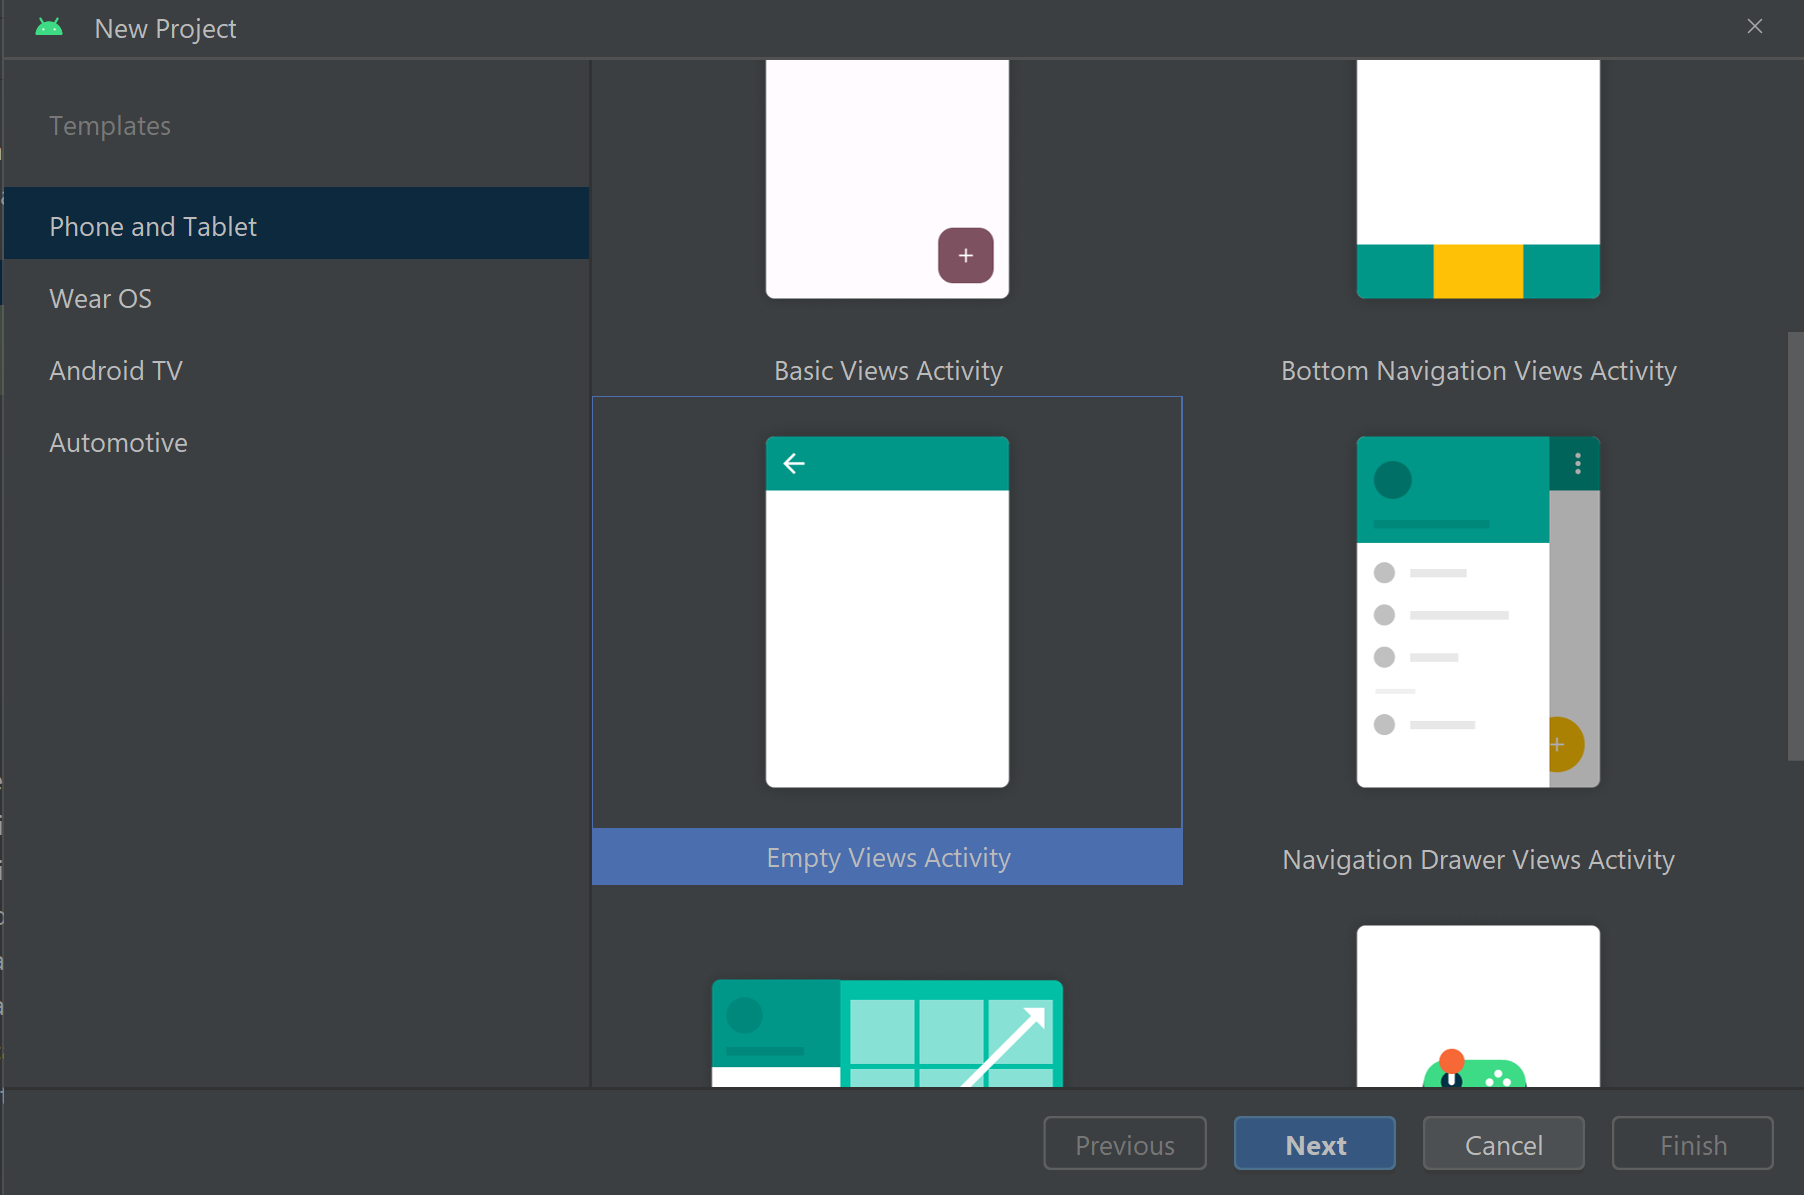
Назовите свой проект Room Call Quickstart и выберите Kotlin.
Установка пакета
На уровне модуля build.gradle добавьте следующую строку в раздел dependencies.
dependencies {
    ...
    //Ability to join a Rooms calls is available in 2.4.0 or above.
    implementation 'com.azure.android:azure-communication-calling:2.4.0'
    ...
}
Добавление разрешений в манифест приложения
Чтобы запросить разрешения, необходимые для вызова, сначала объявите разрешения в манифесте приложения (app/src/main/AndroidManifest.xml). Скопируйте следующий файл манифеста:
<?xml version="1.0" encoding="utf-8"?>
<manifest xmlns:android="http://schemas.android.com/apk/res/android">

    <uses-feature
        android:name="android.hardware.camera"
        android:required="false" />

    <uses-permission android:name="android.permission.INTERNET" />
    <uses-permission android:name="android.permission.ACCESS_NETWORK_STATE" />
    <uses-permission android:name="android.permission.ACCESS_WIFI_STATE" />
    <uses-permission android:name="android.permission.RECORD_AUDIO" />
    <uses-permission android:name="android.permission.CAMERA" />

    <application
        android:allowBackup="true"
        android:icon="@mipmap/ic_launcher"
        android:label="@string/app_name"
        android:roundIcon="@mipmap/ic_launcher_round"
        android:supportsRtl="true"
        android:theme="@style/Theme.AppTheme">

        <!--Our Calling SDK depends on the Apache HTTP SDK.
    When targeting Android SDK 28+, this library needs to be explicitly referenced.
    See https://developer.android.com/about/versions/pie/android-9.0-changes-28#apache-p-->
        <uses-library android:name="org.apache.http.legacy" android:required="false"/>
        <activity
            android:name=".MainActivity"
            android:exported="true">
            <intent-filter>
                <action android:name="android.intent.action.MAIN" />

                <category android:name="android.intent.category.LAUNCHER" />
            </intent-filter>
        </activity>
    </application>

</manifest>
Настройка макета для приложения
Вам нужен текстовый ввод для идентификатора комнаты, кнопка для начала звонка и кнопка для завершения вызова.
Откройте файл и замените содержимое app/src/main/res/layout/activity_main.xml файла следующим кодом:
<?xml version="1.0" encoding="utf-8"?>
<androidx.constraintlayout.widget.ConstraintLayout
    xmlns:android="http://schemas.android.com/apk/res/android"
    xmlns:app="http://schemas.android.com/apk/res-auto"
    xmlns:tools="http://schemas.android.com/tools"
    android:layout_width="match_parent"
    android:layout_height="match_parent"
    tools:context=".MainActivity">

    <TextView
        android:id="@+id/text_role"
        android:layout_width="wrap_content"
        android:layout_height="wrap_content"
        android:text="Role:"
        android:textSize="16sp"
        android:textStyle="bold"
        app:layout_constraintTop_toTopOf="parent"
        app:layout_constraintStart_toStartOf="parent"
        app:layout_constraintEnd_toEndOf="parent"
        android:layout_marginTop="16dp" />

    <TextView
        android:id="@+id/text_call_status"
        android:layout_width="wrap_content"
        android:layout_height="wrap_content"
        android:text="Call Status"
        android:textSize="16sp"
        android:textStyle="bold"
        app:layout_constraintTop_toTopOf="parent"
        app:layout_constraintStart_toStartOf="parent"
        app:layout_constraintEnd_toEndOf="parent"
        android:layout_marginTop="48dp" />

    <EditText
        android:id="@+id/room_id"
        android:layout_width="match_parent"
        android:layout_height="wrap_content"
        android:ems="10"
        android:hint="Room ID"
        android:inputType="textPersonName"
        android:layout_marginTop="100dp"
        android:layout_marginHorizontal="20dp"
        app:layout_constraintTop_toTopOf="parent"
        app:layout_constraintStart_toStartOf="parent"
        app:layout_constraintEnd_toEndOf="parent" />

    <LinearLayout
        android:layout_width="match_parent"
        android:layout_height="wrap_content"
        android:layout_marginBottom="260dp"
        android:gravity="center"
        app:layout_constraintBottom_toBottomOf="parent"
        app:layout_constraintEnd_toEndOf="parent"
        app:layout_constraintStart_toStartOf="parent">

        <Button
            android:id="@+id/call_button"
            android:layout_width="wrap_content"
            android:layout_marginEnd="32dp"
            android:layout_height="wrap_content"
            android:text="Start Call" />

        <Button
            android:id="@+id/hangup_button"
            android:layout_width="wrap_content"
            android:layout_height="wrap_content"
            android:text="Hangup" />

    </LinearLayout>

</androidx.constraintlayout.widget.ConstraintLayout>
Создание основного действия
С помощью созданного макета можно добавить логику для начала созвона в комнате. Действие обрабатывает запрос разрешений среды выполнения, создание агента вызова и размещение вызова, когда участник нажимает кнопку.
Метод onCreate вызывает getAllPermissions и createAgentдобавляет привязки для кнопки вызова.
Это событие происходит только один раз при создании действия. Дополнительные сведения см. в разделе "Общие сведения о onCreateжизненном цикле действий".
MainActivity.kt Откройте файл и замените содержимое следующим кодом:
package com.contoso.roomscallquickstart

import android.Manifest
import android.annotation.SuppressLint
import android.content.pm.PackageManager
import android.media.AudioManager
import android.os.Bundle
import android.widget.Button
import android.widget.EditText
import android.widget.TextView
import android.widget.Toast
import androidx.appcompat.app.AppCompatActivity
import androidx.core.app.ActivityCompat
import com.azure.android.communication.calling.Call
import com.azure.android.communication.calling.CallAgent
import com.azure.android.communication.calling.CallClient
import com.azure.android.communication.calling.HangUpOptions
import com.azure.android.communication.calling.JoinCallOptions
import com.azure.android.communication.calling.RoomCallLocator
import com.azure.android.communication.common.CommunicationTokenCredential
import java.util.concurrent.ExecutionException

class MainActivity : AppCompatActivity() {
    private val allPermissions = arrayOf(
        Manifest.permission.RECORD_AUDIO,
        Manifest.permission.CAMERA,
        Manifest.permission.READ_PHONE_STATE
    )

    private val userToken = "<ACS_USER_TOKEN>"
    private lateinit var callAgent: CallAgent
    private var call: Call? = null

    private lateinit var roleTextView: TextView
    private lateinit var statusView: TextView

    override fun onCreate(savedInstanceState: Bundle?) {
        super.onCreate(savedInstanceState)
        setContentView(R.layout.activity_main)

        getAllPermissions()
        createCallAgent()

        val callButton: Button = findViewById(R.id.call_button)
        callButton.setOnClickListener { startCall() }

        val hangupButton: Button = findViewById(R.id.hangup_button)
        hangupButton.setOnClickListener { endCall() }

        roleTextView = findViewById(R.id.text_role)
        statusView = findViewById(R.id.text_call_status)

        volumeControlStream = AudioManager.STREAM_VOICE_CALL
    }

    /**
     * Start a call
     */
    private fun startCall() {
        if (userToken.startsWith("<")) {
            Toast.makeText(this, "Please enter token in source code", Toast.LENGTH_SHORT).show()
            return
        }

        val roomIdView: EditText = findViewById(R.id.room_id)
        val roomId = roomIdView.text.toString()
        if (roomId.isEmpty()) {
            Toast.makeText(this, "Please enter room ID", Toast.LENGTH_SHORT).show()
            return
        }

        val joinCallOptions = JoinCallOptions()

        val roomCallLocator = RoomCallLocator(roomId)
        call = callAgent.join(applicationContext, roomCallLocator, joinCallOptions)

        call?.addOnStateChangedListener { setCallStatus(call?.state.toString()) }

        call?.addOnRoleChangedListener { setRoleText(call?.callParticipantRole.toString()) }
    }

    /**
     * Ends the call previously started
     */
    private fun endCall() {
        try {
            call?.hangUp(HangUpOptions())?.get()
        } catch (e: ExecutionException) {
            Toast.makeText(this, "Unable to hang up call", Toast.LENGTH_SHORT).show()
        }
    }

    /**
     * Create the call callAgent
     */
    private fun createCallAgent() {
            try {
                val credential = CommunicationTokenCredential(userToken)
                callAgent = CallClient().createCallAgent(applicationContext, credential).get()
            } catch (ex: Exception) {
                Toast.makeText(
                    applicationContext,
                    "Failed to create call callAgent.",
                    Toast.LENGTH_SHORT
                ).show()
            }
    }

    /**
     * Request each required permission if the app doesn't already have it.
     */
    private fun getAllPermissions() {
        val permissionsToAskFor = mutableListOf<String>()
        for (permission in allPermissions) {
            if (ActivityCompat.checkSelfPermission(this, permission) != PackageManager.PERMISSION_GRANTED) {
                permissionsToAskFor.add(permission)
            }
        }
        if (permissionsToAskFor.isNotEmpty()) {
            ActivityCompat.requestPermissions(this, permissionsToAskFor.toTypedArray(), 1)
        }
    }

    /**
     * Ensure all permissions were granted, otherwise inform the user permissions are missing.
     */
    override fun onRequestPermissionsResult(
        requestCode: Int,
        permissions: Array<out String>,
        grantResults: IntArray
    ) {
        super.onRequestPermissionsResult(requestCode, permissions, grantResults)
        var allPermissionsGranted = true
        for (result in grantResults) {
            allPermissionsGranted = allPermissionsGranted && (result == PackageManager.PERMISSION_GRANTED)
        }
        if (!allPermissionsGranted) {
            Toast.makeText(this, "All permissions are needed to make the call.", Toast.LENGTH_LONG).show()
            finish()
        }
    }

    @SuppressLint("SetTextI18n")
    private fun setCallStatus(status: String?) {
        runOnUiThread {
            statusView.text = "Call Status: $status"
        }
    }
    @SuppressLint("SetTextI18n")
    private fun setRoleText(role: String?) {
        runOnUiThread {
            roleTextView.text = "Role: $role"
        }
    }
}
Примечание.
При разработке приложения следует учитывать, когда необходимо запросить эти разрешения. Мы рекомендуем запрашивать разрешения только при необходимости, а не заранее. Дополнительные сведения см. в руководстве по разрешениям Android.
Запуск проекта
Перед запуском проекта замените <ACS_USER_TOKEN> в MainActivity.kt на токен доступа пользователя для Служб связи Azure.
private val userToken = "<ACS_USER_TOKEN>"
Запустите проект на эмуляторе или физическом устройстве.
Найдите поле, чтобы ввести идентификатор комнаты и кнопку, чтобы запустить звонок в комнате. Введите идентификатор комнаты и убедитесь, что изменилось состояние вызова, а также ваша роль.
Присоединение к комнатному вызову
Весь код, добавленный в приложение, позволяет успешно запускать и присоединяться к вызову комнаты. Нам нужно углубленно разобраться, как все работает, и какие еще методы и обработчики можно использовать для получения доступа к комнатам.
Вызовы в комнату присоединяются через CallAgent, который создается с помощью действительного токена пользователя.
private fun createCallAgent() {
    try {
        val credential = CommunicationTokenCredential(userToken)
        callAgent = CallClient().createCallAgent(applicationContext, credential).get()
    } catch (ex: Exception) {
        Toast.makeText(
            applicationContext,
            "Failed to create call callAgent.",
            Toast.LENGTH_SHORT
        ).show()
    }
}
Участники могут использовать CallAgent и RoomCallLocator, чтобы присоединиться к звонку в комнате, используя метод CallAgent.join, который возвращает объект Call.
 val joinCallOptions = JoinCallOptions()
 val roomCallLocator = RoomCallLocator(roomId)
 call = callAgent.join(applicationContext, roomCallLocator, joinCallOptions)
Вы можете дополнительно настроить MainActivity.kt файл, подписавшись на Call события, чтобы получить обновления:
call.addOnRemoteParticipantsUpdatedListener { args: ParticipantsUpdatedEvent? ->
    handleRemoteParticipantsUpdate(
        args!!
    )
}

call.addOnStateChangedListener { args: PropertyChangedEvent? ->
    this.handleCallOnStateChanged(
        args!!
    )
}
Вы можете расширить MainActivity.kt, чтобы отображать роль участников локального или удаленного вызова, используя следующие методы и обработчики:
// Get your role in the call
call.getCallParticipantRole();

// Subscribe to changes for your role in a call
private void isCallRoleChanged(PropertyChangedEvent propertyChangedEvent) {
    // handle self-role change
}

call.addOnRoleChangedListener(isCallRoleChanged);

// Subscribe to role changes for remote participants
private void isRoleChanged(PropertyChangedEvent propertyChangedEvent) {
    // handle remote participant role change
}

remoteParticipant.addOnRoleChangedListener(isRoleChanged);

// Get role of the remote participant
remoteParticipant.getCallParticipantRole();
Возможность присоединиться к телефонному вызову и отображать роли участников звонков доступна в пакете SDK для мобильных звонков Android версии 2.4.0 и более поздних версий.
Для получения дополнительной информации о ролях участников конференц-звонков в комнате, см. API комнат для структурированных собраний.
Реализация примера приложения
Чтобы присоединиться к групповому звонку, настройте приложение Windows с помощью руководства 'Добавление видеозвонков в клиентское приложение'.
Другой вариант: реализуйте код, необходимый для присоединения участников к вызову в помещении, скачав из GitHub пример приложения "Звонок в комнате".
Создайте callAgent с допустимым маркером пользователя.
var creds = new CallTokenCredential("<user-token>");

CallAgentOptions callAgentOptions = new CallAgentOptions();
callAgentOptions.DisplayName = "<display-name>";
callAgent = await callClient.CreateCallAgentAsync(creds, callAgentOptions);
Чтобы присоединиться к вызову комнаты, используйте callAgent и RoomCallLocator, метод CallAgent.JoinAsync возвращает объект CommunicationCall.
RoomCallLocator roomCallLocator = new RoomCallLocator('<RoomId>');

CommunicationCall communicationCall = await callAgent.JoinAsync(roomCallLocator, joinCallOptions);
Подпишитесь на CommunicationCall события для получения обновлений:
private async void CommunicationCall_OnStateChanged(object sender, PropertyChangedEventArgs args) {
	var call = sender as CommunicationCall;
	if (sender != null)
	{
		switch (call.State){
			// Handle changes in call state
		}
	}
}
Чтобы отобразить роли участников вызова, подпишитесь на изменения ролей:
private void RemoteParticipant_OnRoleChanged(object sender, Azure.Communication.Calling.WindowsClient.PropertyChangedEventArgs args)
{
    _ = Windows.ApplicationModel.Core.CoreApplication.MainView.CoreWindow.Dispatcher.RunAsync(CoreDispatcherPriority.Normal, () =>
    {
        System.Diagnostics.Trace.WriteLine("Raising Role change, new Role: " + remoteParticipant_.Role);
        PropertyChanged(this, new System.ComponentModel.PropertyChangedEventArgs("RemoteParticipantRole"));
    });
}
Возможность присоединения к вызову в комнате и отображения ролей участников доступна в выпуске Windows NuGet версии 1.1.0 и выше.
Для получения дополнительной информации о ролях участников конференц-звонков в комнате, см. API комнат для структурированных собраний.
Следующие шаги
В этом разделе вы узнали, как:
- Добавление видеозвонка в приложение
- Передайте идентификатор комнаты в вызывающий пакет SDK
- Присоединяйтесь к звонку в комнате из вашего приложения.
Вы также можете захотеть:
- Сведения о концепции комнат
- Основные понятия голосового и видеозвонка
- Сведения о концепциях проверки подлинности